Before going full-on with the Peltier, I thought that I'd give lapping the heatsink a try. Improving the contact area between the heatsink and processor is always beneficial, so thought I didn't have anything to lose by trying this.
For those interested, here's the general process. This was the first heatsink I've lapped, but have done enough high-precision work(I am a watchmaker) that I was familiar with the general process.
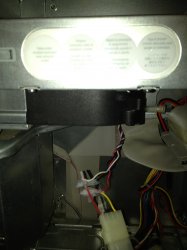
First, I removed the heatsink
(since I did this whole thing on my watchmaking bench, I "photobombed" a disassembled Bunn Special in the background
")
)
And gave it a good cleaning with denatured alcohol to get rid of the thermal compound and other "crap" left behind.
As you can see, the finish on the heatsink is actually pretty poor, with a lot of remnants of machining marks.
Once cleaned, my first step was to take a sharpie and color the entire bottom surface of the heatsink. I've not seen any online guides that suggest doing this, but it's a pretty standard technique in machining. Basically, since I'm assuming that the lapping surface(sandpaper on a sheet of glass) is perfectly flat, the sharpie allows me to monitor the flatness of the heatsink.
All the finishing work was done wet-copper is a very difficult metal to work with, and tends to be fairly "gummy" on abrasives. The liquid-which can be either water or oil-helps to carry the abraded metal particles away. If using water, a small amount of soap is also a good idea both to serve as a lubricant and to help keep the metal in suspension.
The first 10 passes over 400 grit sandpaper showed that the bottom of the heatsink is actually far from flat
About 100 more passes over 400 grit sandpaper didn't get me very far
Neither did a few hundred more
So, I did something that's a bit unconventional-I actually regressed to 320 grit sandpaper. The courser grit makes flattening out the surface a lot faster, at a cost of a lot more "cleanup" work later.
After getting the surface more-or-less clean with 320 grit, I went back to 400 to remove the marks left by the 320 grit(unfortunately I didn't take photos of the intermediates)
As you can see, I didn't eliminate
all of the machining marks, but did at least get the worst of them.
I then proceeded through a progression of finer grit sandpapers-600, 800, 1000, 1500, 2000, and 2500. I didn't take photos all along the way, but the general process is the same-basically you just sand until you can no longer see the lines left by the previous grade. One trick I learned a while ago is to turn the part being sanded 90º with each change in grade. This makes it easy to see which lines are from the grit you are currently using, and which are from the previous grit.
When I went to 600 grit, I switched over to using oil. It's messier, but I've always felt that it gives a better finish. Here's a photo of sanding in oil-the orange tint is from copper suspended in the oil.
And, here it is after finishing the 2500 grit polish
Finally, I gave it a good polish with Simichrome. This is probably unnecessary, but makes it look better
I gave the whole heatsink a bath in hot, soapy water so I'm going to let it dry overnight before re-installing.
By the way, the screws are a standard 6-32 machine screw. While I was at the hardware store buying sandpaper, I also picked up some 6-32x1/2" screws to replace the idiotic pin-headed ones that Gigadesigns used to fit heatsink to the processor originally.
I don't know if this will actually make any difference, but it certainly can't hurt anything.