I would like to share my experience with three different HDR camera apps, and compare their performance against each other and the standard Camera app. I am using an iPhone 4S.
Summary
HDR Fusion costs $2.99, but at the time of this writing is on sale for 99¢. It is by far the fastest and simplest of these three, and in my opinion produces the best results in Manual mode, though often the worst in Automatic. I used version 2.0.
Pro HDR costs $1.99. It is slow and tedious to use, and in my opinion produces mediocre results in both Manual and Automatic mode. I used version 4.01.
True HDR costs $1.99. It is even slower and more tedious than the previous app, though in my opinion it produces the best results in Automatic mode, and quite good in Manual. I used version 2.4.1.
Features
All three apps let you create High Dynamic Range (HDR) pictures, by taking multiple shots at different exposure levels and combining them into a single image. The idea is to make the result have proper exposure in both the shadows and the highlights.
Automatic mode lets you tap the shutter button and the app will select the exposure points on its own. True HDR claims to take three pictures this way, but only two appear to be created. Both Pro HDR and HDR Fusion take two pictures, one dark and one bright, and combine them. In my experience, HDR Fusion selects spots that are too bright and too dark this way.
Manual mode lets you tap to select where the two exposure points will be, then tap the shutter button to take those pictures. All three apps use two exposures here. In True HDR, this is called “SemiAuto” mode, as it has a separate “Manual” mode where you tap to select one exposure point, then tap the shutter to take that picture, then repeat for the second exposure. The SemiAuto mode in True HDR has a problem whereby when you tap to select a point, you are not shown how the exposure will look in the on-screen preview, which makes SemiAuto essentially useless.
Library mode lets you choose two existing pictures in your camera roll, and the app will combine them into and HDR image.
All three apps let you decide whether or not the original exposures are saved, and each has a few more features:
HDR Fusion lets you decide to save only the original exposures and not process them. This makes it extremely fast to capture the bright and dark images, which you can later process in Library mode. That way you don’t have to wait around for the images to be processed when you want to get on with taking more pictures right away.
Pro HDR and True HDR both have image adjustment sliders for brightness, contrast, saturation, warmth, and so forth. You are forced to click through the image adjustment screen after taking an HDR picture, as there is no option to automatically save and bypass that screen.
Pictures
I took these three apps out, along with the stock Camera, and used all of them to take the same exact shots with my iPhone on a tripod, in five different scenes.
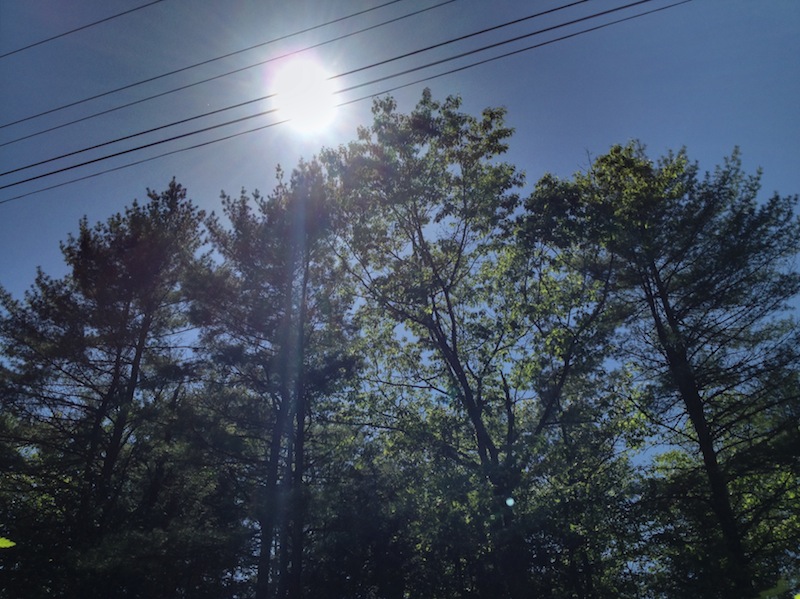
The first scene is looking directly toward the sun, at the shadowed side of some trees. The first two pictures show what this looks like with the stock Camera app in normal and HDR modes, respectively. Then come the result in Automatic and Manual modes from HDR Fusion, True HDR, and Pro HDR.
Camera app in normal (left) and HDR (right)

HDR Fusion app in Automatic (left) and Manual (right)

Pro HDR app in Automatic (left) and Manual (right)

True HDR app in Automatic (left) and SemiAuto (right)
(SemiAuto here means the same as Manual in the other apps)
We see that the Camera app’s HDR has negligible improvement over the plain Camera. The HDR Fusion automatic mode is very poor, with the sky too dark and the trees too bright. Pro HDR in automatic mode has unsightly “fringing” around the trees, where the sky looks pale. Meanwhile both of the True HDR shots, and the manual shots from both HDR Fusion and Pro HDR look good.
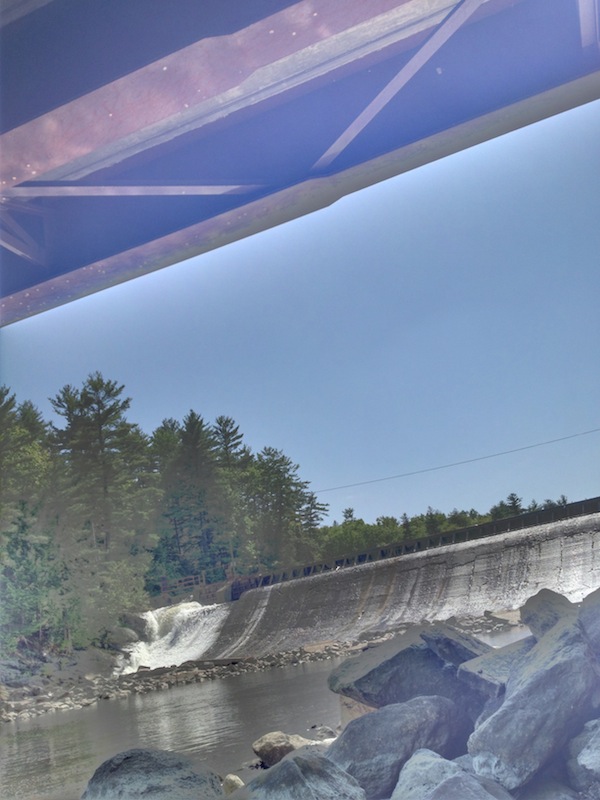
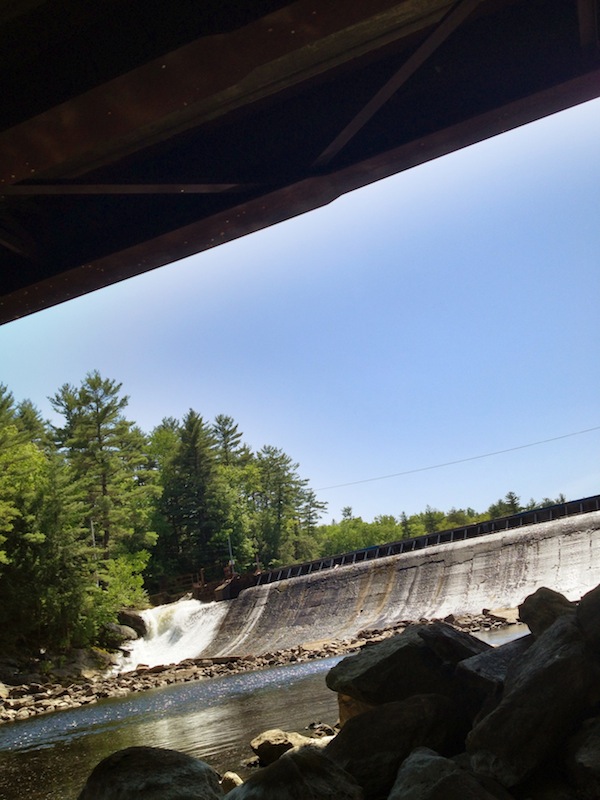
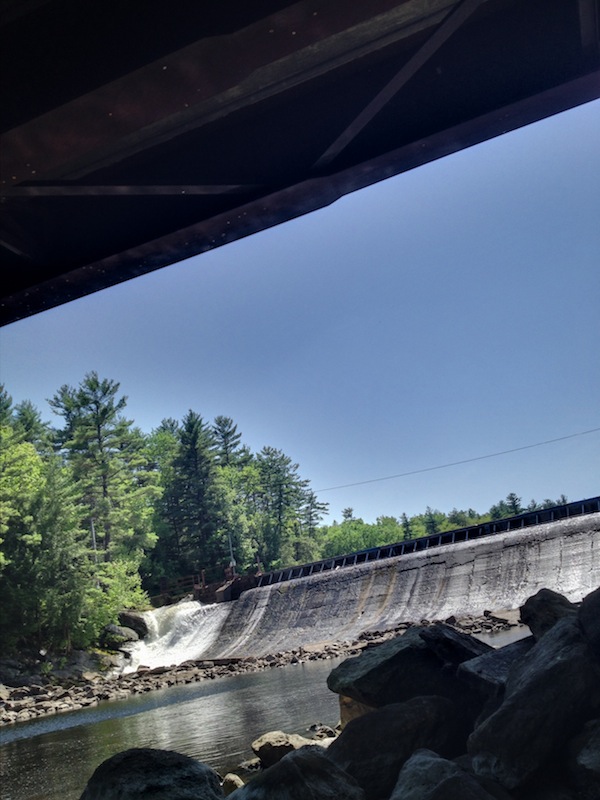
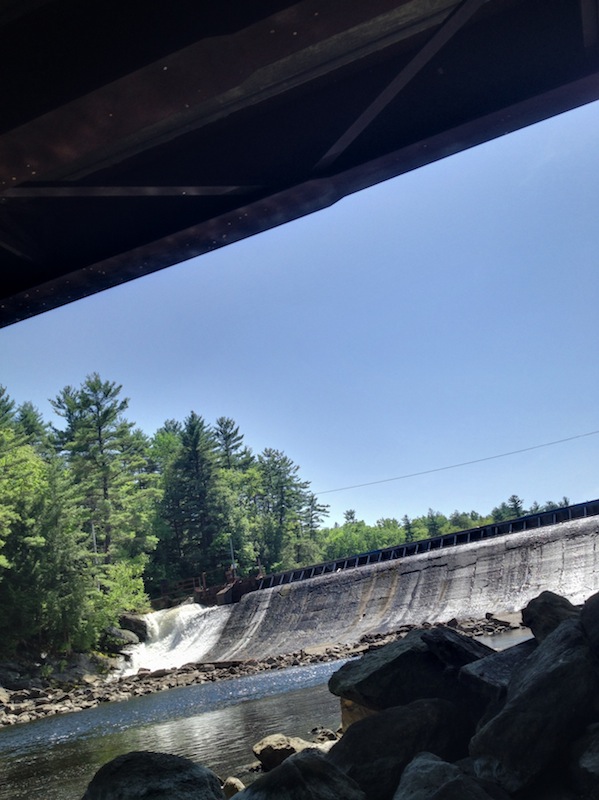
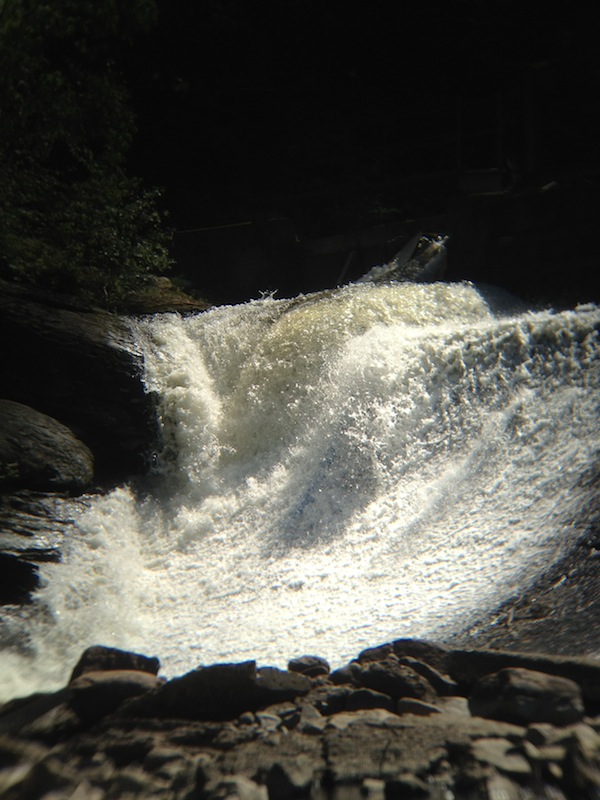
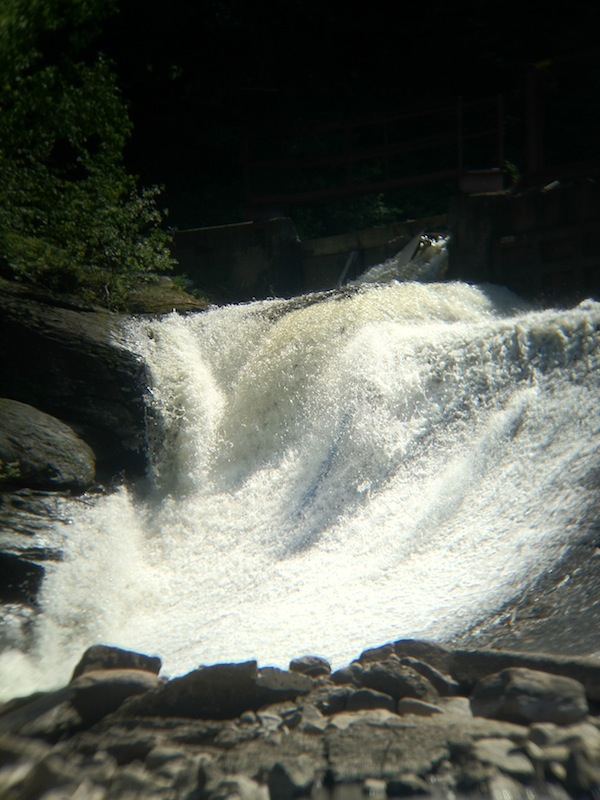
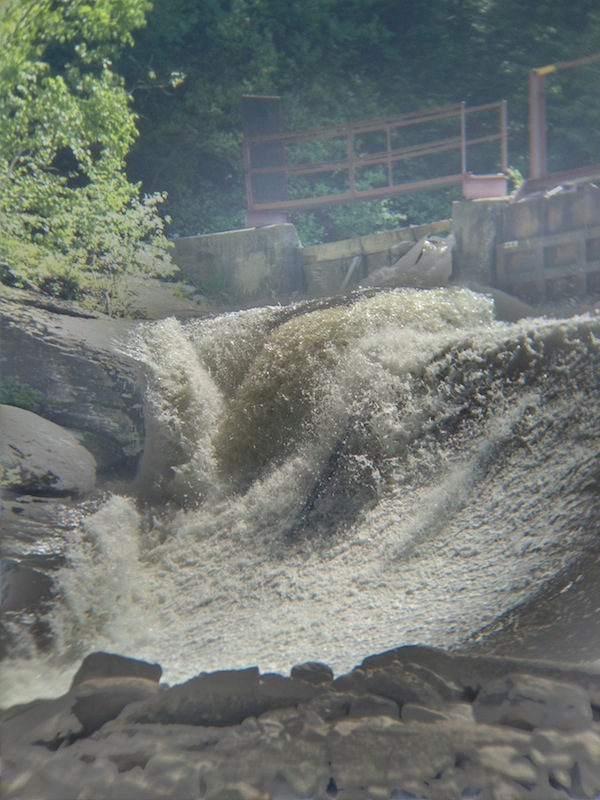
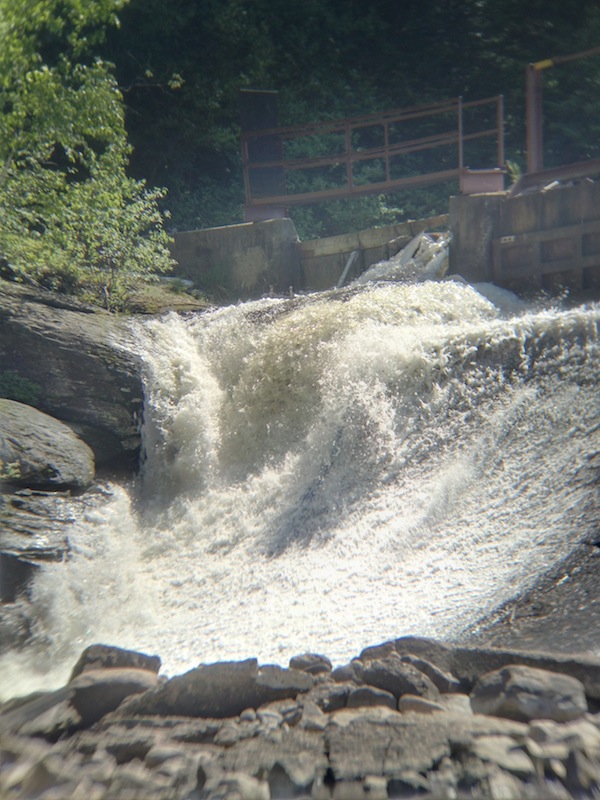
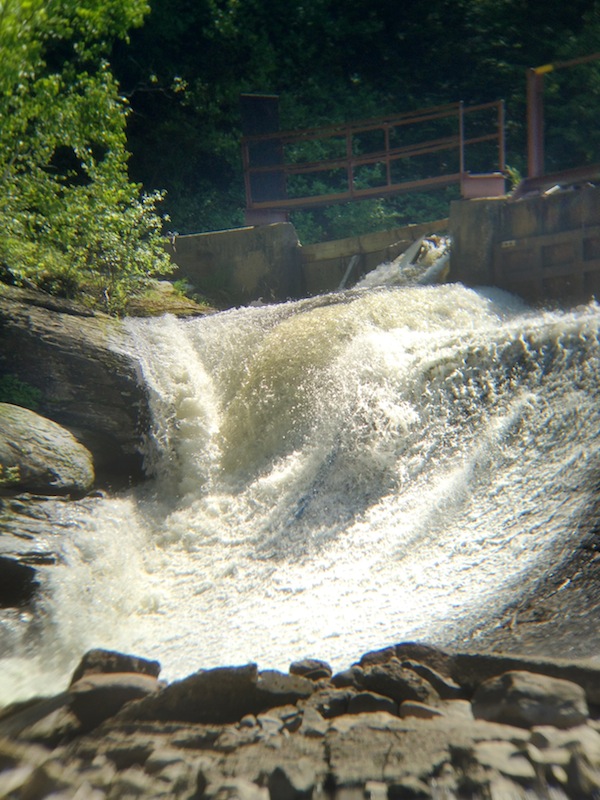
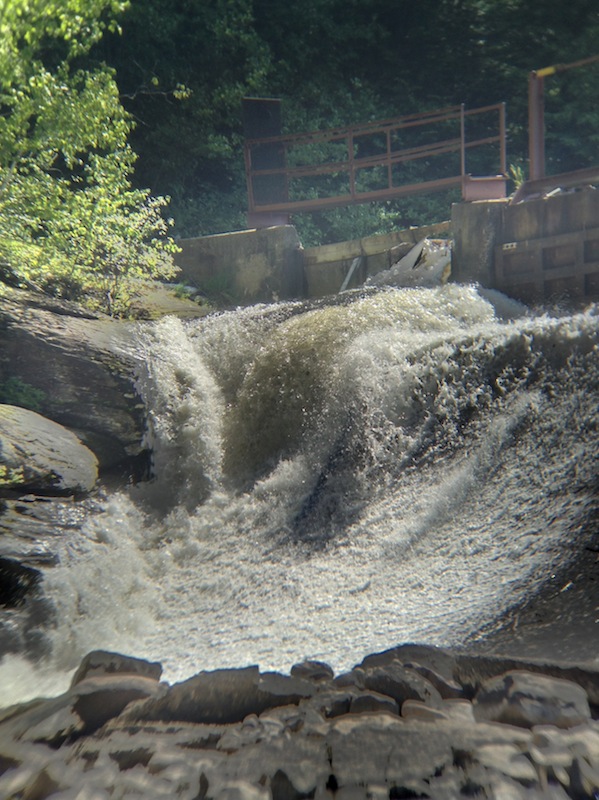
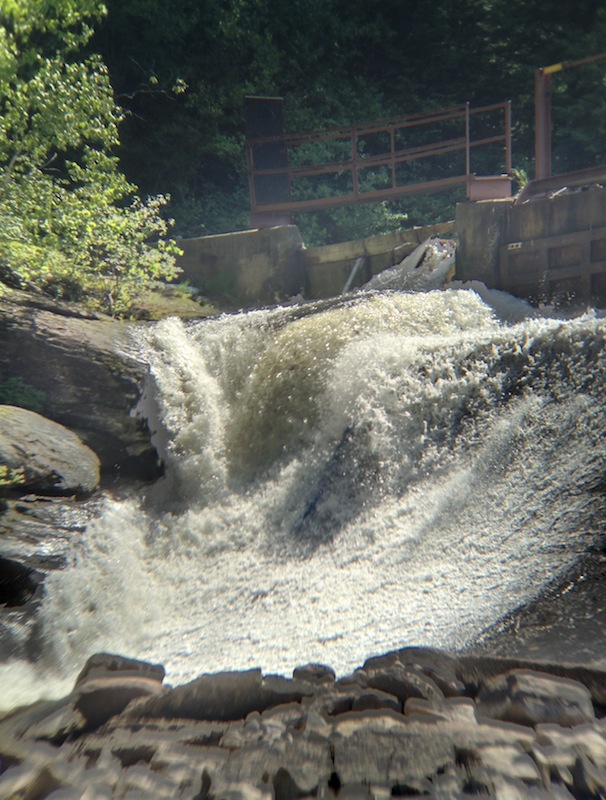
The second scene is from under a bridge in the shade, looking toward water coming over a dam.


Camera app in normal (left) and HDR (right)

HDR Fusion app in Automatic (left) and Manual (right)

Pro HDR app in Automatic (left) and Manual (right)
True HDR app in Automatic (left) and SemiAuto (right)
(SemiAuto here means the same as Manual in the other apps)
Here the Camera app’s HDR mode shows a slight improvement over it’s normal mode, in terms of adding detail to the rocks and the distant trees. However, that is barely perceptible.
Once again the auto mode of HDR Fusion both over and underexposes, making an unacceptable result. However on manual mode HDR Fusion produced the most accurate picture of the bunch.
Both of the Pro HDR shots exhibit strong ringing at the edges of the sky, and their colors are unrealistically vibrant.
The True HDR auto shot has ringing around the sky, though its manual shot is nearly as good as that of HDR Fusion, just a little bit too dark in the shadows still.
The third scene is from the same location as the previous one, but now with a telephoto lens attached to zoom in on the waterfall.
Camera app in normal (left) and HDR (right)
HDR Fusion app in Automatic (left) and Manual (right)

Pro HDR app in Automatic (left) and Manual (right)
True HDR app in Automatic (left) and SemiAuto (right)
(SemiAuto here means the same as Manual in the other apps)
This is starting to get familiar. HDR Fusion on manual mode and the two True HDR shots look best. Pro HDR is oversaturated, Camera is underexposed, and HDR Fusion on auto is not quite right.
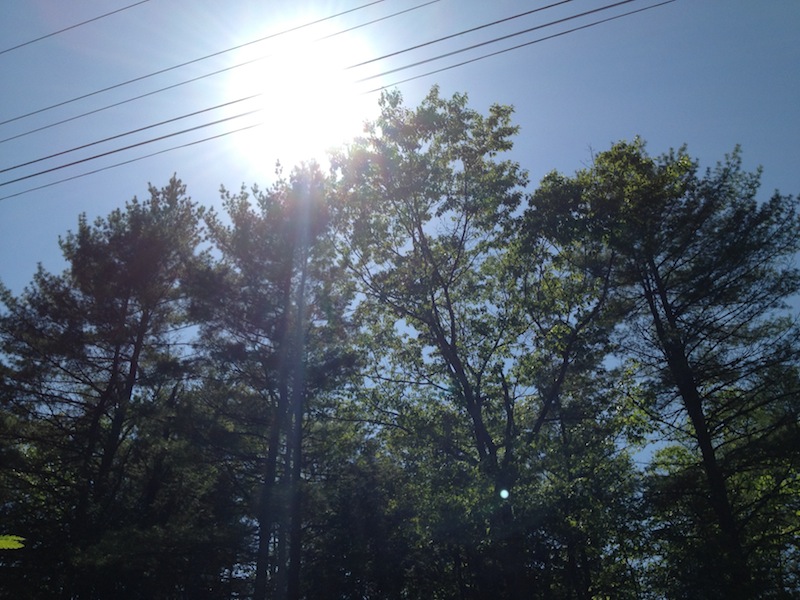
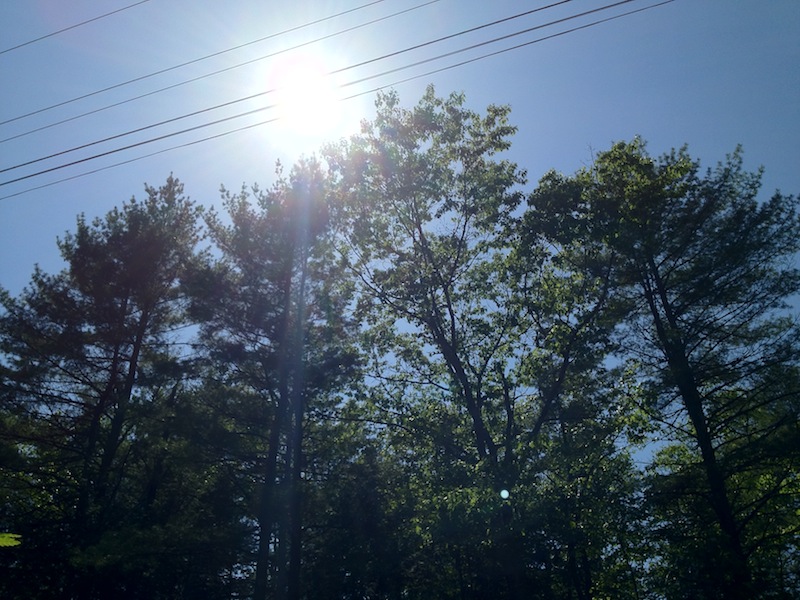
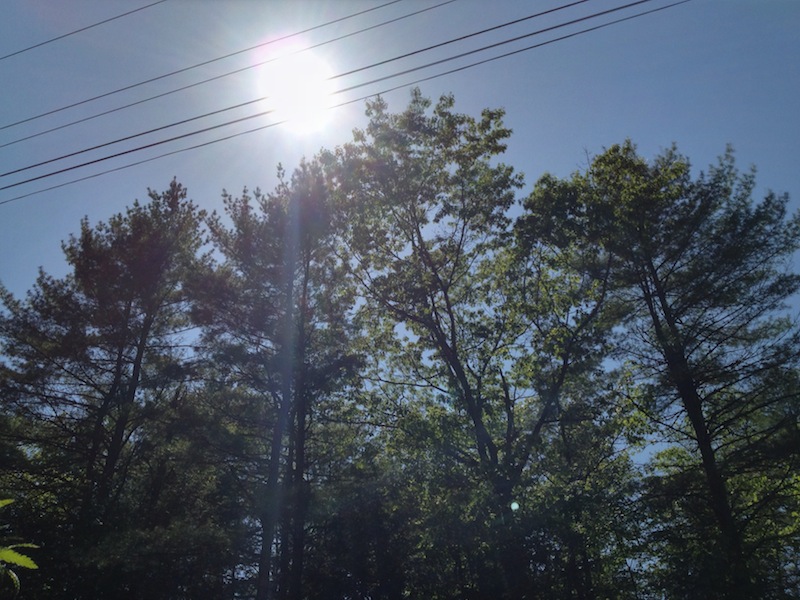
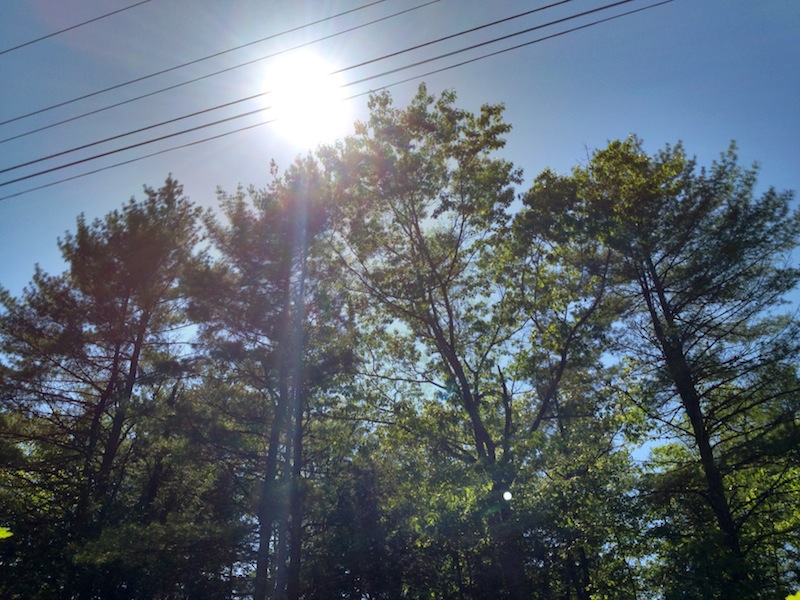
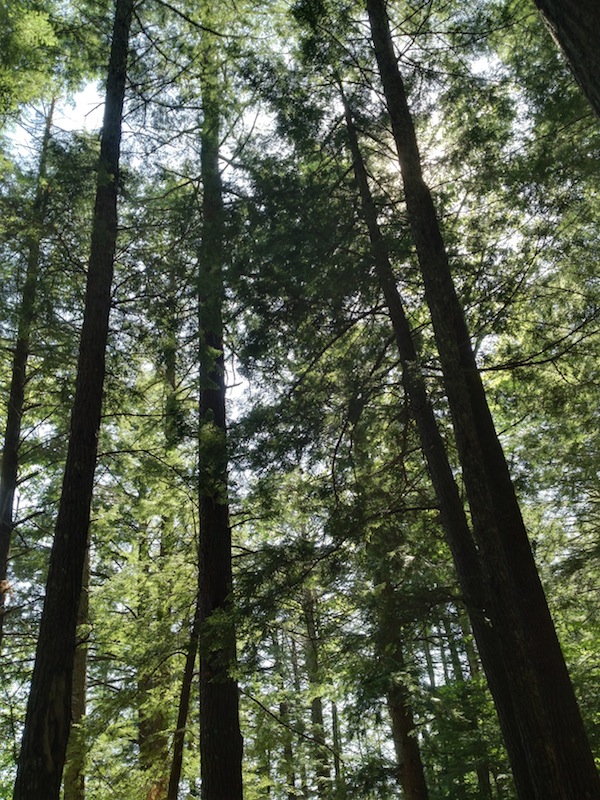
The fourth scene is looking up at some trees, with the sun behind one of them.


Camera app in normal (left) and HDR (right)
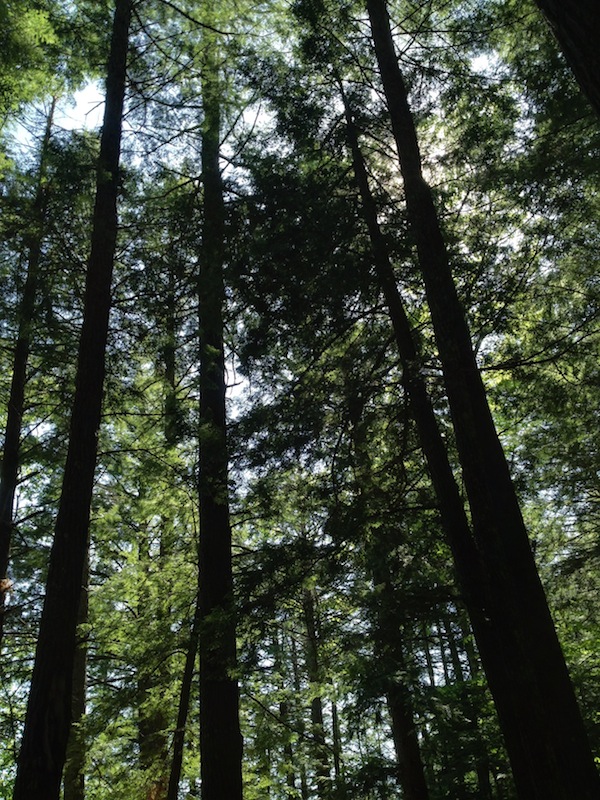
HDR Fusion app in Automatic (left) and Manual (right)
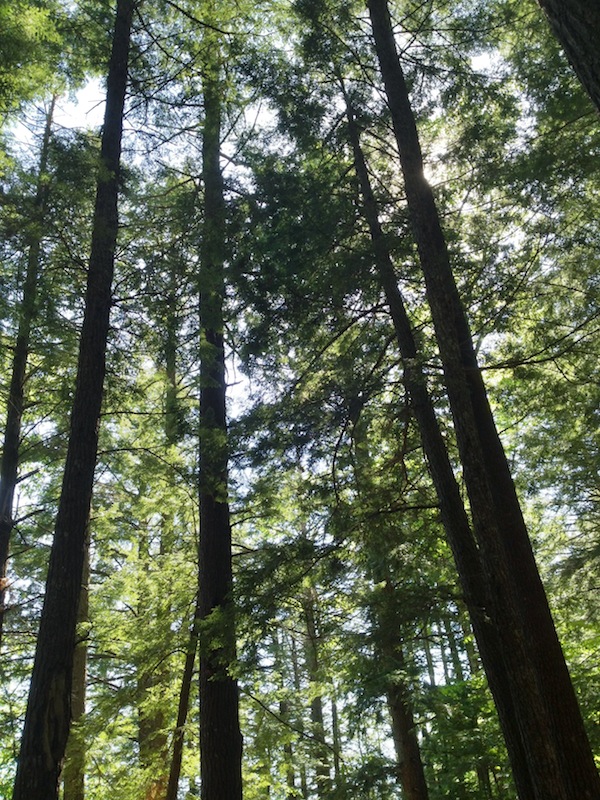

Pro HDR app in Automatic (left) and Manual (right)

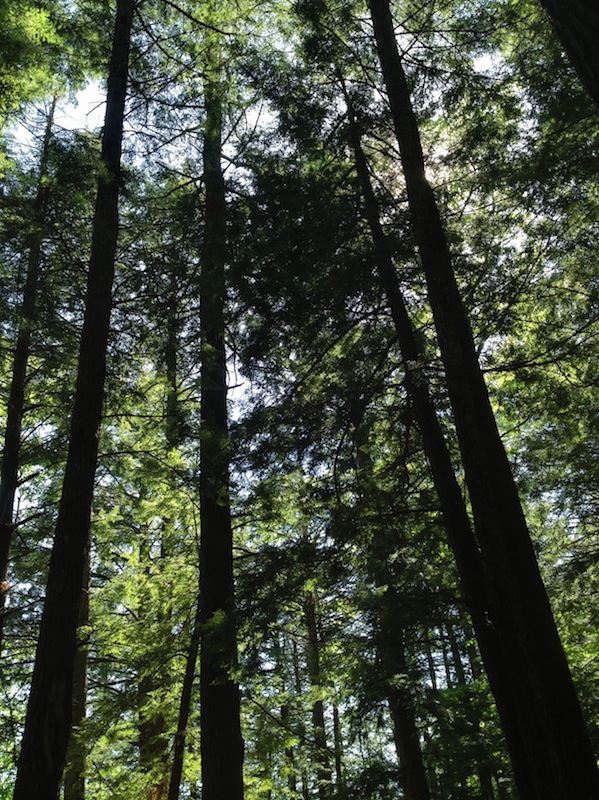
True HDR app in Automatic (left) and SemiAuto (right)
(SemiAuto here means the same as Manual in the other apps)
These are all about equal. Perhaps Camera on HDR mode is slightly better than the rest.
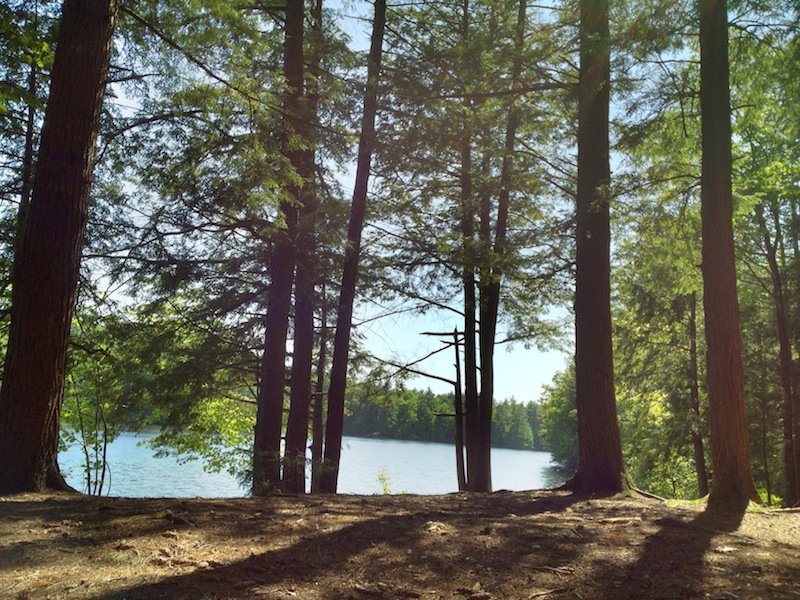
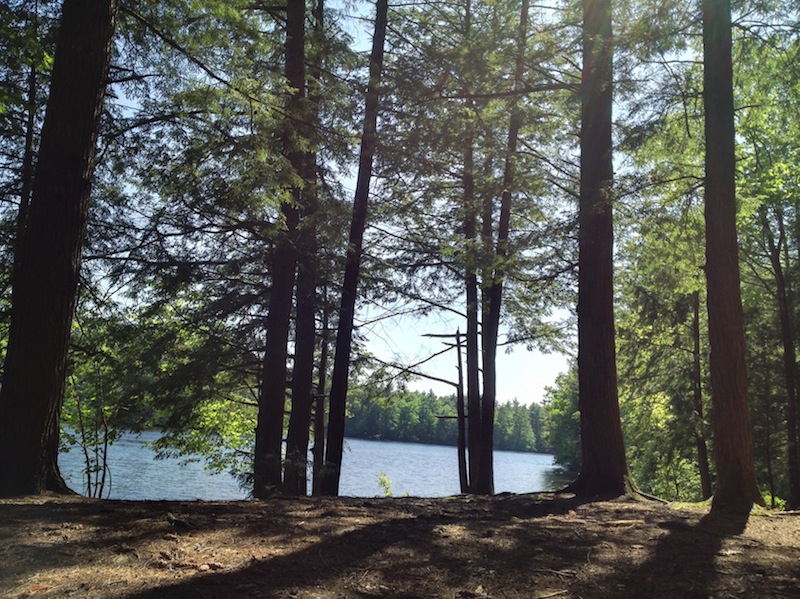
The fifth scene is looking between some trees out at a lake.
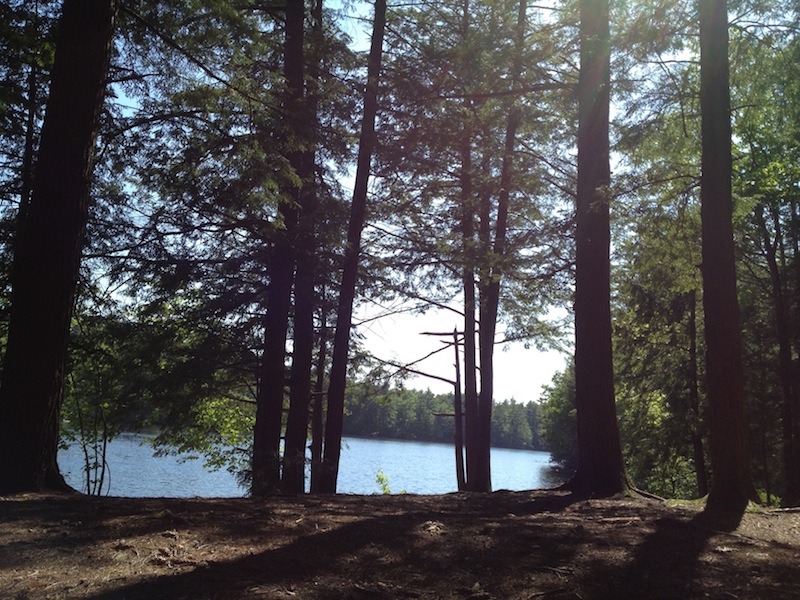

Camera app in normal (left) and HDR (right)
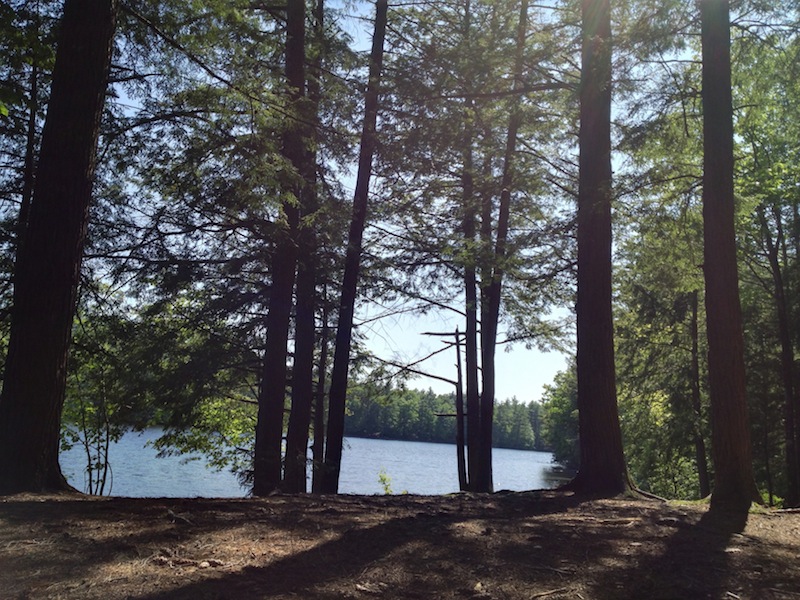
HDR Fusion app in Automatic (left) and Manual (right)
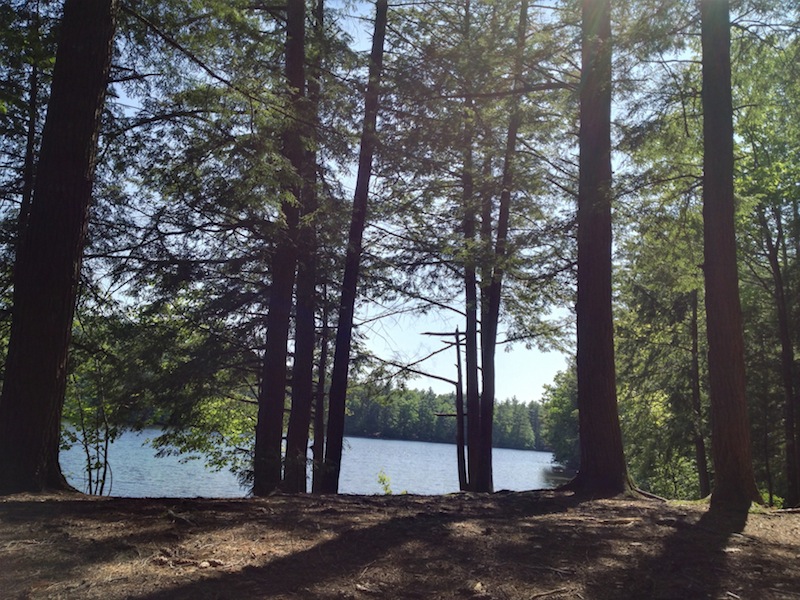
Pro HDR app in Automatic (left) and Manual (right)

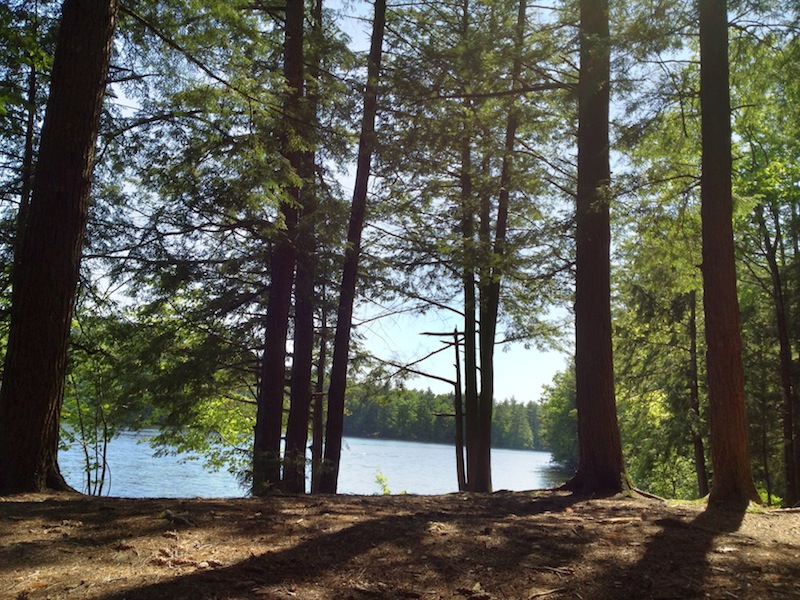
True HDR app in Automatic (left) and SemiAuto (right)
(SemiAuto here means the same as Manual in the other apps)
Again these are fairly comparable, though HDR Pro is still oversaturated. It looks like HDR Fusion on manual mode provides the best detail on the shaded sides of the trees, while still showing how dark they are.
Performance
Number of clicks to take a single HDR photo in Automatic mode, starting from the camera screen and ending back at the camera screen:
HDR Fusion: 1 (tap the shutter button)
Pro HDR: 3 (tap the shutter, save, and done buttons)
True HDR: 5 (tap the shutter, merge, save, okay, and back buttons)
Time to take a single HDR photo in Automatic mode, starting from the camera screen and ending back at the camera screen:
HDR Fusion: 8 seconds
Pro HDR: 34 seconds
True HDR: 45 seconds
Number of clicks to take a single HDR photo in Manual (SemiAuto) mode:
HDR Fusion: 3
Pro HDR: 5
True HDR: 7
Time to take a single HDR photo in Manual (SemiAuto) mode:
HDR Fusion: 18s (it takes a few seconds to manually pick the target points)
Pro HDR: 31s (apparently the automatic point selection takes longer than doing it myself in this app)
True HDR: 43s (apparently the automatic point selection takes longer than doing it myself in this app)
Number of clicks to make a single HDR photo from two existing pictures:
HDR Fusion: 5 (Capture Mode, Library, Camera Roll, First Image, Second Image)
Pro HDR: 9 (Actions, HDR from Library, OK, Camera Roll, Dark Image, OK, Light Image, Save, Done)
True HDR: 8 (Choose Pictures, Camera Roll, First Image, Second Image, Merge, Save, OK, Home)
Time to make a single HDR photo from two existing pictures:
HDR Fusion: 12s
Pro HDR: 25s
True HDR: 36s
The upshot here is, only HDR Fusion has a true “automatic” mode—the other apps require many extra clicks. Indeed, even in the Manual and Library modes, HDR Fusion takes far fewer clicks. Furthermore, HDR Fusion is extremely fast at processing.
Conclusion
HDR Fusion is the simplest and fastest to use. On manual mode it consistently produces the best results. It takes the fewest clicks to use, and the option to save original images for later processing can make things even faster. Its automatic mode has serious drawbacks, often overexposing the shadows and underexposing the highlights, producing a flat image with poor color accuracy. Luckily, manual mode is simpler and faster to use than even the automatic mode on the other apps.
Pro HDR takes a long time and numerous clicks to work, and its results are almost always oversaturated and exhibit ringing in the bright areas. I do not recommend this app.
True HDR takes an extremely long time, and requires excessive clicking, but its results are good on both automatic and manual mode. If you really don’t want to select exposure points manually, and prefer to spend even more time waiting for the app, and making even more clicks than it would’ve taken to pick the exposure points, then True HDR is acceptable.
Bottom Line
Manual mode in HDR Fusion is faster and needs fewer clicks than even the automatic modes of other apps, and produces better-looking results. If a future update fixes the Automatic mode, so much the better, but even if it doesn’t Manual mode alone is still better than the competitors. For fast HDR photography with good results, I recommend HDR Fusion in Manual mode.
Summary
HDR Fusion costs $2.99, but at the time of this writing is on sale for 99¢. It is by far the fastest and simplest of these three, and in my opinion produces the best results in Manual mode, though often the worst in Automatic. I used version 2.0.
Pro HDR costs $1.99. It is slow and tedious to use, and in my opinion produces mediocre results in both Manual and Automatic mode. I used version 4.01.
True HDR costs $1.99. It is even slower and more tedious than the previous app, though in my opinion it produces the best results in Automatic mode, and quite good in Manual. I used version 2.4.1.
Features
All three apps let you create High Dynamic Range (HDR) pictures, by taking multiple shots at different exposure levels and combining them into a single image. The idea is to make the result have proper exposure in both the shadows and the highlights.
Automatic mode lets you tap the shutter button and the app will select the exposure points on its own. True HDR claims to take three pictures this way, but only two appear to be created. Both Pro HDR and HDR Fusion take two pictures, one dark and one bright, and combine them. In my experience, HDR Fusion selects spots that are too bright and too dark this way.
Manual mode lets you tap to select where the two exposure points will be, then tap the shutter button to take those pictures. All three apps use two exposures here. In True HDR, this is called “SemiAuto” mode, as it has a separate “Manual” mode where you tap to select one exposure point, then tap the shutter to take that picture, then repeat for the second exposure. The SemiAuto mode in True HDR has a problem whereby when you tap to select a point, you are not shown how the exposure will look in the on-screen preview, which makes SemiAuto essentially useless.
Library mode lets you choose two existing pictures in your camera roll, and the app will combine them into and HDR image.
All three apps let you decide whether or not the original exposures are saved, and each has a few more features:
HDR Fusion lets you decide to save only the original exposures and not process them. This makes it extremely fast to capture the bright and dark images, which you can later process in Library mode. That way you don’t have to wait around for the images to be processed when you want to get on with taking more pictures right away.
Pro HDR and True HDR both have image adjustment sliders for brightness, contrast, saturation, warmth, and so forth. You are forced to click through the image adjustment screen after taking an HDR picture, as there is no option to automatically save and bypass that screen.
Pictures
I took these three apps out, along with the stock Camera, and used all of them to take the same exact shots with my iPhone on a tripod, in five different scenes.
The first scene is looking directly toward the sun, at the shadowed side of some trees. The first two pictures show what this looks like with the stock Camera app in normal and HDR modes, respectively. Then come the result in Automatic and Manual modes from HDR Fusion, True HDR, and Pro HDR.
Camera app in normal (left) and HDR (right)
HDR Fusion app in Automatic (left) and Manual (right)
Pro HDR app in Automatic (left) and Manual (right)
True HDR app in Automatic (left) and SemiAuto (right)
(SemiAuto here means the same as Manual in the other apps)
We see that the Camera app’s HDR has negligible improvement over the plain Camera. The HDR Fusion automatic mode is very poor, with the sky too dark and the trees too bright. Pro HDR in automatic mode has unsightly “fringing” around the trees, where the sky looks pale. Meanwhile both of the True HDR shots, and the manual shots from both HDR Fusion and Pro HDR look good.
The second scene is from under a bridge in the shade, looking toward water coming over a dam.
Camera app in normal (left) and HDR (right)
HDR Fusion app in Automatic (left) and Manual (right)
Pro HDR app in Automatic (left) and Manual (right)
True HDR app in Automatic (left) and SemiAuto (right)
(SemiAuto here means the same as Manual in the other apps)
Here the Camera app’s HDR mode shows a slight improvement over it’s normal mode, in terms of adding detail to the rocks and the distant trees. However, that is barely perceptible.
Once again the auto mode of HDR Fusion both over and underexposes, making an unacceptable result. However on manual mode HDR Fusion produced the most accurate picture of the bunch.
Both of the Pro HDR shots exhibit strong ringing at the edges of the sky, and their colors are unrealistically vibrant.
The True HDR auto shot has ringing around the sky, though its manual shot is nearly as good as that of HDR Fusion, just a little bit too dark in the shadows still.
The third scene is from the same location as the previous one, but now with a telephoto lens attached to zoom in on the waterfall.
Camera app in normal (left) and HDR (right)
HDR Fusion app in Automatic (left) and Manual (right)
Pro HDR app in Automatic (left) and Manual (right)
True HDR app in Automatic (left) and SemiAuto (right)
(SemiAuto here means the same as Manual in the other apps)
This is starting to get familiar. HDR Fusion on manual mode and the two True HDR shots look best. Pro HDR is oversaturated, Camera is underexposed, and HDR Fusion on auto is not quite right.
The fourth scene is looking up at some trees, with the sun behind one of them.
Camera app in normal (left) and HDR (right)
HDR Fusion app in Automatic (left) and Manual (right)
Pro HDR app in Automatic (left) and Manual (right)
True HDR app in Automatic (left) and SemiAuto (right)
(SemiAuto here means the same as Manual in the other apps)
These are all about equal. Perhaps Camera on HDR mode is slightly better than the rest.
The fifth scene is looking between some trees out at a lake.
Camera app in normal (left) and HDR (right)
HDR Fusion app in Automatic (left) and Manual (right)
Pro HDR app in Automatic (left) and Manual (right)
True HDR app in Automatic (left) and SemiAuto (right)
(SemiAuto here means the same as Manual in the other apps)
Again these are fairly comparable, though HDR Pro is still oversaturated. It looks like HDR Fusion on manual mode provides the best detail on the shaded sides of the trees, while still showing how dark they are.
Performance
Number of clicks to take a single HDR photo in Automatic mode, starting from the camera screen and ending back at the camera screen:
HDR Fusion: 1 (tap the shutter button)
Pro HDR: 3 (tap the shutter, save, and done buttons)
True HDR: 5 (tap the shutter, merge, save, okay, and back buttons)
Time to take a single HDR photo in Automatic mode, starting from the camera screen and ending back at the camera screen:
HDR Fusion: 8 seconds
Pro HDR: 34 seconds
True HDR: 45 seconds
Number of clicks to take a single HDR photo in Manual (SemiAuto) mode:
HDR Fusion: 3
Pro HDR: 5
True HDR: 7
Time to take a single HDR photo in Manual (SemiAuto) mode:
HDR Fusion: 18s (it takes a few seconds to manually pick the target points)
Pro HDR: 31s (apparently the automatic point selection takes longer than doing it myself in this app)
True HDR: 43s (apparently the automatic point selection takes longer than doing it myself in this app)
Number of clicks to make a single HDR photo from two existing pictures:
HDR Fusion: 5 (Capture Mode, Library, Camera Roll, First Image, Second Image)
Pro HDR: 9 (Actions, HDR from Library, OK, Camera Roll, Dark Image, OK, Light Image, Save, Done)
True HDR: 8 (Choose Pictures, Camera Roll, First Image, Second Image, Merge, Save, OK, Home)
Time to make a single HDR photo from two existing pictures:
HDR Fusion: 12s
Pro HDR: 25s
True HDR: 36s
The upshot here is, only HDR Fusion has a true “automatic” mode—the other apps require many extra clicks. Indeed, even in the Manual and Library modes, HDR Fusion takes far fewer clicks. Furthermore, HDR Fusion is extremely fast at processing.
Conclusion
HDR Fusion is the simplest and fastest to use. On manual mode it consistently produces the best results. It takes the fewest clicks to use, and the option to save original images for later processing can make things even faster. Its automatic mode has serious drawbacks, often overexposing the shadows and underexposing the highlights, producing a flat image with poor color accuracy. Luckily, manual mode is simpler and faster to use than even the automatic mode on the other apps.
Pro HDR takes a long time and numerous clicks to work, and its results are almost always oversaturated and exhibit ringing in the bright areas. I do not recommend this app.
True HDR takes an extremely long time, and requires excessive clicking, but its results are good on both automatic and manual mode. If you really don’t want to select exposure points manually, and prefer to spend even more time waiting for the app, and making even more clicks than it would’ve taken to pick the exposure points, then True HDR is acceptable.
Bottom Line
Manual mode in HDR Fusion is faster and needs fewer clicks than even the automatic modes of other apps, and produces better-looking results. If a future update fixes the Automatic mode, so much the better, but even if it doesn’t Manual mode alone is still better than the competitors. For fast HDR photography with good results, I recommend HDR Fusion in Manual mode.
Last edited:


