|
|
#1 |
|
[DIY] Restoring an Iphone ( Front and Back)
(Just like to thank everyone who posted/shared this link with friends, I am glad this guide has reached several others )
Seen a lot of threads of people wondering how to restore an iPhone so I decided to make a DIY guide Also pretty helpful if you want to de-brand your iPhone :P Background 
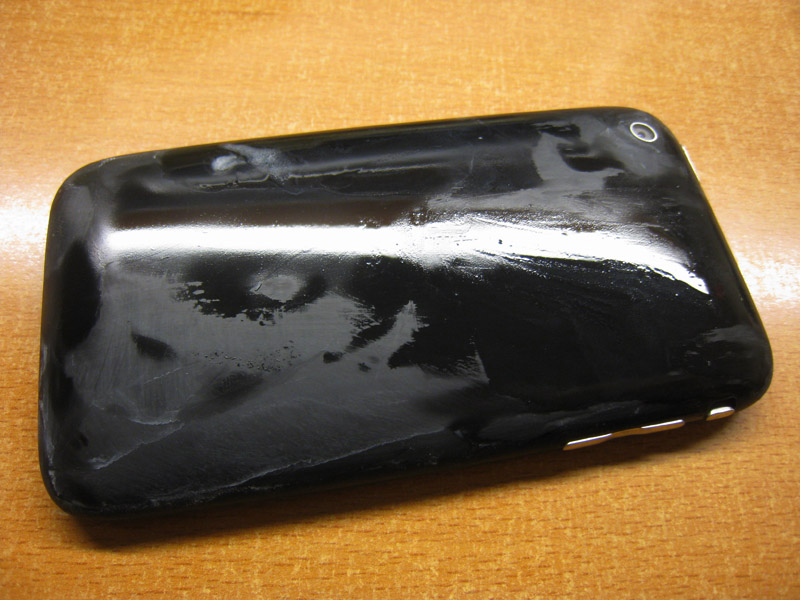
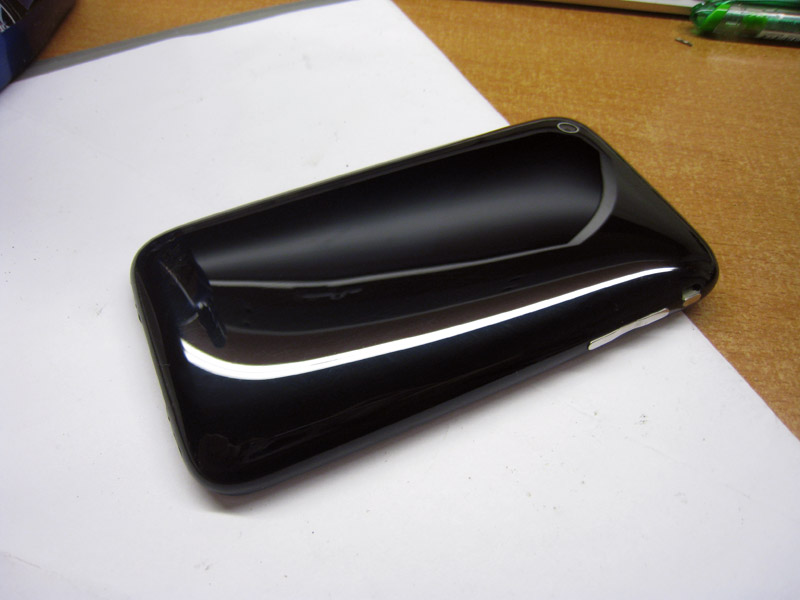
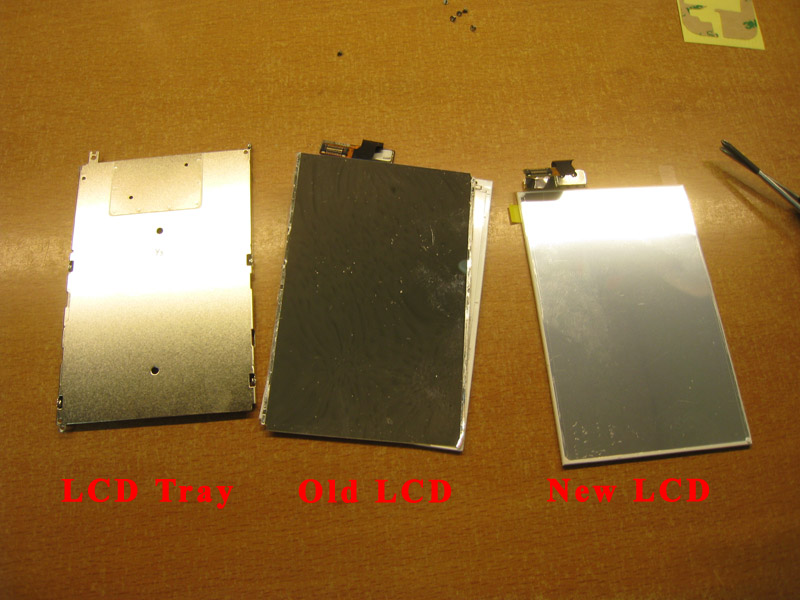
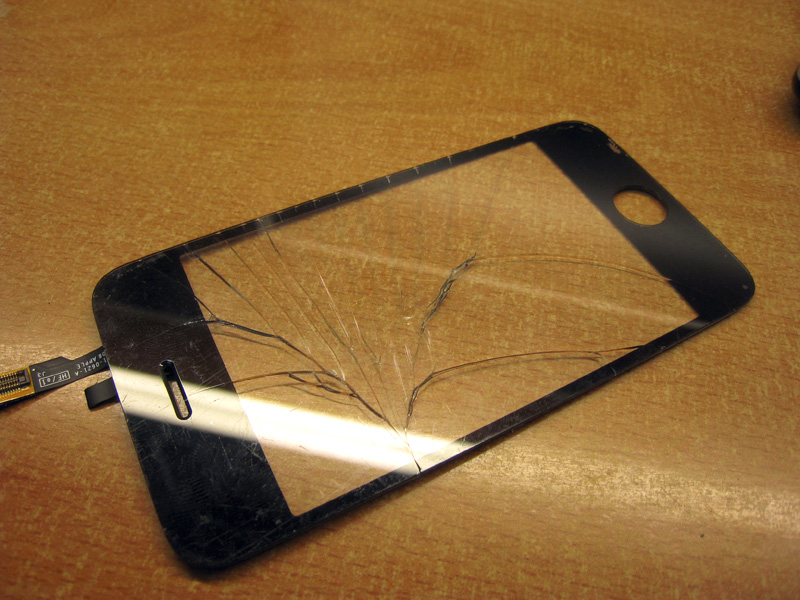
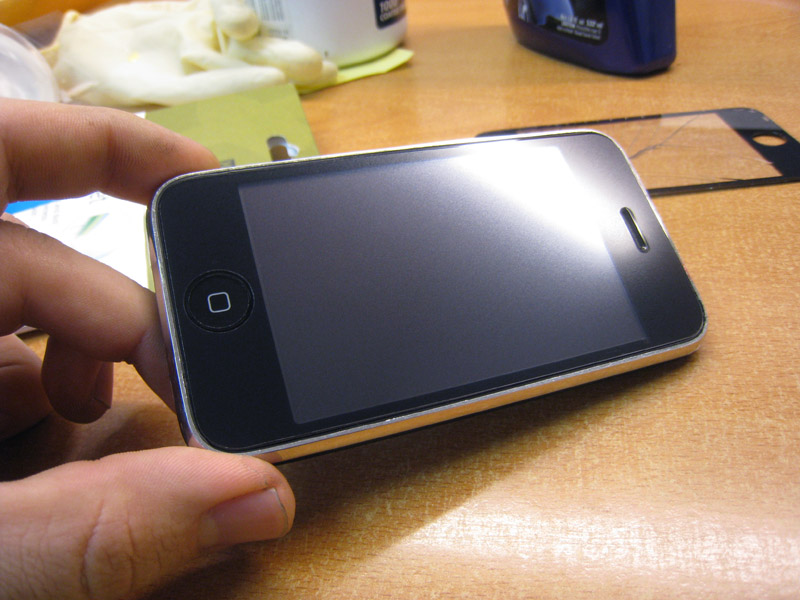
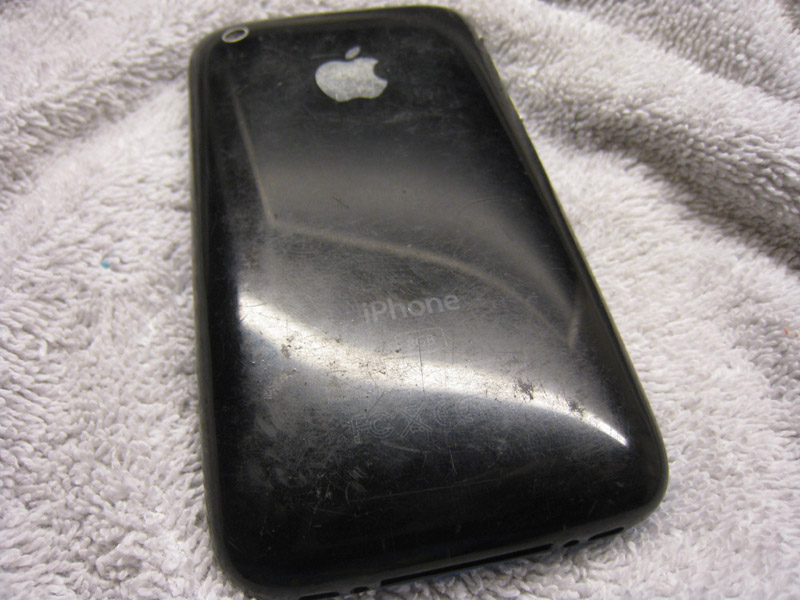
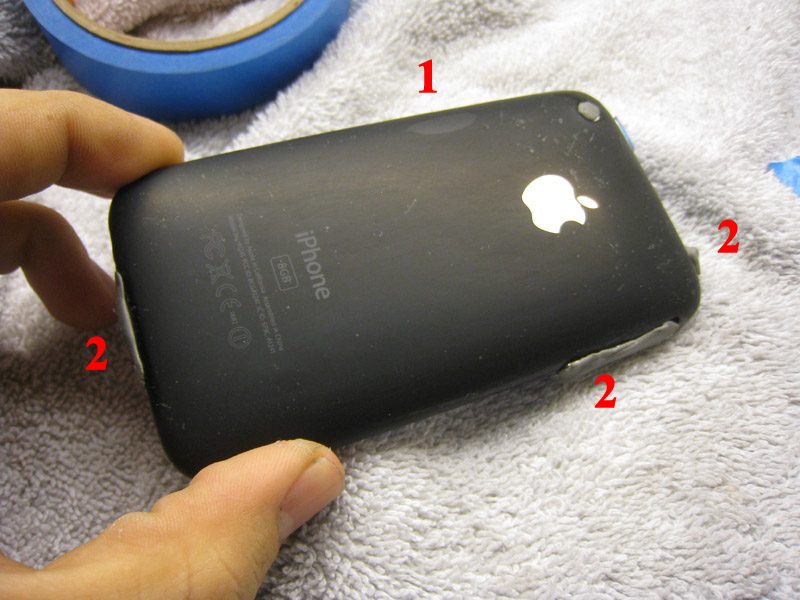
My previous iPhone was stolen at the gym, low on funds I decided to buy the cheapest iPhone I could find that worked regardless of condition. I found an iPhone 3G that had being completely abused and had a dark spot on the LCD. On the second picture notice the gouge on the right side, out of of all the blemishes it was the deepest) Still I ended up buying the phone for a really good price. The replacement parts from eBay only cost $16 for the glass and $23 for the LCD ( sanding kit $10) making it a price effective mod. ![]() ![]() 
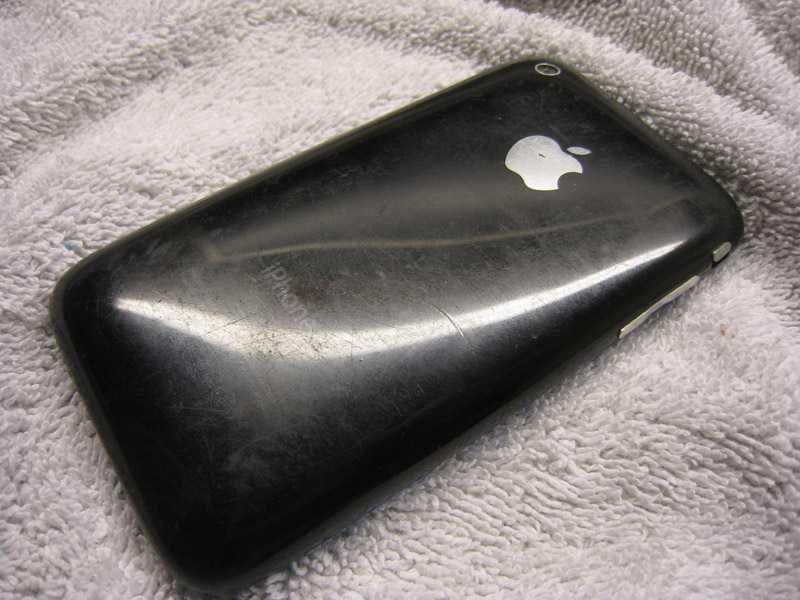
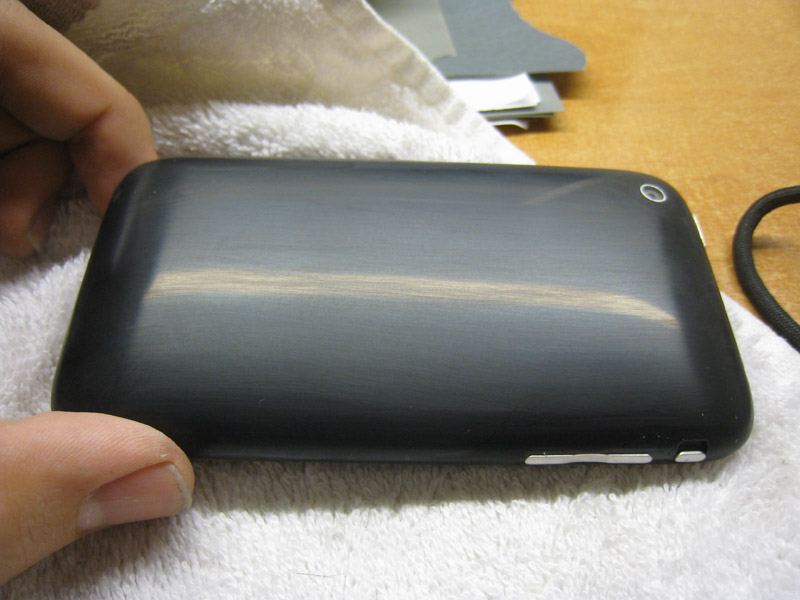
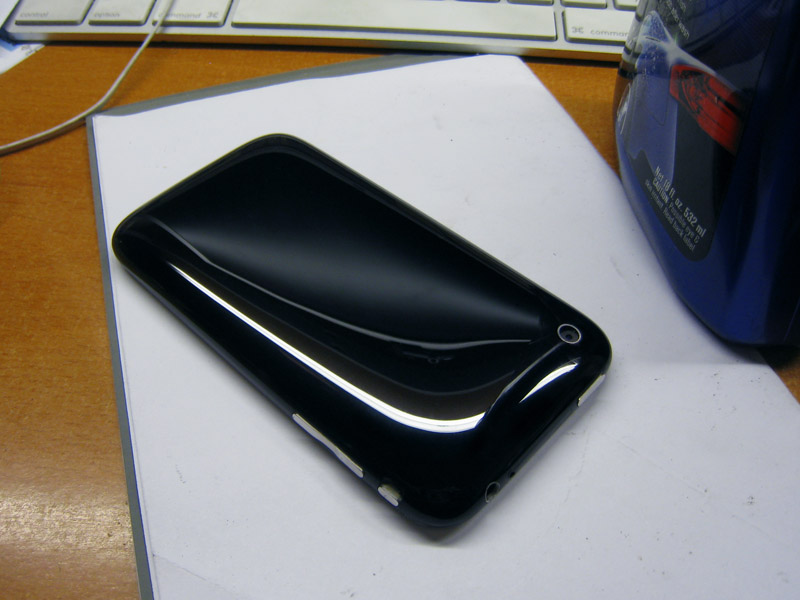
My first attempt at restoring it was a mild success, since I used mild sandpapers/rushed. But you can see that even with 800 grit sandpaper and about an hour I got it looking better, but it still had tons of deep dents and scratches. ![]() Warning Warning Warning Warning Do this at your own risk. I am posting this here only to document how I restored a completely busted iPhone. One thing I should mention first is that iPhone Rear plastic has a scratch-resistant coating The iPhone rear plastic is composed of the following 1) The most inside layer is a thin colored plastic ( black or white). 2) Above that is a clear polycarbonate plastic layer. 3) Above that is the apple logo and writing. 4) Above that finally is a pretty good layer of scratch-resistant coating. If your phone only has a few light scratches, only use the most aggressive sandpaper you have to, in order to remove the scratches. My recommendation is that you try to remove 90-95% of scratches without trying to remove 100%. This way you keep the scratch-resistant coating, which will protect from future scratches. 
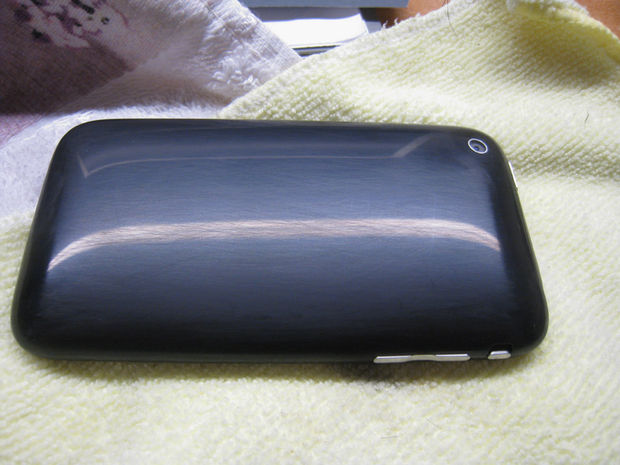
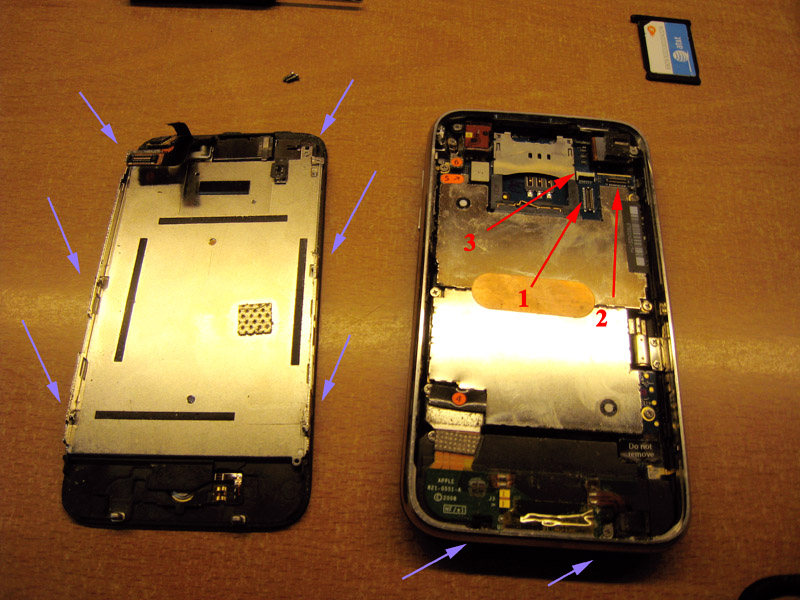
Rule of thumb, if you start noticing that you are removing the apple logo, or that you start seeing a darker plastic, you have gone too far (either stop, or continue based on what you are going for) ( Look at #1) ![]() 
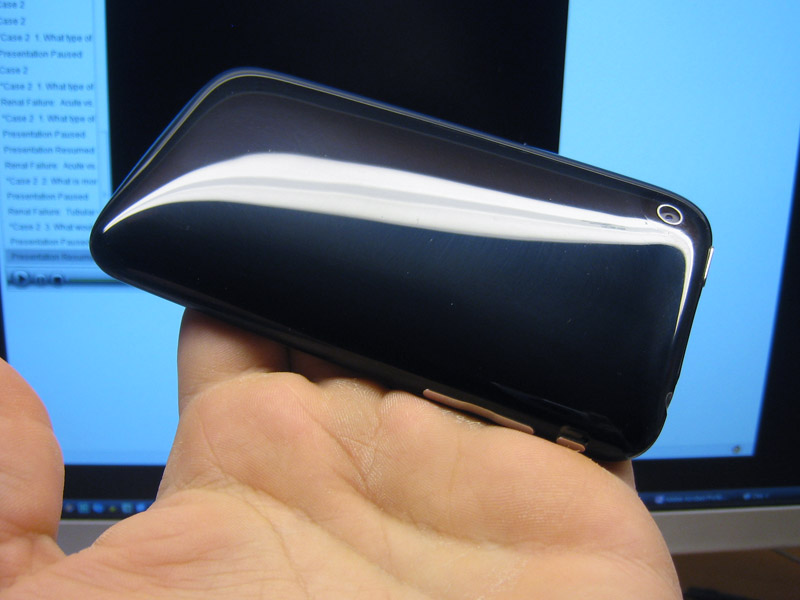
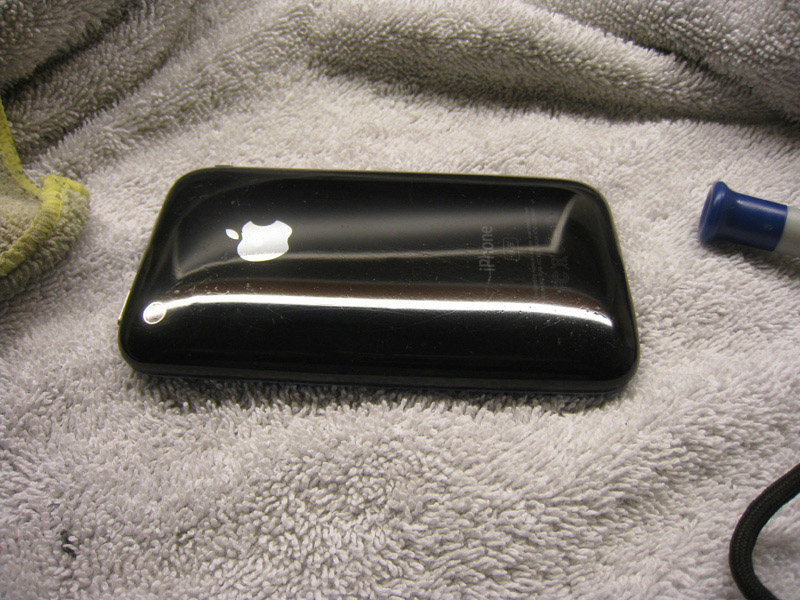
On my phone I had to remove all the scratch-resistant coating because several of the scratches were much much deeper than the coating. It scratches a lot easier now, so if you can avoid doing so, please please please leave the scratch-resistant coating on ( no point in polishing your phone just to see it get marred again) I can't stress this enough, If you remove the scratch-resistant coating it will scratch a lot easier ( you have been warned :P ) Last edited by Shenaniganz08; Mar 4, 2010 at 10:14 PM. |
|
|
|
0
|
|
|
#2 |
|
Restoring the back
This is a complete and comprehensive wetsanding guide. If you have never wetsanded before, or wonder why you never get good results this should help. This will let you restore anything that is plastic, or using harder/ finer grits you can polish metal/aluminum/painted parts. I apologize for the length of the guide but I think the tips here will help you get great results. Tools: Sandpaper 320(or 500),800,1000,1500,2000,2500,3000 grit 3M Rubbing compound Machine Polisher ( Power Drill or small buffer) Microfibers Sticky tack and or tape If you want to save time and money I recommend just purchasing a 3M headlight restoration kit (available at almost all car part stores) $10 bucks at amazon right now http://www.amazon.com/3M-Headlight-L.../dp/B001AIZ5HY It will have almost everything you need, but you still need to buy 1000,1500 and 2000 grit sandpaper + a microfiber on the side Directions : Step 1: Decide and Drysand with first grit (always when sanding keep a thumb/finger above the camera to avoid scratching the glass lens ! ) Dry sand with the least aggressive sandpaper needed to remove scratches. If you have deep scratches you may have to go down to 320-800, but if you have light scratches, 1000 or 1500 might be enough. The best way to test this is to run your fingernail around your phone and try to find a deep scratch. Start at a high grit ( 1500) and see if that removes the scracthes. If you still see deep scratches, try the next most aggressive grit, etc. For me I had to go all the way down to 320 grit, due to several 2-3mm deep defects. This first step is really time intensive, but make sure you don't use water, on the first step because it tends to hide scratches. When you dry sand you can see all the fine sanding marks you are making which allows you to see the scratches you haven't removed. Dry sanding clogs sandpaper, but you can either buy more sandpaper or wash the sandpaper in water and dry it before you use it. Before you finish this first step, make sure all your sanding marks are in one direction; you'll see why later. ![]() Step 2: Wetsand with remaining grits 1) Use very little water when you wetsand ( don't want to kill you iPhone) 2) Make sure the previous sanding marks are completely gone before moving on to the next higher grit The 2nd point is important, and the reason many people get poor results when wetsanding. It's a simple technique but it takes practice/patience to get right. But here are some tips: a) Before moving on to a higher grit make sure all your sanding lines are in the same direction. When you first start sanding the part you can sand in any direction you want, but before you move to a higher grit make sure to sand the entire part down in one direction b) When you have moved to your next higher grit you don't have to sand in a single perpendicular direction (a common myth). Just try to sand the part down as best you can in any direction. However Before you move on to a higher grit, make sure you sand perpendicular to the grit you before. This will let you know where you have to keep sanding before moving on. So if your last sanding marks using 800 grit were left to right , the last sanding marks on 1000 should be top to bottom, then 1500 should be left to right, etc c) Before you move on, dry the part a bit, to make sure all the previous sanding marks are gone ( again water tends to hide scratches ) The most time consuming jumps for me were sanding 800grit lines with 1000 grit , and the 1000 grit lines with 1500 grit. These two are time consuming steps , but make sure you take your time, because the finer grit sandpapers will be unable to remove these deep marks (especially 800 grit lines). When wetsanding the phone it should look like below, not too much water and a slight white film. I kept all my wetsanding paper in a bowl of water, and then dried it on a towel on my lap before using it on the phone. You want the paper to be wet, but not running ! ![]() After 1500 ![]() After 3000 ![]() In all these pictures you will notice a few things a) All the sanding marks are in one direction, and you can see that there are Zero sanding marks in any other direction. b) The phone is dry You may be wondering why all my sanding marks are lengthwise. When I wetsand I still follow what I said above ( last step is to sand in the perpendicular direction to make sure all the previous sanding marks are gone) but then additionally I lightly sand in the longest dimension of the part, this helps me make sure I haven't left any deep sanding marks of the similar grit ( ie, I lightly sand 1000 grit sanding line with 1000grit sandpaper so that sanding with 1500 is easier) Step 3: Cover openings Before you start polishing make sure you cover up your headphone port, volume buttons, vibrate button and 30 pin dock with sticky tack (that blue stuff). You can cover the camera glass, but the polishing compounds are not abrasiveness enough to scratch it (unlike the sandpaper). Sticky tack is easy to apply, and come off in one piece. Tape will probably work too but I found that the tape kept lifting off when I was buffing. Refer to the #2 in the following picture (the gray stuff) ![]() Step 4: Polish Only two steps here, bringing back the shine, and then removing polishing "halos Restoring the Shine You can use what is found in the 3M headlight kit using a power drill Polishing Pad = Orange 3m Pad Polish = 3M rubbing compound Results As you can see it leaves you "Halos" To remove these use the 3M rubbing compound and polish the halo's off with a microfiber towel ( this is softer than the orange 3m Pad). ----------------------------- I had access to detailing products so I used the following Step 2 ( using a rotary tool) Polishing Pad = Blue 3M Pad Polish = Meguair's 205 Then I finished with some Meguair's NXT 2.0 wax Results = completely flawless mirror finish ![]()
Last edited by Shenaniganz08; Mar 10, 2010 at 11:45 PM. |
|
|
|
0
|
|
|
#3 |
|
Restoring the front
Not a comprehensive guide ( sure you can find a video or guide online) but I posted a few tips that I read from different users online, especially the ones that make things easier/lower risk of damaging your iPhone. The replacement parts for the Phone are dirt cheap ( $16 for the glass, $23 for the LCD) Tools Heat gun ( or a blow dryer) Latex Gloves Compressed Air ( I'm cheap so i use a small bike pump) Suction cup ( i used one that was too big but still worked) Prying tools E-xacto blade ( or something flat and thin) Small Phillips screwdriver Replacement parts ( I replaced the LCD and front glass) ![]() Step 1 Opening iPhone 1) Take out two bottom screws (blue arrows) 2) Use suction cup ( place it around the home button) and flip the glass up 3) You will see connectors and numbers. Use the prying tool and lift the number one and number two connector. For the number three connector lift the flap and pull the screen away. ( Red arrows) ![]() Step 2 Remove LCD tray from Frame/Touchscreen 1) Remove the tape on the side of the LCD ( black) 2) Remove the remaining screws ( blue) 3) Use a prying tool on the side of the LCD tray to lift the LCD slightly 4) Once the lcd has been lifter slightly use that small little hole on the bottom to slide the LCD down. ( safest way to remove LCD) Step 2 Removing OLD LCD 1) You will have to unstick your old LCD from the aluminum tray ( this will ruin your OLD LCD, because the rear reflective material of the LCD will staty stuck to the LCD tray) 2) Remove old LCD reflective material (its like a mirror) and clean off the old adhesive 3) Test fit the new LCD ( it lines up with two small plastic nibs and two holes on the LCD tray 4) Remove the rear plastic from the new LCD, and stick it on the LCD tray ( you have to do this right the first step !) 5) When you are done use the old LCD as you template, and make small folds in the LCD cable connector ( you need it to be folded identically) ![]() Step 3 Replacing front glass I didn't take many pictures because, well its a pretty simple thing procedure, that is very difficult to do correctly. It's like removing the aluminum foil from a Hershey's bar. It's easy to do, but in the process the aluminum foil gets a bit wrinkled 1) Heat up the Glass and Plastic frame ( I can't really say how long depending on what you use, but a good sign is if you start to smell a little bit of plastic, that's a good signt 2) Someohow, either using your fingers or a prying tool, remove the glass/touchscreen from the frame. This will probably crack the lcd, and actually that makes it a bit easier. I heard from a friend, that if you already have a cracked glass, removing it is a bit easier than trying to remove it as an entire piece. ![]() 3) Clean off all the old residue, and if you bent your frame alittle, bend it back in to shape. 4) Apply the new adhesive strips ( pretty easy ) make sure that you when you buy the touchscreen/glass it comes with two new strips 5) Before you apply the touchscreen/glass put on some latex gloves ( from now until you are finish) and peel the inside screen protector away a bit, and tape down the cables ![]() 6)Remove the adhesive from the two strips and place the new glass on your plastic frame (take your time ) Step 4 Put New LCD back in 7) Remove the inside screen protector of the Glass/touchscreen and put it glass side up ( to avoid dust). Then remove the lcd screen protector and keep it in your hand ( you want to avoid getting any dust on it ). Before you snap the new LCD into the frame, make sure there in no dust/lint on either part ( used the compressed air before you put everything together, DON'T use the microfiber since they have lint) Step 5 Put everything back together Just the reverse, pretty easy. Before you put the screws on the LCD tray, make sure you didn't get any dust, if you did unsnap the lcd, used the compressed air to get it clean and put it back together. The only tricky connector is the #3 one, but its not too hard. Then you when you put the glass back into your iPhone, slide the top part first ( by the headset) and then the bottom part) and you are done ! ![]() Optional I Love how clear the glass is, but I hate how easy it gets scratched. Right after you take off the front plastic film you can put on a screen protector without having to clean the glass
Last edited by Shenaniganz08; Mar 4, 2010 at 10:12 PM. |
|
|
|
1
|
|
|
#4 |
|
Thats really useful!
Im going to bookmark this for the future, thanks buddy.
__________________
| Mac Pro 1,1 upgraded to X5355 | PowerBook G4 17 1.50Ghz | iMac G4 1.25Ghz | |
|
|
|
0
|
|
|
#5 |
|
Amazing guide.
It's a shame your LCD did not come with the mount, 2/3 times mine did. Also, what screen protector is that, I want one. ![]() GREAT JOB
__________________
MacBook Air 13.3 1.83ghz 2010; iPhone 5 64GB Black ATT; iMac 2.4; iPad Mini 64GB Wifi black/slate; Prototype iPhone 4 "DF3184" |
|
|
|
0
|
|
|
#6 |
|
Simply put. This is an incredible guide. Great work
__________________
Rest in peace. Steven Paul Jobs 1955-2011 (56) Thanks for your intelligence, role model, and innovations. I miss you.
|
|
|
|
0
|
|
|
#7 |
|
looks like power support
__________________
2.66 MBP 13" w/ 60GB Vertex SSD and 500GB WD Scorpio Blue iPhone 4 (Jailbroken )Just remember, windows users aren't really people, so don't listen to them. -racer1441 |
|
|
|
0
|
|
|
#8 |
|
Yup, Power Support Anti-Glare, went on the first try
(mods can i get a sticky )
|
|
|
|
0
|
|
|
#9 |
|
Amazon has the 3M headlight kit for $9 after rebate ( pretty good deal )
http://dealsea.com/view-deal/37438 |
|
|
|
0
|
|
|
#10 |
|
This is truly fantastic work.
You absolutely MUST make a INSTRUCTABLE out of this forum post, at www.instructables.com. In fact I'm sure you will win an award there! |
|
|
|
0
|
|
|
#11 |
|
Parts
Maybe I've missed this earlier or elsewhere, but where do you buy just the LCD and the glass, and how did you know ahead of time which parts you'd need?
/newb |
|
|
|
0
|
|
|
#12 |
|
sticky this mods
__________________
...do you honestly think you're clever for replying to my post with "why so serious"? |
|
|
|
0
|
|
|
#13 |
|
|
0
|
|
|
#14 |
|
Nice guide.
I'm not sure what you are talking about when you say the glass is easily scratched. I've had my 2G for 2.5 years now and there's not even a single scratch on it. I don't have a screen protector or a case and it's been dropped a couple times... The case is a little dinged up here and there, but that "optical quality" glass screen looks mint. Are you keeping your iPhone in the same pocket as your car keys or what?!
|
|
|
|
0
|
|
|
#15 |
![]() The back plastic looks phenomenal. Mine's still pristine since I've had BSE on it since the day I got it but I'm tempted to try this to get rid of the logo and writing. Awesome guide by the way. Definitely deserves to be stickied. |
|
|
|
0
|
|
|
#16 |
|
look below
Last edited by Shenaniganz08; Mar 4, 2010 at 07:43 PM. |
|
|
|
0
|
|
|
#17 | |
|
Thanks guys, Would love a sticky, but it doesn't seem like the mods sticky that many threads in the first place.
I got a few e-mail from people wondering if I would be interested in doing this for them. Seems people like the idea of a "Ninja" iPhone ![]() Quote:
http://www.instructables.com/id/Rest...Front-and-Back Also it's on the Front page of Hack-a-day (I would avoid reading the comments though.. lots of jaded Apple Bashing people ) http://hackaday.com/ |
||
|
|
0
|
|
|
#19 |
|
Congrats on your wave on the intarwebz.
http://gizmodo.com/5486058/how-to-he...ched+up-iphone
__________________
MacBook Air 13.3 1.83ghz 2010; iPhone 5 64GB Black ATT; iMac 2.4; iPad Mini 64GB Wifi black/slate; Prototype iPhone 4 "DF3184" |
|
|
|
0
|
|
|
#20 | |
|
Quote:
__________________
Rest in peace. Steven Paul Jobs 1955-2011 (56) Thanks for your intelligence, role model, and innovations. I miss you.
|
||
|
|
0
|
|
|
#21 | |
|
Quote:
http://www.wired.com/gadgetlab/2010/...to-perfection/ No need for a sticky, seems like people are helping spread the word, and I'm glad to that other's can read it
Last edited by Shenaniganz08; Mar 4, 2010 at 09:19 PM. |
||
|
|
0
|
|
|
#22 |
|
Excellent guide. Even ignoring the fact it's an iPhone, it's a good quite on how to do a proper sanding job, nice. Thank you for your work in posting such a well described document.
I've often found that metal polish (Chromglanz, trusty Autosol or something similar) works surprisingly well on polycarbonate. No doubt plenty of people will disagree and say that it made their house fall down though.
__________________
Y'Know, there are other words in the English language to express appreciation than "Awesome"?! |
|
|
|
0
|
|
|
#23 |
|
Great work! The phone looks better and more mysterious without all the logos and stuff. You got on Gizmodo btw!
__________________
2010 15" MBP | iPhone 4 16GB | PB G4 12" 1.33 Ghz, 768MB RAM, replacement 30GB HDD |
|
|
|
0
|
|
|
#24 |
|
This. Is. Awesome. I cracked my screen last Oct and did not want to pay the ridiculous $200 charge at the Apple Store. But will this void your warranty?
|
|
|
|
0
|
|
|
#25 |
|
Personally, I prefer to spend £18 on a new OEM back casing on eBay and replace it (I have).
|
|
|
|
0
|
![]() |
|
«
Previous Thread
|
Next Thread
»
| Thread Tools | Search this Thread |
| Display Modes | |
|
|
Similar Threads
|
||||
| thread | Thread Starter | Forum | Replies | Last Post |
| Does restoring an iPhone/iPad erase the pics taken on it? | MGH | iPhone | 5 | Aug 8, 2011 10:12 PM |
| HELP! The iPhone "iPhone" could not be restored. An unknown error occurred (1015). | tatstarfreak | iPhone Tips, Help and Troubleshooting | 7 | Jan 12, 2011 08:20 AM |
| Recommended process for wiping/restoring an iPhone for sale | trilla12 | iPhone Tips, Help and Troubleshooting | 8 | Dec 7, 2010 11:48 AM |
| Iphone 3g - Ipod keeps turning off and pausing itself! Also restoring an iphone.help! | Hakimm | iPhone Tips, Help and Troubleshooting | 0 | Jun 21, 2010 05:45 AM |
| i can't jailbreak then restore my iphone =( it doesn't work.. | Martin27021992 | iPhone Tips, Help and Troubleshooting | 0 | Oct 10, 2008 01:57 PM |
All times are GMT -5. The time now is 06:22 AM.


iPhone 4 (Jailbroken
)
)


Linear Mode

