Become a MacRumors Supporter for $50/year with no ads, ability to filter front page stories, and private forums.
Replacing hard drive with SSD
- Thread starter countermoon
- Start date
- Sort by reaction score
You are using an out of date browser. It may not display this or other websites correctly.
You should upgrade or use an alternative browser.
You should upgrade or use an alternative browser.
Please give us more information.
At a minimum, you should include the model and specs of your iMac.
You could also include what exactly you want to do to upgrade the iMac, what you currently do with your iMac, a budget, your skill level, tools available, etc.
Depending on what you say above, if opening your iMac isn't an issue, maybe an external solution would be better fitting your situation.
How hard it is totally depends on the model and the skill level of the individual.
For example, I have swapped the internal drive of the Mid 2011 iMac in less than 5 minutes, with little effort.
At a minimum, you should include the model and specs of your iMac.
You could also include what exactly you want to do to upgrade the iMac, what you currently do with your iMac, a budget, your skill level, tools available, etc.
Depending on what you say above, if opening your iMac isn't an issue, maybe an external solution would be better fitting your situation.
Link the video?The videos look daunting.
How hard it is totally depends on the model and the skill level of the individual.
For example, I have swapped the internal drive of the Mid 2011 iMac in less than 5 minutes, with little effort.
Plenty of people have, I am sure. We just need to know what iMac you are referring to, as the generations could be very different.Has anyone done it?
Since you didn't give any specific information, the correct answer would be - yes and no.The videos look daunting. Has anyone done it?
When I did it to my Mac it took around 30 minutes.
That's right. I entered it last night but there was an error, and then the site went down. It should appear now.
I don't see your signature, not sure why.I put my specs in my signature. I thought it would appear with every post.
It is better just to post the info in the thread for everyone to see. Signatures can change which would confuse anyone finding this thread in the future.
Besides, some people have signatures disabled, which I do not, but for the the people that do, they wouldn't be able to see your signature even if it was working correctly.
I see it now, but again, you shouldn't rely on your signature to give us info on the device you are asking about. Post it in the thread.That's right. I entered it last night but there was an error, and then the site went down. It should appear now.
The good news is that the Mid 2011 iMac is much easier to deal with than some other models, and also gives you many upgrade options for internal and external.
The Mid 2011 iMac is really unique compared to most other generations of iMacs, as it is capable of having three internal drives, and it is possible to swap the GPU in them.
But again, posting more info will help us help you. Please answer the following along with your iMac model and specs:
ou could also include what exactly you want to do to upgrade the iMac, what you currently do with your iMac, a budget, your skill level, tools available, etc.
I've been using Apple computers since 1980. I've opened Macs in the past. And my Dell laptop, when I upgraded the RAM, the HD to a Crucial SD, and replaced the screen. I have a StarTech dock which can hold bare drives. Tried to replace the wireless card but couldn't get it to work. I'm all wired today. I loathe wireless.
That's...in the past. Computers have become increasingly difficult to upgrade, better to get your $$$. Opening an iMac is a different animal altogether. This model, I've only removed the glass with suction cups to clean it. A couple weeks ago. I've had this iMac about four years. Bought it used from Mac of All Trades.
I wouldn't call myself an expert. I supposed I could pay someone to do it. I don't remember the video I watched, but I watched several, and I wouldn't call any of them easy. The average user probably ought not to open the iMac.
I ran El Capitan for a while. Then when I upgraded to Sierra I noticed lags in the Finder, esp. when starting programs. I remember the 90s when everything was zippier. I imagine some of this is due to calling the mothership and other creepy intrusions. After seeing so many negative comments about High Sierra, I decided to stick with Sierra. I'm the kind of person who hates to wait on the computer. I dislike any lag time at all.
Before doing anything to your iMac, such as pulling the HDD, you really should update the OS to High Sierra.
You do not need to use High Sierra with your SSD, but you need the firmware that is installed with High Sierra and the OEM HDD is needed for that.
If you want to preserve your current boot drive, you can partition the HDD, and leave about 20GB or more to install High Sierra.
High Sierra runs great on the Mid 2011 iMac, even on a HDD, as long as the HDD is still good.
Doing the swap is pretty easy, imo, but I understand that easy is relative.
Do you have tools? All you need a T10, T8, and T6 driver for this one, along with the suction cup tool you said you already have.
You will also need an external thermal sensor cable, which is about $30. There are other options if that is an issue for you, such as SW solutions, shorting the sensor wires, etc.
You do not need to use High Sierra with your SSD, but you need the firmware that is installed with High Sierra and the OEM HDD is needed for that.
If you want to preserve your current boot drive, you can partition the HDD, and leave about 20GB or more to install High Sierra.
Thanks for posting more info, but again, post your iMac's specs please.I've been using Apple computers since 1980. I've opened Macs in the past. And my Dell laptop, when I upgraded the RAM, the HD to a Crucial SD, and replaced the screen. I have a StarTech dock which can hold bare drives. Tried to replace the wireless card but couldn't get it to work. I'm all wired today. I loathe wireless.
That's...in the past. Computers have become increasingly difficult to upgrade, better to get your $$$. Opening an iMac is a different animal altogether. This model, I've only removed the glass with suction cups to clean it. A couple weeks ago. I've had this iMac about four years. Bought it used from Mac of All Trades.
I wouldn't call myself an expert. I supposed I could pay someone to do it. I don't remember the video I watched, but I watched several, and I wouldn't call any of them easy. The average user probably ought not to open the iMac.
I ran El Capitan for a while. Then when I upgraded to Sierra I noticed lags in the Finder, esp. when starting programs. I remember the 90s when everything was zippier. I imagine some of this is due to calling the mothership and other creepy intrusions. After seeing so many negative comments about High Sierra, I decided to stick with Sierra. I'm the kind of person who hates to wait on the computer. I dislike any lag time at all.
There was some issues with High Sierra when I first launched, but it is pretty solid now.After seeing so many negative comments about High Sierra, I decided to stick with Sierra.
High Sierra runs great on the Mid 2011 iMac, even on a HDD, as long as the HDD is still good.
Well, a SSD will feel like a new computer, and I am totally serious about this. You are going to regret waiting this long to do the swap.I'm the kind of person who hates to wait on the computer. I dislike any lag time at all.
Doing the swap is pretty easy, imo, but I understand that easy is relative.
Do you have tools? All you need a T10, T8, and T6 driver for this one, along with the suction cup tool you said you already have.
You will also need an external thermal sensor cable, which is about $30. There are other options if that is an issue for you, such as SW solutions, shorting the sensor wires, etc.
iMac 21" Mid 2011
2.8 GHz Intel Core i7
32 GB RAM
AMD Radeon HD 6770M 512 MB
MacOS Sierra 10.12.6
Brother Laser HLL23700W printer
Ducky One Two Skyline keyboard
ATT fiber DSL
In a word, I want everything to be faster. I don't like waiting on the computer at all. For anything.
Although I was never a gamer when I was younger, I found that there were a few games I enjoyed. So after a long pause, I discovered Steam and was surprised at the low prices of games. I discovered I could run games such as GRID and SimCity 4. Also, I have been dipping my toe into Davinci Resolve 15.
My Dell laptop, a hand me down from my brother, was made about 12 years ago. A Crucial SSD gave it new life. I'm still on Win 7 32-bit on that machine. I managed to get a lot of out of it, as I try to do with all my purchases.
I know about the empty drive bays and using a "fusion" of mechanical drives and solid state, though that is something I hadn't considered. I was following what worked on my Dell laptop.
Bootcamp with Win 7 works on this machine. But it's slower than the MacOS, which I still prefer...well, the old MacOS.
There are some quirks. Always have difficulty booting into Safe Mode, for example. When I got this iMac, I noticed some color smears, burn in I guess, I don't know. Then I started using Macs Fan Control, and the color problems disappeared. That's another reason to get an SSD. Lower the temp somewhat. The back of the screen was getting splotchy, so I took a chance, bought some suction cups, and cleaned the back of the glass.
It's a fairly quiet machine. I've enjoyed it.
Last edited:
I have the Ifixit toolkit, the big one. I'm surprised at how often it has come in handy. I dislike how hard it is to read letters and numbers beneath the tool—tiny black letters against a black background. This happens with age I guess. I need glasses to read. Working on the Dell laptop, with those tiny plastic screws...ugh...they strip so easily.
Ah, I forgot. High Sierra started APFS. I remember reading all the complaints. That was something I did not want to mess with.
Ah, I forgot. High Sierra started APFS. I remember reading all the complaints. That was something I did not want to mess with.
The problem with booting into Safe Mode may be related to using a third party keyboard. I use a Ducky One Two Skyline.
Doing this install is not a big deal imo. The first time might take you a little longer, but watch some videos, follow the iFixit guide, and I think you will see it isn't a big deal.
Another thing, there is not just one way to do what you want to do.
In a little bit, I will post some general steps of what I think you could do. It will take a while to type it up.
AFAIK, installing High Sierra on a HDD or Fusion Drive will not automatically convert the drive to APFS.
While it is true that APFS and HDDs do not play nice, and this has only gotten worse with newer MacOS versions, it isn't something you have to worry about with High Sierra.
One thing to check is to find the equivalent to the Apple Keyboard of alt/option keep. This will be helpful when booting. Once you think you know which on it is, shutdown/restart your Mac, and right before the chime, press and hold the alt/option key and make sure it ask you which drive to boot from. You will probably have two, your regular boot drive and the recover.
You may have done this before when using your Windows 7 partition.
The above isn't necessary, but it does save some times when dealing with multiple boot drives.
Another thing, there is not just one way to do what you want to do.
In a little bit, I will post some general steps of what I think you could do. It will take a while to type it up.
High Sierra can run on HFS, even on a SSD.Ah, I forgot. High Sierra started APFS.
AFAIK, installing High Sierra on a HDD or Fusion Drive will not automatically convert the drive to APFS.
While it is true that APFS and HDDs do not play nice, and this has only gotten worse with newer MacOS versions, it isn't something you have to worry about with High Sierra.
Regardless, you will not have to worry about booting into Safe Mode unless there is a problem.The problem with booting into Safe Mode may be related to using a third party keyboard.
One thing to check is to find the equivalent to the Apple Keyboard of alt/option keep. This will be helpful when booting. Once you think you know which on it is, shutdown/restart your Mac, and right before the chime, press and hold the alt/option key and make sure it ask you which drive to boot from. You will probably have two, your regular boot drive and the recover.
You may have done this before when using your Windows 7 partition.
The above isn't necessary, but it does save some times when dealing with multiple boot drives.

I didn’t feel comfortable doing this upgrade to my wife’s identical iMac some years ago so farmed out the task to a local Apple authorized shop. They did the swap for $110 labor. With a SSD I provided. Felt it was worth the cost at the time - done in Nov 2013.
The problem with booting into Safe Mode may be related to using a third party keyboard. I use a Ducky One Two Skyline.
Exactly.
Third party mechanical keyboards take longer to be recognized by Macs, and cannot be used for pre-boot activation of modes such as Target disk mode, Boot devices selection, Recovery mode, etc.
You'll need a simple USB keyboard. The membrand ones like in the link below. Try look around the house or ask friends if they have something laying around. I had to buy mine for 4$ for the unique purpose of activating certain modes on the iMac, after switching all of my keyboards to mechanical ones.
Dell Wired Keyboard - Black KB216 (580-ADMT)
Wired keyboard for everyday home or office use: The Dell Wired Keyboard provides a convenient keyboard solution for everyday home or office computing uses. The keyboard's full layout with chiclet style keys allows for efficient, comfortable typing - excellent for everyday usage on virtually any t...
www.amazon.com
HP USB Slim Business Keyboard
lt;b gt;Hardware compatibility lt;/b gt; lt;br / gt;The HP USB Slim Business Keyboard is compatible with HP EliteDesk 705 G2 MT, HP EliteDesk 705 G2 SFF, HP EliteOne 705 G2 AIO and HP EliteDesk 705 G2 DM (Mini). lt;br / gt; lt;br / gt;Get fast data entry and quick USB connectivity with the HP USB...
www.amazon.com
Check out You Tube videos and the iFixit Guide.
Here is the HDD replacement guide. It will not be exactly what you will be doing, as you are installing an SSD, but the steps are all the same until the very end:
 www.ifixit.com
Look over the guide, and watch some YouTube videos, as the guide alone might leave you with some questions.
For example, on step 7, that could be confusing just by reading the guide. With the iMac laying on its back, you GENTLY pull the tab upward toward the sky to unlock the locking bracket, and then GENTLY pull it toward the top side of the iMac to pull the connector out.
If you read the iFixit guide, and watch some videos and still feel uncomfortable doing the swap, consider this advice:
If you don't feel comfortable doing the swap, and paying someone to do it just isn't an option, you could try an external boot drive, such as Thunderbolt. TB options are sometimes hard to find and might be expensive.
Even using a SSD over USB2 or FW800 might be worth it over using an internal HDD. The sequential speeds would not be as high on USB2 or FW800, but the random speeds will most likely be much better than using a HDD. This would give you that "instant" response from the OS.
You could also use a SSD over USB3 via a TB dock with USB3 ports, which is easier to fine than a TB1 or TB2 enclosure/SSD.
It probably wouldn't be worth the investment, but you could get a TB3 NVMe SSD, which would be the fastest non-RAID drive possible for your iMac (900MBps). To get this working, you will also need a TB3 dock, and the Apple TB bidirectional adapter, so it is expensive. I have this set up for my Late 2012 iMac.
All that said, it isn't that complex of an install. Of course things can go wrong, and you can break stuff, but for Macs this install isn't that big of a deal.
The iMac would feel like a new computer with a SSD installed, and it is totally worth it imo.
If you choose to go forward with the install, read further:
Start with prep work:
Back up your drive - While not required, it is just general good practice to have a backup of your data. A bootable back is better, but TM, or just a manual back up of important stuff is fine.
High Sierra - Update/Fresh Install the OS on the internal HDD to High Sierra and complete all the updates.
Firmware - Check the firmware after all the updates - Apple symbol > About this Mac > System Report > Hardware Overview > Boot Rom Version. It should say "87.0.0.0.0" for the Mid 2011 iMacs.
iFixit Guide - Have this handy on another device.
Buy what you need for the install:
SSD - Get an internal SATAIII SSD. Many like the Samsung EVO 860. I have used them and they were great, but so was every other SSD that I have used, so don't feel the need to pay more if the cost is an issue. Get a size big enough for your needs, leaving at least 10% free space after everything you plan on storing on it.
3.5" to 2.5" SATA caddy - This is not required, but are super cheap and keeps things clean. I have used a few different ones in the past, such as some IcyDock ones. Don't spend a lot on a caddy, if it cost more than $10, it probably isn't worth it for this install.
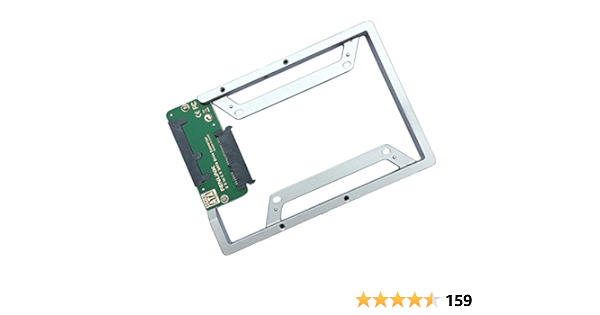
Some advice, try to fine ones without a build-in SATA PCB, as you do not need an exact match up for the SATA ports due to being cable connected. This is an example of one that is NOT recommend for your iMac:
If you might consider a dual SSD in the future, I purchased this one for a dual SSD set up in a Mid 2011 iMac:
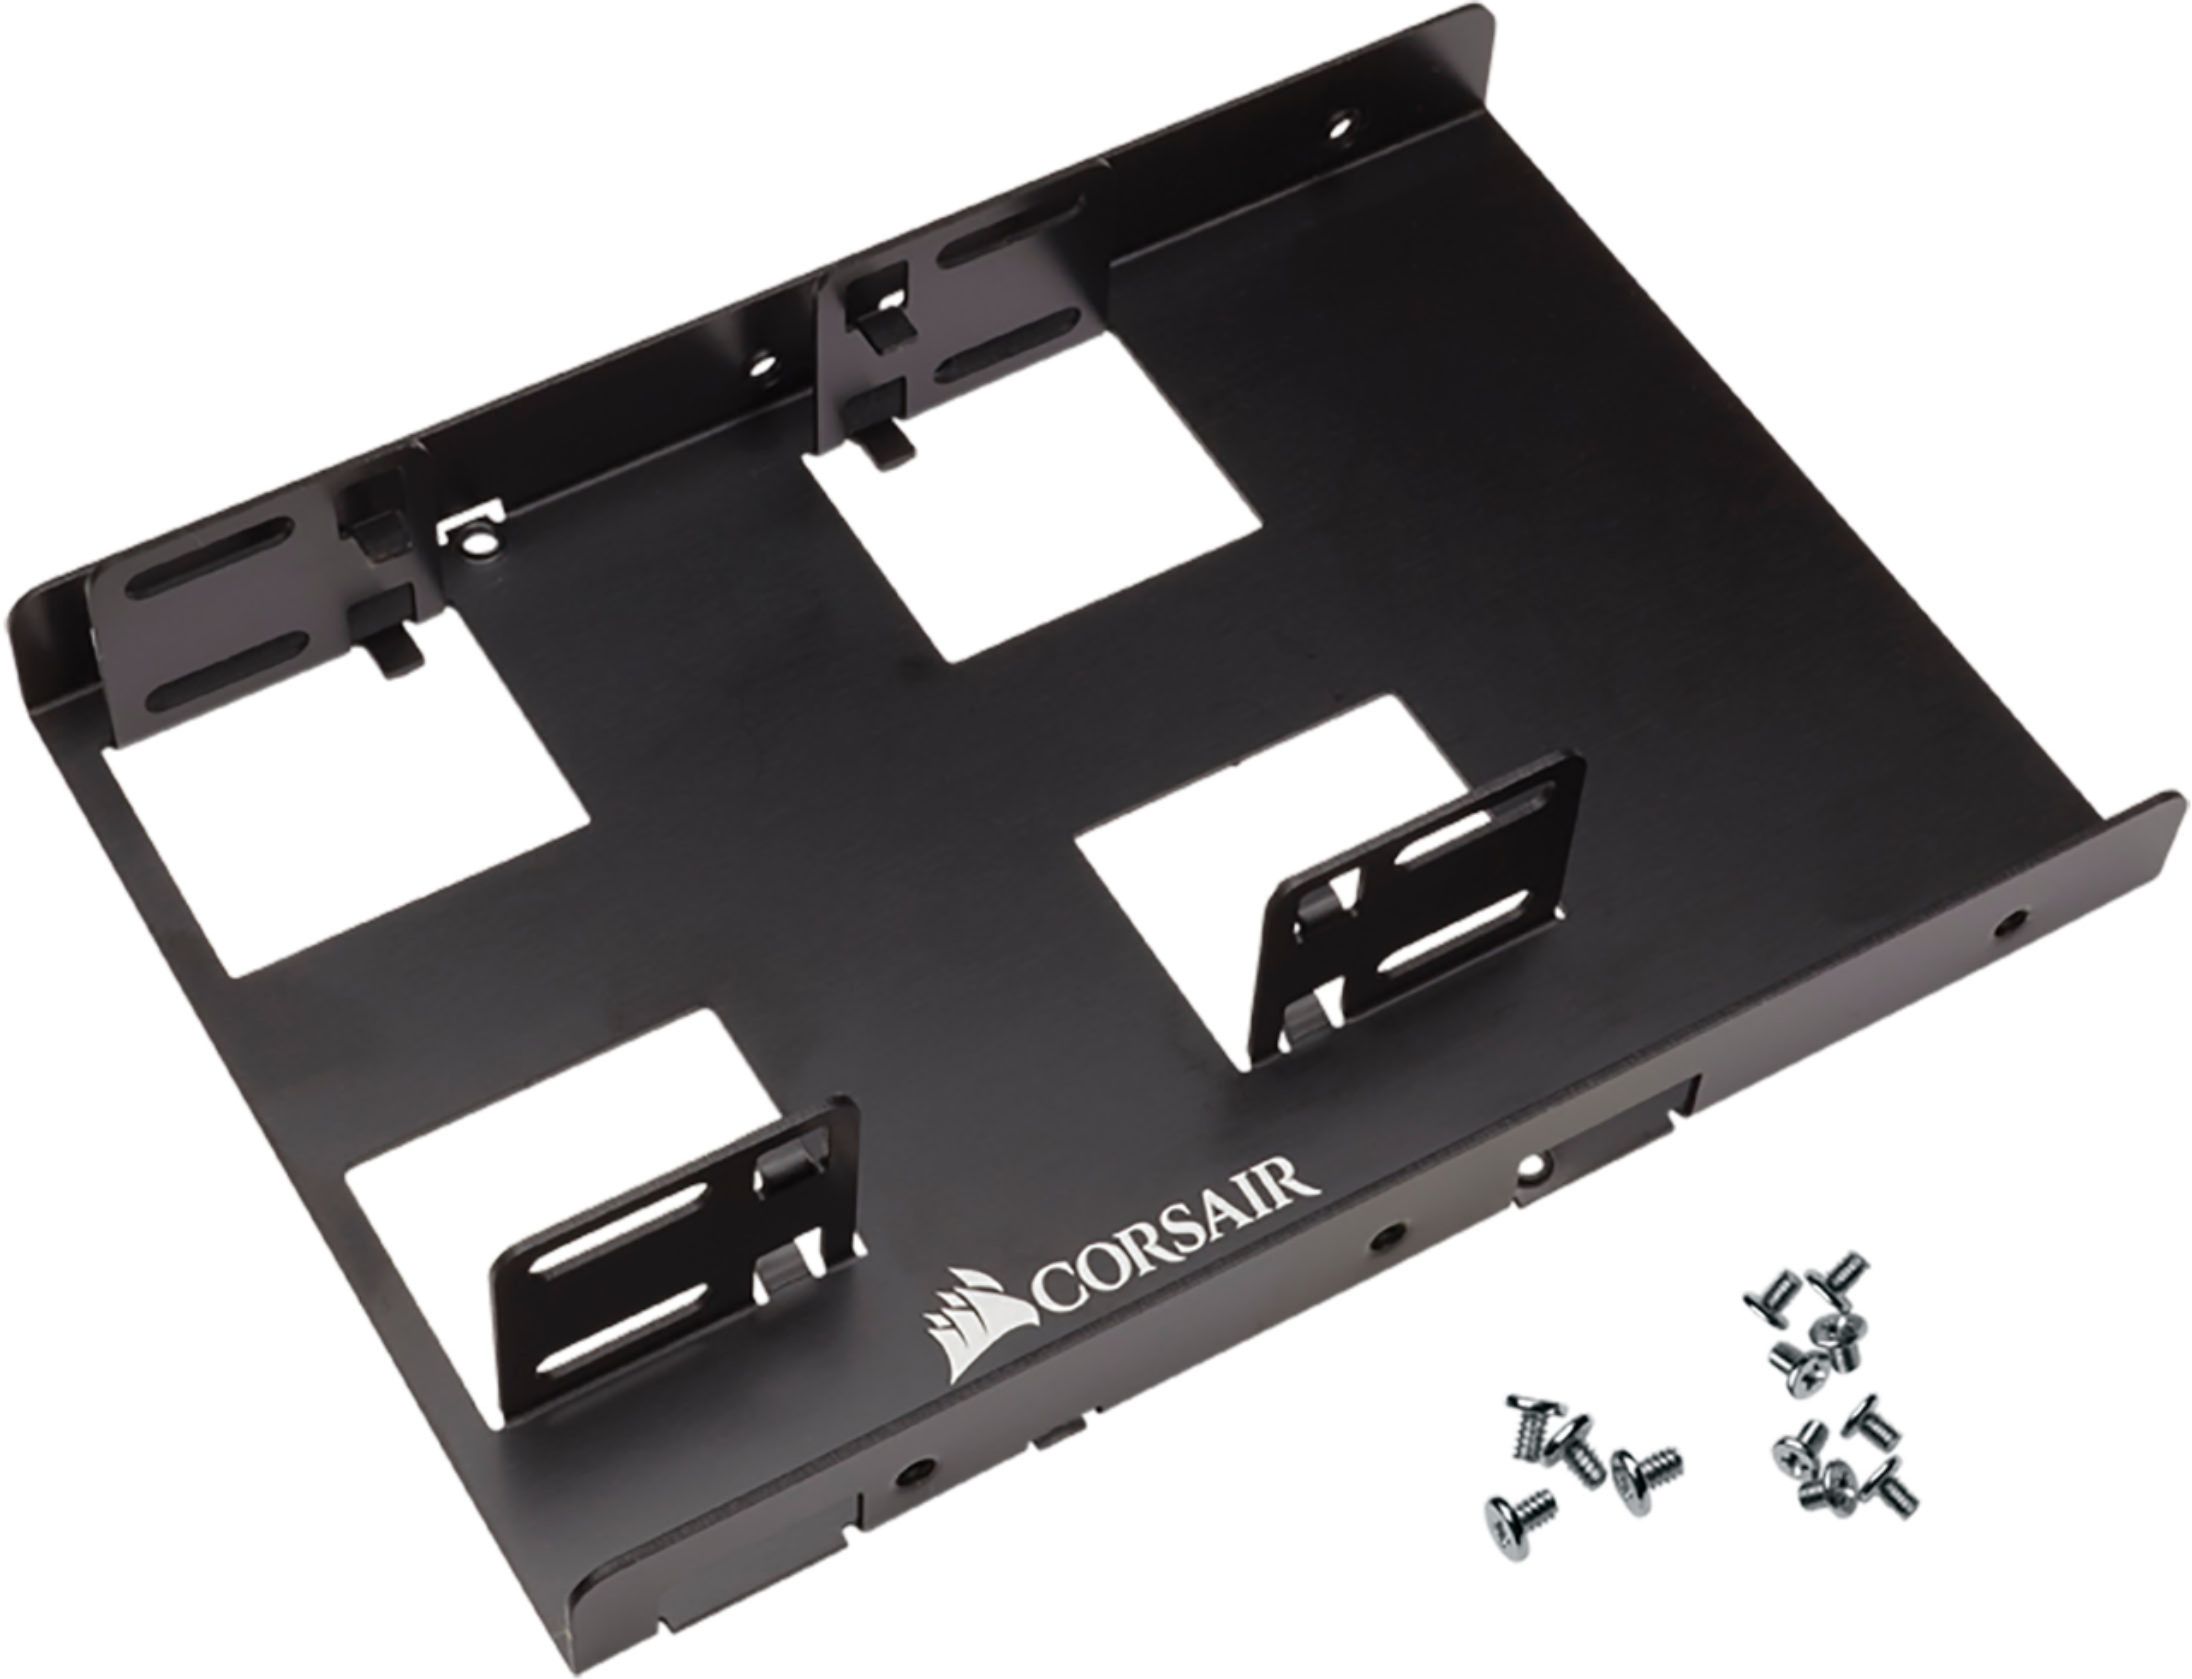
 www.bestbuy.com
You can use the dual caddy for a single drive as well. It is really cheap @$6, so just a good option for both single or dual SSDs.
www.bestbuy.com
You can use the dual caddy for a single drive as well. It is really cheap @$6, so just a good option for both single or dual SSDs.
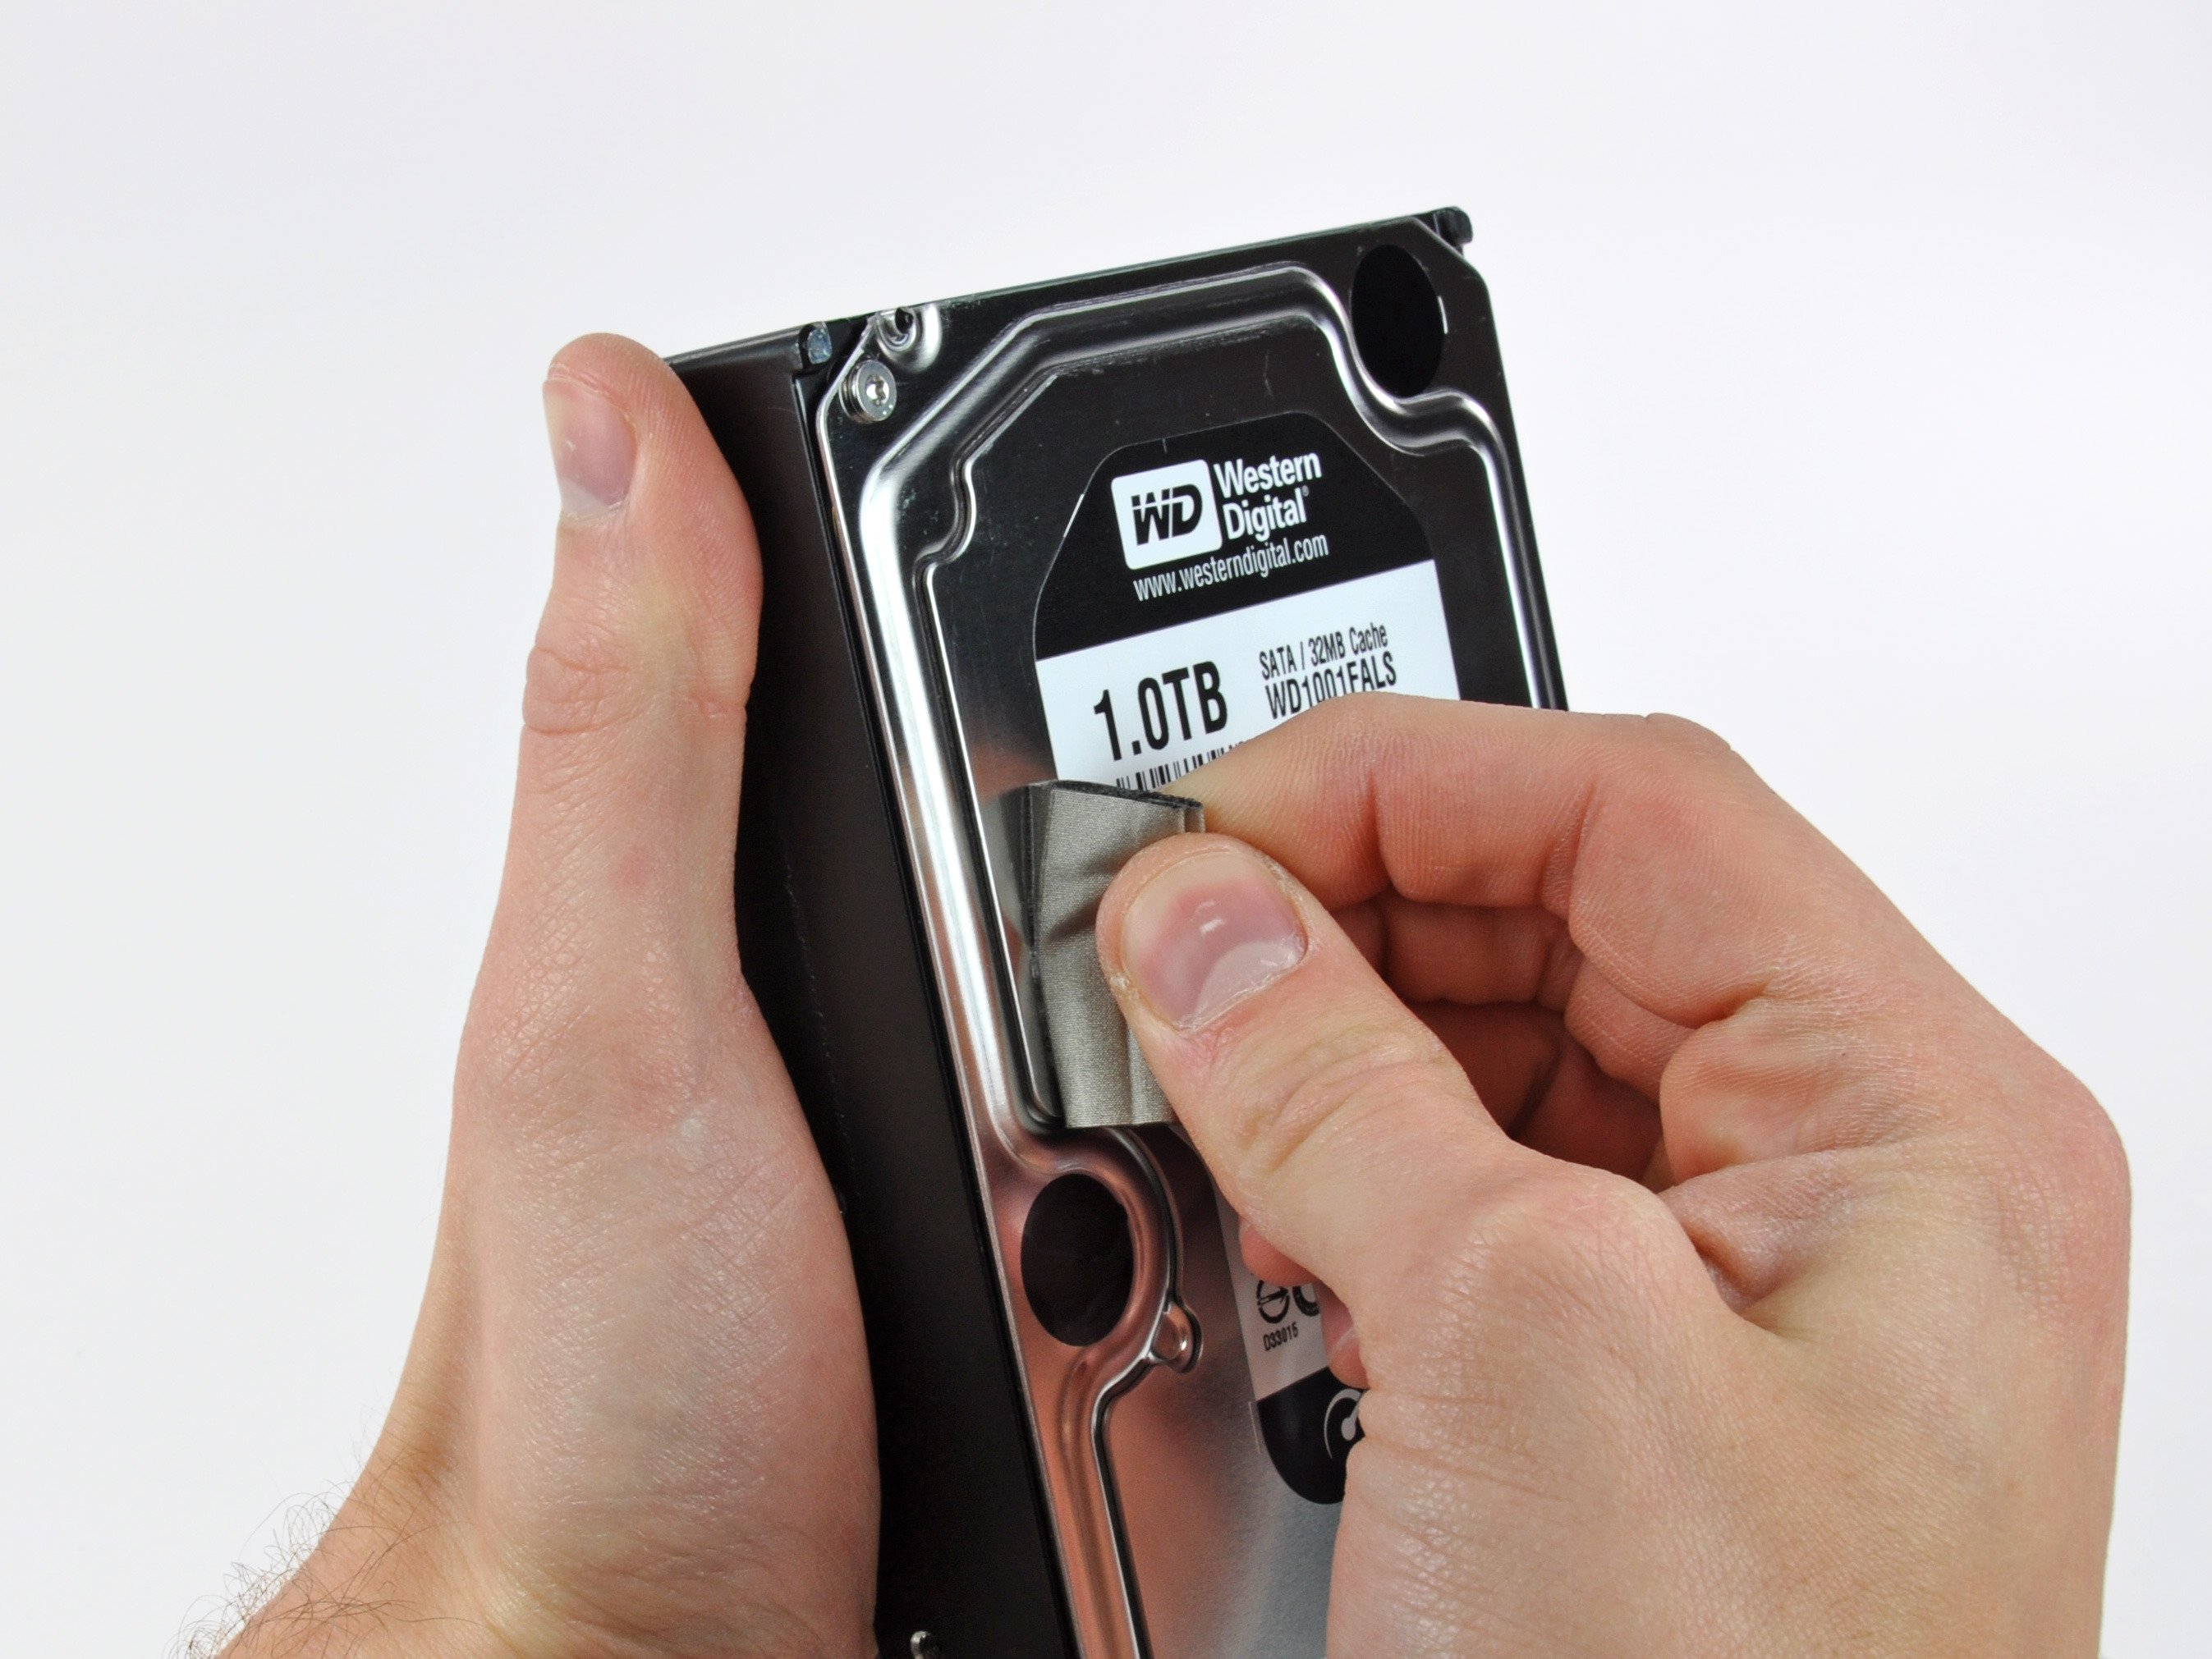
If you want to skip the caddy all together, you can just use double-face tape, and stick in the HDD bay.
USB/SATA Adapter Cable or Enclosure - Completely optional, but it is helpful for externally formatting and testing the new SSD prior to installing it internally. They are nice to keep around for troubleshooting, back ups, or even to have an external boot drive. I like this one:
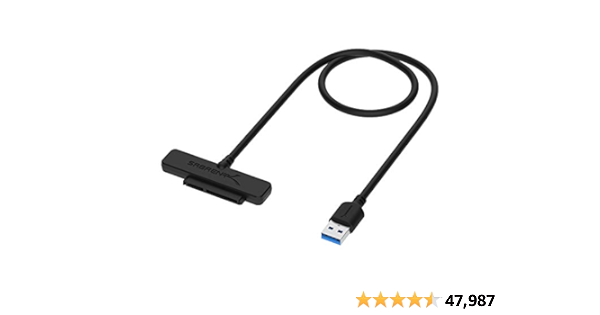
There are also cables for both 2.5" and 3.5" drives as well if you want to have one for your HDD.
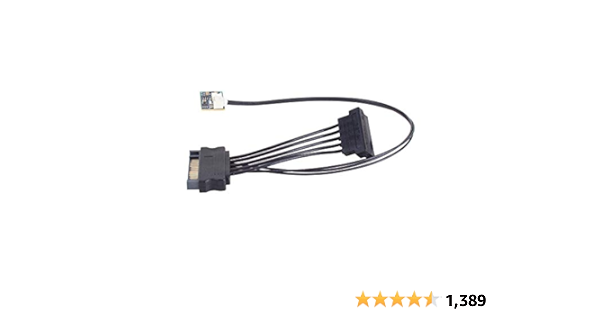
SATA Thermal Sensor Adapter - It prevents your fan speeds to go full blast after replacing the HDD. It is optional because you can use a SW solution (MacsFanControl) to control the fan speeds, use other sensors that your splice in yourself, or just short the sensor wires to make the OS think that the temps are low.
Personally, I recommend just getting the SATA Sensor adapter, as it is an easy, no-hassle way of setting up your new SSD, and will give accurate temperatures, and let the OS decide what the fan speed should be. OWC and iFixit make them.
Here is the OWC version, although I have seen them cheaper on eBay sometimes:
Install:
1. SSD Setup (optional) - After doing the prep work, and purchasing everything, connect the SSD to your iMac via USB (or your way of choice), format the SSD using Disk Utility. Use Mac OS Extended (Journaled) and GUID Partition Map as the options. It should look like this:

1.1 Install High Sierra on the SSD - When setting up the OS on the SSD, you can migrate your data from your HDD if you choose using Apple Migration Assistant. You can also just clone the HDD to the new SSD using CCC or something similar. If you clone, boot into the SSD externally at least once to make sure cloned okay.
1.2 Disconnect everything - Once done doing the optional install of High Sierra and/or migration data, cloning, etc. you can shutdown, disconnect all cables, usb, TB, ethernet, power, etc.
Step 1 is optional, but it lets you know the drive works before installing it. You can do all of that after the drive is installed as well.
2. Get all your tools, parts, guide, and it is helpful to have someone to help you.
3. Follow the steps of the iFixit Guide with maybe some exceptions. I think the guide has your remove the RAM, this isn't necessary for the HDD swap, but is for removing the logic board which you are not doing.
The following is my steps to be used with iFixit Steps to help clarify things while giving optional additional things to do.
3.1 Display glass - You have done this, just be careful not to pick it up by the suction cups, as they can release easily. Also, do not touch the clear side of the glass!
3.2 Display screws - All eight screws for the display are the same T10 screws, so no need keeping track which hole they go in. It is easy to lose some of the screws down the gaps, but the magnets that are used to attach the display glass are helpful to catch them before the drop.
Be careful not to touch the display screen with your tools and hands!
3.3 Display Lift - Having hooks to lift the screen after the display bolts are out is really helpful. I made some with a clothes hanger, but paperclips would be easier to use as long as it would be strong enough to lift the display.
DO NOT lift the display more than a few inches, as there are cables that need to be disconnected first. This is were a friend to help you is nice. I have done this many times without help, so having someone with you isn't required.
If you need to set the display down for whatever reason, a tip is to prop it open with something like the rubber handle of a driver.
There are four connectors that need to be disconnected. These can sometimes be a pain, especially the first time and/or if you do not have someone to hold the display for you while disconnecting the connectors. They all disconnect in the direction of the top of the iMac. There is also a shock risk, pay attention to the iFixit guide where this is.
I already explained above about the cable ribbon with the pull tab. The pull tab is used to first unlock the bracket holding the connector by pulling it upward the display (perpendicular to the logic board), then toward the top of the iMac to disconnect the ribbon from the logic board.
Make sure all four are disconnected, pull the display out, and put in a safe place. You might also want to clean the dust off the back of the display as well, just be careful not to get it all over the front of the display.
3.4 HDD Removal - The HDD bracket is held in place by two T10 screws. Remove the SATA cables, and pull out the HDD.
3.5 Clean up (optional) - Your iMac has probably had 10 years of dust collecting inside. This is a great time to use some compressed air and blow out the inside. One the obvious stuff is gone, concentrate on areas that air is pushed or pulled, like fans and vents. You might want to do this outside, because dust will be flying. Maybe wear a mask too.
3.6 SSD Install - If you have the optional caddy, put the bracket and mounting pegs from the HDD to the caddy. You will need a T8 driver for this. Just make sure the bracket is on the correct side of the caddy, and the orientation is the same.
If you are using the optional SATA temp sensor cable adapter, you can choose where you want to mount the sensor using the stick side. I have mounted it on both a caddy and also directly to iMac, near where the vent hole is.
Also, if using the sensor adapter, you will have to tuck the SATA cable somewhere to get it to fit. I tuck it toward the GPU heat sink a little to get it to fit.
If using double-faced tape, just mount it where the HDD went, but over a little giving you room for the SATA Cable Adapter if you are using one.
Make sure the SATA cables are seated!
3.7 Put everything back together - Reverse what your did to take everything apart.
Two T10 Screws to mount the HDD bracket to the iMac.
Gently slide the display in place at the bottom of it and the iMac. Be careful not to touch the display screen with your tools and hands!
Four cable connectors, most just push right back in, but the ribbon cable, gently push in place, and move the bracket tab toward the bottom of the iMac to lock it in place.
Gently lower the display in place.
Eight T10 screws for the display (or just the top two and bottom two if you want to wait to make sure it works). Putting these screws back in is the hardest part for me. I worry a little about them dropping into the gaps, and while the magnets usually prevent that, the magnets makes it hard to get the screw into the holes.
The last few times, I actually used a small needle nose pliers to hold the screws in one hand, and tighten with the T10 driver with the other.
3.8 Replace the display glass - This is optional if you want to test everything first.
4 Testing and TRIM - Connect the power cable, keyboard and mouse, and boot up. If you did not already install the OS on the SSD, you will need to connect the HDD or some other back up to the iMac externally to boot from.
4.1 Fans - If you choose not to use a sensor, you probably hear the fans on full blast. You can fix this later with a SW solution. If you used a sensor, and the fans are still going nuts, let us know for some trouble shooting.
4.2 Format and HS Install - If you already installed the OS on the SSD, skip this step. Format the SSD in Disk Utilities if you have not already in a previous step. Install High Sierra on the SSD, and migrate your data.
4.3 Enable Trim - This requires using Terminal, but is super easy and is basically copy and paste. Open Terminal and type or paste the following then press enter:
You can check to make sure that TRIM is enabled by Apple Symbol > About This Mac > System Report > Hardware > SATA/SATA Express > Your SSD > TRIM Support.... Or look at this:

5. Enjoy!
It may seem like a lot of steps, but it isn't complicated. The whole task, from step 1 down to step 5 could be done in less than 20 minutes with someone that is proficient with Macs. Of course, if you are migrating a lot of data, that would add some time, especially with USB2.
Depending on your skill level, doing this for the first time might take 45 minute to 1.5 hours.
Let me know if something isn't clear, or if I made a mistake.
Also, let us know if you end up doing the install.
Here is the HDD replacement guide. It will not be exactly what you will be doing, as you are installing an SSD, but the steps are all the same until the very end:
iMac Intel 27" EMC 2429 Hard Drive Replacement
This guide will help you replace/upgrade the hard drive. This guide also includes steps to upgrade your iMac's hard drive with a SSD. It describes...
www.ifixit.com
Look over the guide, and watch some YouTube videos, as the guide alone might leave you with some questions.
For example, on step 7, that could be confusing just by reading the guide. With the iMac laying on its back, you GENTLY pull the tab upward toward the sky to unlock the locking bracket, and then GENTLY pull it toward the top side of the iMac to pull the connector out.
If you read the iFixit guide, and watch some videos and still feel uncomfortable doing the swap, consider this advice:
I didn’t feel comfortable doing this upgrade to my wife’s identical iMac some years ago so farmed out the task to a local Apple authorized shop. They did the swap for $110 labor. With a SSD I provided. Felt it was worth the cost at the time - done in Nov 2013.
If you don't feel comfortable doing the swap, and paying someone to do it just isn't an option, you could try an external boot drive, such as Thunderbolt. TB options are sometimes hard to find and might be expensive.
Even using a SSD over USB2 or FW800 might be worth it over using an internal HDD. The sequential speeds would not be as high on USB2 or FW800, but the random speeds will most likely be much better than using a HDD. This would give you that "instant" response from the OS.
You could also use a SSD over USB3 via a TB dock with USB3 ports, which is easier to fine than a TB1 or TB2 enclosure/SSD.
It probably wouldn't be worth the investment, but you could get a TB3 NVMe SSD, which would be the fastest non-RAID drive possible for your iMac (900MBps). To get this working, you will also need a TB3 dock, and the Apple TB bidirectional adapter, so it is expensive. I have this set up for my Late 2012 iMac.
All that said, it isn't that complex of an install. Of course things can go wrong, and you can break stuff, but for Macs this install isn't that big of a deal.
The iMac would feel like a new computer with a SSD installed, and it is totally worth it imo.
If you choose to go forward with the install, read further:
In a little bit, I will post some general steps of what I think you could do.
Start with prep work:
Back up your drive - While not required, it is just general good practice to have a backup of your data. A bootable back is better, but TM, or just a manual back up of important stuff is fine.
High Sierra - Update/Fresh Install the OS on the internal HDD to High Sierra and complete all the updates.
Firmware - Check the firmware after all the updates - Apple symbol > About this Mac > System Report > Hardware Overview > Boot Rom Version. It should say "87.0.0.0.0" for the Mid 2011 iMacs.
iFixit Guide - Have this handy on another device.
Buy what you need for the install:
SSD - Get an internal SATAIII SSD. Many like the Samsung EVO 860. I have used them and they were great, but so was every other SSD that I have used, so don't feel the need to pay more if the cost is an issue. Get a size big enough for your needs, leaving at least 10% free space after everything you plan on storing on it.
3.5" to 2.5" SATA caddy - This is not required, but are super cheap and keeps things clean. I have used a few different ones in the past, such as some IcyDock ones. Don't spend a lot on a caddy, if it cost more than $10, it probably isn't worth it for this install.
Some advice, try to fine ones without a build-in SATA PCB, as you do not need an exact match up for the SATA ports due to being cable connected. This is an example of one that is NOT recommend for your iMac:
Fenlink 2.5" to 3.5" Internal SSD Hard Drive SATA Drive Converter (Silver)
Fenlink 2.5" to 3.5" Internal SSD Hard Drive SATA Drive Converter (Silver)
www.amazon.com
If you might consider a dual SSD in the future, I purchased this one for a dual SSD set up in a Mid 2011 iMac:
CORSAIR Dual SATA Drive Enclosure for 2.5" Solid-State Drives Black CSSD-BRKT2 - Best Buy
Shop CORSAIR Dual SATA Drive Enclosure for 2.5" Solid-State Drives Black at Best Buy. Find low everyday prices and buy online for delivery or in-store pick-up. Price Match Guarantee.
If you want to skip the caddy all together, you can just use double-face tape, and stick in the HDD bay.
USB/SATA Adapter Cable or Enclosure - Completely optional, but it is helpful for externally formatting and testing the new SSD prior to installing it internally. They are nice to keep around for troubleshooting, back ups, or even to have an external boot drive. I like this one:
SABRENT USB 3.0 to SSD / 2.5 Inch SATA I/II/III Hard Drive Adapter (EC-SSHD)
Product Description:Take advantage of the lightening speed of USB 3.0 to quickly transfer files up to 5 Gbps! Connect any 2.5'' Serial ATA (SATA) / SSD or SATA II Hard Drive to your computer through an available USB 3.0 port on your desktop or laptop. Reverse compatible with USB 2.0 and 1.1, this...
www.amazon.com
There are also cables for both 2.5" and 3.5" drives as well if you want to have one for your HDD.
SATA Thermal Sensor Adapter - It prevents your fan speeds to go full blast after replacing the HDD. It is optional because you can use a SW solution (MacsFanControl) to control the fan speeds, use other sensors that your splice in yourself, or just short the sensor wires to make the OS think that the temps are low.
Personally, I recommend just getting the SATA Sensor adapter, as it is an easy, no-hassle way of setting up your new SSD, and will give accurate temperatures, and let the OS decide what the fan speed should be. OWC and iFixit make them.
Here is the OWC version, although I have seen them cheaper on eBay sometimes:
OWC in-Line Digital Thermal Sensor HDD Upgrade Cable for iMac 2011, (OWCDIDIMACHDD11)
OWC In-line Digital Thermal Sensor for iMac 2011 Hard Drive Upgrade. OWC DIY Kit for all Apple iMac 2011 Models for replacing the main hard drive. Includes all cables necessary for installation. Hard drive and tools sold separately. Eliminate fan noise and maintain correct system fan control when...
www.amazon.com
Install:
1. SSD Setup (optional) - After doing the prep work, and purchasing everything, connect the SSD to your iMac via USB (or your way of choice), format the SSD using Disk Utility. Use Mac OS Extended (Journaled) and GUID Partition Map as the options. It should look like this:

1.1 Install High Sierra on the SSD - When setting up the OS on the SSD, you can migrate your data from your HDD if you choose using Apple Migration Assistant. You can also just clone the HDD to the new SSD using CCC or something similar. If you clone, boot into the SSD externally at least once to make sure cloned okay.
1.2 Disconnect everything - Once done doing the optional install of High Sierra and/or migration data, cloning, etc. you can shutdown, disconnect all cables, usb, TB, ethernet, power, etc.
Step 1 is optional, but it lets you know the drive works before installing it. You can do all of that after the drive is installed as well.
2. Get all your tools, parts, guide, and it is helpful to have someone to help you.
3. Follow the steps of the iFixit Guide with maybe some exceptions. I think the guide has your remove the RAM, this isn't necessary for the HDD swap, but is for removing the logic board which you are not doing.
The following is my steps to be used with iFixit Steps to help clarify things while giving optional additional things to do.
3.1 Display glass - You have done this, just be careful not to pick it up by the suction cups, as they can release easily. Also, do not touch the clear side of the glass!
3.2 Display screws - All eight screws for the display are the same T10 screws, so no need keeping track which hole they go in. It is easy to lose some of the screws down the gaps, but the magnets that are used to attach the display glass are helpful to catch them before the drop.
Be careful not to touch the display screen with your tools and hands!
3.3 Display Lift - Having hooks to lift the screen after the display bolts are out is really helpful. I made some with a clothes hanger, but paperclips would be easier to use as long as it would be strong enough to lift the display.
DO NOT lift the display more than a few inches, as there are cables that need to be disconnected first. This is were a friend to help you is nice. I have done this many times without help, so having someone with you isn't required.
If you need to set the display down for whatever reason, a tip is to prop it open with something like the rubber handle of a driver.
There are four connectors that need to be disconnected. These can sometimes be a pain, especially the first time and/or if you do not have someone to hold the display for you while disconnecting the connectors. They all disconnect in the direction of the top of the iMac. There is also a shock risk, pay attention to the iFixit guide where this is.
I already explained above about the cable ribbon with the pull tab. The pull tab is used to first unlock the bracket holding the connector by pulling it upward the display (perpendicular to the logic board), then toward the top of the iMac to disconnect the ribbon from the logic board.
Make sure all four are disconnected, pull the display out, and put in a safe place. You might also want to clean the dust off the back of the display as well, just be careful not to get it all over the front of the display.
3.4 HDD Removal - The HDD bracket is held in place by two T10 screws. Remove the SATA cables, and pull out the HDD.
3.5 Clean up (optional) - Your iMac has probably had 10 years of dust collecting inside. This is a great time to use some compressed air and blow out the inside. One the obvious stuff is gone, concentrate on areas that air is pushed or pulled, like fans and vents. You might want to do this outside, because dust will be flying. Maybe wear a mask too.
3.6 SSD Install - If you have the optional caddy, put the bracket and mounting pegs from the HDD to the caddy. You will need a T8 driver for this. Just make sure the bracket is on the correct side of the caddy, and the orientation is the same.
If you are using the optional SATA temp sensor cable adapter, you can choose where you want to mount the sensor using the stick side. I have mounted it on both a caddy and also directly to iMac, near where the vent hole is.
Also, if using the sensor adapter, you will have to tuck the SATA cable somewhere to get it to fit. I tuck it toward the GPU heat sink a little to get it to fit.
If using double-faced tape, just mount it where the HDD went, but over a little giving you room for the SATA Cable Adapter if you are using one.
Make sure the SATA cables are seated!
3.7 Put everything back together - Reverse what your did to take everything apart.
Two T10 Screws to mount the HDD bracket to the iMac.
Gently slide the display in place at the bottom of it and the iMac. Be careful not to touch the display screen with your tools and hands!
Four cable connectors, most just push right back in, but the ribbon cable, gently push in place, and move the bracket tab toward the bottom of the iMac to lock it in place.
Gently lower the display in place.
Eight T10 screws for the display (or just the top two and bottom two if you want to wait to make sure it works). Putting these screws back in is the hardest part for me. I worry a little about them dropping into the gaps, and while the magnets usually prevent that, the magnets makes it hard to get the screw into the holes.
The last few times, I actually used a small needle nose pliers to hold the screws in one hand, and tighten with the T10 driver with the other.
3.8 Replace the display glass - This is optional if you want to test everything first.
4 Testing and TRIM - Connect the power cable, keyboard and mouse, and boot up. If you did not already install the OS on the SSD, you will need to connect the HDD or some other back up to the iMac externally to boot from.
4.1 Fans - If you choose not to use a sensor, you probably hear the fans on full blast. You can fix this later with a SW solution. If you used a sensor, and the fans are still going nuts, let us know for some trouble shooting.
4.2 Format and HS Install - If you already installed the OS on the SSD, skip this step. Format the SSD in Disk Utilities if you have not already in a previous step. Install High Sierra on the SSD, and migrate your data.
4.3 Enable Trim - This requires using Terminal, but is super easy and is basically copy and paste. Open Terminal and type or paste the following then press enter:
sudo trimforce enable
You can check to make sure that TRIM is enabled by Apple Symbol > About This Mac > System Report > Hardware > SATA/SATA Express > Your SSD > TRIM Support.... Or look at this:

5. Enjoy!
It may seem like a lot of steps, but it isn't complicated. The whole task, from step 1 down to step 5 could be done in less than 20 minutes with someone that is proficient with Macs. Of course, if you are migrating a lot of data, that would add some time, especially with USB2.
Depending on your skill level, doing this for the first time might take 45 minute to 1.5 hours.
Let me know if something isn't clear, or if I made a mistake.
Also, let us know if you end up doing the install.
Wow! An unpeccable guide from @vertical smile .
OP, you may wish to live in my home town (HCM city) where the shop offer SSD replacement service at your home for just 25$ service fee.....
OP, you may wish to live in my home town (HCM city) where the shop offer SSD replacement service at your home for just 25$ service fee.....
My advice:
Don't put any money into a 10-year-old iMac.
Get something new, or Apple-refurbished.
Either an iMac or Mini.
Don't put any money into a 10-year-old iMac.
Get something new, or Apple-refurbished.
Either an iMac or Mini.
My advice:
Don't put any money into a 10-year-old iMac.
Get something new, or Apple-refurbished.
Either an iMac or Mini.
The SSD can be transplanted to a newer iMac in the future. So I guess just some labour is wasted, in exchange for some knowledge and personal experience. Quite a fair trade to upgrade old iMac.
Yeah, I agree.The SSD can be transplanted to a newer iMac in the future. So I guess just some labour is wasted, in exchange for some knowledge and personal experience. Quite a fair trade to upgrade old iMac.
It sounds like the OP is otherwise happy with their current Mac and just wants that instant feel from a SSD. Why spend $$$$ on a new iMac, when a tiny fraction of the price of a new iMac could get them exactly what they want. Most of the invested new parts could always be used on a new Mac when the OP eventually gets one.
Of course, if the labor isn't realistic for the OP, then many a new iMac would be a better option.
Thank you for an excellent guide, and I appreciate your time and expertise. But I have a 21'' imac, not 27''
I dislike new Macs and Mac Os. This might even be the last Mac I ever buy, I don't know.
I like Crucial SSDs. I already own a SATA cable and have used it many times. BootROM is correct. Why do I need to upgrade to High Sierra? For the firmware?
I will watch some videos again and think about whether I want to try it or pay someone else.
Last edited:
Thanks for the write up! I've been thinking about doing the same as my son was initially using it while remote learning (has since migrated to using the school issued Chromebook). But nonetheless it is a nice way to spruce up an aging machine. Already upgraded the ram but the HD>SSD is definitely the best bang for the performance boost.
Sorry about that.But I have a 21'' imac, not 27''
This is another good example of why the description of your iMac should be in the first post of the thread, and also in the thread title would be helpful.
The good news is that the HDD Swap steps for the 27" Mid 2011 iMac is completely identical to the 21".
I will double check the firmware version, but I am pretty sure that is the same as well.
Yes, for the firmware.Why do I need to upgrade to High Sierra? For the firmware?
It isn't exactly needed to use SSDs, but not having the latest firmware could prevent you from installing High Sierra (and maybe some other MacOS versions) on the SSD.
There are work arounds, one is installing on a HDD, and cloning to the SSD. But, if you still have the OEM drive, there is little reason not to update to the newest OS for the firmware. You don't have to keep using it, you would just do it for the firmware.
High Sierra runs great on your iMac if you decided to just stick with it.
I upgraded to High Sierra yesterday. The Finder has been sluggish, but it's getting better. I don't regret the choice.
Register on MacRumors! This sidebar will go away, and you'll see fewer ads.