Become a MacRumors Supporter for $50/year with no ads, ability to filter front page stories, and private forums.
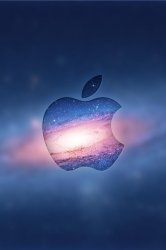
iPhone Wallpaper Overlay
- Thread starter Vizio
- Start date
- Sort by reaction score
You are using an out of date browser. It may not display this or other websites correctly.
You should upgrade or use an alternative browser.
You should upgrade or use an alternative browser.
Thanks, can you teach me how you did this?
Thanks, can you teach me how you did this?
Gather source images.
After opening the image you provided, I noted that it was a low resolution image (282x500); so I first used the reverse-image search feature from http://images.google.com to find a higher quality version of your image.
I was able to find a copy of the same background image which was already properly sized for the iPhone 5 (640x1136).
I also used Google Images to search for an Apple logo that I could use as a selection template.
Create the iPhone background.
Note: I am using Photoshop Elements but other graphics programs will involve similar steps.
Open the background image to be edited.

Create a duplicate layer to be used as the "frosted glass".

You should now have two layers as shown below. Ensure that the "Background copy" layer is highlighted.

Apply a Gausian Blur to simulate the distortion caused by looking through the frosted glass.

Adjust the Gausian Blur Radius setting until you achieve the desired effect.

The "Background copy" image should now be appropriately fuzzy.

Create a new layer.

Use the paint bucket tool to fill the new layer with white color.

just so...

Adjust the opacity of the white layer to around 30%. This will help simulate the hazy white color of the frosted glass.

Combine the white layer (Layer 1) with the blurry layer (Background copy) by choosing the "Merge Down" option under the Layer menu.

Open the Apple logo image which will be used as a template.
![]()
Choose "Select All"
![]()
Copy the image
![]()
Return to the original image being edited and paste the Apple logo into it.
![]()
The Apple logo should now be visible in a new layer (Layer 1).
![]()
Using the magic wand tool select the Apple logo by first clicking on the body of the apple, then while holding down the [shift] key, click on the leaf to add to the selection.
![]()
![]()
Now, hide the Apple logo by unchecking the eye icon to the left of (Layer 1) then be sure to highlight the (Background copy) layer to activate it.
![]()
You should be left with an outline selection of the Apple logo as seen below:
![]()
Cut out the shape of the Apple logo to reveal a portion of the original (Background) layer by choosing "Delete" from the Edit menu.
![]()
![]()
Disable the selection by choosing "Disable" under the Select menu.
![]()
Add a drop shadow and beveled edge with the Layer Styles menu.
![]()
Adjust the Shadow and Bevel settings similar to those shown below:
![]()
![]()
If you are happy with the results, "Flatten" the image then save it in the file format of your choice.
![]()
Have fun!

Choose "Select All"

Copy the image

Return to the original image being edited and paste the Apple logo into it.

The Apple logo should now be visible in a new layer (Layer 1).

Using the magic wand tool select the Apple logo by first clicking on the body of the apple, then while holding down the [shift] key, click on the leaf to add to the selection.


Now, hide the Apple logo by unchecking the eye icon to the left of (Layer 1) then be sure to highlight the (Background copy) layer to activate it.

You should be left with an outline selection of the Apple logo as seen below:

Cut out the shape of the Apple logo to reveal a portion of the original (Background) layer by choosing "Delete" from the Edit menu.


Disable the selection by choosing "Disable" under the Select menu.

Add a drop shadow and beveled edge with the Layer Styles menu.

Adjust the Shadow and Bevel settings similar to those shown below:


If you are happy with the results, "Flatten" the image then save it in the file format of your choice.

Have fun!
Last edited:
Good effort!
Maybe they should have a tutorial's iPhone subforum.
Gather source images.
After opening the image you provided, I noted that it was a low resolution image (282x500); so I first used the reverse-image search feature from http://images.google.com to find a higher quality version of your image.
I was able to find a copy of the same background image which was already properly sized for the iPhone 5 (640x1136).
I also used Google Images to search for an Apple logo that I could use as a selection template.
Create the iPhone background.
Note: I am using Photoshop Elements but other graphics programs will involve similar steps.
Open the background image to be edited.
[url=http://i.imgur.com/4I04Ll.png]Image[/URL]
Create a duplicate layer to be used as the "frosted glass".
[url=http://i.imgur.com/TFZ8ul.png]Image[/URL]
You should now have two layers as shown below. Ensure that the "Background copy" layer is highlighted.
[url=http://i.imgur.com/IC9OAl.png]Image[/URL]
Apply a Gausian Blur to simulate the distortion caused by looking through the frosted glass.
[url=http://i.imgur.com/NEnoul.png]Image[/URL]
Adjust the Gausian Blur Radius setting until you achieve the desired effect.
[url=http://i.imgur.com/zzATRl.png]Image[/URL]
The "Background copy" image should now be appropriately fuzzy.
[url=http://i.imgur.com/VrWOpl.png]Image[/URL]
Create a new layer.
[url=http://i.imgur.com/VcHgJl.png]Image[/URL]
Use the paint bucket tool to fill the new layer with white color.
[url=http://i.imgur.com/Qt6g1l.png]Image[/URL]
just so...
[url=http://i.imgur.com/9DoZDl.png]Image[/URL]
Adjust the opacity of the white layer to around 30%. This will help simulate the hazy white color of the frosted glass.
[url=http://i.imgur.com/3gORSl.png]Image[/URL]
Combine the white layer (Layer 1) with the blurry layer (Background copy) by choosing the "Merge Down" option under the Layer menu.
[url=http://i.imgur.com/mVDC0l.png]Image[/URL]
Thank you
Wow Ruffinatti, you absolutely rock
Sent from my iPhone 5 using Tapatalk 2
Thanks. If you run into difficulties while creating your own image, just ask for help.
Register on MacRumors! This sidebar will go away, and you'll see fewer ads.


