
Apple's latest iPhones include several headline camera features that are worth using, such as Portrait Mode and Photographic Styles. But if all you want to use is the standard photo mode, there are still several tools and settings that can improve the composition of your pictures and help you capture the perfect shot using more traditional techniques.
Whether you are the owner of a new iPhone or a longtime user looking to up your photography game, here are six camera tools and settings in iOS that are worth checking out and experimenting with.
1. Use the Rule of Thirds
For a while now, Apple's Camera app has included a few optional settings that can help you line up your shots. Foremost in these settings is the Grid tool, which should be used when applying the rule of thirds. It divides the frame of your photo into a grid with two horizontal lines and two vertical lines, creating nine equal parts.
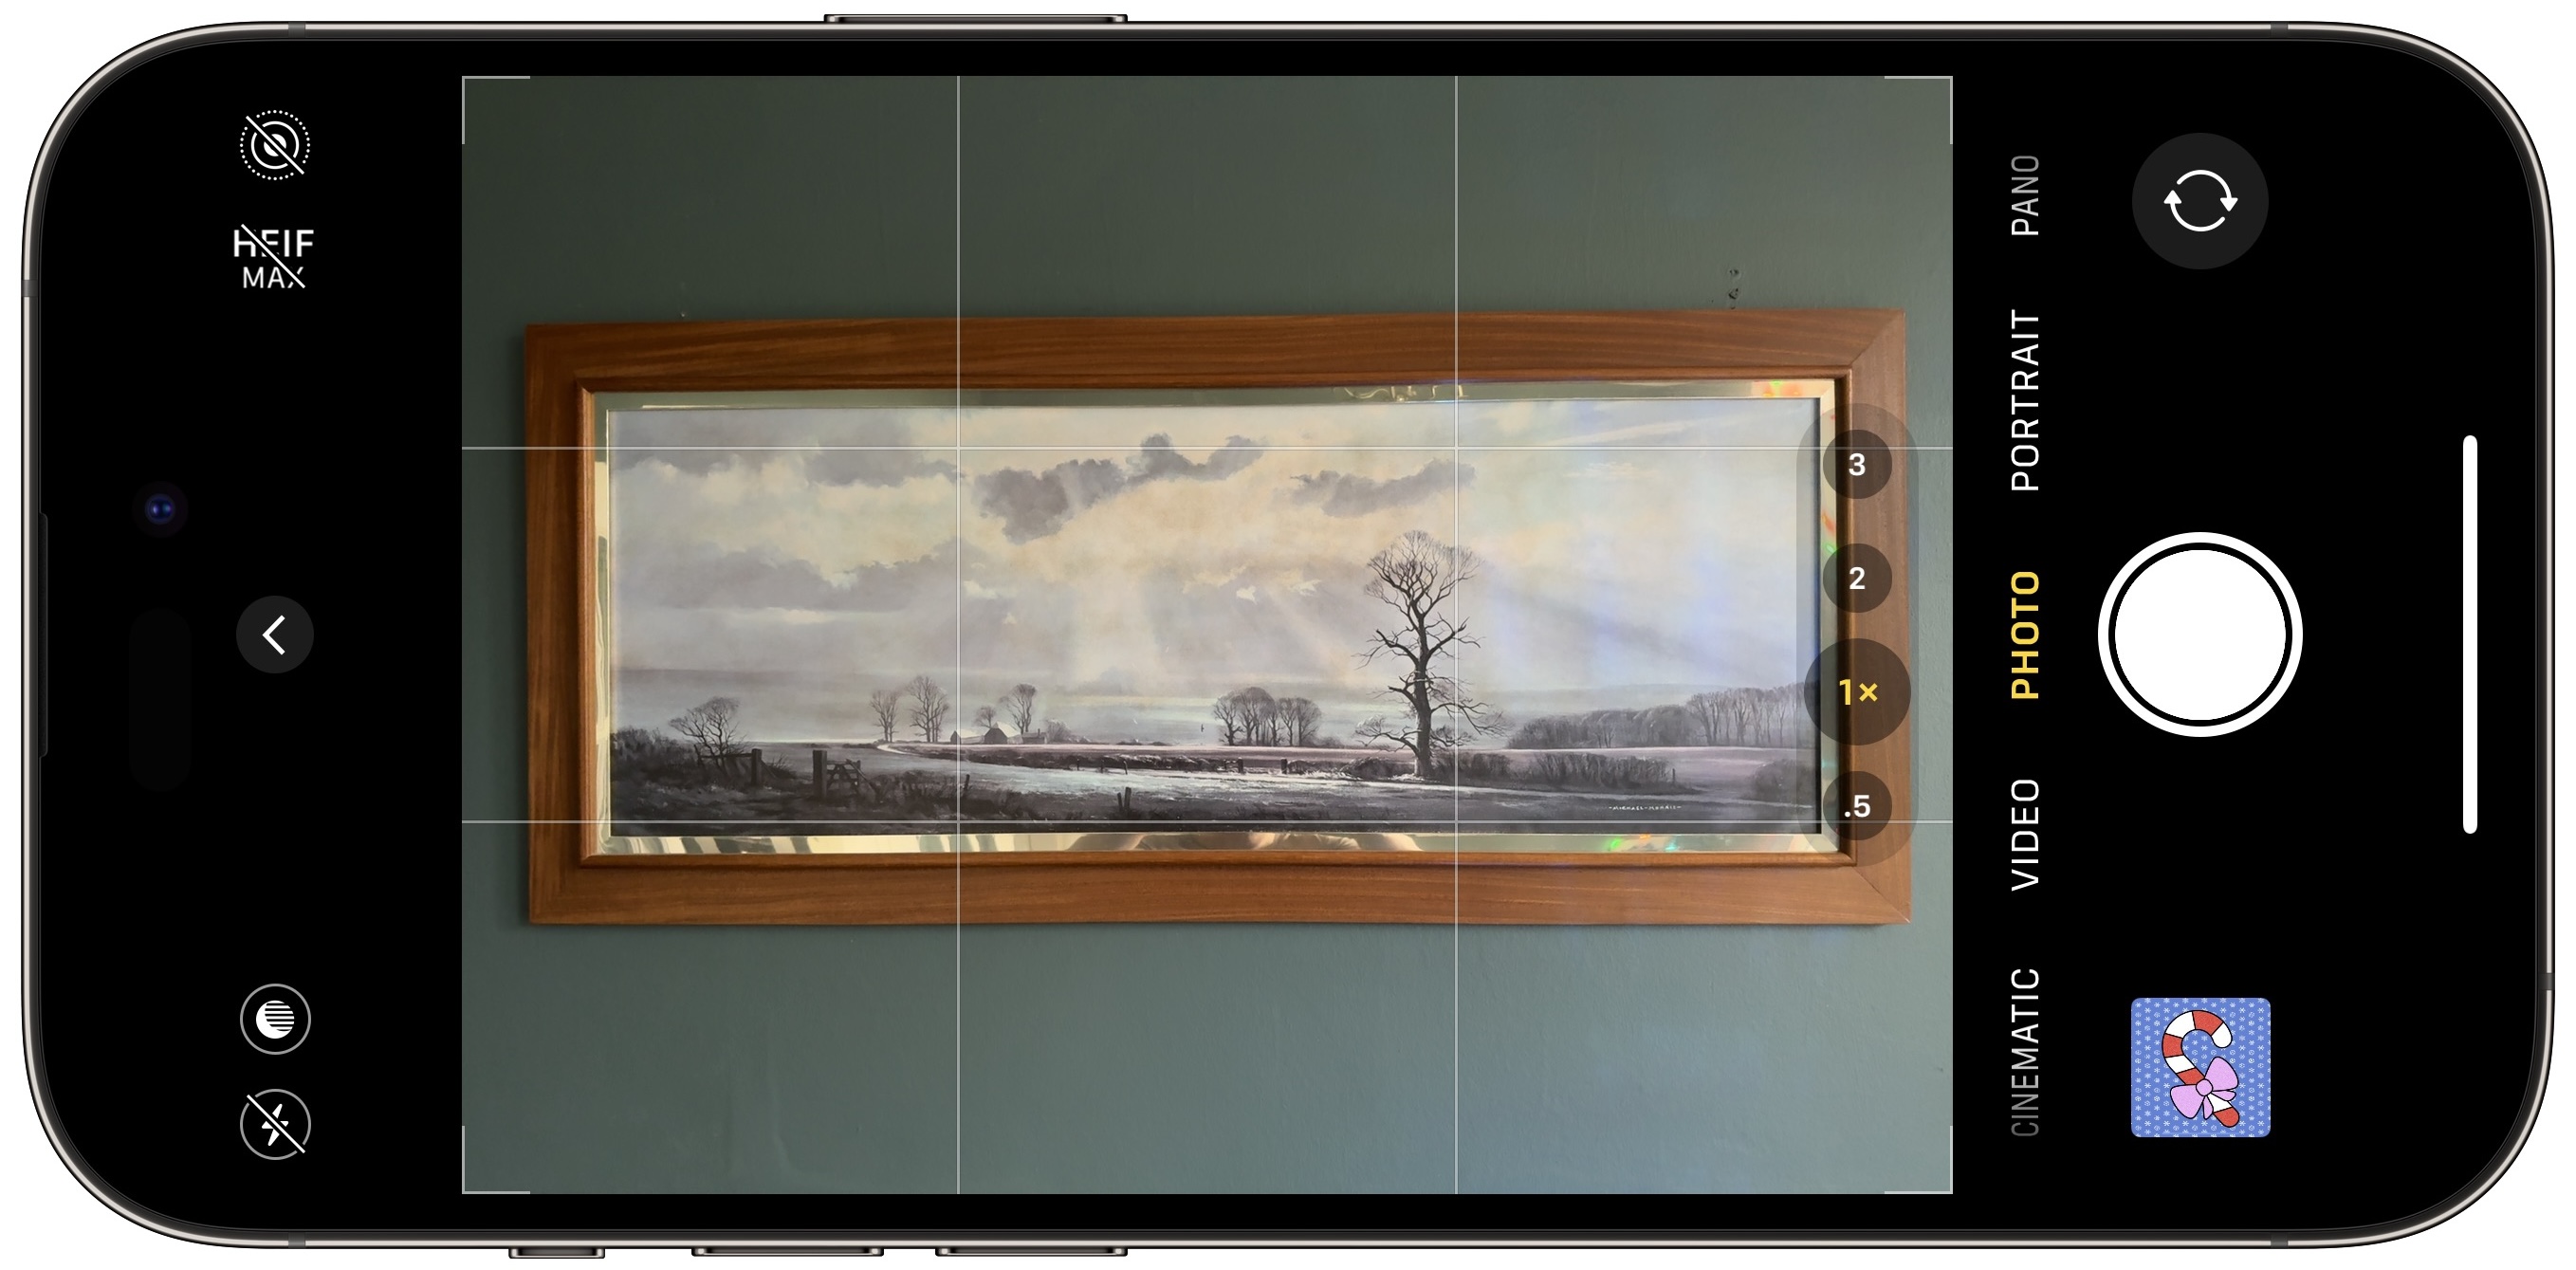
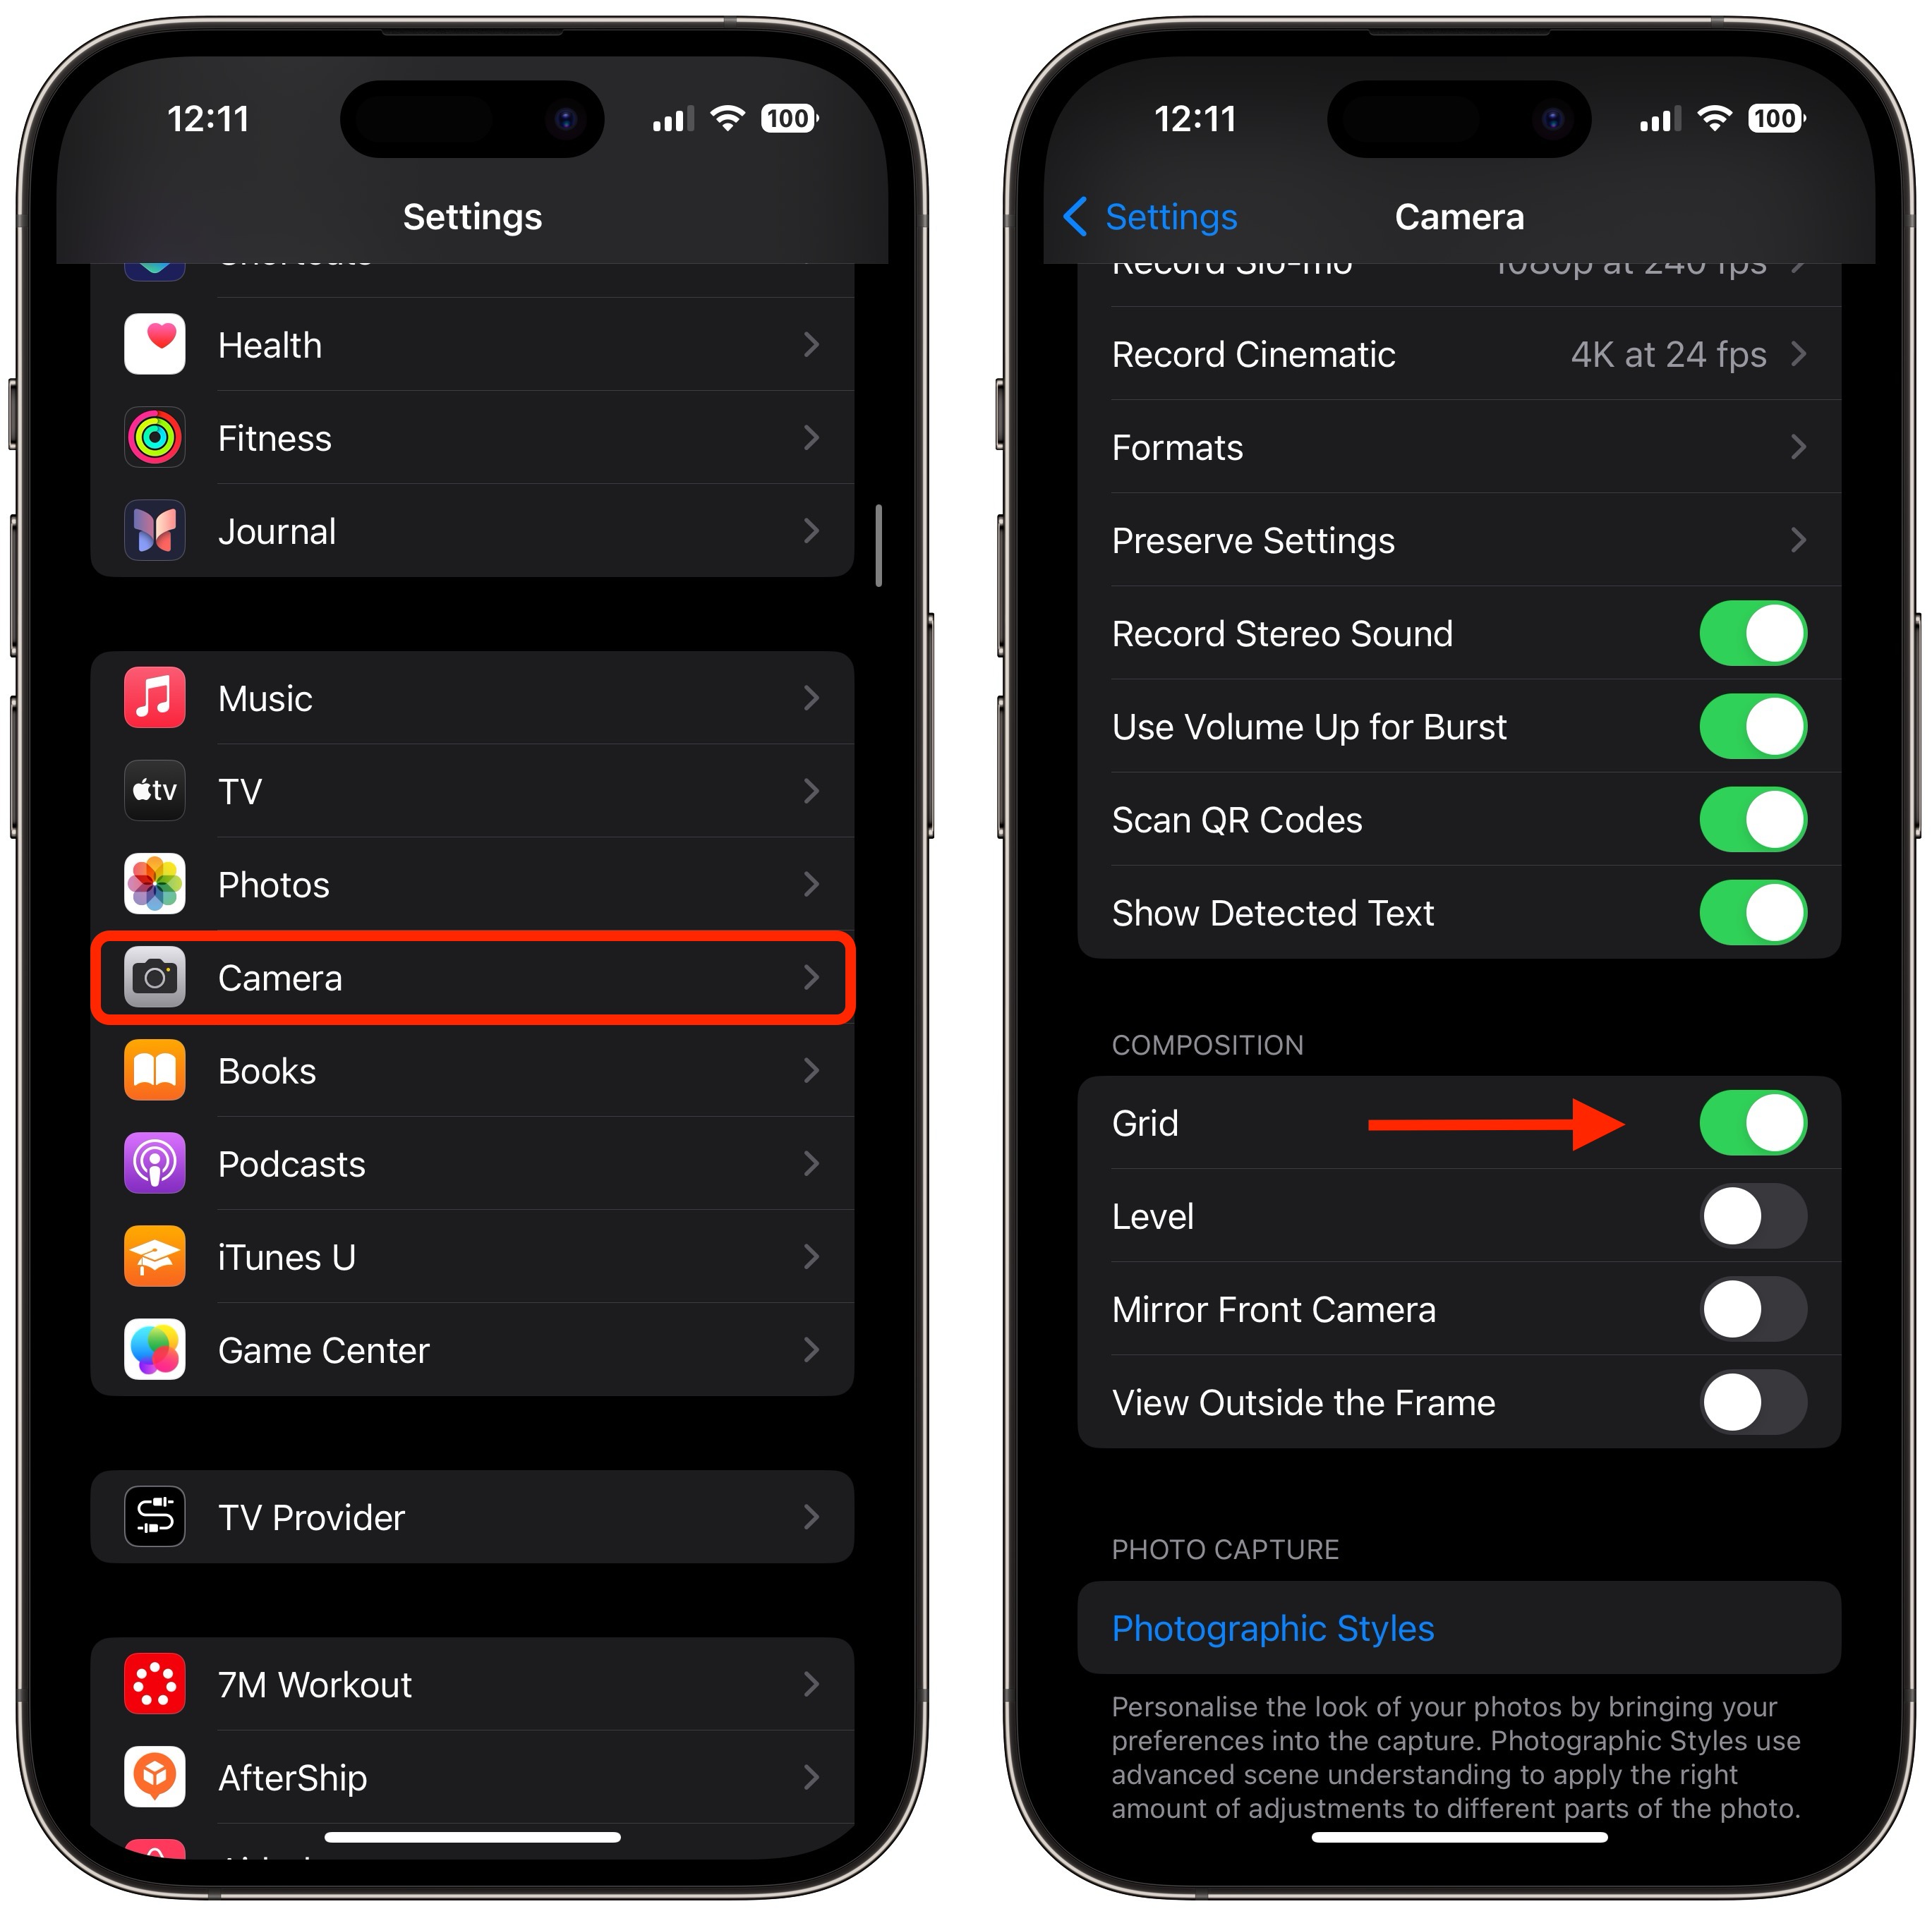
The rule of thirds helps guide the viewer's eye to the most important parts of your photo and creates a more harmonious composition. Here's how to overlay a grid on the viewfinder.
- Open the Settings app on your iPhone.
- Scroll down and tap Camera.
- In the "Composition" section, toggle on the switch next to Grid.
Here are five things to keep in mind when using the grid to apple the rule of thirds.
- Identify the Key Elements: First, identify the main subjects or elements in the scene you want to photograph. These could be a person, a building, a tree, or any focal point.
- Positioning the Subjects: Place these key elements along the lines or at the points where the lines intersect. For instance, if you're taking a photo of a person, you might position them along one of the vertical lines, rather than in the center of the frame.
- Horizontal Elements: For horizontal elements like the horizon in a landscape, align them with one of the horizontal lines. For a more dramatic sky, place the horizon on the lower line. For more emphasis on the land or sea, place it on the upper line.
- Balancing the Image: Use the rule of thirds to balance your photo. If you place a subject on the left, consider having something of lesser importance on the right to create a sense of balance.
- Experimentation: While the rule of thirds is a guideline, it's not a strict rule. Feel free to experiment with it and see how shifting elements in your frame changes the photo's impact.
2. Straighten Top-Down Shots
If you're taking a picture of something from above like a plate of food or an ornament on the ground, consider using the camera level, as it helps you capture a balanced shot without having to use a tripod arm or mount. It's also useful for taking a shot of something directly above you, like an object on the ceiling or in the sky.
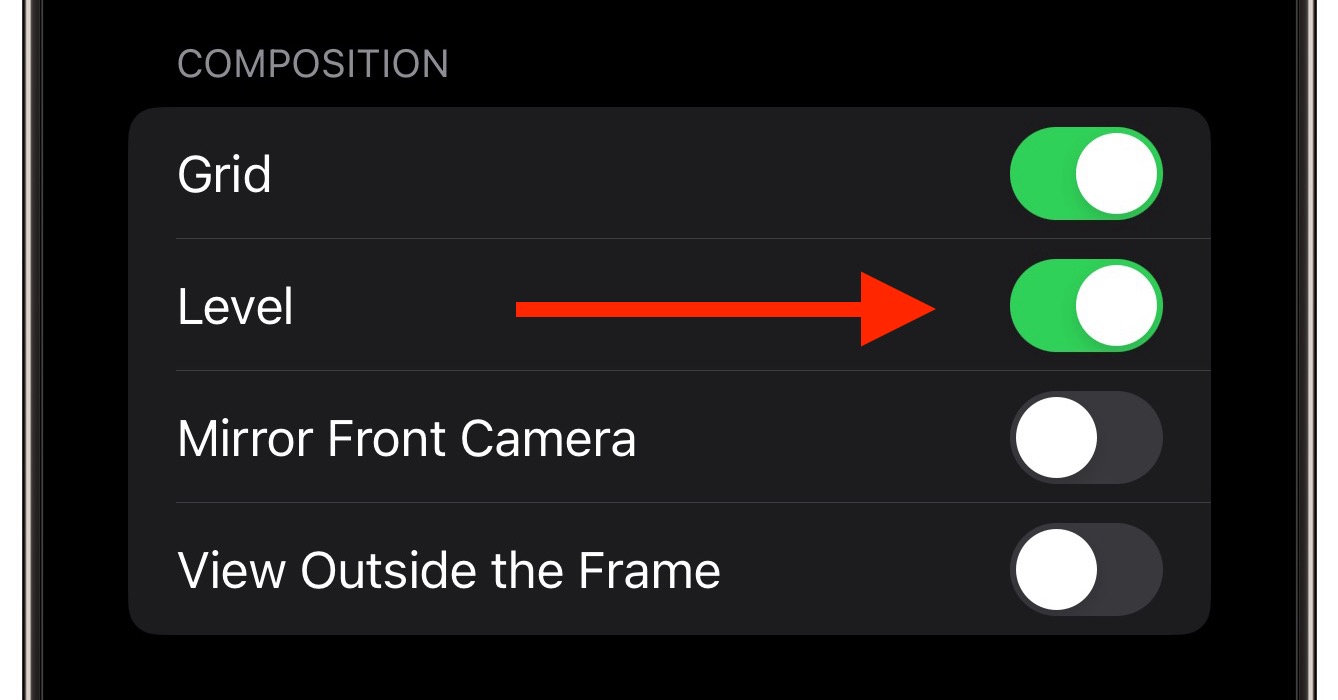
The camera level tool used to be part of the Grid overlay, but Apple separated out the function in iOS 17, and it now has its own switch: Open the Settings app on your iPhone, select Camera, then toggle on the switch next to Level. Now you are ready to use it.
- Open the Camera app, and set the capture mode to Photo, Portrait, Square, or Time Lapse, using the sliding menu above the shutter button.
- Point the camera straight down above your subject (or straight up if the subject/scene you want to capture is above you).
- Line up the floating crosshair with the fixed crosshair in the center of the screen by adjusting the angle of your phone's camera. The crosshairs will both glow yellow when in perfect alignment.
Tap the shutter button to capture the shot.
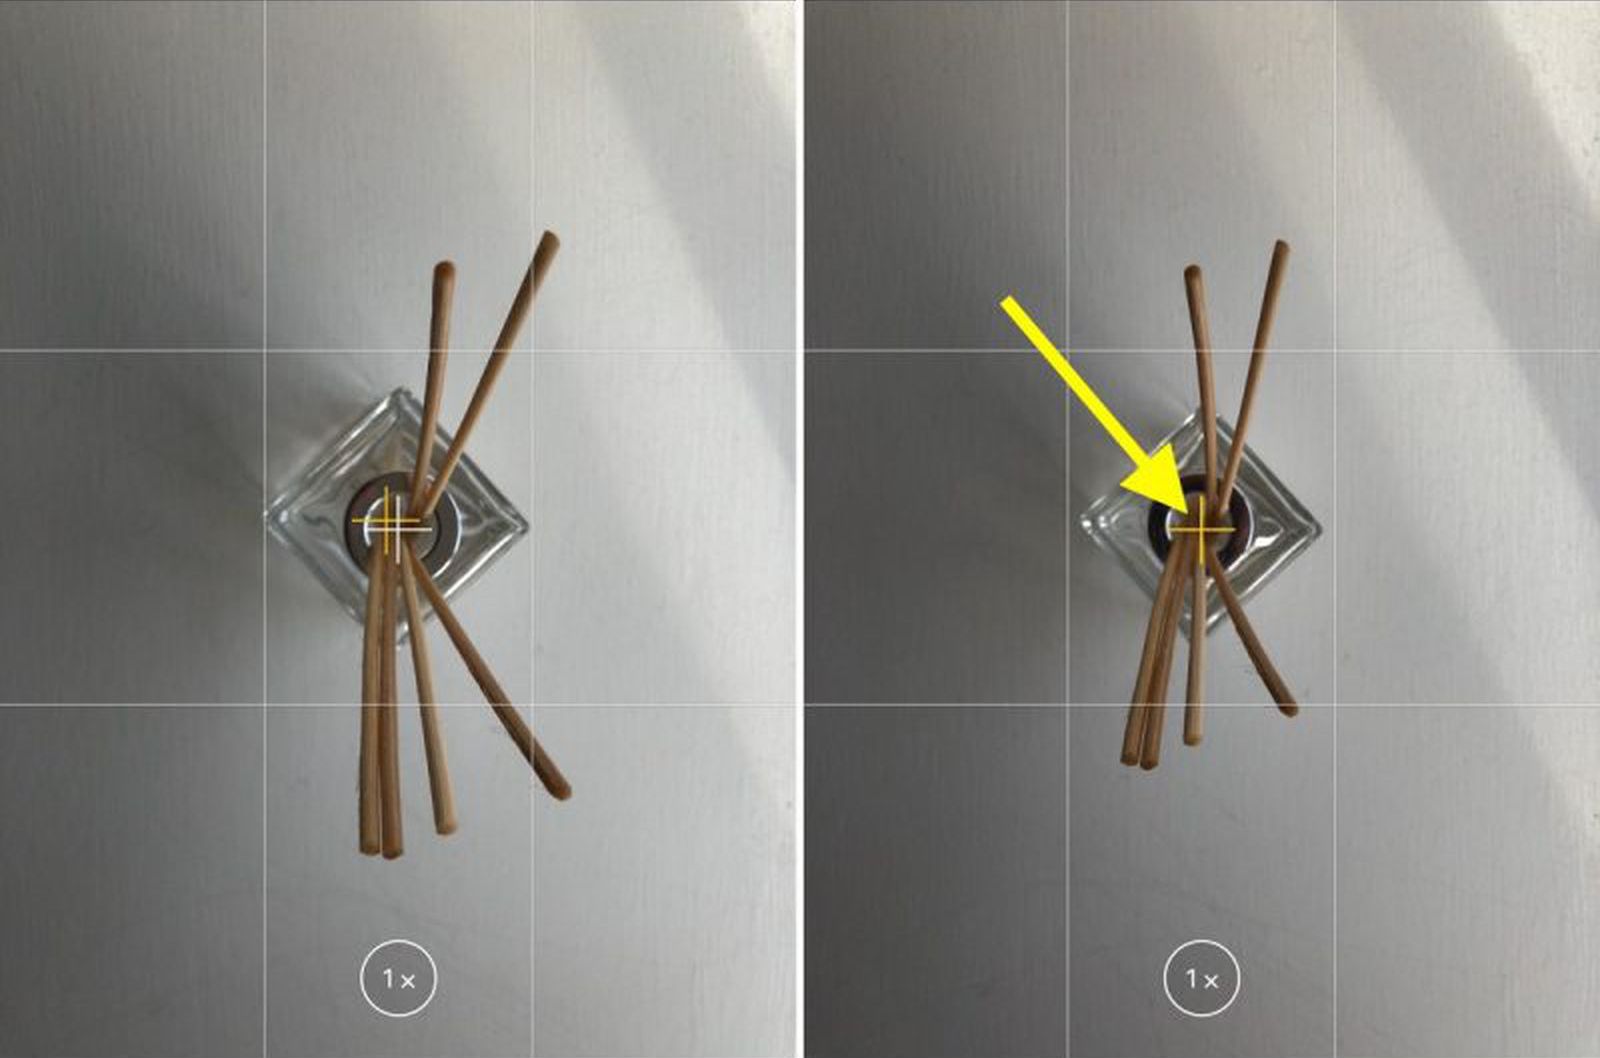
The aligned crosshairs turn yellow (right), indicating the lens is parallel with the ground.
3. Straighten Your Horizontal Shots
By making the Level tool an individual option in iOS 17, Apple has also included an additional horizontal level for more traditional straight-on photos.
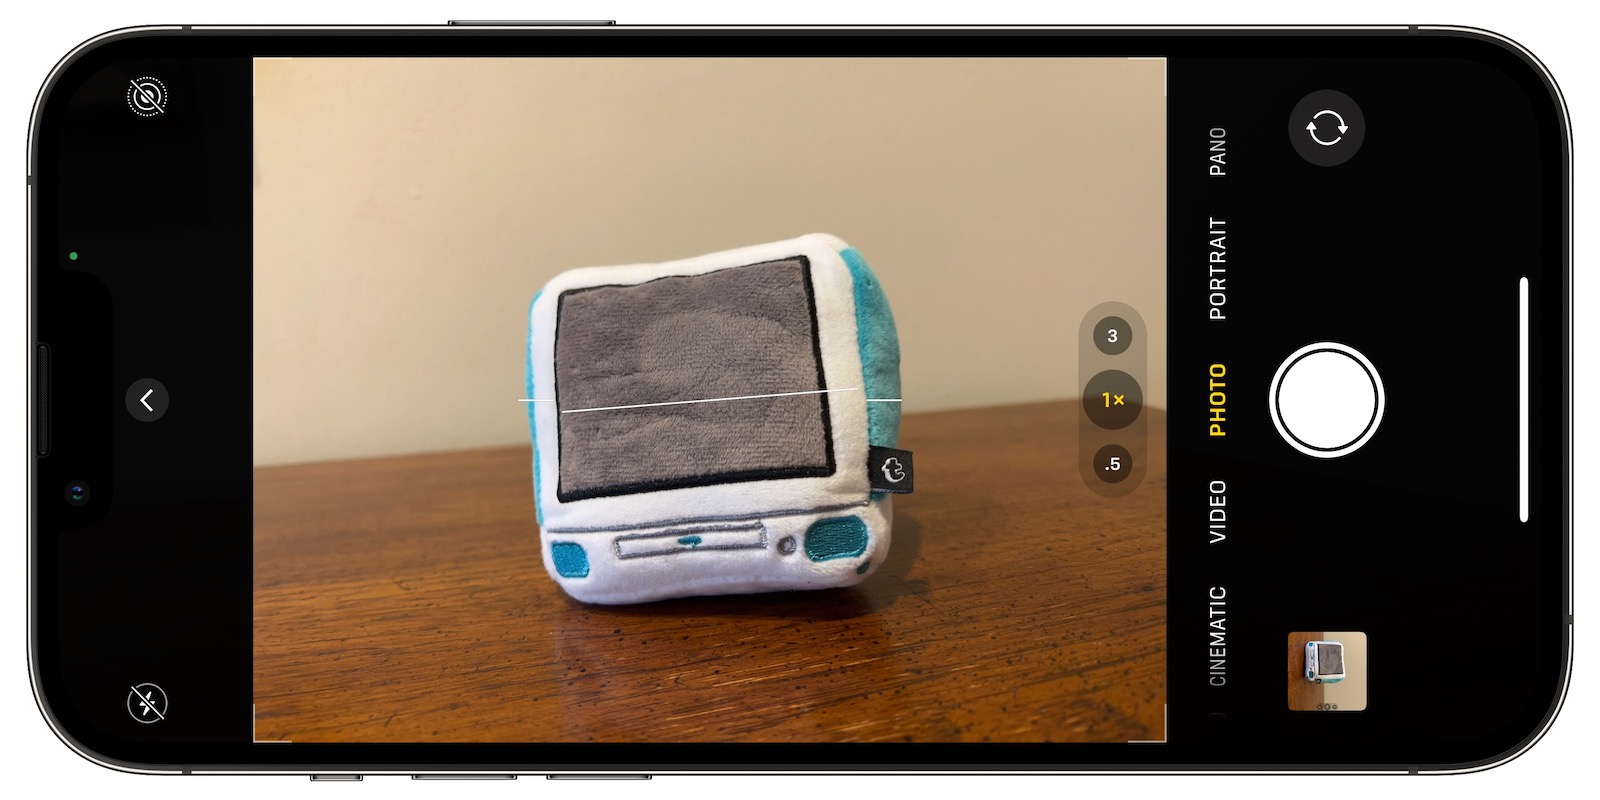
Turning the Level option on makes a broken horizontal line appear on the screen when your iPhone senses that you're lining up for a straight-on shot and you tilt your device slightly out of horizontal. The line appears white while your phone is out of level and then turns yellow once you achieve a level orientation to indicate success.
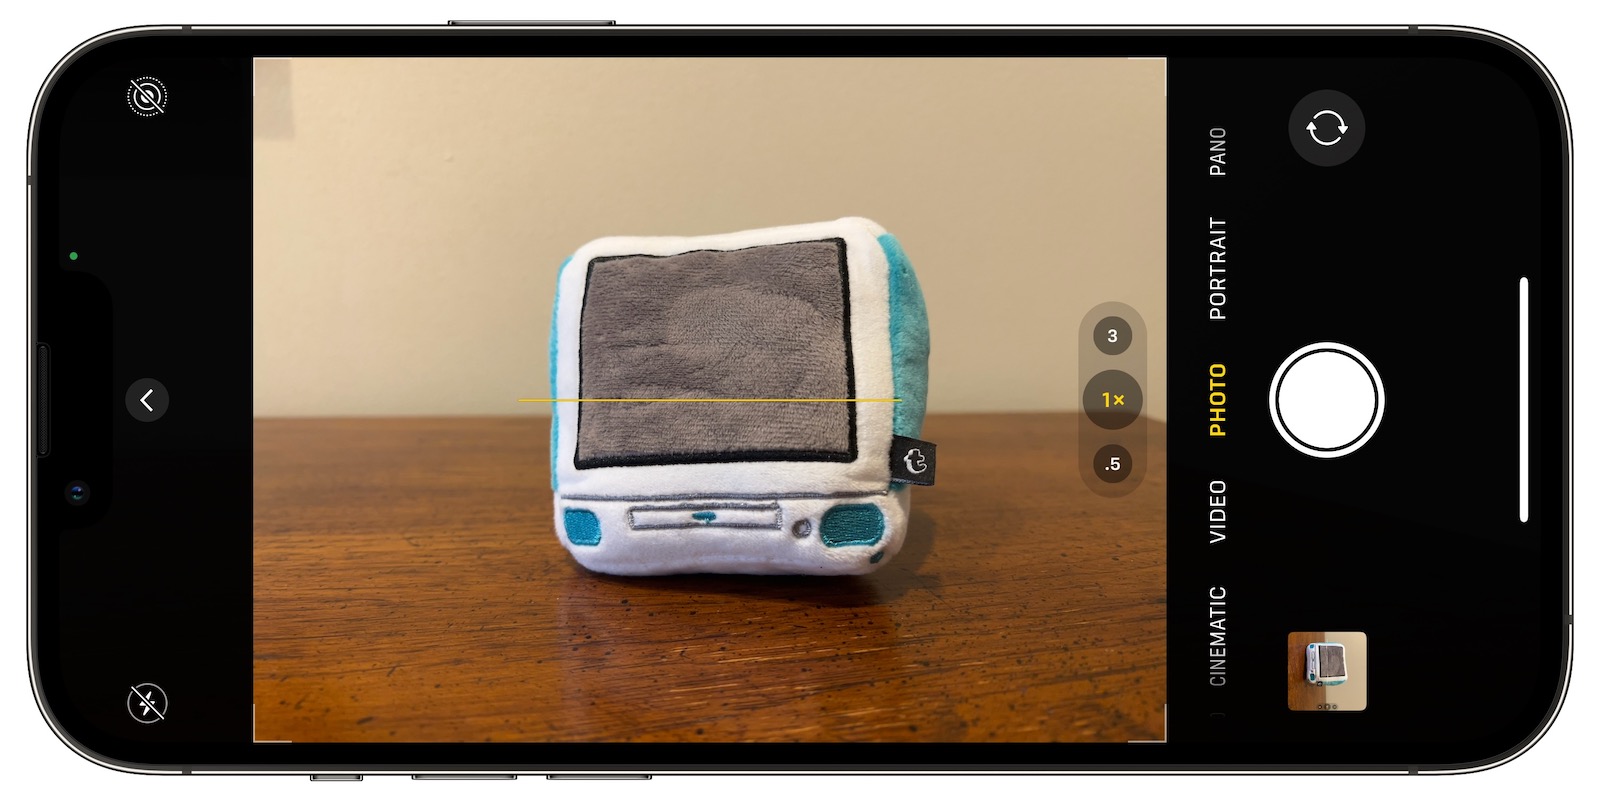
With the Level setting enabled (Settings ➝ Camera ➝ Level), try it for yourself. Open the Camera app and try shooting a subject at a straight angle, and you should see the broken horizontal lines in the center of the viewfinder. Straighten your angle up to connect the lines and make a single yellow line.
The leveling pop-up only appears briefly and only within a narrow range of angles close to horizontal (in either portrait or landscape orientation), so it won't intrusively pop up when you're intentionally trying to take a photo at an angle.
4. Take Burst Photos
Burst Mode refers to when the camera on your iPhone captures a series of photos in rapid succession, at a rate of ten frames per second. It's a great way to shoot an action scene or an unexpected event, since you're always more likely to end up with the picture you were aiming for.
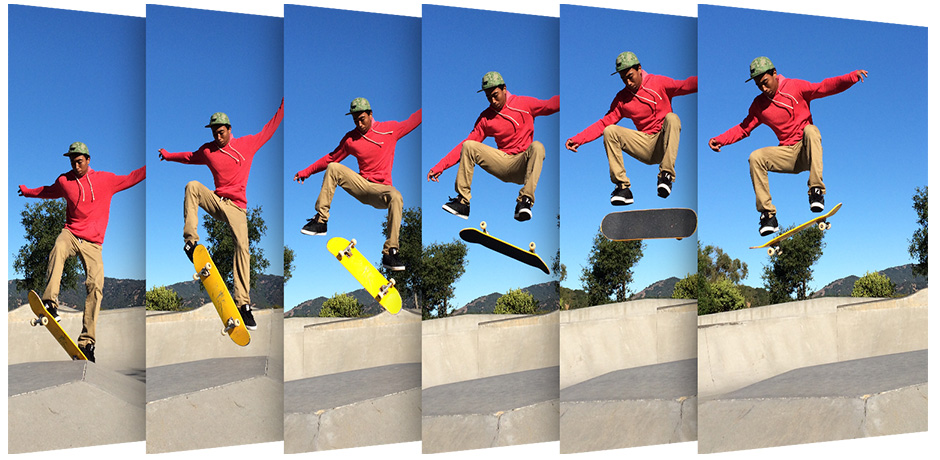
To shoot in Burst Mode, go to Settings ➝ Camera and toggle on Use Volume Up for Burst, then simply long press on the Volume Up button when in the Camera app, and your iPhone will take a series of photos in quick succession. Notice that a counter increases inside the on-screen shutter button for as long as you hold down the... Click here to read rest of article
Article Link: 6 iPhone Camera Tips Every User Should Know
Last edited:

