For some reasone pics of MaxUpgrade's MaxConnect and any install information is *very* lacking on the web. Their own website is kind of odd. I decided I wanted to mount to more drives internally and have a few pics to show from my recent upgrade. Enjoy. Let me know if there are any questions.
Product: http://www.maxupgrades.com/istore/index.cfm?fuseaction=product.display&product_id=158
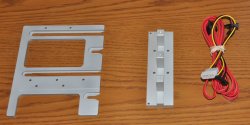
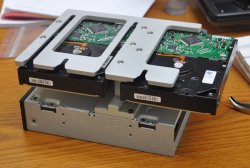
#1: The parts (left to right) include hard drive mount/sled which slots into the optical bay guides, riser to mount the DVD drive above the two SATA drives, and the necessary cables to make it all work.
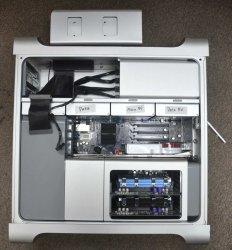
#2: Optical bay pulled out, cables disconnected, ready to drop in the new parts.
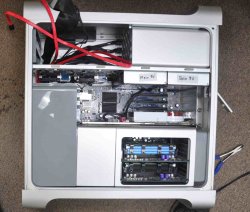
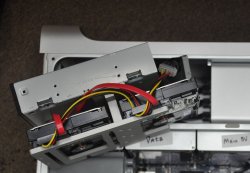
#3: Running the red SATA cables was a bit tricky. It would be easier if you removed the lower left fan assembly. I had a hard time getting them into the SATA ports on the motherboard without some angled pliers (bottom right of #3 and #4).
#4: The assembled tower (upside down and backwards). Gives a sense of how the SATA drives and the DVD are assembled. This whole assembly slides in and out of the optical bay very easily. The drives could be swapped without too much trouble (pull out assembly, two screws per drive, and two cables per drive).
#5: The *almost* installed assembly. Just before it slotted in.
I forgot to reconnect the power to my video card and was surprised to learn that my 30" display still showed the login prompt, but a warning popped up telling me to reconnect the power to the card!
Product: http://www.maxupgrades.com/istore/index.cfm?fuseaction=product.display&product_id=158
#1: The parts (left to right) include hard drive mount/sled which slots into the optical bay guides, riser to mount the DVD drive above the two SATA drives, and the necessary cables to make it all work.
#2: Optical bay pulled out, cables disconnected, ready to drop in the new parts.
#3: Running the red SATA cables was a bit tricky. It would be easier if you removed the lower left fan assembly. I had a hard time getting them into the SATA ports on the motherboard without some angled pliers (bottom right of #3 and #4).
#4: The assembled tower (upside down and backwards). Gives a sense of how the SATA drives and the DVD are assembled. This whole assembly slides in and out of the optical bay very easily. The drives could be swapped without too much trouble (pull out assembly, two screws per drive, and two cables per drive).
#5: The *almost* installed assembly. Just before it slotted in.
I forgot to reconnect the power to my video card and was surprised to learn that my 30" display still showed the login prompt, but a warning popped up telling me to reconnect the power to the card!
 )
)