Become a MacRumors Supporter for $50/year with no ads, ability to filter front page stories, and private forums.

Menneisyys2

macrumors 603
Original poster
Jun 7, 2011
6,004
1,108
I loved CameraTweak under iOS versions prior to 7. It made the stock Camera app configurable by allowing access to (almost) all the API functions right from Camera, and added fairly-easy-to-implement non-API functions like timed and interval shooting.

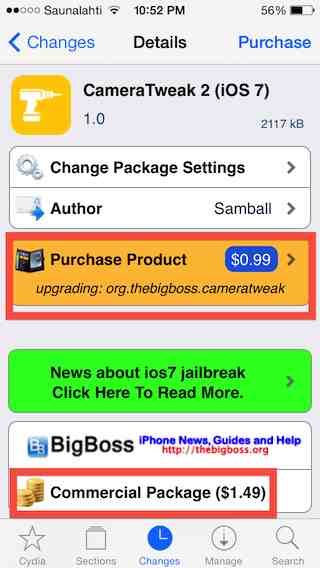
CameraTweak 2, the successor to the non-iOS7-compliant CameraTweak, is finally here. (iPhone version only; the iPad-specific one might be later released.) And it has an upgrade price ($0.99 vs. the regular $1.49) for us legal users of the previous version, as can be seen in the following screenshot:

upgradeprice.jpeg


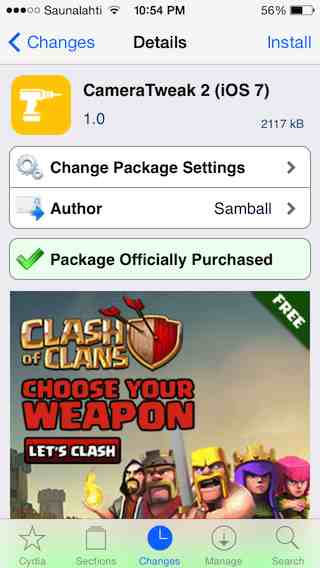
This is a shot after my purchasing the new app:

ostettu.jpeg


I'll update this post with a more detailed review soon. My initial experience is positive.
 
Last edited:
So, a more complete report - Part I

Compatibility with other Camera app tweaks:

CameraTweak 2 is fully compatible with my full sensor video oversampler tweak, “VidCam WideAngle Tweak”. As a bonus, as CameraTweak 2 always displays the current resolution, you'll always see whether my custom mode is active. In the screenshot below, I annotated this ("2448p" on the 8 Mpixel sensor of the iPhone 4S, 5, 5c and 5s) by a red rectangle:

2448p-with-my-tweak.jpeg


In addition, you can quickly switch from my full sensor mode to standardized resolutions / video recording modes by, as usual, tapping the (above-annotated) resolution label and selecting a target resolution from the pop-up menu:

video-resmenu-in-2448p-mode.jpg


However, as you may have already guessed, there's no way of switching back to my custom mode from inside the Camera app, using CameraTweak 2's resolution selector: as you can see in the above screenshot, only the standard resolutions are listed but not the currently set one, which, thanks to the hackability of the system, may be different from the stock ones. (And my tweaked full-sensor mode does have a different sensor input resolution.)

Fortunately, it's easy to switch back to my full-sensor mode: just kill and restart the Camera app. No need to start my resolution selector and set it back to the full-sensor mode. This saves a lot of time.

These also mean if you do use my tweak and often switch between 1080p (on the iPhone 4, 720p) and my tweaked full-sensor mode, you can tremendously speed up switching by using CameraTweak 2. After all, switching from full-sensor mode to 1080p (or any other stock resolution) only requires two taps, while switching back only one and two presses of the Home button and killing Camera. If you only use my tweak for switching resolutions, you end up having to kill Camera and fire up my switcher GUI in both cases.
 
Last edited:
Continued from above:

Compatibility with other tweaks: - Part II

Slo-mo Mod

The absolutely excellent “Slo-mo Mod” (see my full report on it at https://forums.macrumors.com/threads/1698879/ ) works together just fine with the hack (as does with my full-sensor tweak). As usual, by default, it's only accessible via the newly-added, iPhone 5s-like “Slo-mo” menu item as can be seen in the screenshot below (annotated):

slomo.jpg


Note that there's no resolution label, rendered by CameraTweak 2, directly above the (also-annotated) 60 fps label on the shot above. That's because CameraTweak 2 isn't active in this mode. (So, you can't use its features like separate exposure and focus setters.)

Should you want to shot all your videos, even ones that you shoot at 30 fps and at full resolution (or even with my full-sensor one) with the slo-mo flag allowing for defining custom slow-down sections in the stock Photos app, you can easily do this if you, as has always been the case, enable the “Force slo-mo for all videos” flag in Settings:

slomo%20all%20video%20enable.jpg


Then, if you increase the framerate in the regular video mode via the framerate setter there, also depicted as follows:

set-fps-in-ct7.jpg


you won't even need to return to the “Slo-mo” menu item. (Note: the above screenshot was taken without Slo-mo Mod installed.)

(Note: on the iPhone 5/5c/5s and iPad Mini 1/2, if you exceed 30 fps here, the resolution will be automatically switched to 720p mode. You don't need to manually switch to it before starting to increase the framerate.)

Burst Mode

The excellent tweak, Burst Mode, which gets automatically installed when you install Slo-mo Mod but, on iOS7 devices, needs to be explicitly enabled (under Settings), also works just fine together with CameraTweak 2. That is, you can safely install both tweaks and, after enabling Burst Mode, use it for (on the iPhone 5) approximately 30% faster shooting (some of my benchmarks are at https://forums.macrumors.com/threads/1698879/ ) than with the stock Camera client.
 
Last edited:
So would this tweak allow for true 720p at 120fps on iPhone 5s?
(I'm asking because the stock slow mo camera records upscaled 480p at 120fps...
 
So would this tweak allow for true 720p at 120fps on iPhone 5s?
(I'm asking because the stock slow mo camera records upscaled 480p at 120fps...

Nope, it's the same upscaled 360p as with the stock slo-mo mode. Which Apple shamelessly calls HD (720p)... lolz.
 
I've very thoroughly tested the burst shooting speed of the lower-resolution photo mode to find out whether setting to a low(er) resolution results in an increase of the burst framerate.

For the tests, I used 480p mode; that is, 640*480 images, selected using the built-in resolution selector (annotated below):

photo-res-setting.jpg


The results are as follows: unless you install and enable Burst Mode separately, the results aren't at all better than with full-res shooting. On the contrary - they're even worse. However, if you do install and enable Burst Mode prior to shooting, the framerate increase will be significant (from around 2 fps to around 6 fps).

Unfortunately, this still can't come close to the speed of the latest version of SnappyCam delivering steady 60 fps (tested over a minute, without rebooting the device first to max RAM memory).

The figures I've also posted at https://forums.macrumors.com/posts/18787919/ :

Burst Mode tweak not active: 2.14 fps
Burst Mode tweak active: 5.91
SnappyCam: truly 60 fps
 
Nope, it's the same upscaled 360p as with the stock slo-mo mode. Which Apple shamelessly calls HD (720p)... lolz.

Even if we do regular video tab and choose 720p and set to 120fps?

Also, is it true 720 if we choose 720p at 60fps?
 
Even if we do regular video tab and choose 720p and set to 120fps?

Also, is it true 720 if we choose 720p at 60fps?

Anything over 30p results in pixel binning; that is, halved resolution. See my dedicated articles.
 
Today, on my iPhone 4 running 7.0.4 (as opposed to the iPhone 5-specific, previous benchmark at https://forums.macrumors.com/posts/18788121/ ) I've continued playing with the burst mode with
- CameraTweak's low-res (here, VGA) mode,
- the (completely independent) Burst Mode tweak and
- the now-removed "SnappyCam" AppStore app.

Based on the results:

If you plan to shoot burst on the iPhone 4,

- you really should avoid the low-res modes, unless you (can) use SnappyCam. The latter, just like with the previously benchmarked iPhone 5, delivers significantly (about eight-ten times) higher framerate, even after the memory getting filled in, than the stock Camera app shooting in 480p (configuration modded by CT7) or, even worse, the same with the Burst Mode tweak enabled. The latter has caused a significant framerate drop - from around 1.36 fps to 0.96. (SnappyCam, on the other hand, shot a steady 30 fps before the RAM filling in after around 250 pictures and, after that, its framerate dropped to around 6 fps.)

This means the significantly lower resolution (here, 640*480) doesn't at all speed up burst shooting. Unless, again, you use SnappyCam.

- default-res burst shooting shoots around 1 fps with both the stock, unaltered Camera app and with Burst Mode enabled. That is, there's absolutely no advantage to installing and using Burst Mode on the iPhone 4, it seems.

With SnappyCam shooting full-res, it only keeps the last 11...18 frames, all of them 60/12 = 5 fps apart. With a freshly-rebooted 7.0.4 iPhone 4, it can shoot for around 15-20 images with higher framerate before the initially available RAM gets filled in.

Again: keep in mind the fact that SnappyCam only keeps the last few images on the iPhone 4, when shooting full-res, as opposed to shooting low-res on the same device - or shooting full-res on more capable models like the iPhone 5. That is, to keep the exact image you want, immediately stop shooting after the perfect moment.
 
CameraTweak 7 1.0.1 released! (EDIT: also for the iPad!)

The iOS7-only version of the generic best iOS camera enhancer, CameraTweak 2 (CT2 for short), has just received a major update.

Here's the “what's new” list:

ct7-1.1-cydia.jpeg


Let's start with the uppermost item: screen overlay (and, later, iPad compatibility). At last, the new CT2 has received it back. An example of the “grid” option:

ct7-1.1-overlays.jpeg


Note:

- I've annotated the new icon used to bring up the new segmented control (between the shutter and the Camera Roll icon)

- there, regrettably, aren't 16:9 / 3:2 grids for proper framing when targeting other, non-native (non-4:3) aspect ratios, unlike in many third-party AppStore apps

- grids are not supported when shooting video – and, of course, on the iPad at all.

- overlays are completely messed up in landscape mode if you rotate to landscape orientation after enabling them in Portrait. Solution: only enable them when you're already in Landscape.

Speaking of the iPad compatibility, CT2, unlike previous versions, is a Universal application. This is certainly good news in that you don't need to shell out extra money for the separate HD version, unlike in the pre-iOS7 times.

Unfortunately, the tweak, when running on the iPad, has other problems. For example, the timing / WB locking icons are pretty much invisible when not activated, as can be seen in the following screenshot:

ct7-1.1-ipad-black%20icons.jpeg


I've annotated the two almost-invisible, inactive icons with red rectangles, while the activated ones were annotated by green ones.
 
Last edited:
Wow, detailed as usual! But I don't know the camera lingo, could you dumb it down so users like me? I'd really appreciate it.
 
Wow, detailed as usual! But I don't know the camera lingo, could you dumb it down so users like me? I'd really appreciate it.

I'll publish a full, detailed article on this tweak soon - along with all the other, recommended JB tweaks like those of mine, Burst Mode and the like. I'll try to make it a bit less technical.
 
Tad off topic, but I know you know your stuff Menn. How's iOS 7.0.6 compared to the 7.1 betas?

Assuming 7.0.6 is the same as 7.0.4 memory management-wise (I haven't personally tested this), 7.1 is significantly better on even 32-bit iPhones, let alone 64-bit everything, that is, even iPads. On 32-bit iPads, the difference isn't as big.

See some of my objective benchmark comparisons (between 7.1b2 and 7.0.4), mostly talking about Safari / UIWebView memory management on both the iPhone 5 and iPad 3 at https://forums.macrumors.com/posts/18522600/
 
How is the stock camera with CameraTweak7 compared quality-wise to ProCamera7? I found the stock iOS6 app + CameraTweak wasn't as good as ProCamera, or didn't seem to be.
 
How is the stock camera with CameraTweak7 compared quality-wise to ProCamera7? I found the stock iOS6 app + CameraTweak wasn't as good as ProCamera, or didn't seem to be.

If ypou meant the regular image quality, I'm pretty sure you've messed something up, unless you used a feature not accessible in the stock Camera + CT duo but present in ProCamera and having a direct impact on the IQ:

- manually extending the shutter speed up to 1s (the stock Camera only does this up until 1/15s) resulting in waaaaaay brighter, less noisy images under very low light. Just an example I've created for my iOS Night Shooting bible:

stock Camera w/o PP (with 1/15 s & ISO800): http://www.flickr.com/photos/33448355@N07/9433519221/in/set-72157634921449003

stock Camera with PP (vastly increased brightness: settings at http://www.flickr.com/photos/33448355@N07/9433540445/in/set-72157634921449003 ): http://www.flickr.com/photos/33448355@N07/9433540197/in/set-72157634921449003

ProCamera (with 1/2 s & ISO400; no wonder it's way brighter and less noisy than with the stock client): http://www.flickr.com/photos/33448355@N07/9436281640/in/set-72157634921449003

- manually adjusting ISO boosting (for example, if you do disable it in ProCamera and, assuming a static subject & stabilized shooting, it results in far less noise)

(- JPEG quality setting: I'm pretty much sure this wasn't the case as the JPEG's directly exported by Camera are of high quality).

I honestly don't know if using ProCamera over the iOS6 camera was placebo or not.

I like to take the odd pictures at gigs and the different low light modes that ProCamera7 offers is useless there (too much movement/no tripod) but I still felt that the ProCamera pictures were better than the ones from the stock iOS6 app, maybe it was because I could force it to not use the low light boost maybe..

CameraTweak7 doesn't have that option to disable that mode, does it?
 
Register on MacRumors! This sidebar will go away, and you'll see fewer ads.