Hey everyone,
I’ve got a PowerMac7,3 Dual 2.5GHz G5 (originally liquid-cooled).
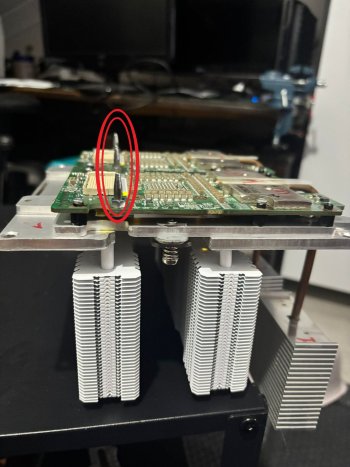
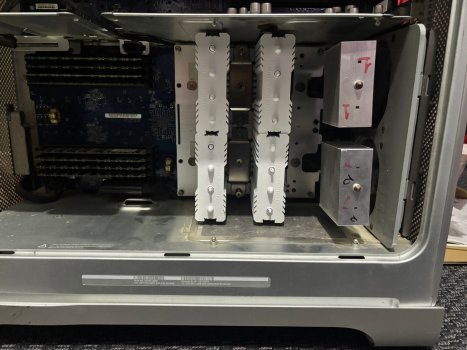
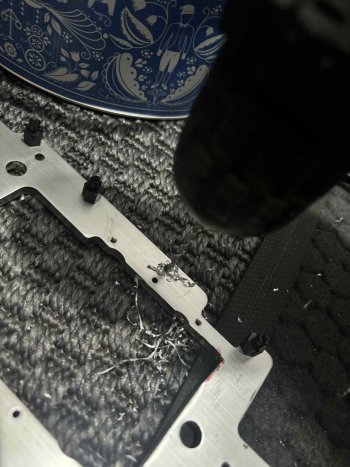
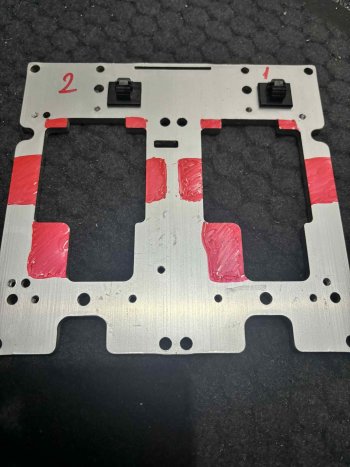
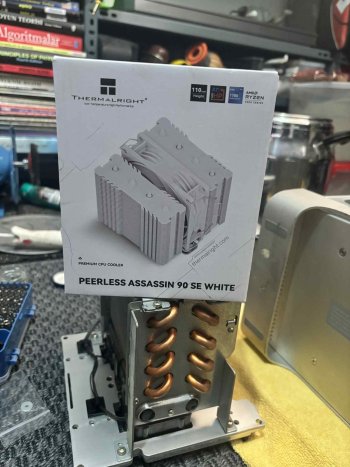
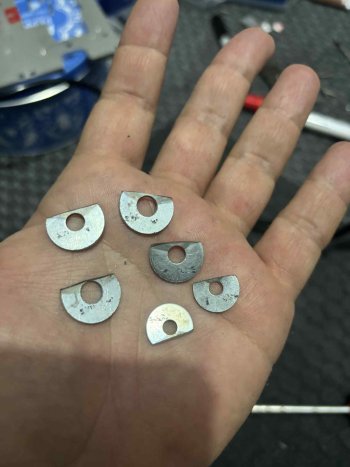
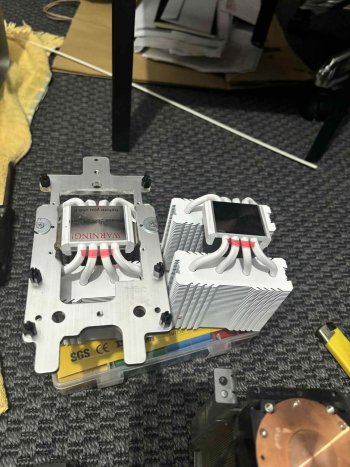
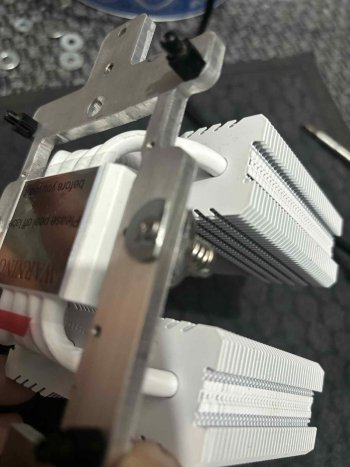
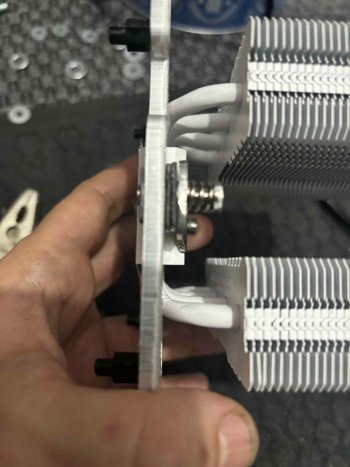
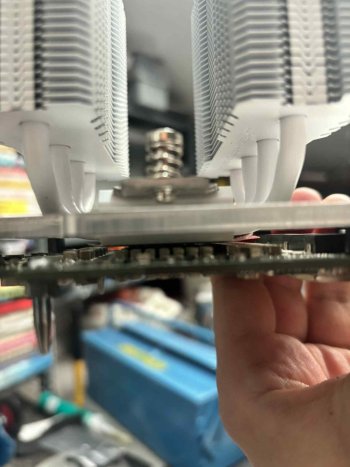
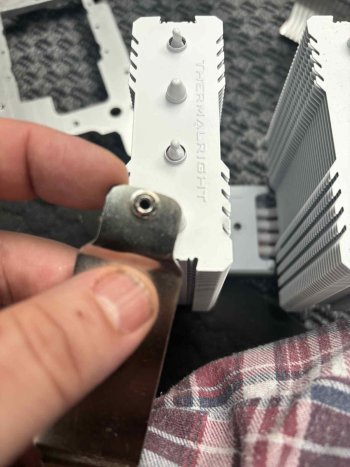
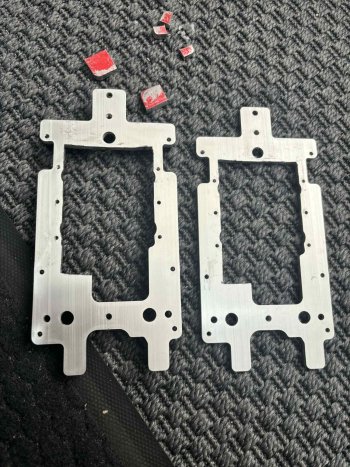
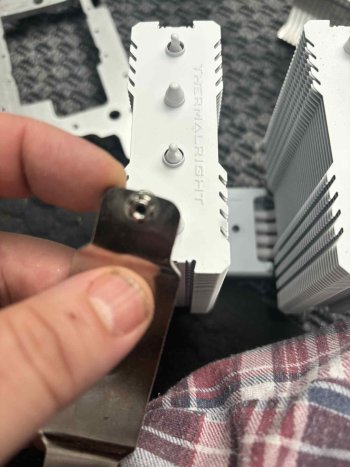
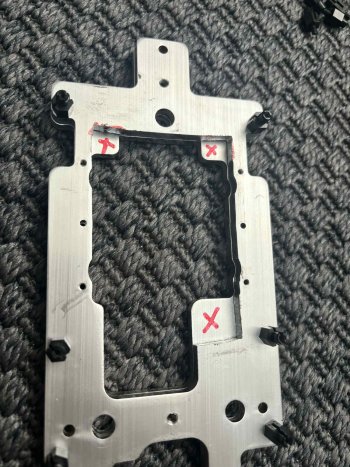
I completely removed the Panasonic LCS and replaced it with two Thermalright Assassin 90 Peerless White air coolers.
At first, I even tested it without any fans — just pure passive cooling.
Now with fans installed (case open, idle test):
Under real load (Photoshop, Dreamweaver, Fireworks, Flash, Illustrator all open):
Everything’s stable and quiet.
The machine runs macOS 10.5.8 and the temps are measured with Temperature Monitor 3.1.
Also, just a note for anyone who has worked with these Panasonic LCS units —
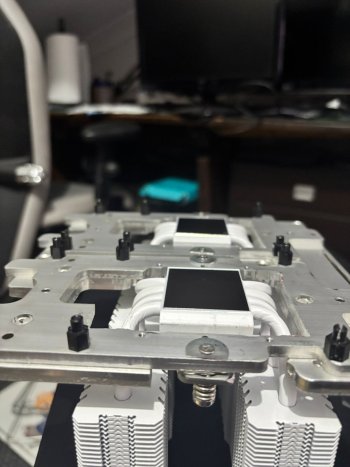
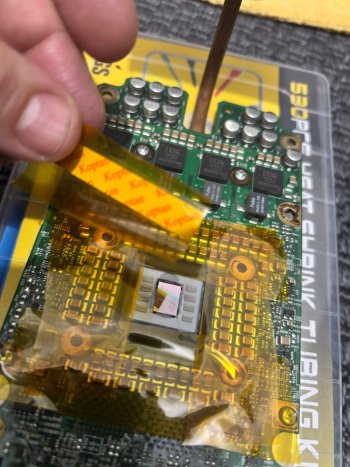
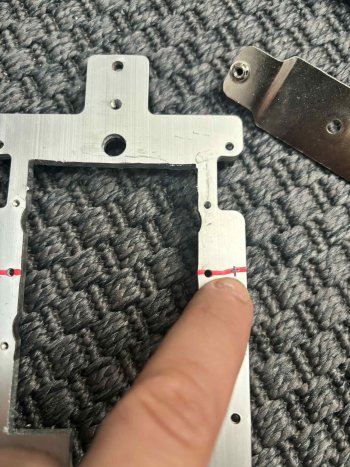
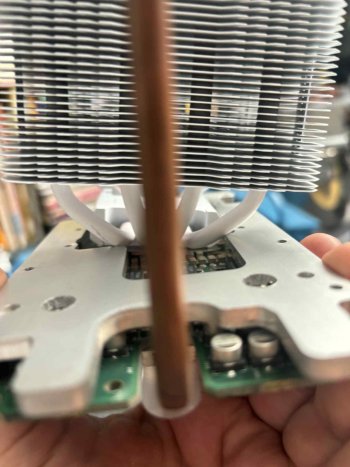
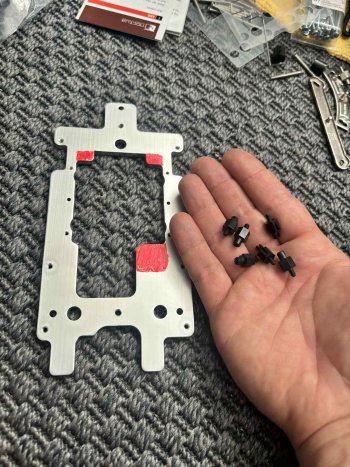
on the single-core 970FX models, the CPUs are not mounted directly on the logic board, but on the aluminum base of the liquid cooling system itself.
So converting this model to air cooling is not at all like the common G5 Quad mods where the heatsinks bolt to the CPU daughtercard.
This one is much harder to adapt.
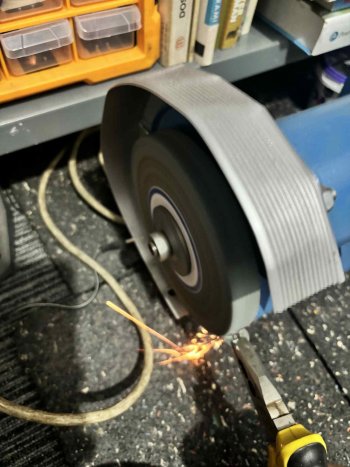
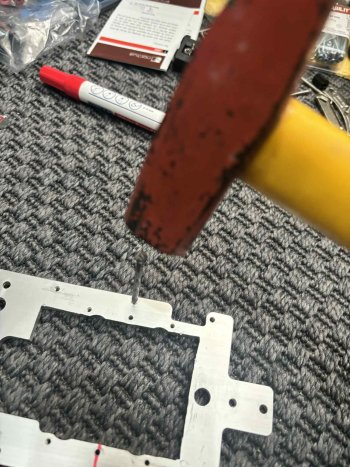
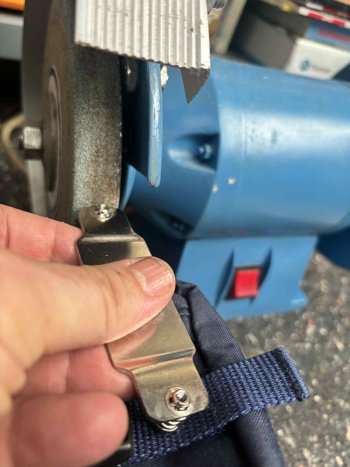
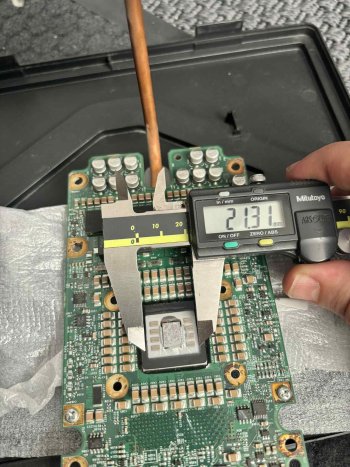
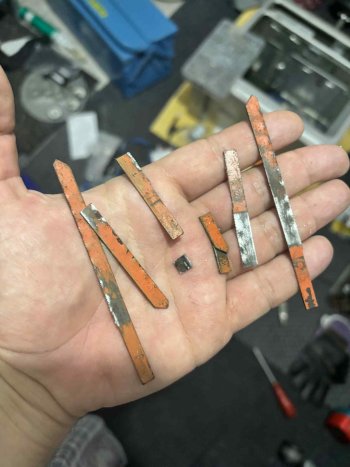
I also took photos at every step of the process — every part, every modification — but unfortunately I can’t upload them here.
Has anyone else tried air-cooling mods on the liquid-cooled G5s?
I’d love to see your results or mounting ideas.
I’ve got a PowerMac7,3 Dual 2.5GHz G5 (originally liquid-cooled).
I completely removed the Panasonic LCS and replaced it with two Thermalright Assassin 90 Peerless White air coolers.
At first, I even tested it without any fans — just pure passive cooling.
- Idle: CPU A ~62°C, CPU B ~54°C
- Under full load (both CPUs): system reached ~110°C and automatically shut down (thermal protection).
Now with fans installed (case open, idle test):
- CPU A Die: 35.1°C
- CPU B Die: 31.3°C
Under real load (Photoshop, Dreamweaver, Fireworks, Flash, Illustrator all open):
- CPU A peaks around 78°C
Everything’s stable and quiet.
The machine runs macOS 10.5.8 and the temps are measured with Temperature Monitor 3.1.
Also, just a note for anyone who has worked with these Panasonic LCS units —
on the single-core 970FX models, the CPUs are not mounted directly on the logic board, but on the aluminum base of the liquid cooling system itself.
So converting this model to air cooling is not at all like the common G5 Quad mods where the heatsinks bolt to the CPU daughtercard.
This one is much harder to adapt.
I also took photos at every step of the process — every part, every modification — but unfortunately I can’t upload them here.
Has anyone else tried air-cooling mods on the liquid-cooled G5s?
I’d love to see your results or mounting ideas.
Attachments
-
 WhatsApp Image 2025-10-21 at 14.50.05 (4).jpeg378.6 KB · Views: 56
 -
 WhatsApp Image 2025-10-21 at 14.50.05 (3).jpeg333.6 KB · Views: 38
 -
 WhatsApp Image 2025-10-21 at 14.50.05 (1).jpeg268.1 KB · Views: 36
 -
 WhatsApp Image 2025-10-21 at 14.50.05.jpeg390.6 KB · Views: 37
 -
 12.jpg385.5 KB · Views: 37
 -
 3.jpg412 KB · Views: 33
 -
 2.jpg271.7 KB · Views: 31
 -
 1.jpg350.2 KB · Views: 35
 -
 13.jpg242.1 KB · Views: 34
 -
 debad9e8-a95e-44fc-868b-76e8e3969cd9.jpg433.5 KB · Views: 41
 -
 12_2.jpg331.7 KB · Views: 35
 -
 16.jpg256.2 KB · Views: 35
 -
 15.jpg270.5 KB · Views: 36
 -
 12f497b5-dc33-487d-bf65-62837e177441.jpg546.2 KB · Views: 38
 -
 14.jpg255.6 KB · Views: 37
 -
 10.jpg502.9 KB · Views: 31
 -
 4.jpg261.4 KB · Views: 31
 -
 11.jpg579.9 KB · Views: 31
 -
 7.jpg295 KB · Views: 38
 -
 5.jpg303.1 KB · Views: 37
 -
 2_1.jpg315.3 KB · Views: 31
 -
 9.jpg725.4 KB · Views: 27
 -
 8.jpg302.6 KB · Views: 29
 -
 6.jpg601.5 KB · Views: 34
 -
 10_1.jpg769.7 KB · Views: 33
 -
 6febb29b-ffd4-4e40-b765-8e60e7b47b5f.jpg294.3 KB · Views: 31
 -
 1_1.jpg538 KB · Views: 34
 -
 57c57213-b0b0-4315-9355-51abcf680c4d.jpg603.4 KB · Views: 36
 -
 a6625cc4-1679-4a1c-989b-4d3b7e4822ee.jpg271.7 KB · Views: 37