I thought I’d document this process as I know I would have appreciated it when starting out. At first glance, the procedure looks insanely complicated, but I wanted to show it’s not too bad.
Objective
I’m replacing a similar size, wall-mounted 27” Dell UP2715K monitor — a 5K display which Dell brought to market around the same time as Apple’s first Retina iMac 5K. Apple sort of stole Dell’s thunder, but at the time the Dell actually had slightly better specs and a wider color gamut.
The biggest difference was that this 5K display could actually be connected to a Mac Pro, which is the arrangement I have here:

I find a wall-mounted display is very well suited to this corner of the room. The desk is actually a collapsible table that is often moved to get access to the shelving on the right. Having to move a large 27” monitor (or iMac) every time would be tedious. Instead, it stays on the wall out of the way.
In addition, the cabling can be ducted, which gives it a very clean appearance, almost as if the display is floating above the table.
My recently arrived iMac Pro is going to replace both the Mac Pro and the wall-mounted 5K monitor. So, to do that, it has to be fitted with Apple’s iMac Pro VESA Mount Adapter.
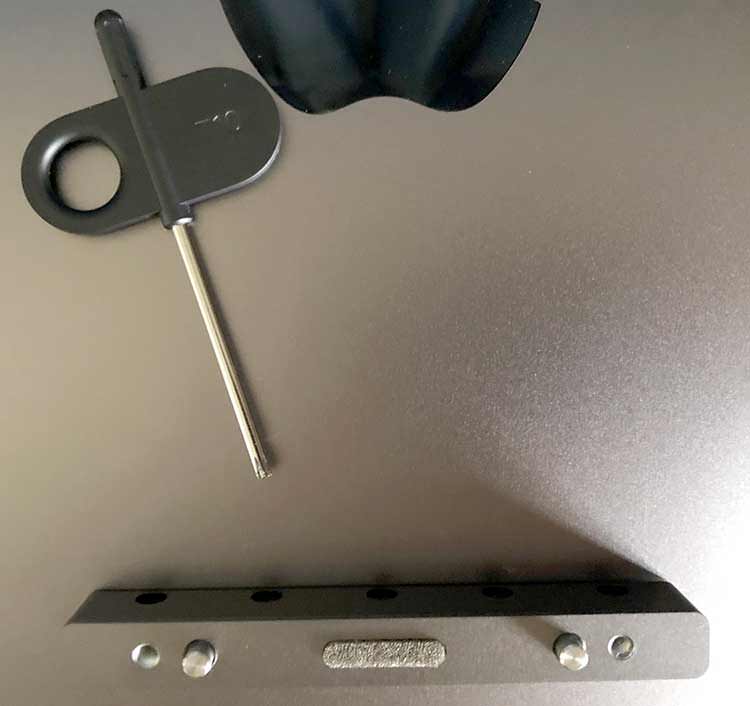
This kit is supplied in a box which is just a bit larger than the bracket inside, with tools and screws packed inside the hollow section:

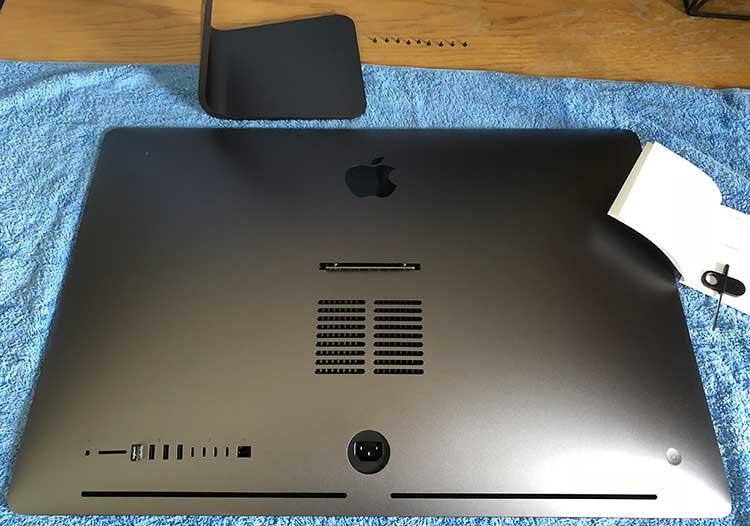
The first step is to lay the iMac Pro screen down on a soft cloth:

Then for a magic card trick. In the box there is a stiff piece of plastic, about the size of a thin credit card, which is inserted where the iMac stand meets the case.
Once the right position is found, a latch disengages and the stand swings down to reveal 9 small Torx screws:

The included screwdriver is then used to remove these to allow the stand to be separated from the iMac.
The kit includes a flange which attaches to the same hinge point that the stand used to, using 5 larger screws. The result is that the internal hinge is turned into a rigid block.
The VESA bracket itself is fixed to this block, using the two large screws in the center:
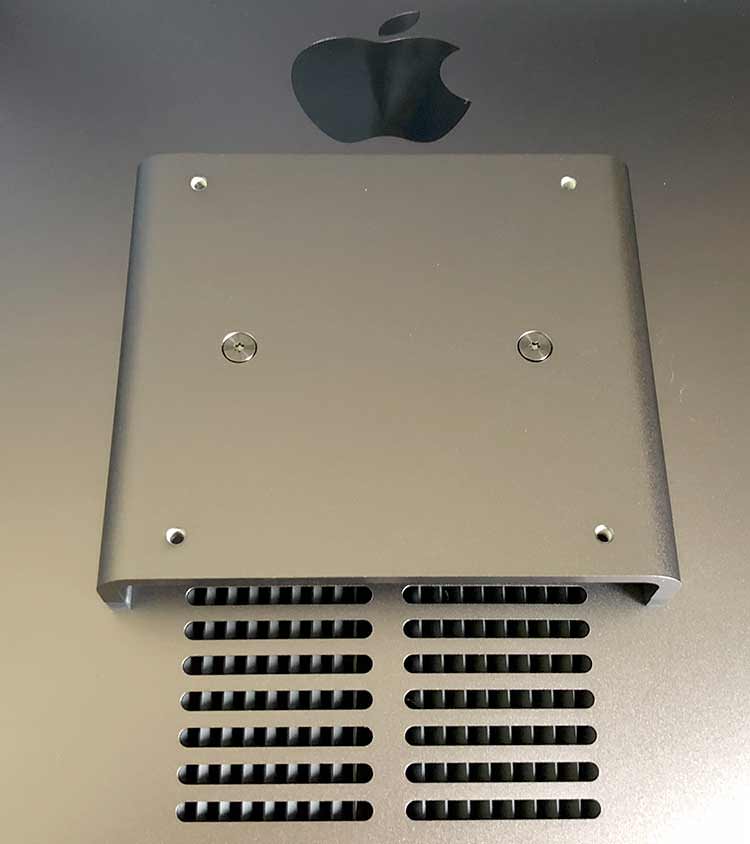
Note that the bracket partially obscures a few of the air vents. This isn’t quite as bad as it sounds, as the bracket is raised about 25 mm from the surface, leaving some room for the air exhaust.
The four screw holes at the corners are spaced exactly 100 mm apart, which is one of the VESA mounting standards.
Here I’ve attached the matching half of the same VESA compatible wall mount retainer that the Dell was mounted on:

Result
The iMac Pro has now replaced the Dell 5K display, and looks quite impressive floating in space:
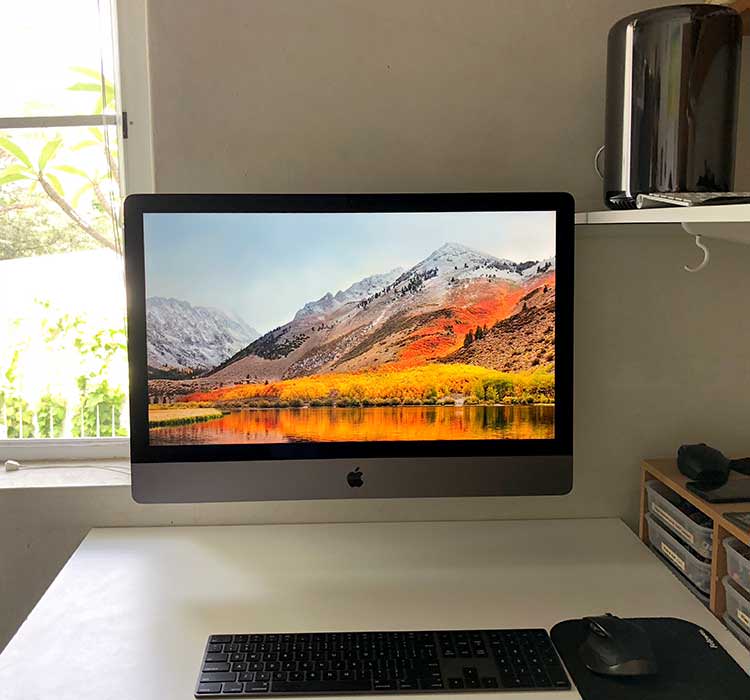
The Mac Pro on the shelf is still powered up, although now of course it is headless.
(“Headless Mac Pro.” “Legless iMac Pro…” It’s like a New Year’s Eve party gone very wrong.)
To check it was on, I screen shared into it from the iMac...

...which was like the beginning of some sort of iMac Pro / Mac Pro inception. It's funny after 4 years, the "numbers" haven't changed that much.
Bonus
Putting the desk stand back on the Dell monitor.
Step 1: Position the stand.
Step 2: Click it in.
Step 3: [Jeff Goldbloom chuckle] There is no step 3!

However, the plastic case and faux metal plastic stand sure don’t look as nice as the aluminium and stainless steel fittings of the iMac.
Objective
I’m replacing a similar size, wall-mounted 27” Dell UP2715K monitor — a 5K display which Dell brought to market around the same time as Apple’s first Retina iMac 5K. Apple sort of stole Dell’s thunder, but at the time the Dell actually had slightly better specs and a wider color gamut.
The biggest difference was that this 5K display could actually be connected to a Mac Pro, which is the arrangement I have here:
I find a wall-mounted display is very well suited to this corner of the room. The desk is actually a collapsible table that is often moved to get access to the shelving on the right. Having to move a large 27” monitor (or iMac) every time would be tedious. Instead, it stays on the wall out of the way.
In addition, the cabling can be ducted, which gives it a very clean appearance, almost as if the display is floating above the table.
My recently arrived iMac Pro is going to replace both the Mac Pro and the wall-mounted 5K monitor. So, to do that, it has to be fitted with Apple’s iMac Pro VESA Mount Adapter.
This kit is supplied in a box which is just a bit larger than the bracket inside, with tools and screws packed inside the hollow section:
The first step is to lay the iMac Pro screen down on a soft cloth:
Then for a magic card trick. In the box there is a stiff piece of plastic, about the size of a thin credit card, which is inserted where the iMac stand meets the case.
Once the right position is found, a latch disengages and the stand swings down to reveal 9 small Torx screws:
The included screwdriver is then used to remove these to allow the stand to be separated from the iMac.
The kit includes a flange which attaches to the same hinge point that the stand used to, using 5 larger screws. The result is that the internal hinge is turned into a rigid block.
The VESA bracket itself is fixed to this block, using the two large screws in the center:
Note that the bracket partially obscures a few of the air vents. This isn’t quite as bad as it sounds, as the bracket is raised about 25 mm from the surface, leaving some room for the air exhaust.
The four screw holes at the corners are spaced exactly 100 mm apart, which is one of the VESA mounting standards.
Here I’ve attached the matching half of the same VESA compatible wall mount retainer that the Dell was mounted on:
Result
The iMac Pro has now replaced the Dell 5K display, and looks quite impressive floating in space:
The Mac Pro on the shelf is still powered up, although now of course it is headless.
(“Headless Mac Pro.” “Legless iMac Pro…” It’s like a New Year’s Eve party gone very wrong.)
To check it was on, I screen shared into it from the iMac...
...which was like the beginning of some sort of iMac Pro / Mac Pro inception. It's funny after 4 years, the "numbers" haven't changed that much.
Bonus
Putting the desk stand back on the Dell monitor.
Step 1: Position the stand.
Step 2: Click it in.
Step 3: [Jeff Goldbloom chuckle] There is no step 3!
However, the plastic case and faux metal plastic stand sure don’t look as nice as the aluminium and stainless steel fittings of the iMac.
