Become a MacRumors Supporter for $50/year with no ads, ability to filter front page stories, and private forums.

MacRumors

macrumors bot
Original poster
Apr 12, 2001
67,535
37,859


In macOS, you can easily convert the format of images using a Quick Action in Finder or you can achieve the same thing via the Preview app, but if your daily workflow requires you to repeatedly convert images – for uploading to a blog, for example – then using a Folder Action can be a much faster way of getting the job done.
automator-robot-finder.jpg

In this article, we'll show you how to use the macOS Automator app to create a very simple Folder Action that will automatically convert images dropped into a specific folder, without you having to manually apply a Quick Action or open an image editing app. Keep reading to learn how it's done.

How to Create an Image Converting Folder in Automator

  1. Launch Automator from the Applications folder.
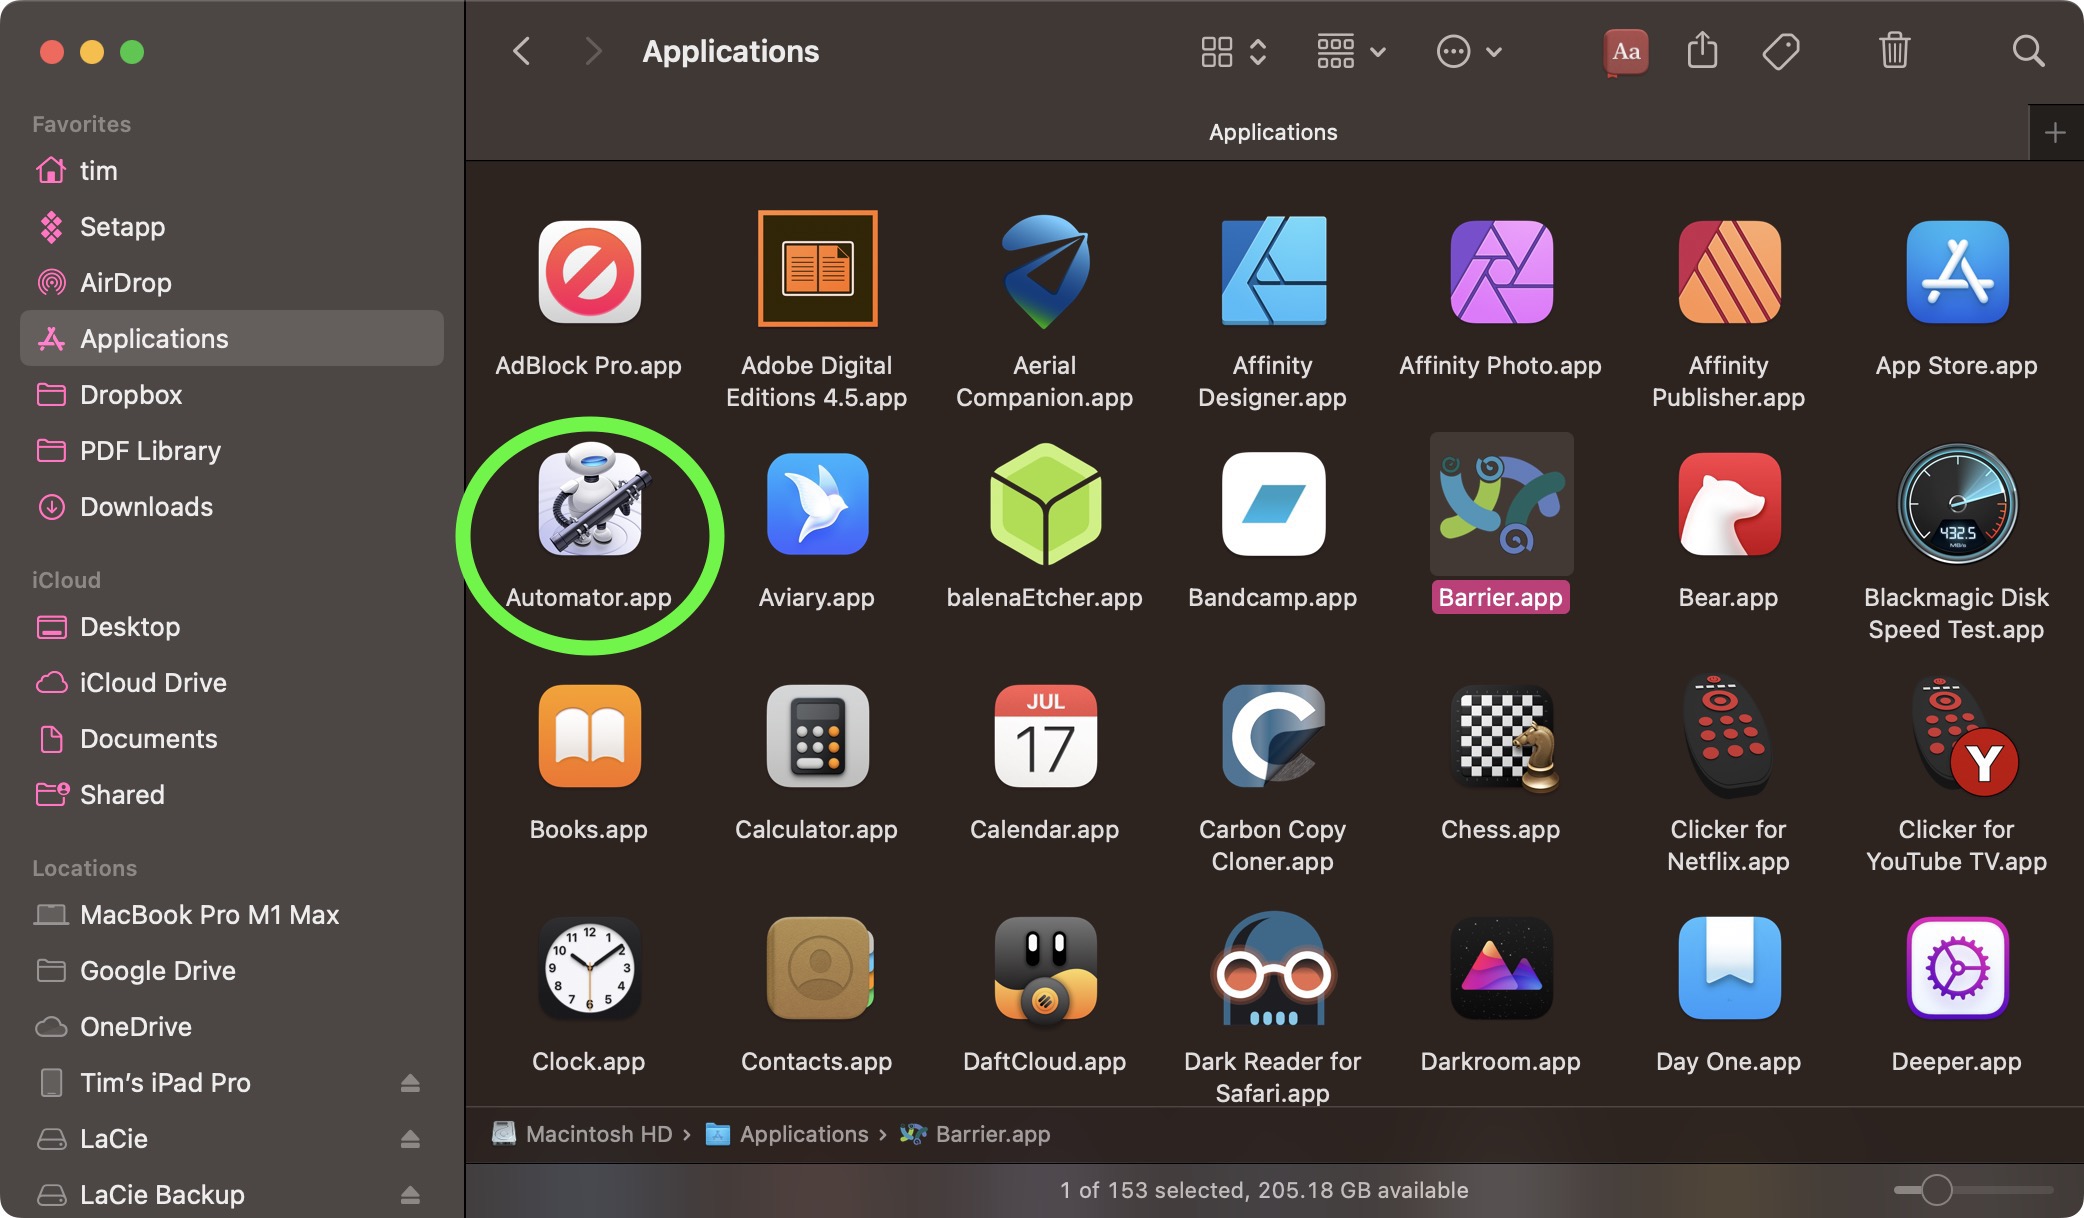
    automator-appplications.jpg

    Click New Document.
  2. Choose Folder Action as the type of your document.
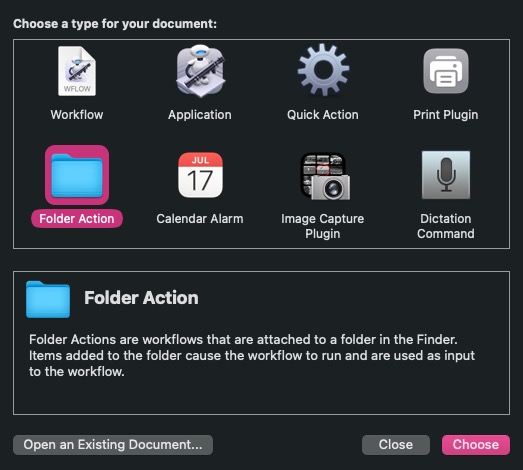
    folder-action-automator.jpg

    At the top of the workflow area, click the dropdown next to Folder Action receives files and folders added to: then select Other....
    folder-action-1.jpg

    Select the folder that you'd like to attribute the image conversion action to. In our example, we're choosing the Downloads folder.
  3. From the Library sidebar on the far left, select Photos.
  4. From the Actions column, drag Change Type of Images (the one with the Preview icon) to the workflow area.
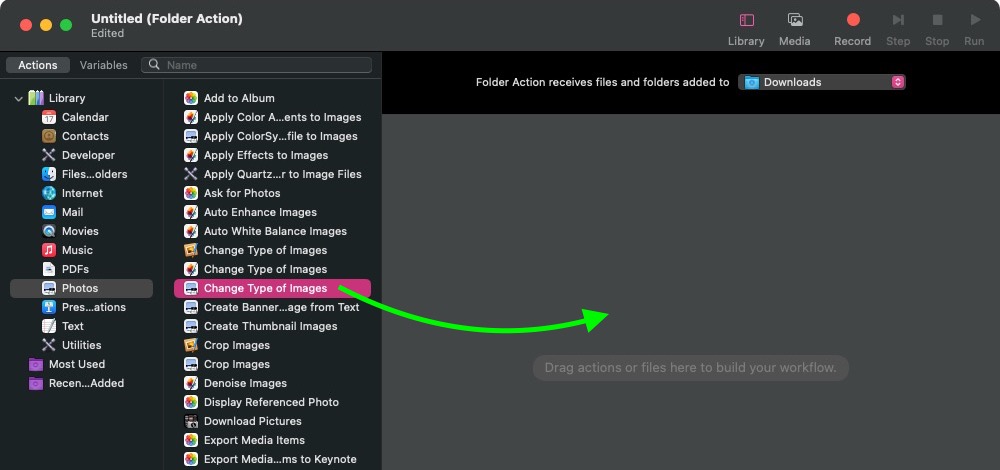
    change-image-type.jpg

    A dialog prompt will appear. If you want your action to convert copies of images placed in the folder and preserve the originals, select Add. If you want it to convert the original images, select Don't Add.
  5. In the Change Type of Images action panel, choose the type of format that you want images to be converted to. We're selecting JPG.
    convert-jpg-action.jpg

    In the Automator menu bar, select File -> Save... or press Command-S, call your new file action "Convert Image," then click Save.
That's all there is to it. Next time you want to convert an image into your preferred format, simply drag it into the folder that you assigned the action to.

Now that you know how to create the image conversion workflow in Automator, you may want to turn it into a standalone "Application," the option for which you can find in Automator's document menu. An "Application" is a self-running workflow that acts as a droplet – any files or folders dropped onto it are used as input to the workflow. In other words, you could add an "Application" to your Dock and drop images onto it for conversion.

You can also import Automator workflows into the Shortcuts app. Shortcuts can convert most Automator workflows into shortcuts that carry out the same functions, events and automations — you simply drag a workflow file into Shortcuts and the conversion happens automatically.

Article Link: How to Make an Image-Converting Folder in macOS
 
Last edited:
Ive been using a QuickAction to convert HEIC images that I transfer from my iPhone, to JPG for uploading online, for several years now. Quick and easy.
 
I use shell scripts to do that. SIP command but for webp I ended installing cwebp. Probably not very efficient tools because I am not a developer but they work fine.

PNG to WEBP
Use: sh Png2webp Folder_Source
Bash:
#!/usr/bin/env bash
# Png2jpg Image converter Script

# Variables
SRC="$1"
DEL="$SRC/delete"
clear

if [ -e "$DEL" ]
then
    echo "\n"
else
    mkdir "$DEL"
fi

echo "PNG Converter\n"
echo "#############\n"

test=`ls -l "$SRC"/*.png`

if [ $? -eq 0 ]; then
    for file in "$SRC"/*.png; do
        #sips -s format jpeg -s formatOptions 70 "${file}" --out "${file%png}jpg";
        cwebp -metadata all -q 100 "${file}" -o "${file%png}webp";
    done
    mv  "$SRC"/*.png "$SRC/delete"
else
    for file in "$SRC"/*.PNG; do > /dev/null 2>&1
        #sips -s format jpeg -s formatOptions 70 "${file}" --out "${file%png}jpg";
        cwebp -metadata all -q 100 "${file}" -o "${file%PNG}webp";
    done
    mv  "$SRC"/*.PNG "$SRC/delete" > /dev/null 2>&1
fi

PNG to JPG
Use: sh Png2jpgFolder_Source
Bash:
#!/usr/bin/env bash
# belPng2jpg Image converter Script

# Variables
SRC="$1"
#DEST="${SRC} jpg"

clear

mkdir "$SRC/delete"
# for i in *.png; do sips -s format jpeg -s formatOptions 70 "${i}" --out "${i%png}jpg"; done
for file in "$SRC"/*.png; do
  sips -s format jpeg -s formatOptions 70 "${file}" --out "${file%png}jpg";
done
mv  "$SRC"/*.png "$SRC/delete" > /dev/null 2>&1


for file in "$SRC"/*.PNG; do
  sips -s format jpeg -s formatOptions 70 "${file}" --out "${file%PNG}jpg";
done
mv  "$SRC"/*.PNG "$SRC/delete" > /dev/null 2>&1
 
I tried to read the article but all I could think of was that Apple really needs to design a consistent look for their GUI. Those icons! god it's awful. With all the talented designers they employ would it be really that hard to do.
If that bothers you, DO NOT open Logic and play with any synthesizers. You'll vomit in your mouth.😜
 
I’ve been using folder automations similar to this for some years now to add images to specific folders in the Photos app. I have an automation set so that every time I take a screenshot, the folder it gets added to knows to also automatically add that image to the Photos app, and then it syncs across to my phone. I have another folder where I save random desktop images I want to use. I just drag them to the folder, it adds it to the Photos app into a desktop background folder, and my Mac automatically cycles through those folders.

I will definitely be adding this automation to my tool set.
 
if you have Hazel, this can also be helpful.

 
Register on MacRumors! This sidebar will go away, and you'll see fewer ads.