
On iPhone and iPad, the Control Center provides quick access to a host of useful features in iOS, regardless of whether you have an app open or not, or even whether your device is locked or not. The Control Center is also highly customizable, so you can choose what gets to live there and what doesn't.
Subscribe to the MacRumors YouTube channel for more videos.
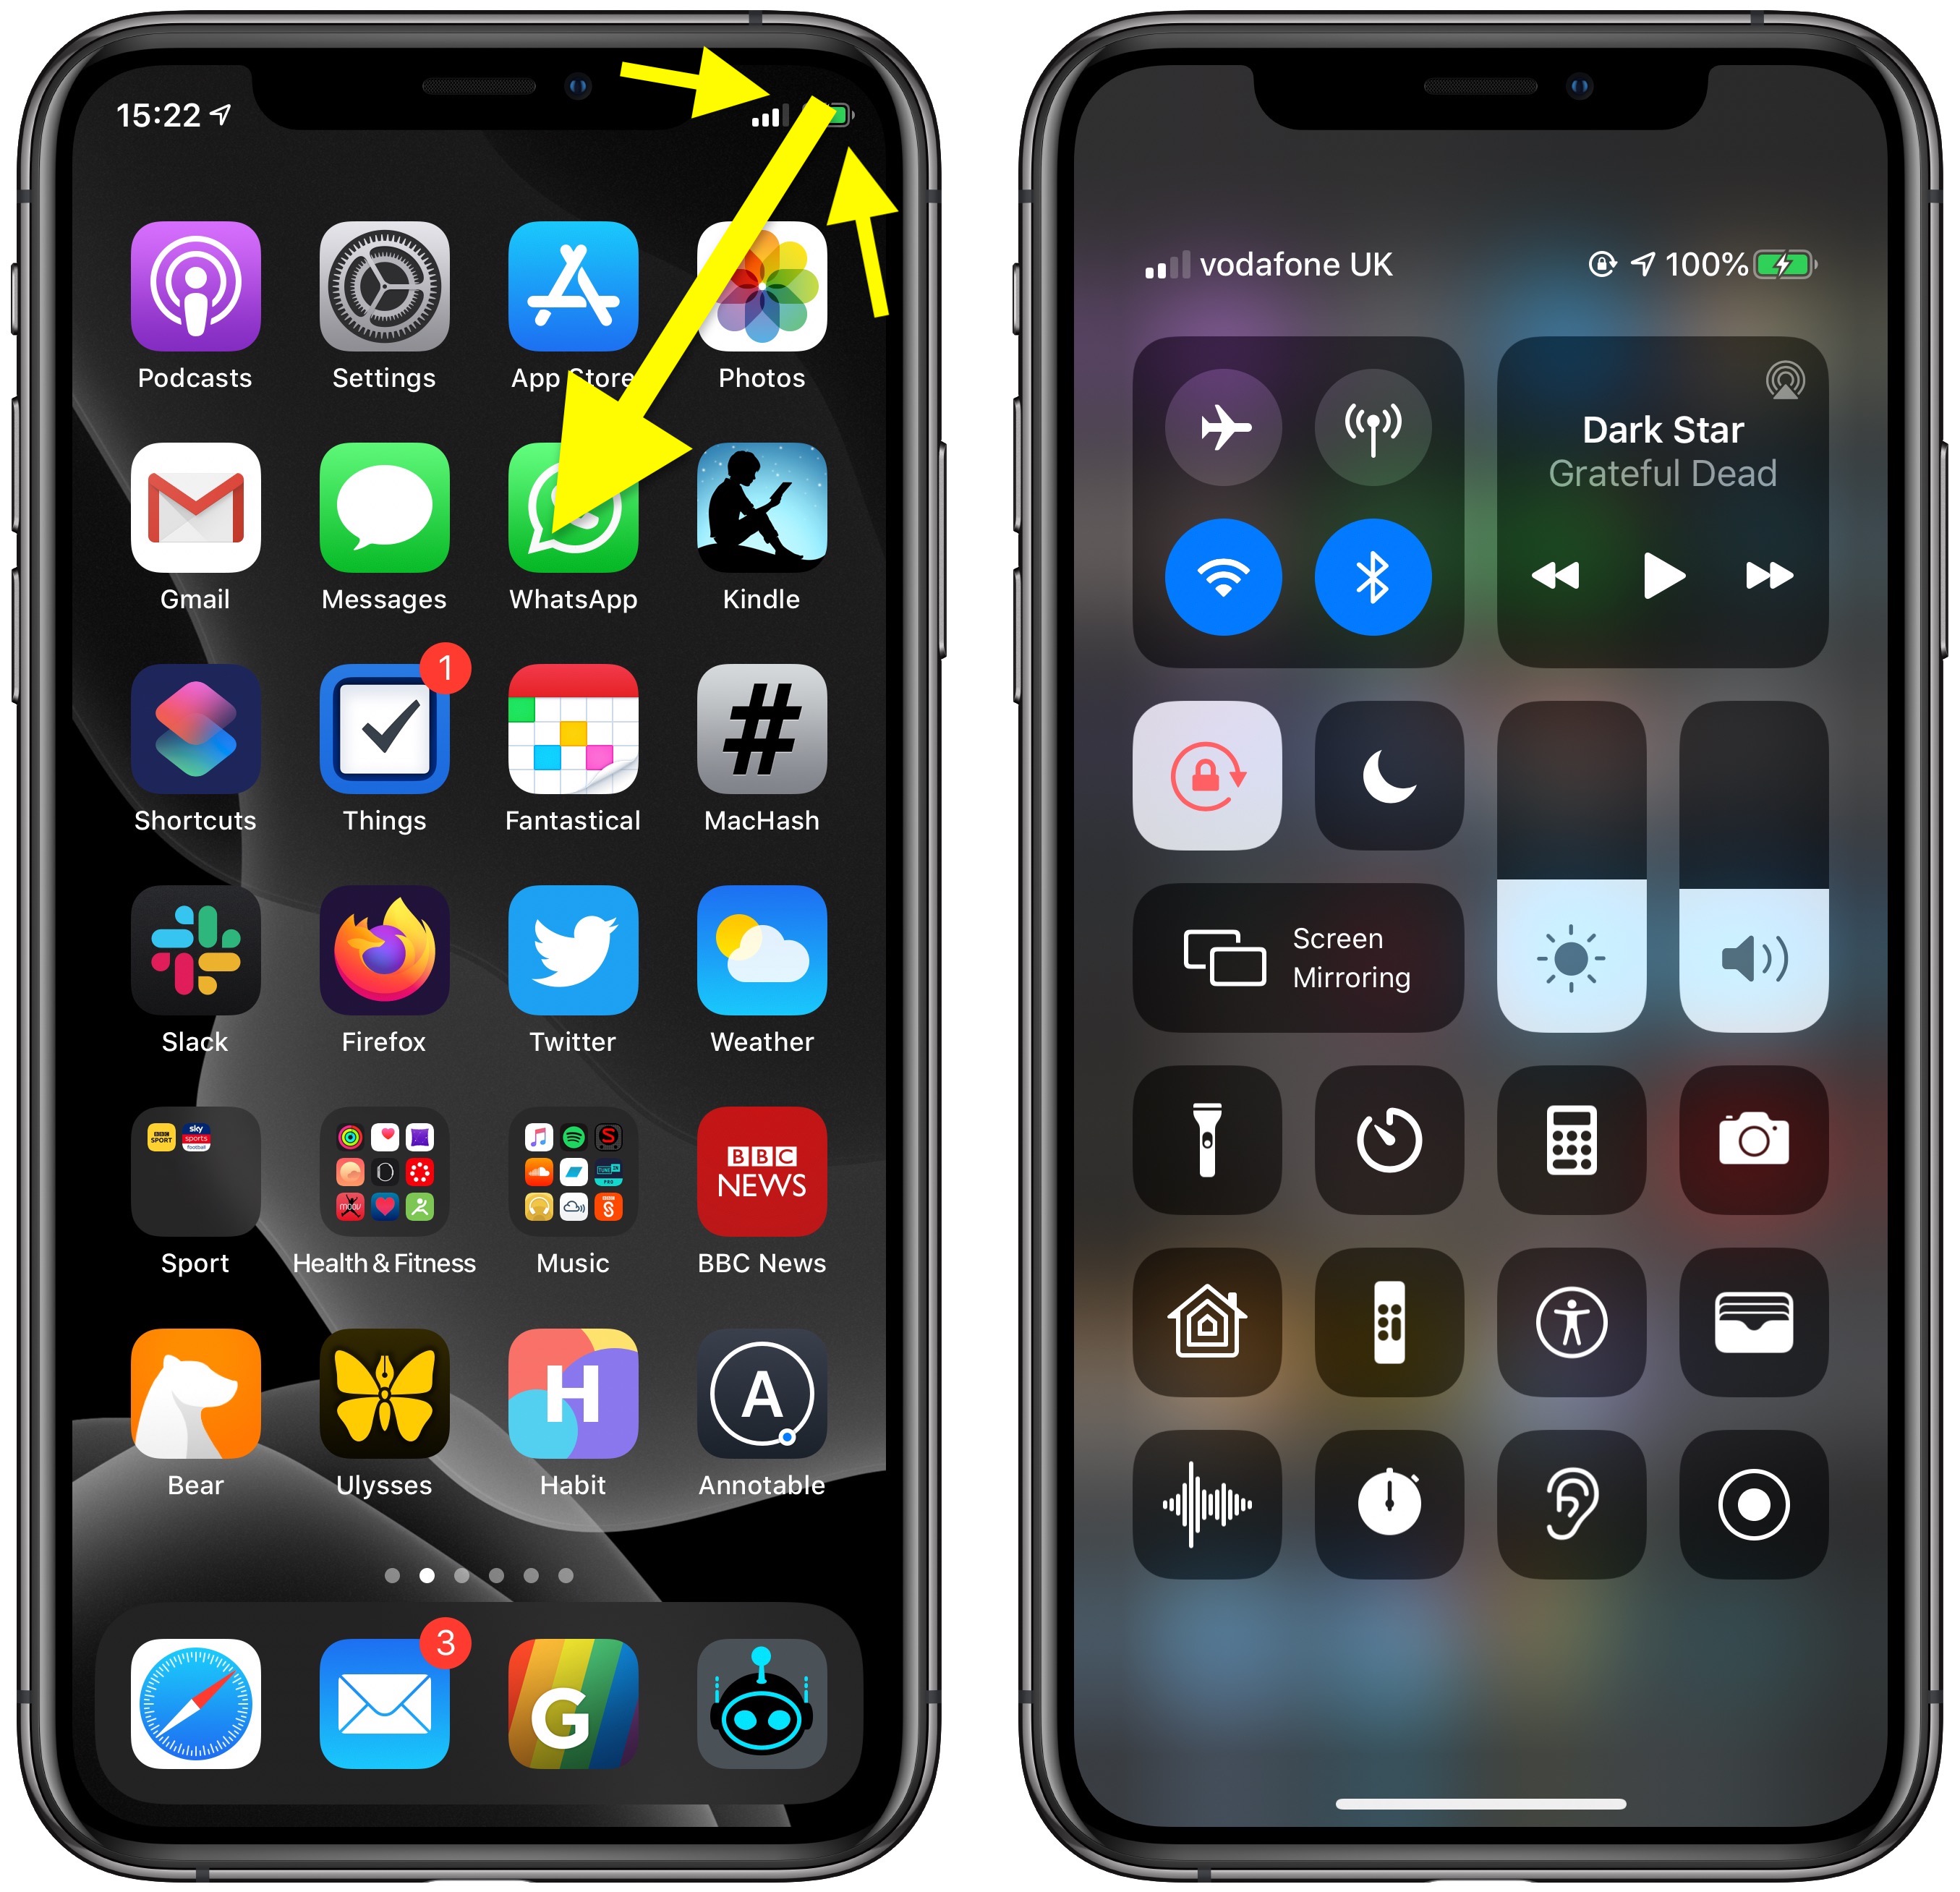
How to Access Control Center on iPhone and iPad
Accessing Control Center in iOS is designed to be easy. On an iPad with a Home button, simply double-tap the Home button; on iPhone 8 or earlier, swipe up from the bottom of the screen; and on a 2018 iPad Pro or iPhone X and later, swipe down from the upper right corner of the screen.
Connectivity Controls
The Control Center is made up of several panels containing associated functions. The first pane on the left allows you to quickly enable or disable the wireless connectivity functions of your device, including Airplane mode, cellular data, Wi-Fi, and Bluetooth. Simply tap any of the buttons to enable or disable the related feature.
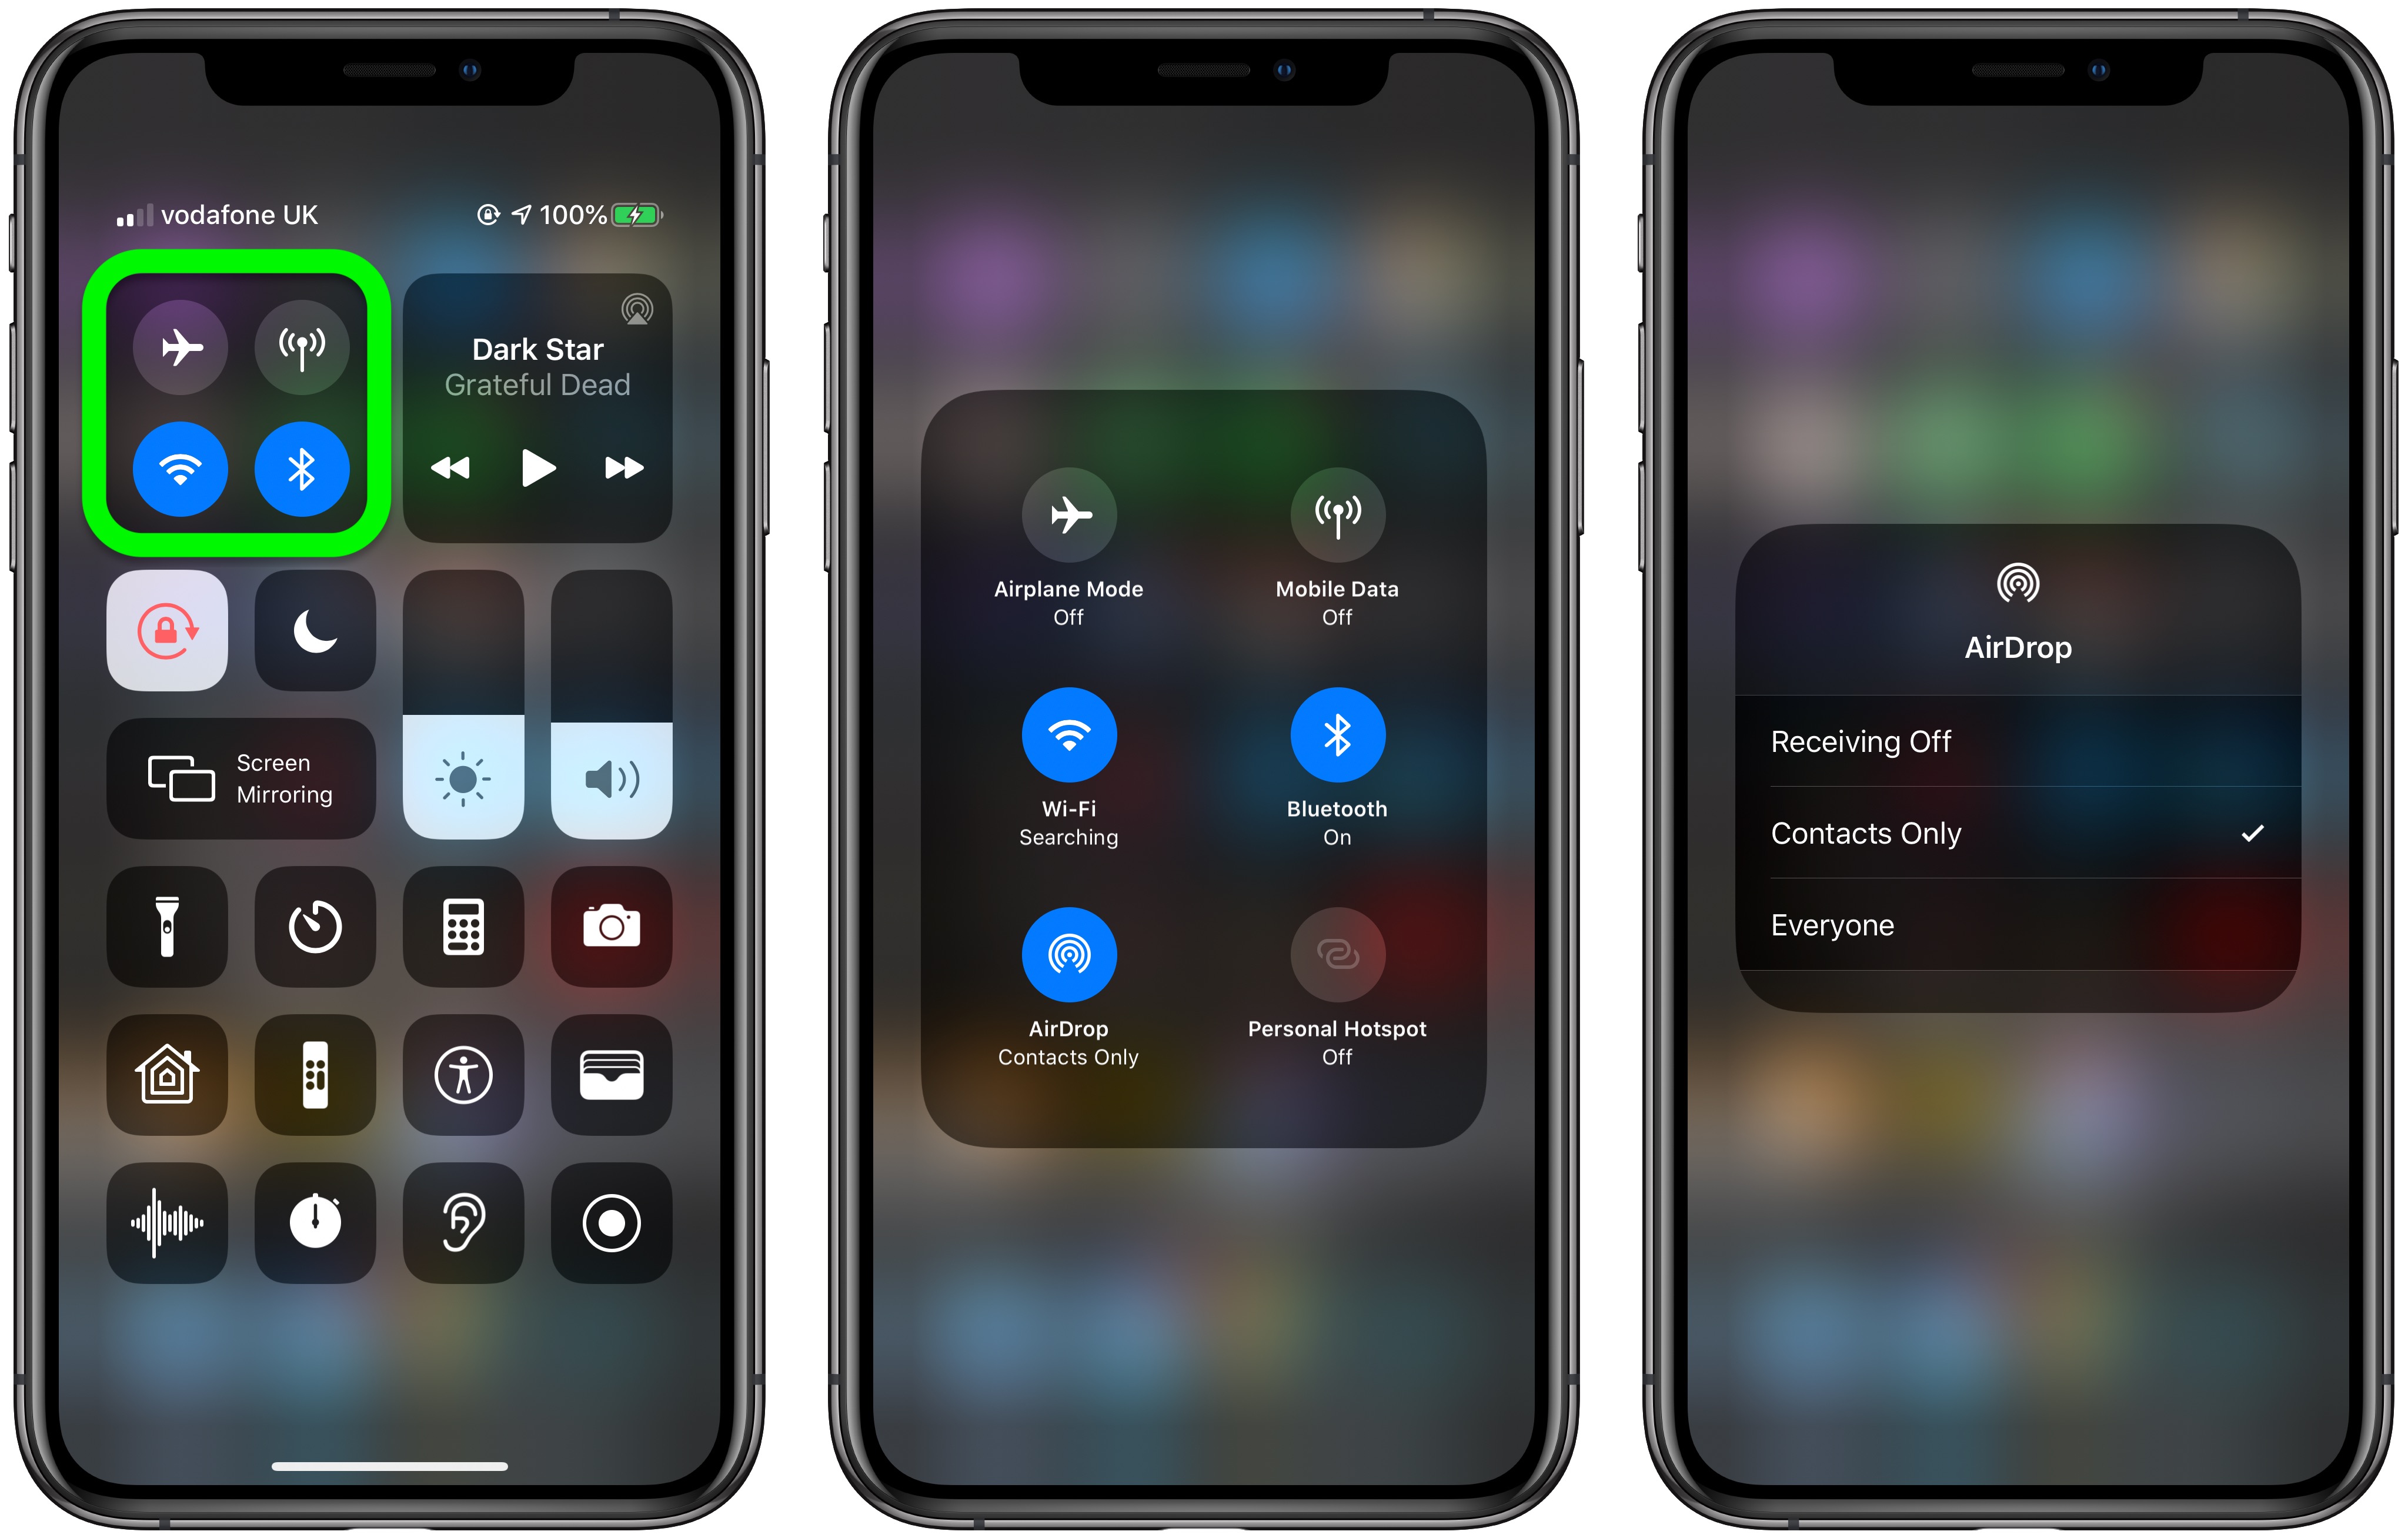
If instead you press and hold on this panel, it will take over the screen and expand to reveal two more buttons: AirDrop and Personal Hotspot. From here, if you press and hold the AirDrop button you can opt to turn off AirDrop or set it to receive files either from Everyone or Contacts Only. Likewise, if you press and hold the Wi-Fi or Bluetooth buttons, you can access a list of available wireless networks and Bluetooth devices, respectively, any of which you can connect to with a tap.
Audio Playback
The second large panel at the top-right corner of the Control Center contains your media playback options, including the name of the currently selected track, album name, and buttons to play/pause and skip forward/go backward a track. There's also an AirPlay button in the top-right corner of the panel which can you can press and hold to expand.
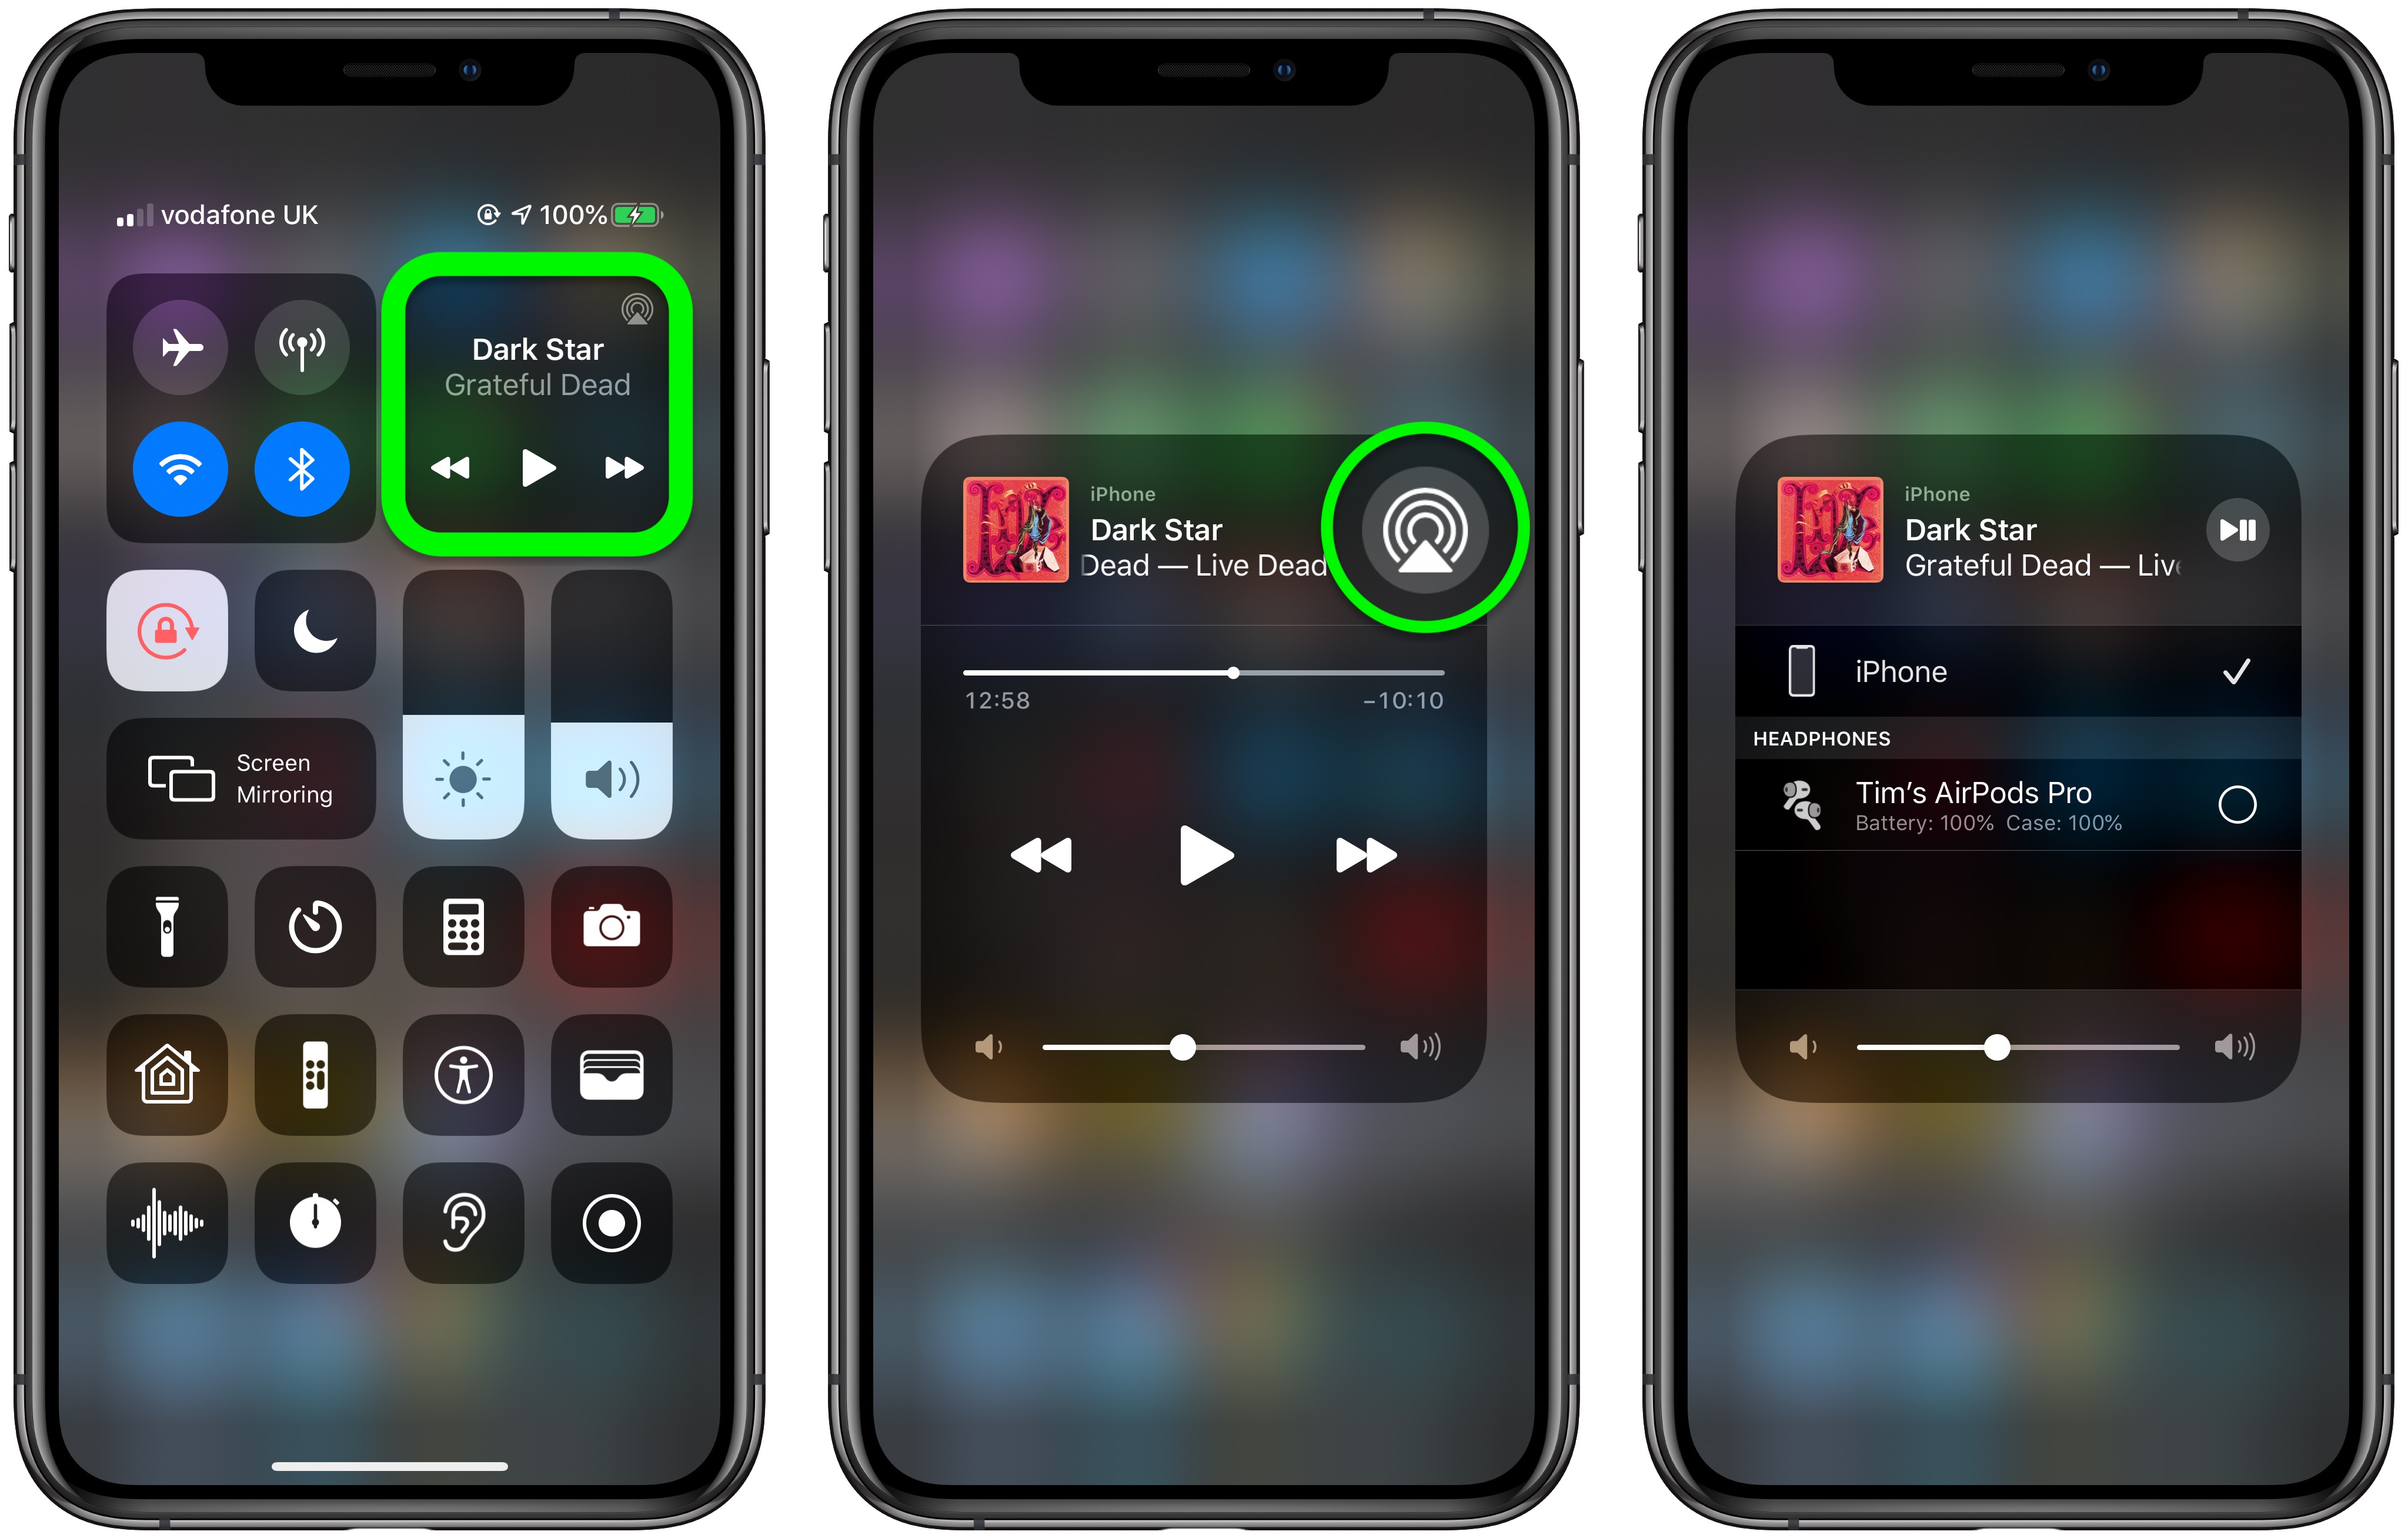
In this expanded view you'll see a track scrubber that you can drag with your finger to advance the current track or return to an earlier point in it. If you press the larger AirPlay button, you can access a list of available AirPlay-compatible devices and top on one to connect to it.
Orientation Lock, Do Not Disturb, and Screen Mirroring
Below the two big panels in the Control Center are three options that always appear in the Control Center. The padlock button lets you enable/disable the Screen Orientation Lock, while the crescent moon turns Do Not Disturb on and off. You can also press and hold the Do Not Disturb button to schedule the mode for 1 hour, Until this evening, or Until I leave this location.
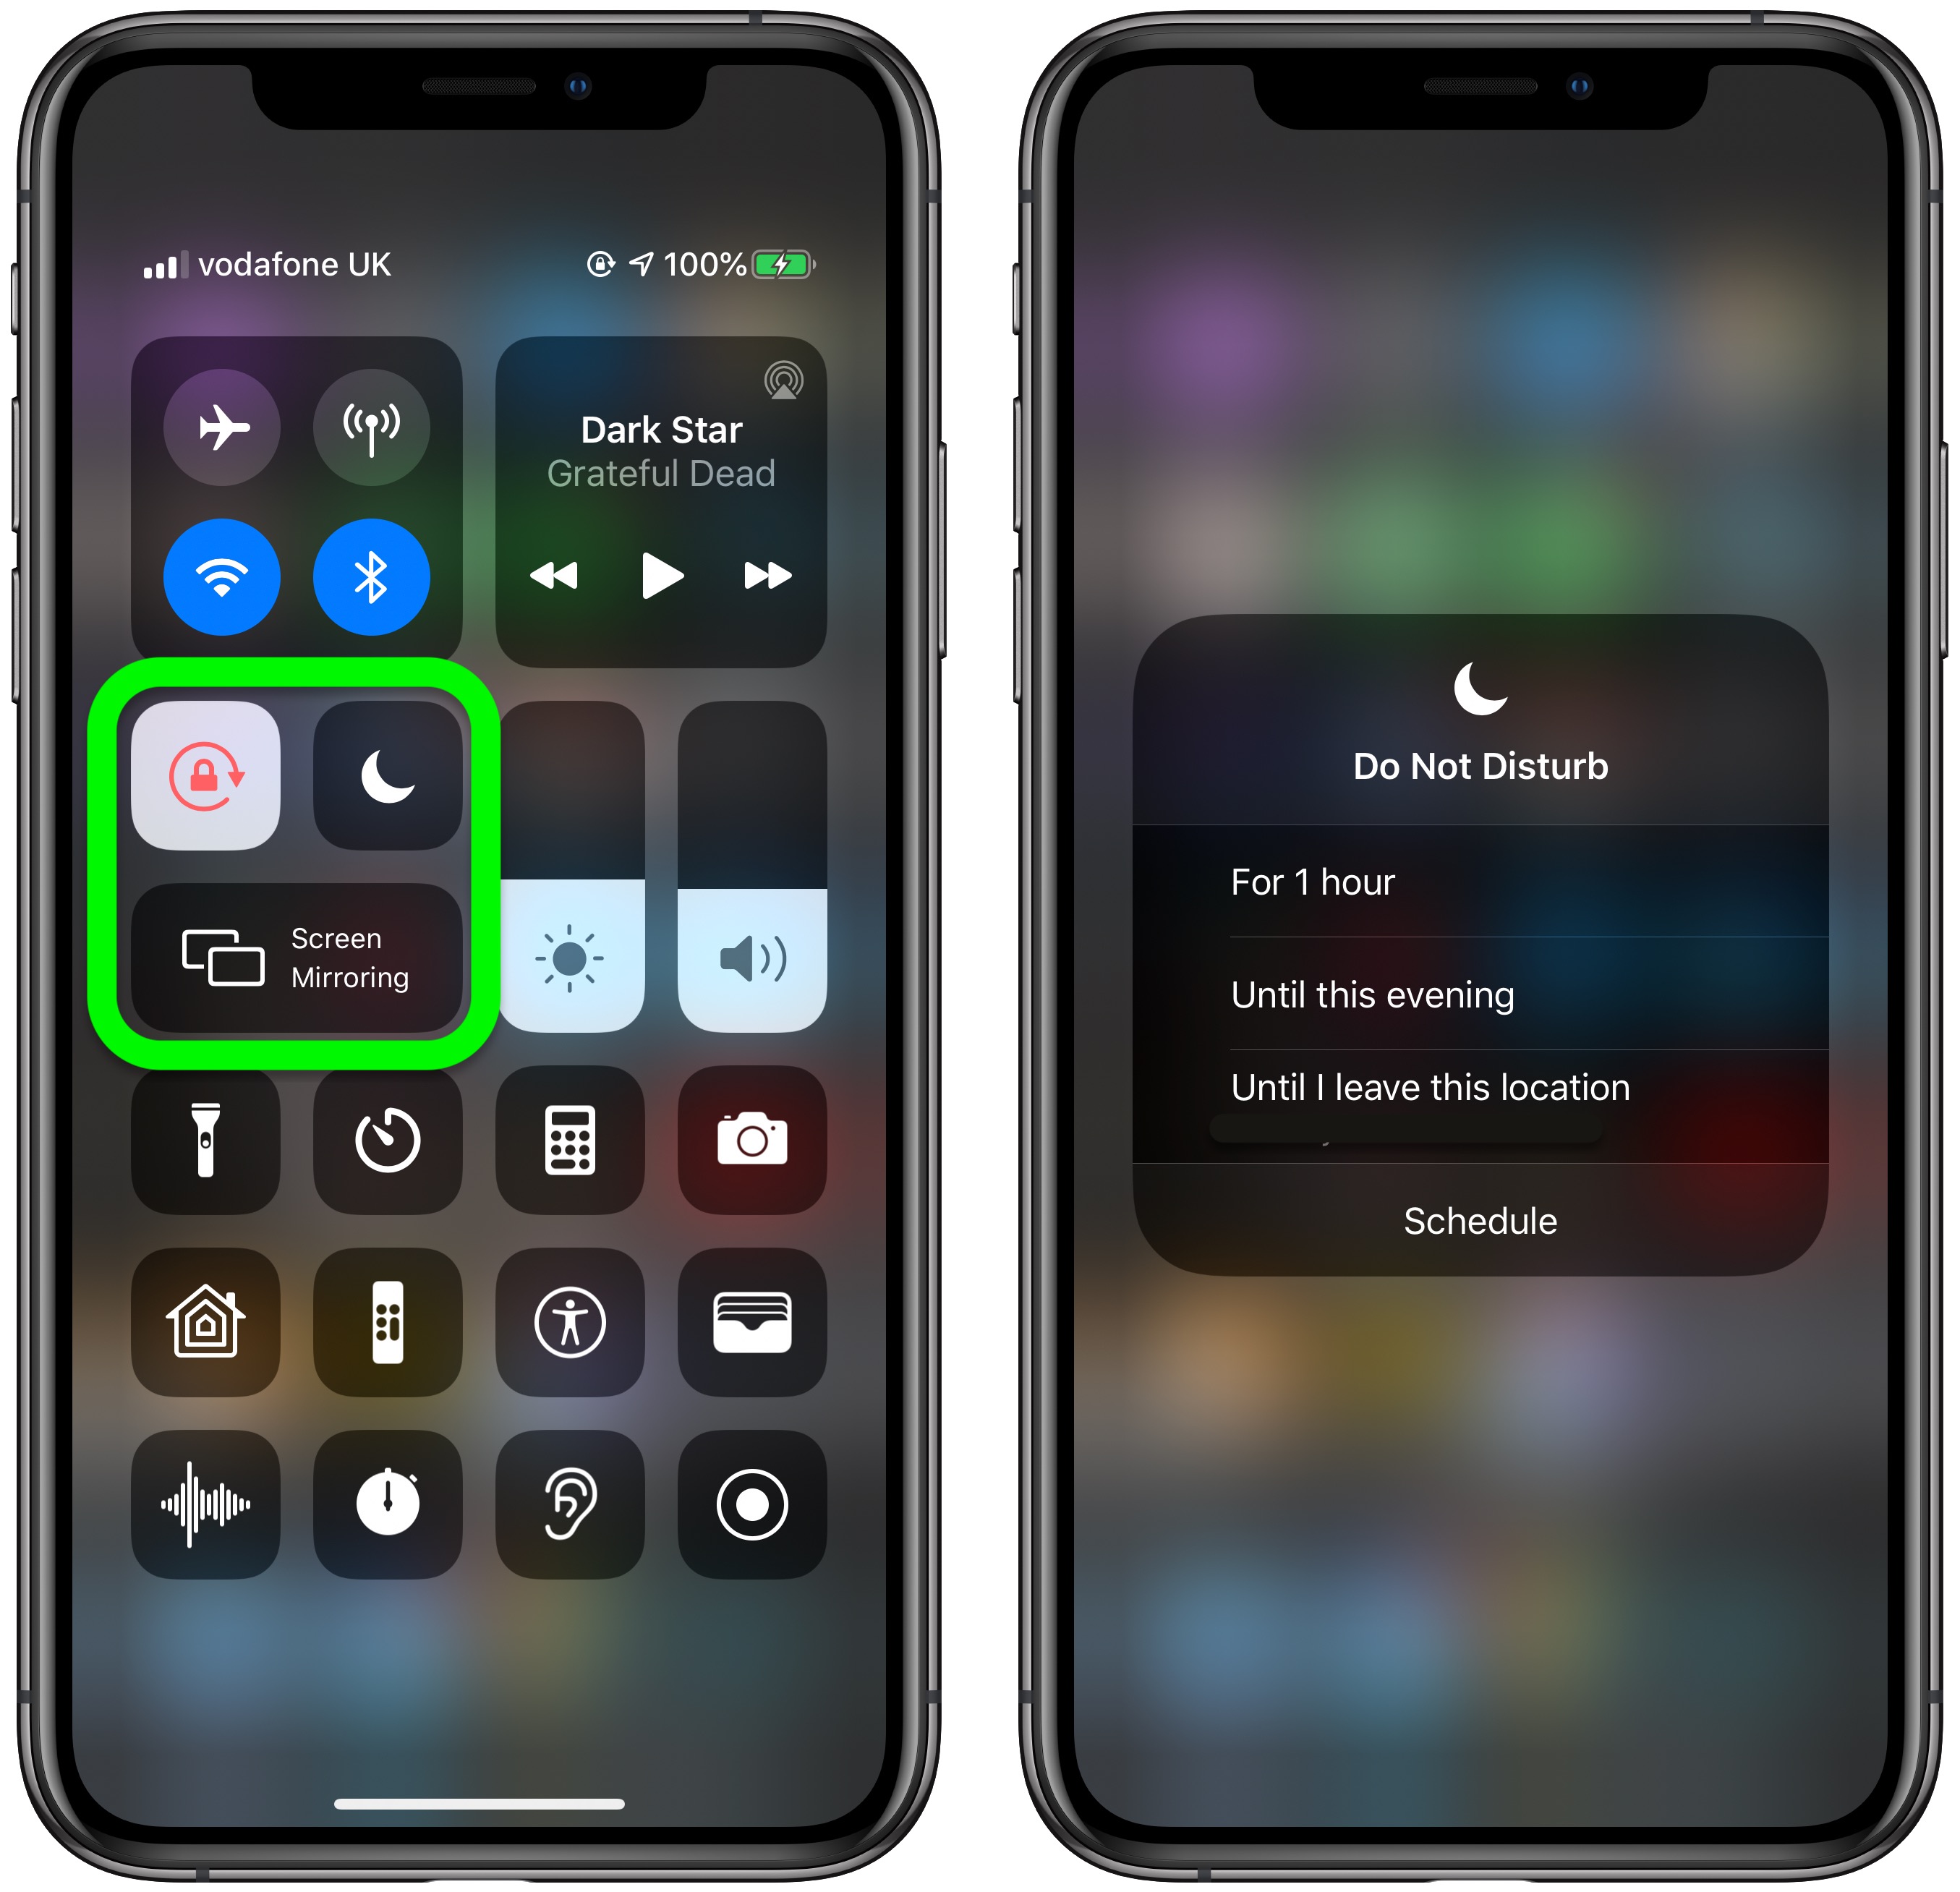
The oblong Screen Mirroring button provides quick access to a list of devices on the same Wi-Fi network that support AirPlay video. Using this button, you can mirror the entire screen of your iOS device on an Apple TV or AirPlay 2-compatible smart TV, just by tapping it in the list.
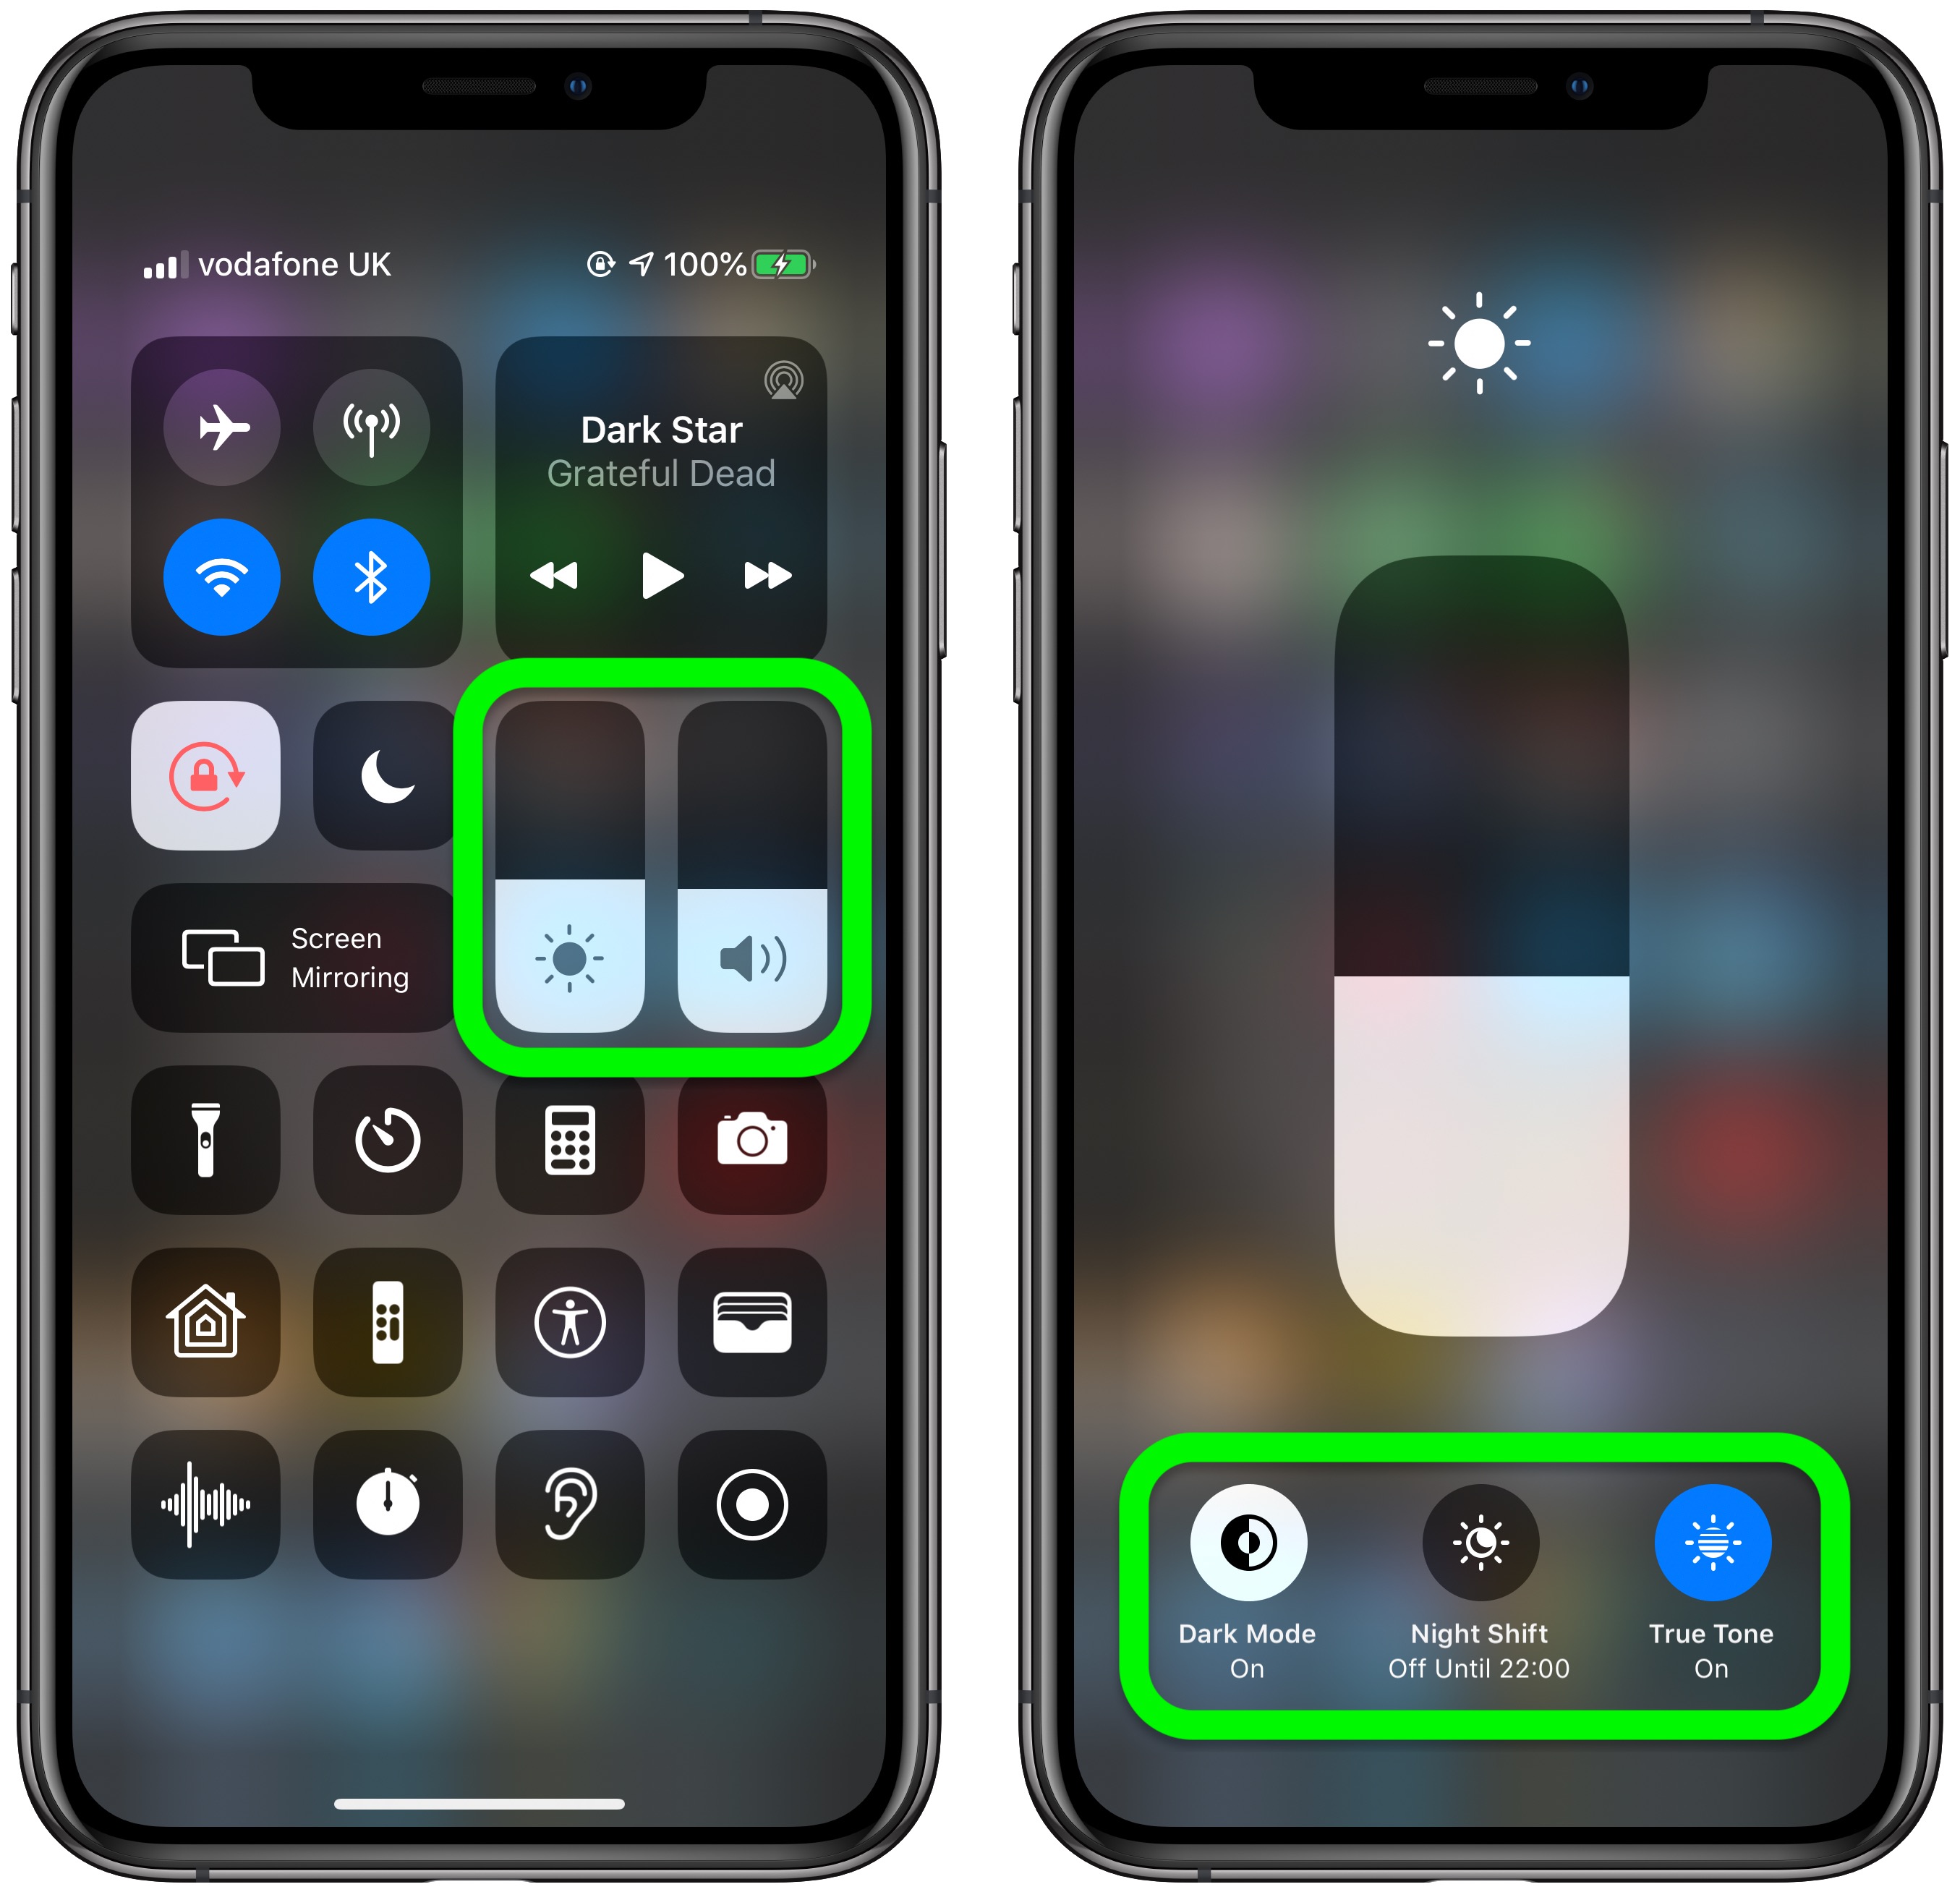
Brightness and Volume Sliders
The Brightness and Volume sliders are more useful than they first appear. Aside from letting you set the screen brightness by dragging the level up and down, you can press and hold the Brightness slider to reveal more buttons that let you enable or disable Dark Mode, Night Shift, and True Tone.
If you're listening to audio on your iOS device using Apple AirPods Pro, you can also press and hold the Volume slider to control Transparency and Noise Cancelation functions independently.
Customizing the Control Center
The buttons that appear in Control Center (below the ones we've already described) can vary, because you can add, remove, and organize them in the way you want through the... Click here to read rest of article
Article Link: How to Use and Customize Control Center in iOS
Last edited:
