Making Dolby Atmos mixes in Logic Pro involves enabling the feature in Project Settings, converting your project (often from stems), using the dedicated object panner and binaural renderer for 3D placement, and monitoring through your specific speaker setup or headphones, finally exporting as an ADM file. The core workflow shifts from traditional stereo mixing to positioning sounds as objects or beds within a 3D space, utilizing the built-in Atmos plugin on the master bus for visualization and rendering.
1. Project Setup & Conversion
Create New Project: Start a new project or use a Project Alternative to keep your original stereo mix safe.
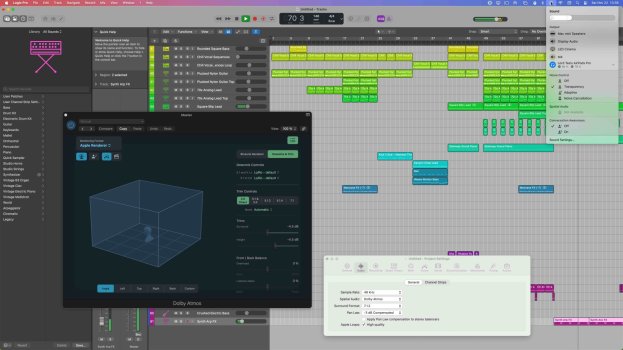
Enable Atmos: Go to File > Project Settings > Audio and set the Spatial Audio pop-up to Dolby Atmos.
Sample Rate: Set the sample rate to 48 kHz or 96 kHz.
Convert: Logic will prompt you to convert to 7.1.2 surround format; accept this.
2. Channel & Panning Setup
Mixer View: Open the Mixer (X) and find the Dolby Atmos plugin on the Master Bus.
Beds & Objects: Tracks are sent to the "Bed" (surround channels like 7.1.2) or become "Objects" (individual sounds).
3D Object Panner: Right-click a track's pan knob (or use the Surround Panner) to access the 3D Object Panner for 360° placement and elevation control.
Stereo to Atmos: For existing stereo tracks, send them to buses and then route those buses into the Atmos bed as surround channels.
3. Monitoring & Rendering
Atmos Plugin: Use the Atmos plugin on the Master Bus to select your monitoring format (e.g., Stereo, 5.1, Headphones).
Binaural Rendering: For headphones, adjust binaural settings to simulate speaker distances and realism.
LFE & Center: Control subwoofer (LFE) and center channel levels within the panners.
4. Exporting
Export ADM: Once mixed, export the project as an ADM BWF file (Audio Definition Model) through the Render menu to get your final Atmos mix.
By following these steps, you can transition your audio mixes into the immersive world of Dolby Atmos within Logic Pro.