Use SSH instead of Telnet
Launching telnet daemon (telnetd) on Mac OS X client and Mac OS X Server requires the use of Terminal.app and the launchctl command, while ssh can be enabled through the available GUI interfaces.
Enabling telnet daemon
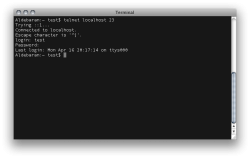
To enable the telnet daemon, launch Terminal.app and issue:
$ sudo launchctl load -w /System/Library/LaunchDaemons/telnet.plist
To disable the daemon:
$ sudo launchctl unload -w /System/Library/LaunchDaemons/telnet.plist
Also ensure that the system firewall and intervening firewalls have TCP port 23 opened for telnet traffic.
For various reasons and not the least of which is better security, ssh is recommended over telnet. The telnet protocol exposes your username and password in cleartext to any attackers monitoring the telnet network traffic.
Enabling ssh daemon
To enable ssh on Mac OS X Server, launch Server Admin:
**Server Admin > select server > Settings > General > ssh.
On Mac OS X client, you can enable ssh by launching System Preferences:
**System Preferences > Sharing > Remote Login.
Also ensure that the system firewall and intervening firewalls have TCP port 22 opened for ssh traffic.
Enabling ssh also enables sftp and scp file transfer tools.
Additionally, ssh can be configured for a no-password or passphrase-based login using locally-issued or commercially-purchased certificates. When compared with configuring firewalls for ftp, sftp is also vastly easier to operate when firewalls are in use; you need only open TCP port 22.
For remote ssh and sftp access, various options exist including Panic's iOS Prompt (which we're using) (iTunes link), the free GUI Filezilla tool, University of Michigan's fugu, the Mac OS X command-line ssh client, and various terminal emulators including PuTTY.

")