Everything has (unsupringly) come to a painful grinding halt with the simplest of tasks since making the the mistake of allowing all updates. Now running - extremely slooooowly Catalina. I‘m thinking of taking the RAM from 8 to 16 Gb and fitting a SSD from Crucial. Any thought as to whether this is worth the effort - not in the market for a new one, at the moment I have a lump of stone rather than the useful kit it was....it will cost £200
Got a tip for us?
Let us know
Become a MacRumors Supporter for $50/year with no ads, ability to filter front page stories, and private forums.
Thinking of SSD upgrade on mid 2012 MacBook Pro
- Thread starter IPD2000
- Start date
- Sort by reaction score
You are using an out of date browser. It may not display this or other websites correctly.
You should upgrade or use an alternative browser.
You should upgrade or use an alternative browser.
Could it be a bad/failing SATA hard drive cable that causing the sluggishness? It's a fairly common issue.

Any easy way of telling? The issue seemed to start after the last few OS upgrades...Could it be a bad/failing SATA hard drive cable that causing the sluggishness? It's a fairly common issue.
[automerge]1603399766[/automerge]
It’s also running very hotAny easy way of telling? The issue seemed to start after the last few OS upgrades...
The only way to really tell is to try a clean install of the OS. If there are no beach balls, then it's probably software-related. If there is no change, I'd look into changing the cable, especially if you intend to use an SSD.Could it be a bad/failing SATA hard drive cable that causing the sluggishness? It's a fairly common issue.
I've change a few cables from 2010, 2011, and 2012 Pros.
Thanks - it has had several clean installs and is stripped down to bare bones now, hardly running anything, loads of room etc.. appreciate your assistance, many thanksThe only way to really tell is to try a clean install of the OS. If there are no beach balls, then it's probably software-related. If there is no change, I'd look into changing the cable, especially if you intend to use an SSD.
I've change a few cables from 2010, 2011, and 2012 Pros.
Lots of beach balls BTW, even just opening finder, settings et alThanks - it has had several clean installs and is stripped down to bare bones now, hardly running anything, loads of room etc.. appreciate your assistance, many thanks
Are you currently using a SSD or HDD?
What do you typically do on your MBP?
Also, can you post your specs?
It has been shown that there is a significant performance loss with APFS on HDDs, and for some reason, has gotten so much worse on Catalina.
A have seen a lot of people with slowdown issues after upgrading to Catalina on HDDs.
If you are currently using a SSD, was this an upgrade that you did, or did you get it that way from Apple?
If you did the upgrade yourself, I wonder if TRIM is enabled.
If it is an Apple SSD, then maybe it is starting to go or a cable issue.
Let us know more info, and we can probably give better advice.
What do you typically do on your MBP?
Also, can you post your specs?
If you are using a HDD, I suspect that is the issue.Now running - extremely slooooowly Catalina.
It has been shown that there is a significant performance loss with APFS on HDDs, and for some reason, has gotten so much worse on Catalina.
A have seen a lot of people with slowdown issues after upgrading to Catalina on HDDs.
If you are currently using a SSD, was this an upgrade that you did, or did you get it that way from Apple?
If you did the upgrade yourself, I wonder if TRIM is enabled.
If it is an Apple SSD, then maybe it is starting to go or a cable issue.
Let us know more info, and we can probably give better advice.
Thanks - original HDD in place, been performing more slowly by increments through the last two or three OS changes. Now just not happening except in its own time warp which is not ours. Not doing any proper work on my MBP which involves processing power all heavy duty stuff on the iMac now. It was used for DJ ing with Ableton which isn’t even installed now. Like to get it back on track though...Are you currently using a SSD or HDD?
What do you typically do on your MBP?
Also, can you post your specs?
If you are using a HDD, I suspect that is the issue.
It has been shown that there is a significant performance loss with APFS on HDDs, and for some reason, has gotten so much worse on Catalina.
A have seen a lot of people with slowdown issues after upgrading to Catalina on HDDs.
If you are currently using a SSD, was this an upgrade that you did, or did you get it that way from Apple?
If you did the upgrade yourself, I wonder if TRIM is enabled.
If it is an Apple SSD, then maybe it is starting to go or a cable issue.
Let us know more info, and we can probably give better advice.
MBP mid 2012 15” 8 Gb Ram 1600 MHz DDR3Thanks - original HDD in place, been performing more slowly by increments through the last two or three OS changes. Now just not happening except in its own time warp which is not ours. Not doing any proper work on my MBP which involves processing power all heavy duty stuff on the iMac now. It was used for DJ ing with Ableton which isn’t even installed now. Like to get it back on track though...
I would bet money that your issue is the HDD. It is known that they are horrible with Catalina, and plus there is a lot of age on that HDD, so I am sure that is helping any.original HDD in place
I would highly suggest getting a SSD. They are super easy to install your your MBP, and the 1TB SATA SSDs are pretty cheap now.
You can get a cheap USB3 enclosure or USB3/SATA cable and a 1TB SSD for less than $100.
Connect the SSD to the Mac with the enclosure or adapter cable and format the SSD. You can then either clone your HDD to your SDD, or install Catalina and just use Apple's Migration Assistant to migrate all your files over to the new SSD.
Then install it. Really easy.
I am telling you, it will feel like a totally different computer.
You can use this guide from Apple to see if you could benefit from additional RAM, but adding a SSD would have a much bigger effect on performance:I‘m thinking of taking the RAM from 8 to 16 Gb
Check if your Mac needs more RAM in Activity Monitor
Use Activity Monitor on your Mac to see if memory is being used efficiently and if you need more memory (RAM).
Opening up your MBP is super easy, so if you wanted to get the SSD first and see how everything goes, and then later invest in some RAM if you need it.
I would definitely priorities the SSD over the RAM in this particular case.
Thanks - appreciate your input and this is looking like the likely option. The previous correspondent also suggested changing the cable which is known to have issues, may as well, as the thought of stumping up for a new one is not in the equation.....I would bet money that your issue is the HDD. It is known that they are horrible with Catalina, and plus there is a lot of age on that HDD, so I am sure that is helping any.
I would highly suggest getting a SSD. They are super easy to install your your MBP, and the 1TB SATA SSDs are pretty cheap now.
You can get a cheap USB3 enclosure or USB3/SATA cable and a 1TB SSD for less than $100.
Connect the SSD to the Mac with the enclosure or adapter cable and format the SSD. You can then either clone your HDD to your SDD, or install Catalina and just use Apple's Migration Assistant to migrate all your files over to the new SSD.
Then install it. Really easy.
I am telling you, it will feel like a totally different computer.
One more thing, you may need to enable TRIM once you get your SSD installed.
You do it in terminal if you need to, but it is just one line entry. You can search it up or ask here for help if you need to enable it, but it is a really easy thing to do. You check to see if you need to enable TRIM in the system profile, it is under the SATA section.
Also, if you need help or advice on anything else with the SSD install, just ask us here. But, like I said, that particular upgrade is really easy, and I wish it was that easy on other Macs.
When I added a SSD and RAM to my Late 2011 17" MBP, it took maybe 10 minutes max for the physical install.
I have a suggestion for SATA/USB cable:
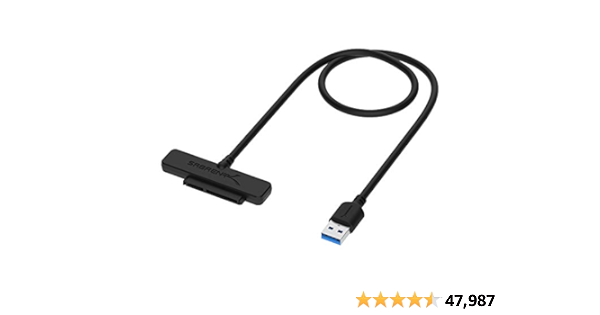
I bought a few of these for my 2.5" drives. I like them over using enclosures because they are quick in speed and assembly, have long cables, and cheap.
If this was a more complex install or a Mac that was more difficult to open, then I would consider doing the SSD, RAM, and SATA cable all together, but it only takes a minute to open the Mid 2012 MBP. I would just replace what you know matters, and leave the other stuff for later if they are a problem as well.
One potential issue with doing multiple things is that if you get your MBP all back together and stuff isn't working, you don't know which one of the things you replaced is causing the issue.
Of course, if you would just want to knock it all out together, thats okay too.
You do it in terminal if you need to, but it is just one line entry. You can search it up or ask here for help if you need to enable it, but it is a really easy thing to do. You check to see if you need to enable TRIM in the system profile, it is under the SATA section.
Also, if you need help or advice on anything else with the SSD install, just ask us here. But, like I said, that particular upgrade is really easy, and I wish it was that easy on other Macs.
When I added a SSD and RAM to my Late 2011 17" MBP, it took maybe 10 minutes max for the physical install.
I have a suggestion for SATA/USB cable:
SABRENT USB 3.0 to SSD / 2.5 Inch SATA I/II/III Hard Drive Adapter (EC-SSHD)
Product Description:Take advantage of the lightening speed of USB 3.0 to quickly transfer files up to 5 Gbps! Connect any 2.5'' Serial ATA (SATA) / SSD or SATA II Hard Drive to your computer through an available USB 3.0 port on your desktop or laptop. Reverse compatible with USB 2.0 and 1.1, this...
www.amazon.com
I bought a few of these for my 2.5" drives. I like them over using enclosures because they are quick in speed and assembly, have long cables, and cheap.
This could be an issue as it is not uncommon, but again, I would bet money that it is the HDD. I personally like to keep things simple and replace the stuff that needs to be replaced. At least on something like the Mid 2012 MBP.The previous correspondent also suggested changing the cable which is known to have issues
If this was a more complex install or a Mac that was more difficult to open, then I would consider doing the SSD, RAM, and SATA cable all together, but it only takes a minute to open the Mid 2012 MBP. I would just replace what you know matters, and leave the other stuff for later if they are a problem as well.
One potential issue with doing multiple things is that if you get your MBP all back together and stuff isn't working, you don't know which one of the things you replaced is causing the issue.
Of course, if you would just want to knock it all out together, thats okay too.
As an Amazon Associate, MacRumors earns a commission from qualifying purchases made through links in this post.
Sounds sensible to me!One more thing, you may need to enable TRIM once you get your SSD installed.
You do it in terminal if you need to, but it is just one line entry. You can search it up or ask here for help if you need to enable it, but it is a really easy thing to do. You check to see if you need to enable TRIM in the system profile, it is under the SATA section.
Also, if you need help or advice on anything else with the SSD install, just ask us here. But, like I said, that particular upgrade is really easy, and I wish it was that easy on other Macs.
When I added a SSD and RAM to my Late 2011 17" MBP, it took maybe 10 minutes max for the physical install.
I have a suggestion for SATA/USB cable:
SABRENT USB 3.0 to SSD / 2.5 Inch SATA I/II/III Hard Drive Adapter (EC-SSHD)
Product Description:Take advantage of the lightening speed of USB 3.0 to quickly transfer files up to 5 Gbps! Connect any 2.5'' Serial ATA (SATA) / SSD or SATA II Hard Drive to your computer through an available USB 3.0 port on your desktop or laptop. Reverse compatible with USB 2.0 and 1.1, this...www.amazon.com
I bought a few of these for my 2.5" drives. I like them over using enclosures because they are quick in speed and assembly, have long cables, and cheap.
This could be an issue as it is not uncommon, but again, I would bet money that it is the HDD. I personally like to keep things simple and replace the stuff that needs to be replaced. At least on something like the Mid 2012 MBP.
If this was a more complex install or a Mac that was more difficult to open, then I would consider doing the SSD, RAM, and SATA cable all together, but it only takes a minute to open the Mid 2012 MBP. I would just replace what you know matters, and leave the other stuff for later if they are a problem as well.
One potential issue with doing multiple things is that if you get your MBP all back together and stuff isn't working, you don't know which one of the things you replaced is causing the issue.
Of course, if you would just want to knock it all out together, thats okay too.
As an Amazon Associate, MacRumors earns a commission from qualifying purchases made through links in this post.
Everything has (unsupringly) come to a painful grinding halt with the simplest of tasks since making the the mistake of allowing all updates. Now running - extremely slooooowly Catalina. I‘m thinking of taking the RAM from 8 to 16 Gb and fitting a SSD from Crucial. Any thought as to whether this is worth the effort - not in the market for a new one, at the moment I have a lump of stone rather than the useful kit it was....it will cost £200
I have the base model mid 2012 13" macbook pro, not sure what the original specs were, 2.5GHz cpu and 4Gb RAM perhaps? Maybe 4 years ago I upgraded the RAM to 8Gb and added a 256Gb Crucial SSD. That made a big difference at the time, I think the SSD was probably the most noticeable change to performance.
After changing the SSD I started to get some weird performance problems so I took it to the Apple store where they diagnosed a damaged HDD cable, (as suggested above). After changing the cable everything has been fine.
I started getting issues last year with the Macbook getting hot, and occassionally it crashed, I'd leave it nd come back to find a grey screen with a folder icon with a question mark in it...no hard drive/OS found. Rebooting fixed the issue but I took that as a hint that we were approaching end of life so I bought a Macbook Air i5 base spec when the 2020 models were released earlier this year.
In comparison the Macbook Pro is a little laggy compared to the Macbook Air, but I think the Macbook Air gets hotter and the fans are audible more often. The Macbook Pro is still working as a secondary machine and doesn't crash like it used to now it's not my daily driver.
Overall I'd say if you're not ready to move to a new Mac then an SSD upgrade is well worth the investment. Just be aware that you're investing in vintage tech without support from Apple. The SSD can easily be reused with an external enclosure if the worst comes to the worst so it's not a wasted investment. I'd update the SSD before the RAM and see what affect that has.
It's a great machine, hope it keeps going, (as does mine!), for a few more years!
Forgot to mention, I've updated macOS every year without significant issues, though I've held off Catalina until a couple of weeks ago because it seems to be a little unreliable. Big Sur won't be available as an update so Catalina is the end of the line if that's a factor for you?
Definitely worth a SSD and 16GB update IMO. Those 15-inch 2012 Unibodies are built like tanks, and once you up the RAM and SSD, the only major bottleneck is the GPU, which for many users isn't that big of a deal. As others have noted, you will be blown away with the difference. Something like a Samsung 860 Evo will make your system like anew.
Thank you, appreciate the input - no I don't think that not getting Big Sur is an issue for me, at the moment the machine is hardly working anyway!I have the base model mid 2012 13" macbook pro, not sure what the original specs were, 2.5GHz cpu and 4Gb RAM perhaps? Maybe 4 years ago I upgraded the RAM to 8Gb and added a 256Gb Crucial SSD. That made a big difference at the time, I think the SSD was probably the most noticeable change to performance.
After changing the SSD I started to get some weird performance problems so I took it to the Apple store where they diagnosed a damaged HDD cable, (as suggested above). After changing the cable everything has been fine.
I started getting issues last year with the Macbook getting hot, and occassionally it crashed, I'd leave it nd come back to find a grey screen with a folder icon with a question mark in it...no hard drive/OS found. Rebooting fixed the issue but I took that as a hint that we were approaching end of life so I bought a Macbook Air i5 base spec when the 2020 models were released earlier this year.
In comparison the Macbook Pro is a little laggy compared to the Macbook Air, but I think the Macbook Air gets hotter and the fans are audible more often. The Macbook Pro is still working as a secondary machine and doesn't crash like it used to now it's not my daily driver.
Overall I'd say if you're not ready to move to a new Mac then an SSD upgrade is well worth the investment. Just be aware that you're investing in vintage tech without support from Apple. The SSD can easily be reused with an external enclosure if the worst comes to the worst so it's not a wasted investment. I'd update the SSD before the RAM and see what affect that has.
It's a great machine, hope it keeps going, (as does mine!), for a few more years!
Forgot to mention, I've updated macOS every year without significant issues, though I've held off Catalina until a couple of weeks ago because it seems to be a little unreliable. Big Sur won't be available as an update so Catalina is the end of the line if that's a factor for you?
I got the MBP 13" 2012. 16GB. 128 GB SSD (400MB/s read/write) plus 1 TB HDD instead of CD/DVD drive. This one performs pretty well even with BigSur. I heard of EVO SSDs are being faster when looking at the benchmarks, however real life Finder speeds are always way below that. The MBP mid 2012 is not really made for handling/editing 4k video, so 16GB only come in handy when using Safari or Firefox or wanting to keep lots of Apps open in the background.
Are you going to do a fresh install of Catalina or clone your existing drive? I put the SSD into a cheap usb 3.0 SATA 2.5" external enclosure to clone the HD with Carbon Copy (freeware) then swapped out the internal HD with the cloned SSD. Amazing what it did to my mid-2012 non retina 13" MBP! I only increased my ram to 8GB.Thanks to everyone for all the help with my question - I've gone ahead and ordered a 1TB SSD from Crucial. Hopefully that should do the trick. If not I'll look at replacing the Sata Cable next....
If you are going to do a fresh install on your SSD, put it in an external enclosure and format the SSD to a Mac compatible file system then pop the SSD into your Mac.
Last edited:
OP:
Some additional advice:
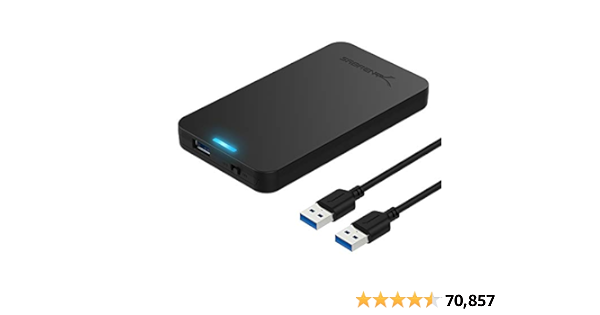
BEFORE you do the job, you might consider getting a 2.5" USB3 enclosure like this:
Reason:
When you get the SSD, put it into the enclosure FIRST.
Now, get it "prepped and tested" this way BEFORE you open up the MacBook.
This way, if something doesn't work out right, YOU STILL HAVE A WORKING MACBOOK with which to diagnose and straighten things out.
Once you've got the drive set up as you like (do a test boot in the enclosure), then it's time to "open up and do the surgery".
Once the old drive is out, put it into the enclosure.
It can then serve as a backup or for extra storage...
Some additional advice:
BEFORE you do the job, you might consider getting a 2.5" USB3 enclosure like this:
SABRENT 2.5 Inch SATA to USB 3.0 Tool Free External Hard Drive Enclosure [Optimized for SSD, Support UASP SATA III] Black (EC-UASP)
SABRENT 2.5 Inch SATA to USB 3.0 Tool Free External Hard Drive Enclosure [Optimized for SSD, Support UASP SATA III] Black (EC-UASP)
tinyurl.com
Reason:
When you get the SSD, put it into the enclosure FIRST.
Now, get it "prepped and tested" this way BEFORE you open up the MacBook.
This way, if something doesn't work out right, YOU STILL HAVE A WORKING MACBOOK with which to diagnose and straighten things out.
Once you've got the drive set up as you like (do a test boot in the enclosure), then it's time to "open up and do the surgery".
Once the old drive is out, put it into the enclosure.
It can then serve as a backup or for extra storage...
Sounds like good advice...OP:
Some additional advice:
BEFORE you do the job, you might consider getting a 2.5" USB3 enclosure like this:
SABRENT 2.5 Inch SATA to USB 3.0 Tool Free External Hard Drive Enclosure [Optimized for SSD, Support UASP SATA III] Black (EC-UASP)
SABRENT 2.5 Inch SATA to USB 3.0 Tool Free External Hard Drive Enclosure [Optimized for SSD, Support UASP SATA III] Black (EC-UASP)tinyurl.com
Reason:
When you get the SSD, put it into the enclosure FIRST.
Now, get it "prepped and tested" this way BEFORE you open up the MacBook.
This way, if something doesn't work out right, YOU STILL HAVE A WORKING MACBOOK with which to diagnose and straighten things out.
Once you've got the drive set up as you like (do a test boot in the enclosure), then it's time to "open up and do the surgery".
Once the old drive is out, put it into the enclosure.
It can then serve as a backup or for extra storage...
I would install the ssd and check the speed before replacing the sata cable. The SATA cable is much more prone to go bad in the 13 inch models (from 2009-2012) than the 15 inch MBP (if you believe all the forum posts). I have a 2012 MPB 13 and have replaced the cable twice.
I've updated 5 MBP 13's of those years, including two of my own 2012's (put in SSD's, more ram, etc.) and did not have to replace any of their SATA cables. Removed the broken DVD and put a second drive on mine.
Your heat issue could be 8 + years of dust collecting in it, so blow out the fan, heat sink fins, etc when you have it opened up. You can install Macs Fan control to check that your fan actually works.
Both the 2012 13" and 15" are really great MBP's. Still using some 32 bit programs so can't go to Catalina, I stopped upgrading at Mojave which is very, very stable, works like a dream.
Register on MacRumors! This sidebar will go away, and you'll see fewer ads.