Become a MacRumors Supporter for $50/year with no ads, ability to filter front page stories, and private forums.

MacRumors

macrumors bot
Original poster
Apr 12, 2001
67,547
37,903


In macOS, you can easily convert the format of images using a Quick Action in Finder or you can achieve the same thing via the Preview app, but if your daily workflow requires you to repeatedly convert images – for uploading to a blog, for example – then using a Folder Action can be a much faster way of getting the job done.

finder-images-folder.jpg

In this article, we'll show you how to use the macOS Automator app to create a very simple Folder Action that will automatically convert images dropped into a specific folder, without you having to manually apply a Quick Action or open an image editing app. Keep reading to learn how it's done.

How to Create an Image Converting Folder in Automator

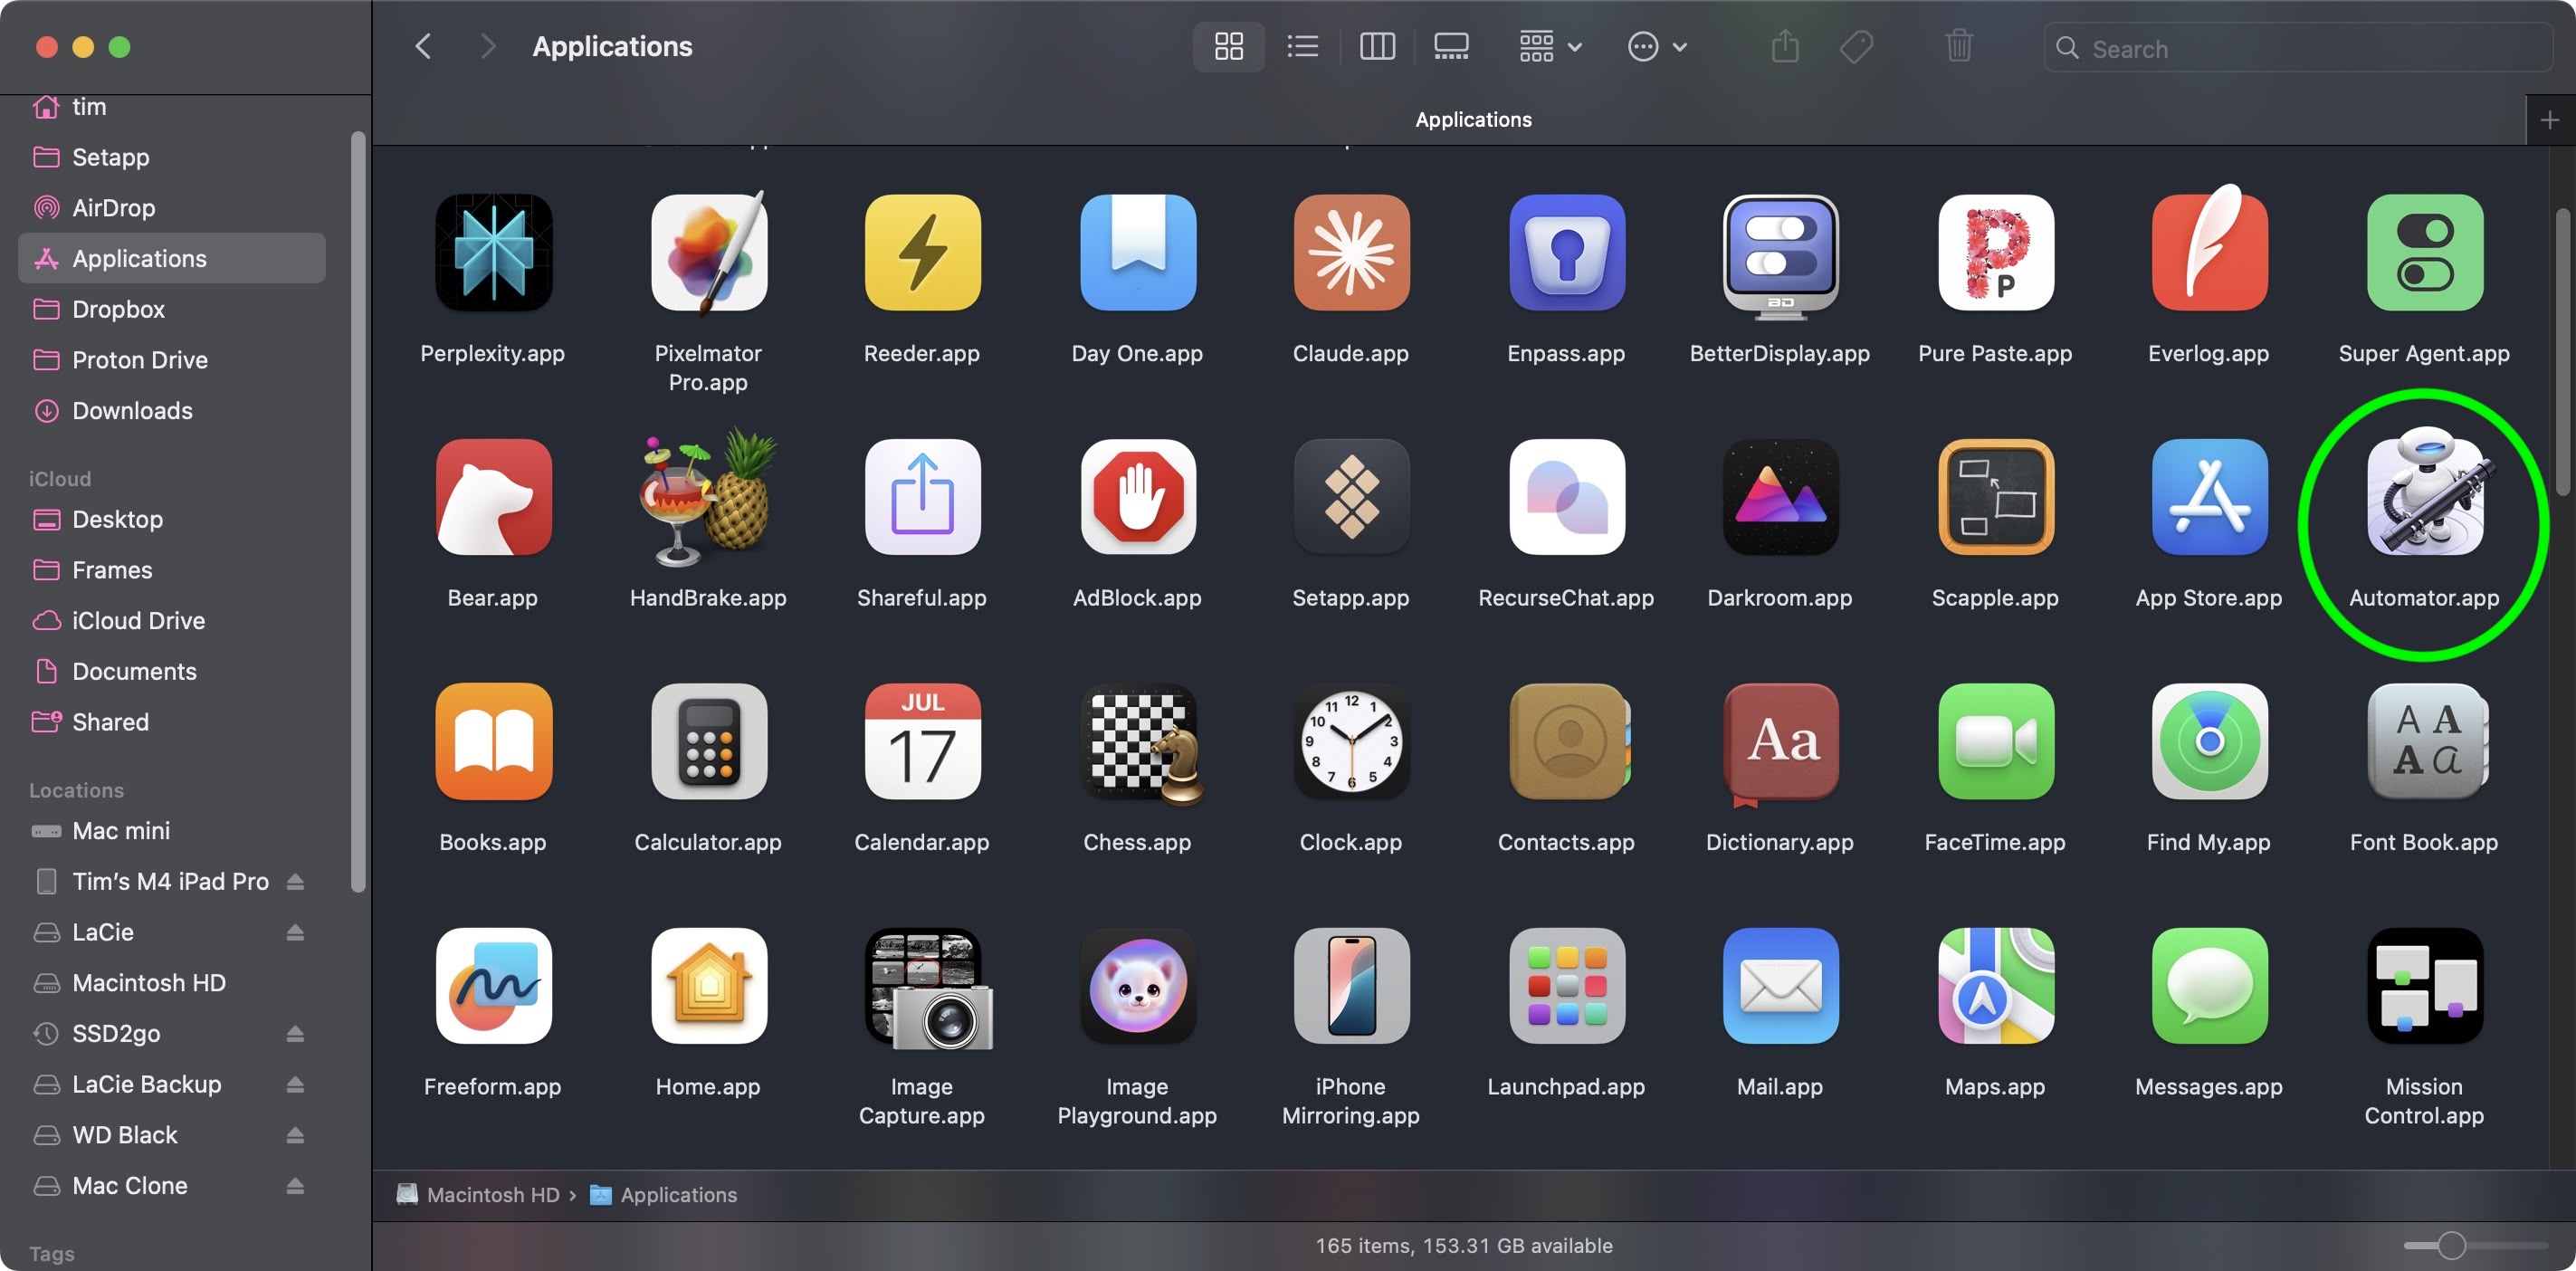
  1. Launch Automator from the Applications folder.
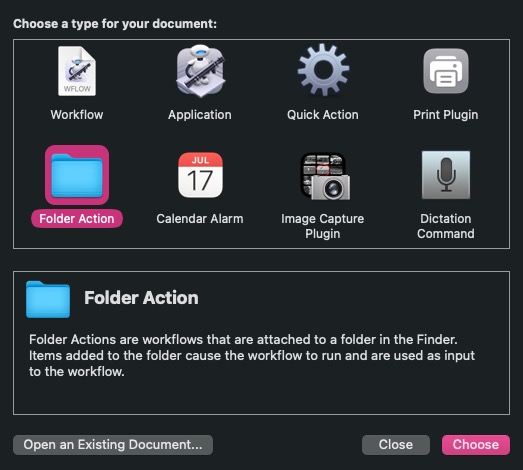
    finder-automator.jpg

    Click New Document.
  2. Choose Folder Action as the type of your document.
    folder-action-automator.jpg

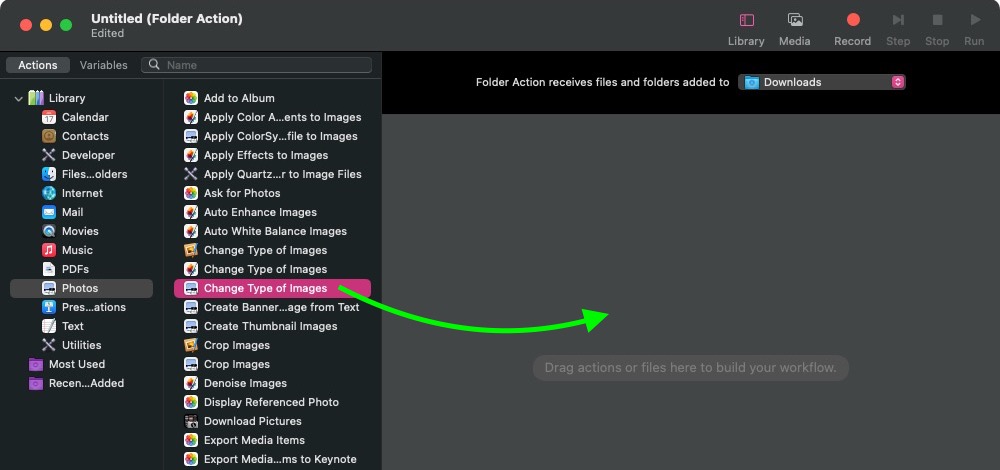
    At the top of the workflow area, click the dropdown next to Folder Action receives files and folders added to: then select Other....
    folder-action-1.jpg

    Select the folder that you'd like to attribute the image conversion action to. In our example, we're choosing the Downloads folder.
  3. From the Library sidebar on the far left, select Photos.
  4. From the Actions column, drag Change Type of Images (the one with the Preview icon) to the workflow area.
    change-image-type.jpg

    A dialog prompt will appear. If you want your action to convert copies of images placed in the folder and preserve the originals, select Add. If you want it to convert the original images, select Don't Add.
  5. In the Change Type of Images action panel, choose the type of format that you want images to be converted to. We're selecting JPG.
    convert-jpg-action.jpg

    In the Automator menu bar, select File -> Save... or press Command-S, call your new file action "Convert Image," then click Save.
That's all there is to it. Next time you want to convert an image into your preferred format, simply drag it into the folder that you assigned the action to.

Now that you know how to create the image conversion workflow in Automator, you may want to turn it into a standalone "Application," the option for which you can find in Automator's document menu. An "Application" is a self-running workflow that acts as a droplet – any files or folders dropped onto it are used as input to the workflow. In other words, you could add an "Application" to your Dock and drop images onto it for conversion.

You can also import Automator workflows into the Shortcuts app. Shortcuts can convert most Automator workflows into shortcuts that carry out the same functions, events and automations — you simply drag a workflow file into Shortcuts and the conversion happens automatically.

Article Link: Turn Any macOS Folder Into an Image Converter – Here's How
 
I have my own Quick Action workflows in AppleScript and they can convert multiple images to a specific format and display the progress on Terminal.
 
Love these these tips MacRumors - not that I use all of them.
But once in a while....
 
I've always wanted something like this but was too lazy to do it myself. I got this up and running in a minute, thanks to MR!
 
I have my own Quick Action workflows in AppleScript and they can convert multiple images to a specific format and display the progress on Terminal.
Love Quick Actions. I’ve used them to set Genre metadata in movies among other things. Used scripting along with subler CLI.
 
  • Like
Reactions: Digger148
Automator does an incredible amount of stuff, no doubt; MR could drop a tip a week on Automator workflows and likely never run out of nuggets that only a few people know about.

In the past, I've used GraphicConverter (a really great "poor man's PhotoShop" for Mac) to do this particular task, but it doesn't surprise me in the least that Automator can do it now, too. I do find myself wondering, though... anyone happen to know when this particular feature surfaced in Automator?
 
Lossless WebP is the second most efficient lossless image format only behind JPEG XL.
They probably meant the format was useless because nothing supports it and weren’t concerned with compression and quality loss. I too find myself always converting away from WebP though usually not to a standard jpeg. However many will find the standard jpeg the most useful as they are primarily interested in sharing images, not preserving them.
 
Great tip, if you’re going to use images that you took on your phone to post on a public website, it would also be smart to remove the meta data so people can’t pull the location data off your photos.
 
What is the oldest mac os that can do this?
No idea this was a thing... it is a chore having to use ezgif or similar for this stuff!
 
No *.webp export from the Folder Action, and no *.webp import into MacRumors's Forum 🤷‍♂️

Love the implication of the idea, though :)
 
They probably meant the format was useless because nothing supports it and weren’t concerned with compression and quality loss. I too find myself always converting away from WebP though usually not to a standard jpeg. However many will find the standard jpeg the most useful as they are primarily interested in sharing images, not preserving them.
The support of WebP has been growing significantly recent years, and even softwares from Japan such as CSP now fully support it. I wouldn't recommend lossless WebP for preserving images either as the features of WebP are very limited.


8-bit only means no HDR which is a big NO. With the new encoder Jpegli introduced last year, JPEG's lifespan is expanded again.
 
Register on MacRumors! This sidebar will go away, and you'll see fewer ads.