Things you will need
Step 1: Setup
In 10.5 Apple has changed their package type to xar, unfortunately it is not built into Tiger. Luckily an opensource app called Darwin Ports, has ports of all sorts of open source things. I will detail this section more later for those having trouble. I ran into a problem, but I don't remember how I solved it, basically the package update wouldn't run. If someone runs into it, I will let them know how to fix it. (This turned out to be the C compiler)
Install Darwin Ports. Installation instructions are on the page after you download.
*NOTES* If you get the following error: "no acceptable C compiler found in $PATH," this is because you have no compiler. This is the issue I ran into and I realized I hadn't installed XCODE on this Mac. I have the disk from my developer tools so I installed it from there. You can also get it here: Developer Tools
Next you will need to install xar, the installation instructions are on the linked page.
Also, install Carbon Copy Cloner, you can get this here. CCC
Now you are ready for the fun, assuming everything is working!
Step 2: Make a new image
Use your disc or dmg to create a sparse image, this will maintain the disc contents with block level copying, it will also make your image write-able. Use Carbon Copy Cloner to make the sparse image. Carbon Copy Cloner is pretty straight forward, on the left side choose "Restore from disk image" and on the right choose "New disk image." You will get a dialog select the location for the image and give it a name. Further be sure to select the read and write option. Then run the clone. CCC is actually heaps faster than FreeDMG anyhow.
Now, once you have the new dmg. Get info on it, expand the Ownership and Permission section and be sure to set yourself up to have read and write access. (you will need to authenticate with the lock).
This process worked like a charm for me when I tested it on 10-26-2007. This is one of the definite routes to take. See the following to get an idea of what I sorta know. I apologize for not being able to test every option and honestly when I made the guide i had fumbled through the whole process myself. I reinstalled Tiger however to make this guide better. 🙂
This relates to number 6, which I know some people have had trouble with. I did too, and tons of it. To be honest, I don't remember the exact way I ended up doing it. I am testing out better methods to make this work better. Here are some things I know and don't know.
1. FreeDMG does not work for doing this.
2. CCC may work for doing this, it is also faster
3. Burning the original DMG to disk and using diskutil to make a read-write image may work as well, it would be nice to cut out the burning step.
4. Not also that Diskutil has a converting option. In my tests this did not work, however it could have been my source DMG.
I will stress here the idea of having a clean DMG/Disk. If you have a Leopard disk, I strongly advise creating an image from it in diskutil or possibly CCC.
Step 3: Bust it open!
If you are good with terminal, copy the following file from the mounted image (/System/Installation/Packages/OSInstall.mpkg somewhere so you can work on it (Desktop works well), for those not so good, you can use this terminal command which is useful anyway! I have found that depending on the build version or dmg you have, it may or may not show the folders. If it does show it, you don't have to do this next step.
Followed by
This will show all hidden files. To change it back, simply change the value to False and kill the Finder. Now, go into to the DMG, you should see some new stuff in there. You want to navigate to /System/Installation/Packages/OSInstall.mpkg, copy this file to the desktop.
Now create a folder called package on the Desktop. Fire up terminal again, navigate to the package folder. You should be at the home directory by default so you can type the following:
Now comes the fun part. Type the following:
If this fails, there is a problem with your xar installation. I will work with you to troubleshoot this. If it works you should see some files being extracted to the package folder. Great!
Step 4: Hack that code!
Now, if you made it here we are getting close. Now, go into the package folder you made. You should see a file called Distribution. Good, back it up somewhere and then open the original with Textedit. You should now see some wonderful code. You want to pay attention to this part of the script (changed to GM version):
Now, you can probably see where you need to make edits. First take a look at the G3 section. You can simply change it to return true, if you need to install on a G3. It has been said that you still can't install on a G3, I have no way to test this at the moment. I have to wonder though, why even add a section about G3s if it was just not an option (as in you couldn't even boot the disk as some have said). Same goes for the badMachines section. Or you can also simply remove the "bad machines" you have.
Now comes the cpu speed.
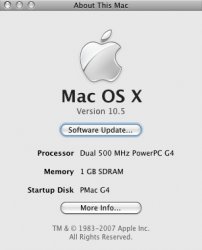
Where 'xxx' is the minimum processor speed. I have a DP 500 (which makes no difference, it is still seen at 500Mhz), so I changed mine to 499. I don't think you will gain any advantage by dropping it lower than the speed you need, other than having a disc that can be used on any Mac if you drop it to say, 0Mhz, although I would do 1Mhz as 0 may cause a problem.
Simple changing the false to a true will also work here. And is probably a more elegant solution throughout. I actually think removing the entire section would be the best solution. However, I have not tested this theory. My concern is that something else is there to be sure these things have returned values. Until we get a test on this, I am more inclined to say the section should remain in place, but simply be edited.
You can also edit the RAM and anything else really. Just be sure what you are doing will help you in some way 😉
Now, save the document and exit textedit.
Step 5: Wrap it up
Now we are going to reverse the step 3 by repackaging the altered contents. Hop back into terminal and type the following:
And just like that, you should have a new package on your desktop.
Step 6: New mpkg placement
Now that we have a new mpkg, navigate back to the /System/Installation/Packages folder. Rename the old OSInstall.mpkg, I usually do OSInstall.mpkg.old, Finder will ask if you want to append the new extension, say yes. Now, drop in the NewOSInstall.mpkg, rename it to OSInstall.mpkg.
You now have a disc image ready.
I know there have been some problems with this. Admittedly I also had a big problem with this part. My solution was to burn the dmg to DVD, then rip it back. Again, I also think this is largely related to the integrity of the original image you are working with. If you are working with a torrent or slightly modified image, it won't work so well. If you are working with a clean image and or ripping from DVD, the sparseimage should work flawlessly (pending you set permission properly). I am in the process of making this an easier and more clear process.
Step 7: Resizing the image for SL-DVD (optional)
Coming soon!
Step 8: Burn it baby!
Now it is time to burn the image to a DVD. You can do one of two things, burn the sparseimage or make a read only cd master out of the image. I originally made a cdr image, but that didn't work too well. Burning the sparseimage worked best for me. Your mileage may vary. Note though, my DVD burner is a max 4x. (EDIT: I got a new burner, 20x woot!) Anyhow, try the sparseimage out, if that doesn't work try to make a read only image.
You can use diskutil to burn the image.
Step 9: The true test
Now you have the DVD. Lets boot it up. You will know right away whether or not it worked. You will get the message right away. If so, you possibly made a mistake somewhere. Once you get to actual menu to install Leopard you are home free!
Some have been getting kernel panics when the disk is loading, here is what some have said will work.
Add:
AppleCore99PE.kext
AppleMLANAudio.kext
Replace:
AppleMPIC.kext
ApplePMU.kext
When I get the GM, I will be sure to see what happens on mine without changing the kexts. Power Mac G4, DP 500, Gigabit.
Edits to come:
Have fun!
- A Mac
- Decent DVD burner, DL is best
- A clean Leopard disc or official dmg
- A decent image manipulator, Carbon Copy Cloner or disc utility
- Darwin Ports with xar installed, if running Tiger or below. Don't need this if running Leopard.
- Terminal knowledge, helps, but I will give commands too. Mainly don't be afraid to do some things manually.
- Patience
Step 1: Setup
In 10.5 Apple has changed their package type to xar, unfortunately it is not built into Tiger. Luckily an opensource app called Darwin Ports, has ports of all sorts of open source things. I will detail this section more later for those having trouble. I ran into a problem, but I don't remember how I solved it, basically the package update wouldn't run. If someone runs into it, I will let them know how to fix it. (This turned out to be the C compiler)
Install Darwin Ports. Installation instructions are on the page after you download.
- Download from here: http://darwinports.com/download/
- Run the installer
- I found that a restart was good at this point
- Run terminal and type the following
Code:
sudo port -d selfupdate - The darwin ports install should be complete now.
*NOTES* If you get the following error: "no acceptable C compiler found in $PATH," this is because you have no compiler. This is the issue I ran into and I realized I hadn't installed XCODE on this Mac. I have the disk from my developer tools so I installed it from there. You can also get it here: Developer Tools
Next you will need to install xar, the installation instructions are on the linked page.
- If everything went well with the DarwinPorts installation continue with this
- In Terminal type
Code:
sudo port install xar - Depending on the speed of the Mac this may take some time since it needs to get the dependencies and compile
- If everything goes without error you have successfully installed XAR
Also, install Carbon Copy Cloner, you can get this here. CCC
Now you are ready for the fun, assuming everything is working!
Step 2: Make a new image
Use your disc or dmg to create a sparse image, this will maintain the disc contents with block level copying, it will also make your image write-able. Use Carbon Copy Cloner to make the sparse image. Carbon Copy Cloner is pretty straight forward, on the left side choose "Restore from disk image" and on the right choose "New disk image." You will get a dialog select the location for the image and give it a name. Further be sure to select the read and write option. Then run the clone. CCC is actually heaps faster than FreeDMG anyhow.
Now, once you have the new dmg. Get info on it, expand the Ownership and Permission section and be sure to set yourself up to have read and write access. (you will need to authenticate with the lock).
This process worked like a charm for me when I tested it on 10-26-2007. This is one of the definite routes to take. See the following to get an idea of what I sorta know. I apologize for not being able to test every option and honestly when I made the guide i had fumbled through the whole process myself. I reinstalled Tiger however to make this guide better. 🙂
This relates to number 6, which I know some people have had trouble with. I did too, and tons of it. To be honest, I don't remember the exact way I ended up doing it. I am testing out better methods to make this work better. Here are some things I know and don't know.
1. FreeDMG does not work for doing this.
2. CCC may work for doing this, it is also faster
3. Burning the original DMG to disk and using diskutil to make a read-write image may work as well, it would be nice to cut out the burning step.
4. Not also that Diskutil has a converting option. In my tests this did not work, however it could have been my source DMG.
I will stress here the idea of having a clean DMG/Disk. If you have a Leopard disk, I strongly advise creating an image from it in diskutil or possibly CCC.
Step 3: Bust it open!
If you are good with terminal, copy the following file from the mounted image (/System/Installation/Packages/OSInstall.mpkg somewhere so you can work on it (Desktop works well), for those not so good, you can use this terminal command which is useful anyway! I have found that depending on the build version or dmg you have, it may or may not show the folders. If it does show it, you don't have to do this next step.
Code:
defaults write com.apple.finder AppleShowAllFiles True
Code:
Killall FinderThis will show all hidden files. To change it back, simply change the value to False and kill the Finder. Now, go into to the DMG, you should see some new stuff in there. You want to navigate to /System/Installation/Packages/OSInstall.mpkg, copy this file to the desktop.
Now create a folder called package on the Desktop. Fire up terminal again, navigate to the package folder. You should be at the home directory by default so you can type the following:
Code:
cd desktop/packageNow comes the fun part. Type the following:
Code:
xar -x -v -f ~/Desktop/OSInstall.mpkgIf this fails, there is a problem with your xar installation. I will work with you to troubleshoot this. If it works you should see some files being extracted to the package folder. Great!
Step 4: Hack that code!
Now, if you made it here we are getting close. Now, go into the package folder you made. You should see a file called Distribution. Good, back it up somewhere and then open the original with Textedit. You should now see some wonderful code. You want to pay attention to this part of the script (changed to GM version):
Code:
 var minRam = 512;

	function checkSupportedMachine(machineType){
		// Fail on G3
		if (1 != system.sysctl('hw.vectorunit') ) {
			return false;
		}

		var badMachines = ['MacBook3,1','iMac','PowerBook1,1','PowerBook2,1', 'AAPL,Gossamer', 'AAPL,PowerMac G3', 'AAPL,PowerBook1998', 'AAPL,PowerBook1999'];

		if(machineType){
			var length = badMachines.length;

			// Fail if any of the compatible values match the list of badMachines
			for( var j = 0; j < length; j++ ){
				if(machineType == badMachines[j]){
						return false;
				}

			}

		}

		// require 867Mhz+
		if (system.sysctl("hw.cpufrequency") < 866000000) {
			return false;
		}

		return true;
	}
Now, you can probably see where you need to make edits. First take a look at the G3 section. You can simply change it to return true, if you need to install on a G3. It has been said that you still can't install on a G3, I have no way to test this at the moment. I have to wonder though, why even add a section about G3s if it was just not an option (as in you couldn't even boot the disk as some have said). Same goes for the badMachines section. Or you can also simply remove the "bad machines" you have.
Now comes the cpu speed.
Code:
if (system.sysctl("hw.cpufrequency") < xxx000000) {
return false;
Where 'xxx' is the minimum processor speed. I have a DP 500 (which makes no difference, it is still seen at 500Mhz), so I changed mine to 499. I don't think you will gain any advantage by dropping it lower than the speed you need, other than having a disc that can be used on any Mac if you drop it to say, 0Mhz, although I would do 1Mhz as 0 may cause a problem.
Simple changing the false to a true will also work here. And is probably a more elegant solution throughout. I actually think removing the entire section would be the best solution. However, I have not tested this theory. My concern is that something else is there to be sure these things have returned values. Until we get a test on this, I am more inclined to say the section should remain in place, but simply be edited.
You can also edit the RAM and anything else really. Just be sure what you are doing will help you in some way 😉
Now, save the document and exit textedit.
Step 5: Wrap it up
Now we are going to reverse the step 3 by repackaging the altered contents. Hop back into terminal and type the following:
Code:
xar -c ./ -v -f ~/Desktop/NewOSInstall.mpkgAnd just like that, you should have a new package on your desktop.
Step 6: New mpkg placement
Now that we have a new mpkg, navigate back to the /System/Installation/Packages folder. Rename the old OSInstall.mpkg, I usually do OSInstall.mpkg.old, Finder will ask if you want to append the new extension, say yes. Now, drop in the NewOSInstall.mpkg, rename it to OSInstall.mpkg.
You now have a disc image ready.
I know there have been some problems with this. Admittedly I also had a big problem with this part. My solution was to burn the dmg to DVD, then rip it back. Again, I also think this is largely related to the integrity of the original image you are working with. If you are working with a torrent or slightly modified image, it won't work so well. If you are working with a clean image and or ripping from DVD, the sparseimage should work flawlessly (pending you set permission properly). I am in the process of making this an easier and more clear process.
Step 7: Resizing the image for SL-DVD (optional)
Coming soon!
Step 8: Burn it baby!
Now it is time to burn the image to a DVD. You can do one of two things, burn the sparseimage or make a read only cd master out of the image. I originally made a cdr image, but that didn't work too well. Burning the sparseimage worked best for me. Your mileage may vary. Note though, my DVD burner is a max 4x. (EDIT: I got a new burner, 20x woot!) Anyhow, try the sparseimage out, if that doesn't work try to make a read only image.
You can use diskutil to burn the image.
Step 9: The true test
Now you have the DVD. Lets boot it up. You will know right away whether or not it worked. You will get the message right away. If so, you possibly made a mistake somewhere. Once you get to actual menu to install Leopard you are home free!
Some have been getting kernel panics when the disk is loading, here is what some have said will work.
Add:
AppleCore99PE.kext
AppleMLANAudio.kext
Replace:
AppleMPIC.kext
ApplePMU.kext
When I get the GM, I will be sure to see what happens on mine without changing the kexts. Power Mac G4, DP 500, Gigabit.
Edits to come:
- Screen shots
- More detailed terminal commands
- Troubleshooting tips
- I will turn this into a printable PDF with screenshots in the coming week(s)
- Resizing for SL-DVD
Have fun!