Replying to joywolf and fhall1...
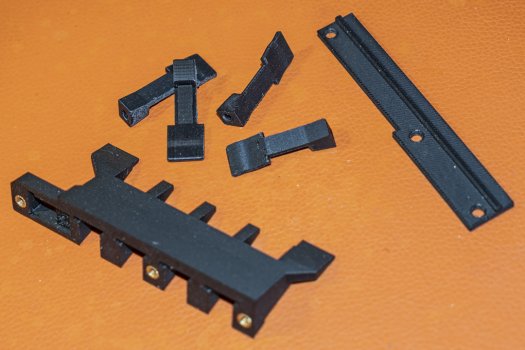
Here's a photo of all the required components. This shows:
1.Housing. The face shown is the one glued to the inside of the chin, the feet at either end rest on the grille's bars to ensure perfect horizontal alignment. 2. 4x Paddle Buttons these slot into the top of the housing once it's glued in place and the Control Strip is then positioned over these with its 4 buttons slotting into the paddle holes 3. Top Plate. I've just included this to give the Control Strip a bit more rigidity once it's sandwiched in between this and the housing with M3 screws (see pic 1 from my previous post). When that's all done, the strip just connects up to the SA1 driver board in the usual way.