So I think I killed my iMac....
Its an 2017 A1419 27 inch
it came with i5 3.8GHz - I wanted to upgrade to an i7-7700, plus 1TB nvme
Got all the parts, watched all the videos
Big day comes - have al my fixit instructions printed out, go through it step by step, have my screws and parts labels all laid out
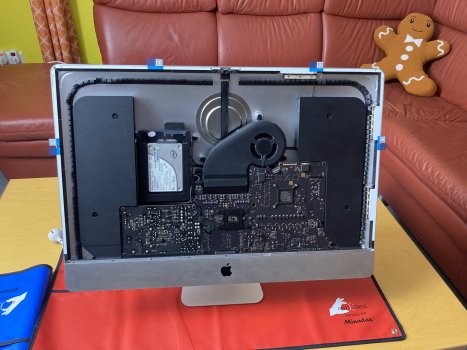
Opened the screen w/ the fixit cutter wheel - OK done - all adhesive came off OK and was careful with the 2 monitor cables
So took all the items out step by step
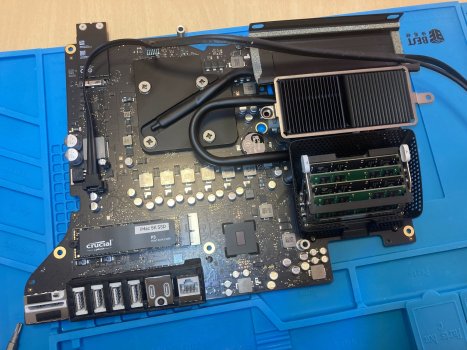
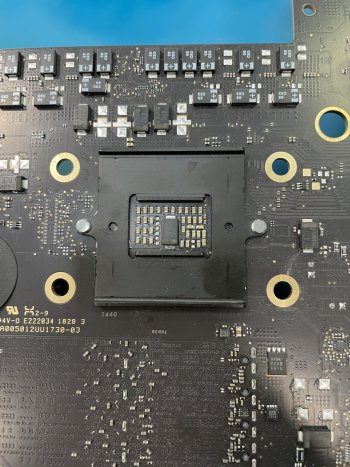
down to the logic board
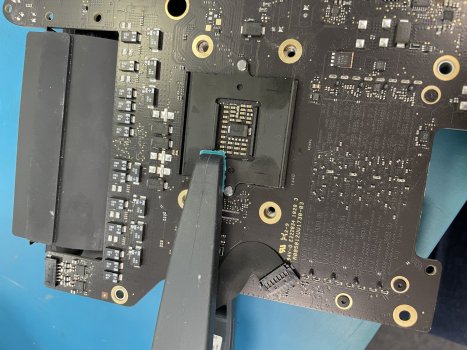
lets just say no video prepared me for the fact that whilst it's really hard to unscrew all 4 CPU screws and all 4 GPU screws, it's downright impossible to put those back without moving the CPU, keeping tension constant and keeping the tension springs held down - you are tightening 4 x screws on either side of the board at the same time - insane - you need 3 pairs of hands!!!
I did my best anyway through a combination of tape, plastic ties and lying on the floor and screwing in from bottom...!
so put it all back together
Did it start up? No Effin way - not a whimper out of it
OK! So take apart again
down to logic board
and yes CPU had moved and was bent at corner
put back in and tried ot power on again - NOPE
so could be the i7 too - bummer
but now of course i am sh___ing it that i damaged the pins
SO - put the original i5 in again
Started with power and fan on full power
but no further
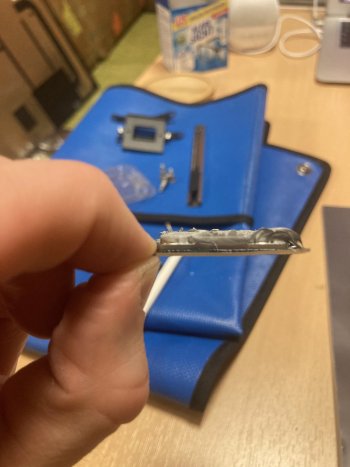
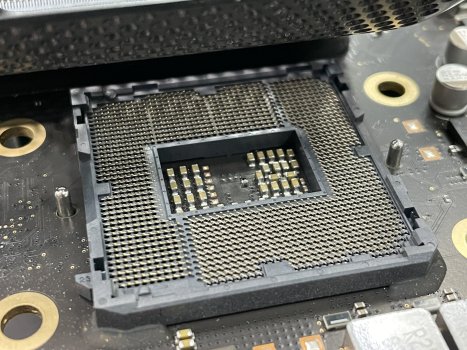
SO looked at pins
yes some bent , one twisted - tried my best to straighten
Put i5 back in - again no boot
SO Logic Board is screw*d
OK - well I need this badly back up and running so bi the bullet and ordered the board from reputable returnable company in UK the book yard. The price is ... a lot. Then add customs and UPS delivery and its €560 - oh my god, cant afford it but got it anyway
so came yesterday - put RAM in, put bluetooth board on, reinstalled , connected the PSU and was getting 4 diagnostic LED's - great
Then connected screen - power on and....
... no chime, no screen
... look behind screen and LEDs go to 4 (with 4 being half-lit)
try connect keyboard and PRAM reset - nothing
try SMC reset - nothing
screen is black and dead
I know - now I am thinking its the screen but try external display thunderbolt 3 to hdmi on 4K external - and nothing !
and its not chiming either .... which to me is weird
I replaced the PRAM battery
and reseated / tried different configurations of RAM while it was on - nope - no differrence
Could it be the hard drive ?
It has the stock NVME that it came with
Booting while holding Cmd-R does nothing
Kind of at wits end now .... could it be something shorted on logic board?
Its new and seems to be coming from a reputable source...
It just powers on, fans go to full speed, 4 LED's all light and nothing... so now I'm thinking have broken original logic board, new logic board AND a screen... 🙄😟 I mean that takes some doing. Not happy with myself to say the least. This machine is for my work as a freelancer and I've basically cost myself a huge amount of money I can't afford. Luckily there's no work / data on it but still.... just feel like an idiot.
Anyone ever seen this where you have 4 LED's and no chime / no OS boot...?
ALL help suggestions welcome !
Its an 2017 A1419 27 inch
it came with i5 3.8GHz - I wanted to upgrade to an i7-7700, plus 1TB nvme
Got all the parts, watched all the videos
Big day comes - have al my fixit instructions printed out, go through it step by step, have my screws and parts labels all laid out
Opened the screen w/ the fixit cutter wheel - OK done - all adhesive came off OK and was careful with the 2 monitor cables
So took all the items out step by step
down to the logic board
lets just say no video prepared me for the fact that whilst it's really hard to unscrew all 4 CPU screws and all 4 GPU screws, it's downright impossible to put those back without moving the CPU, keeping tension constant and keeping the tension springs held down - you are tightening 4 x screws on either side of the board at the same time - insane - you need 3 pairs of hands!!!
I did my best anyway through a combination of tape, plastic ties and lying on the floor and screwing in from bottom...!
so put it all back together
Did it start up? No Effin way - not a whimper out of it
OK! So take apart again
down to logic board
and yes CPU had moved and was bent at corner
put back in and tried ot power on again - NOPE
so could be the i7 too - bummer
but now of course i am sh___ing it that i damaged the pins
SO - put the original i5 in again
Started with power and fan on full power
but no further
SO looked at pins
yes some bent , one twisted - tried my best to straighten
Put i5 back in - again no boot
SO Logic Board is screw*d
OK - well I need this badly back up and running so bi the bullet and ordered the board from reputable returnable company in UK the book yard. The price is ... a lot. Then add customs and UPS delivery and its €560 - oh my god, cant afford it but got it anyway
so came yesterday - put RAM in, put bluetooth board on, reinstalled , connected the PSU and was getting 4 diagnostic LED's - great
Then connected screen - power on and....
... no chime, no screen
... look behind screen and LEDs go to 4 (with 4 being half-lit)
try connect keyboard and PRAM reset - nothing
try SMC reset - nothing
screen is black and dead
I know - now I am thinking its the screen but try external display thunderbolt 3 to hdmi on 4K external - and nothing !
and its not chiming either .... which to me is weird
I replaced the PRAM battery
and reseated / tried different configurations of RAM while it was on - nope - no differrence
Could it be the hard drive ?
It has the stock NVME that it came with
Booting while holding Cmd-R does nothing
Kind of at wits end now .... could it be something shorted on logic board?
Its new and seems to be coming from a reputable source...
It just powers on, fans go to full speed, 4 LED's all light and nothing... so now I'm thinking have broken original logic board, new logic board AND a screen... 🙄😟 I mean that takes some doing. Not happy with myself to say the least. This machine is for my work as a freelancer and I've basically cost myself a huge amount of money I can't afford. Luckily there's no work / data on it but still.... just feel like an idiot.
Anyone ever seen this where you have 4 LED's and no chime / no OS boot...?
ALL help suggestions welcome !
Last edited: