Become a MacRumors Supporter for $50/year with no ads, ability to filter front page stories, and private forums.
Update:

2 Geniuses worked on my laptop at the Apple Store. I was there for 2 hours.
It kept dying (powering off) while in the various recovery modes.
It's now returned.
At least I'm not out $5k with a flaky laptop.

I re-ordered. Replacement to arrive Dec 18.

@Velin , This is a great idea, given how much data I need to wing around frequently.
In the meantime, get a USB-C M.2 NVMe SSD enclosure, it will be 3.1 gen 1 or 2 most likely. Make sure it's also got USB 3.0 and 2.0 backwards-capability. And of course pick up an internal M.2 NVMe internal SSD, even the 2 TB internal M.2 NVMe SSDs are getting pretty cheap. You may even have one lying around. If not, I'd recommend a Sabrent enclosure and a Samsung 970, a reliable combo. If in doubt, look at the pins, M.2 NVMe has only one pin spacer, as I recall. (If you have older internal SATA SSDs lying around, then get the SATA enclosures or external pin devices for that, they will be super cheap because the world is rapidly moving to NVMe.)

Once you've got inernal SSD + external enclosure, you've got a screaming fast transfer capability, probably 2000+ MB/s over T3, just blazing (that's what I've seen real-world performance). Even USBA 3.0, it's going to be as fast as can be with your older devices. And now you've got a ton of external SSD storage too, which you can easily expand simply by buying more sticks.
Question about "expand simply by buying more sticks".
... Which M.2 enclosure lets me expand by adding more sticks?
https://www.sabrent.com/product-category/hard-drive-accessories/hard-drive-enclosures/m-2-ssd/

I'm currently using all my M.2 sticks in Thinkpads. But I LOVE the idea of using M.2 sticks in an external enclosure as a fast " transit device " instead of those sloggy slow external hard drives that I cycle through my safe deposit box as backups.

(Not just for speed reasons - My last new 3 WD My PassPort Ultra drives failed when all my other WDs have been totally reliable for years. After reading other posts here, it seems WD introduced quality problems in that line recently, so I switched to a different sloggy slow brand of external drive, Seagate.)

Maybe I'll get lucky with a Cyber Monday sale. I've always purchased the Samsung M.2s (Samsung's SSD migration software has always worked perfectly when going Thinkpad to Thinkpad.)

You can select what you copy over with Migration Assistant. I for instance copied of application setting and user documents but not the applications.
Yes, that's what I tried to do also.

I have also before copied over folders. But I have done this on the User subfolder level, i.e. Documents, Pictures, Desktop and so forth, one by one.
Good to know; thanks.

If you copy the complete User folder that will include folders like (user) Applications and Library which includes application settings. This may not be what you want if you want a clean install.
I didn't realize that. Makes sense. Thanks for the tip.

Did I not warn you (in another thread) that you should not have created a new account on the new MBP before "migrating"? And that doing so might lead to problems?
Did you not see my response that I had already turned it on, etc.? i.e, I had already logged on before seeing your post?

So based on your reply, using Migration Assistant and / or not following your approach caused my hardware to fail.

Because... It created too much stress on the system?

I never got to the point of having permission problems. It just started dying during Migration Assistant.

Thank you @Fishrrman for posting the complete list of steps for transferring between laptops.

=== Carbon Copy Cloner

One thing happened during the CCC backup that caused me to lose confidence in either that backup process or the backup drive:
I completed the first full backup using CCC.
Then 1 day later I re-ran the CCC backup just to catch a dozen files I created in that day.
Upon completion, I saw this [ pic below ]
Yet, I did not create that 534GB of data in just 1 day.

My conclusion was either:
- The original backup was incomplete. But why? CCC reported it had finished.
- My Seagate Backup Plus drive had too many errors during first backup.

1575147468301.png


I'm sure there's a rationale for it, but I could not explain this volume of data transferred 1 day after after a complete backup was performed, and therefore couldn't trust the CCC backup or backup drive.

So Plan B - I decided to use Migration Assistant and Laptop to Laptop transfer.
 
Question about "expand simply by buying more sticks".
... Which M.2 enclosure lets me expand by adding more sticks?
https://www.sabrent.com/product-category/hard-drive-accessories/hard-drive-enclosures/m-2-ssd/

Eh, not familiar with any portable ones, only the desktop RAID units. My wording perhaps was a bit sloppy, I was merely saying if you need more space, buy more sticks and drop them in the enclosure, because it doesn't require drivers, just drop them in and plug-and-play. I've got a brand new enclosure and SSD coming Monday, I think.
 
I've got a brand new enclosure and SSD coming Monday, I think.
Please post pics! Which enclosure and SSD?

@Velin, Which enclosure and SSD did you end out with?

I literally just installed and powered on my first NAS - a Synology DiskStation DS718+ and 2 x 10TB drives while watching the Ravens-49ers football game. Excited about my first experience with the Synology software.

1575237344133.png
 
I had the same issue, my MBP froze with using Migration Assistant. rebooted it and it kept doing the same thing yours did. Went to an Apple Store the next day and I got hooked up with a tech that had just came back from the Mothership in California from training on the 16" MBP specifically. He was able to wipe the HD and install a fresh copy of Catalina, it was basically back to brand new. I decided to forego migration assistant and transfer what I needed manually.

The tech did say that once you start one of those automated assistants that you have to commit and let it finish all the way, or that it's best not to use them at all.
 
  • Like
Reactions: MareLuce
When the new laptop comes, I recommend that you follow my guide for migration.
DO NOT set up an account on the new MBP right away -- connect your backup BEFORE you press the power on button for the very first time.

Also, if you're using CCC, do either a complete clone (or update your existing clone) just before you take the backup drive to the new MBP. This "captures" the old MacBook at the moment you last used it before the upgrade.

I realize the very first impulse when you take it out of the box is, "let's try it and see if it works", but this isn't the way to do it. Have the backup ready to go, and the migration may go much better!

Something to check in CCC's preferences -- do you have "snapshots" enabled?
If so, I'd suggest TURNING THAT FEATURE OFF.
That might account for the extra space.
Also, if you still have time machine enabled, you need to delete local snapshots, which "eat up the invisible space" on your internal drive.
 
  • Like
Reactions: MareLuce
Which enclosure and SSD?

The Sabrent M.2 NVMe enclosure. I like it because it's solid aluminum, torx screws which I prefer, and it has a blue indicator light during data transfer (not all have that), it's USB. 3.1 Gen. 2, so it's fast. Construction and assembly were a breeze, it's a solid product. Happy with it.

For the SSD, I picked up a Samsung 970 EVO Plus SSD 2TB - M.2 NVMe, I think the model number is MZ-V7S2T0B/AM. The release-day prices were way too high, but now the 2 TB versions are below $400, so I snatched it up.

This new enclosure and stick are absolutely destroying my old WD platters. It's such a night-and-day difference that I'm giving away my 4TB HDDs which I have had for years. But the HDDs are so unbelievably slow compared to the new SSDs, and especially the new enclosures and internal SSD sticks. I no longer have the time to tie up HDD read/write heads moving terabytes of data, with sub 100 MB/s read/writes, it's such a productivity killer and it just eats valuable computer time.

Another good buy right now are the Samsung T5 SSDs, they too were priced really just a year ago, and most certainly two years ago (the T5 cost almost as much as a new laptop). But the T5 drives have come way down in price, you can pick up the 1 TB version for under $140 right now.

The reason the T5 is so cheap right now is Samsung released the X5, which has Thunderbolt 3 capability -- but once again, it is absurdly, insanely overpriced right now. The 2 TB X5 is a stunning $800 at the moment, which is a whopping ~ $0.40 per GB. The 970 EVO 2TB SSD I just bought is $0.19 per GB, and even that is expensive (but I desperately needed it). You can buy a Western Digital 2TB Transport SSD for ~ $0.12 per GB, though that price reflects the fact it's a SATA device.

Finally, for comparison's sake, you can pick up a WD Black 4 TB HDD, a 7200 rpm drive, right now for $191.99 or ~ $0.04 per GB. That is cheap.
 
Last edited:
  • Like
Reactions: me55 and MareLuce
When the new laptop comes, I recommend that you follow my guide for migration.
DO NOT set up an account on the new MBP right away -- connect your backup BEFORE you press the power on button for the very first time.

Also, if you're using CCC, do either a complete clone (or update your existing clone) just before you take the backup drive to the new MBP. This "captures" the old MacBook at the moment you last used it before the upgrade.

I realize the very first impulse when you take it out of the box is, "let's try it and see if it works", but this isn't the way to do it. Have the backup ready to go, and the migration may go much better!

Something to check in CCC's preferences -- do you have "snapshots" enabled?
If so, I'd suggest TURNING THAT FEATURE OFF.
That might account for the extra space.
Also, if you still have time machine enabled, you need to delete local snapshots, which "eat up the invisible space" on your internal drive.

This.

I have had zero issues with using Migration assistant for this and the reason of using TB3 SSD Envoy Pro externals from OWC. I use a pair of 2TB ones for time machine backups of both my iMac Pro and Macbook Pro and a couple of 1TB for travel backup, they blast data across at around 1500 MB/s sustained. A 1TB will set you back about $250 and the 2TB are currently $480.

I think a fair amount of people run into issues with stalled or even corrupt migrations because they are using super slow spinners. You want a very robust data stream on that initial transfer and speed helps that immensely.

I got my 16" today and my 1.02TB of data migrated across flawlessly in less than 20 minutes, a spinner would have taken a day or more and could have stalled or gotten corrupted.
 
Last edited:
I got my 16" today and my 1.02TB of data migrated across flawlessly in less than 20 minutes, a spinner would have taken a day or more and could have stalled or gotten corrupted.

With my latest 16" Macbook Pro upgrade, I'm realizing just how much I hate platters. They are so damn slow now, they really need to be put out to pasture. I may have contributed to my own problems, however, by formatting a couple HDDs in APFS, probably should have done that only to the SSDs.
 
Thinking through the recommended migration steps…

Specific question about your Step #7 @Fishrrman
>>7. Open the OS installer and install a clean and "unused" copy of the OS

Given where I will “be” after step #6 (in the funky internet recovery mode)
how do I “Open the OS Installer” ?

Will that be an option on the screen? Or reboot to get back to the same initial screen?

---

fyi - what I put so far into Goog Drive for reference
(reworded very slightly for emphasis to get it through my skull... I believe this is still as you intended)

1. Open the lid while pressing "Command-Option-R"
This will boot to internet recovery (NOT to "the recovery partition")


2. DO NOT "install" yet. Let the internet utilities load, but DO NOT "install" yet.


3. Open Disk Utility. Go the "View" menu and select "Show all devices"


4. Now, select the topmost item in the list on the left. This is your physical drive inside.


5. Click the Erase button. Choose APFS with GUID partition format


6. When done, close disk utility.


stopped here for now
7. Open the OS installer and install a clean and "unused" copy of the OS


[...]
Manual copy directions which I will apply with a 4TB SSD arriving Wednesday as per @Velin‘s brilliant suggestion to use SSD as the intermediate drive vs spinning drives.
 
Eh, why are you going to go through all that? First, read this.

Second, I would do what the article I linked says in the section called, "Create a macOS bootable installer on a flash drive." Why not start over, totally and completely fresh.

Make a bootable USB Catalina. Plug into USB-C on your new Macbook Pro, power up the Macbook Pro while holding the option key. Select the USB. Click through, do NOT install Catalina yet. First go to Disk Utility, selec the Macbook Pro's hard drive. Select erase, and ensure you partition with AFPS (under GUID Partition Map).

After the Macbook Pro hard drive is erased, click back, you'll see Install OSX Catalina, and now put it on your freshly reformated drive. Once it's done, you'll have a clean version of OSX Catalina, as well as a pristine Recovery Partition.

Actually I think you know all that, but just wanted to put it out there for anyone else who reads this. But, I'd pass on the internet recovery and simply wipe and reinstall using physical media, i.e. the USB.
 
  • Like
Reactions: MareLuce
speaking of long backup times,
1575381623492.png

this 16 hours is just "part 2" backing up for the first time to a Synology DiskStation DS718+ with 2 WD 10TB Ultrastars @7500rpms.

I'm just grateful that the weirdness exhibited after "part 1" was cured by rebooting

re:
1575381730661.png


What is the difference between the 1.43 TB that Time Machine is backing up and the
1.8 TB total on disk?

i.e., Catalina + ? + ? = 0.37 TB or ~ 370GB ?
 

Attachments

  • 1575381691216.png
    1575381691216.png
    68.5 KB · Views: 142
There is a list of standard exclusions from the backup, e.g. Spotlight index, certain internal DB and so forth.

Additionally you can configure TM to exclude system files and applications. That is in TM settings under the Options button. Is this box ticked?

The value you see in TM is also "padded" with a buffer. Use the following command in Terminal to see more precisely what is going on:

log show --style compact --predicate 'subsystem == "com.apple.TimeMachine"' --info --last 3h
 
  • Like
Reactions: MareLuce
OP:

Cue us in as to "where you are" right now.

Are you keeping the existing MBP?
Or... are you going to return it?

As for the backup problems with the older MacBook.
I realize that I sound like a broken record in this forum, but I advise you to STOP USING TIME MACHINE and use either CarbonCopyCloner or SuperDuper instead.
The backups that either of the above create will be much more reliable.
You can just mount a CCC or SD backup on the desktop, and it will appear as would any other drive.
Copy one file, several files, or clone the entire drive back to the internal drive if necessary.
You will be able to boot and run from the cloned backup if you need to (you CAN'T DO THAT with a tm "backup").

Both CCC and SD are free to download and use for 30 days.
SD will actually work forever without registering it, but it will only do "full clones" (clones the entire drive). If you want to do incremental clones, you have to register it.
 
Last edited:
OP:
Cue us in as to "where you are" right now.
I am waiting by the front door...
installing a strain gauge under the porch to detect UPS deliveries...

1575416664611.png


Are you keeping the existing MBP?
Or... are you going to return it?
2 Geniuses worked on it, one after the other. 2 hours. It kept powering off during the various recovery modes. He was impressed when I said,
"I see you're doing a non volatile RAM reset."
Nearby customer said "Wow a girl geek!"
Ha!

They suggested I return it.
I agreed.
 
MBP 16" The Second arrived.
I am migrated.

Many thanks to @Velin for saving hours of my life during this migration. He suggested I use a SSD as the shuttle disk between old and new MBP, and clue'd me in about #ditto.
Many thanks to @Fishrrman for describing in full detail his migration process, especially the prep steps below.
I ended out needing to use parts of many people's advice and a couple old tools.


To underscore the massive difference SSDs made, some speed compares:
3 MB / sec - regular external hard drive like the Seagate kind I've bought at Costco: Mind numbing sloggy slow. Days needed to get a good backup.
380 MB / sec - Old 2 TB MBP to 4 TB 2.5" SSD disk. WOW. Hours to a good backup.
350 MB / sec - Old 2 TB MBP 2 TB nVME M.2 SST stick. WOW.

837 MB / sec - 4 TB SSD disk to new 4 TB MacBook Pro. Stunning.

over 800 MB per second.png


!!!


Steps I used to migrate data from old to new:

=== Prepare new MacBook Pro for Migration

1. Open the lid while pressing "Command-Option-R"
This will boot to internet recovery (NOT to "the recovery partition")
2. DO NOT "install" yet. Let the internet utilities load, but DO NOT "install" yet.
3. Open Disk Utility. Go the "View" menu and select "Show all devices"
4. Select the topmost item in the list on the left. This is your physical drive inside.
5. Click the Erase button. Choose APFS with GUID partition format
6. When done, close disk utility.
7. Open the OS installer and install a clean and "unused" copy of the OS
8. When done, you will see the initial setup screen.

I completed normal OS setup.


=== Transfer data from old to new MBP

After reading a lot about the different methods and even contacting the help desk of several tools, I decided to use GoodSync for Mac to manage the transfer for several reasons:

- I realized I wanted to transfer my data without owner metadata on the files. I just wanted my data like it was data downloaded from the net. Most of it will be automatically sync'd upon any change in any file peer-to-peer between 3 different systems and 2 different Apple IDs. GoodSync syncs files with a million options. In the Mac version, not including Owner or ACLs is an option. I can edit on any of the 3 systems, grab my travel system, run to the airport, and know with confidence that my data will have already sync'd to the laptop I grabbed without my taking any extra step.

- More than that, I absolutely wanted to see detailed transfer logs of the at the file level. Given my initial experience, I could not trust Setup Assistant or Migration Assistant.
I thought Carbon Copy Cloner would of course have logs. Nope.
I would never trust a data transfer program that couldn't show me logs at the file level that the transfer occurred.
Would I use it as a redundant backup? Sure, just like I want to keep a Time Machine backup. Time Machine is the Apple approved way, and lots of you say very positive things about Carbon Copy Cloner. It's probably fine. But the backup I trust the most is one where I can see that each new file changed has transferred. At any moment, I can go to that Synology share or SSD and access any file individually.

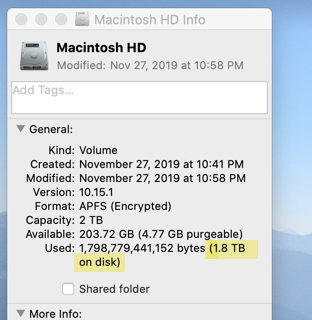
Of the nearly 2 TB of data, logs showed 87 files with an issue. Of those 87, 3 were super important, and 1 would have caused a problem next April.

=== Current Status

Been running for several days now. All seems good. Love the keyboard. Mostly, love not being storage constrained. LOVE the snappy 64 GB of memory.

Am not doing anything too strenuous right now and am using...

1576308106179.png
 
I'm so glad I came across this thread today. Expecting delivery of a MBP16 on Monday. I was tempted to use Migration Assistant but i'll be steering clear of it. I'll just transfer my stuff the old fashioned way...using an external drive.
 
  • Like
Reactions: Daverru
I'm so glad I came across this thread today. Expecting delivery of a MBP16 on Monday. I was tempted to use Migration Assistant but i'll be steering clear of it. I'll just transfer my stuff the old fashioned way...using an external drive.
Migration Assistant was flawless for me going from a 2013 MBP to the 16" over Thunderbolt. I'm sure it's not a widespread problem for most people.
 
@hawkeye_a , Using a SSD as the data store makes all the difference
from an agonizing experience to a more bearable one if you have a lot of data


quick update, I’m on 16” MBP #3
it seems like a keeper.

My original post was about MBP #1 That just exhaled and died while running migration assistant

MBP #2:
Had a problem with the keyboard and trackpad not getting power when opening the lid from sleep
for 15 agonizing seconds
Apple support advised me to return it
after of course all sorts of resets
I am now an expert in alllllllllllll forms of resets possible

currently have been running MBP #3 for 2 weeks
so far so good


so glad i got 64gb
am rarely using < 22 gb and have been > 40gb several times

LIke the 16” a lot but overall feel burned out by all the hw problems
such a massive time suck
it stole the time over the holidays i had dedicated to do a photo project for a relative who passed and will soon have his military honor service
Will be on the flying > 50,000 mi in next 4 months; all away from my MBP :-(

odd thing is - my 15” from 2016 was perfect from moment 1
the one that everyone had keyboard issues with, etc
i had zero problems
 
Register on MacRumors! This sidebar will go away, and you'll see fewer ads.