
Apple today released the new iOS 15 and iPadOS 15 updates to all users, and there are dozens of new features to learn about. Some of these options must be toggled on or set up, so we've created a handy get started with iOS 15 guide that walks you through what you should do after installing the update.
Subscribe to the MacRumors YouTube channel for more videos.
Set Up Notification Summary
If you're tired of getting endless notification alerts all day long, Notification Summary is a feature you're going to want to use. You can set your notifications to be delivered just a few times a day in bulk, which is ideal for cutting down on notification spam.
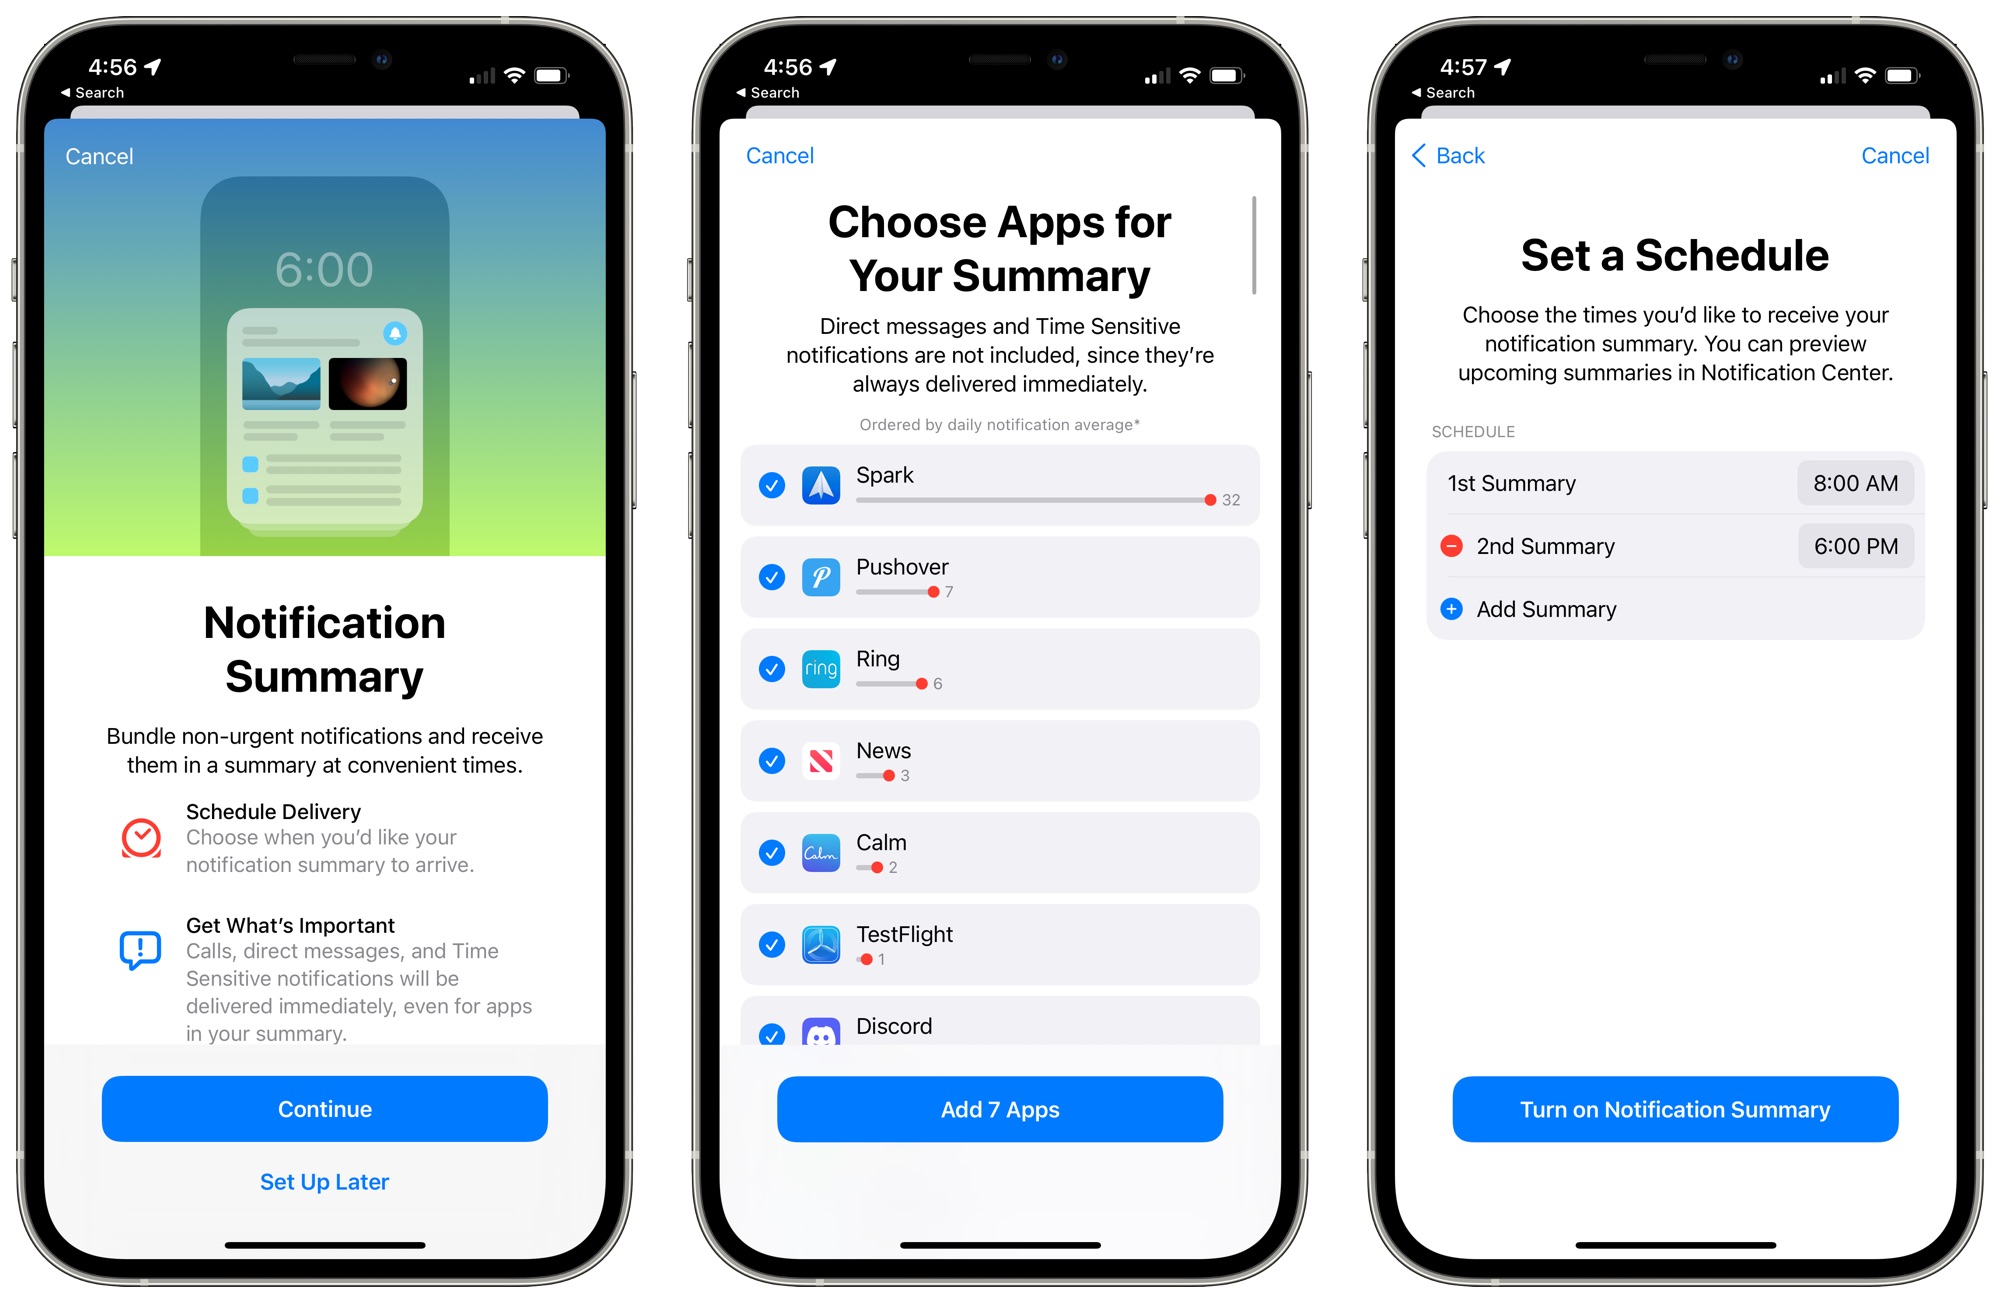
This is ideal for notifications that you don't necessarily need to see right away like new TV show alerts or Apple News, and you can set it up on a per-app basis. Don't worry about missing critical alerts that you need to see right away - Apple has a built-in "Time-Sensitive" feature that works for calendar notifications, ride alerts, messages, and more.
Notification Summary can be set up by going to the Notifications setting of the Settings app, tapping on "Notification Summary," and following the steps to set times and choose apps.
We have more on what's new with notifications in iOS 15 in our guide.
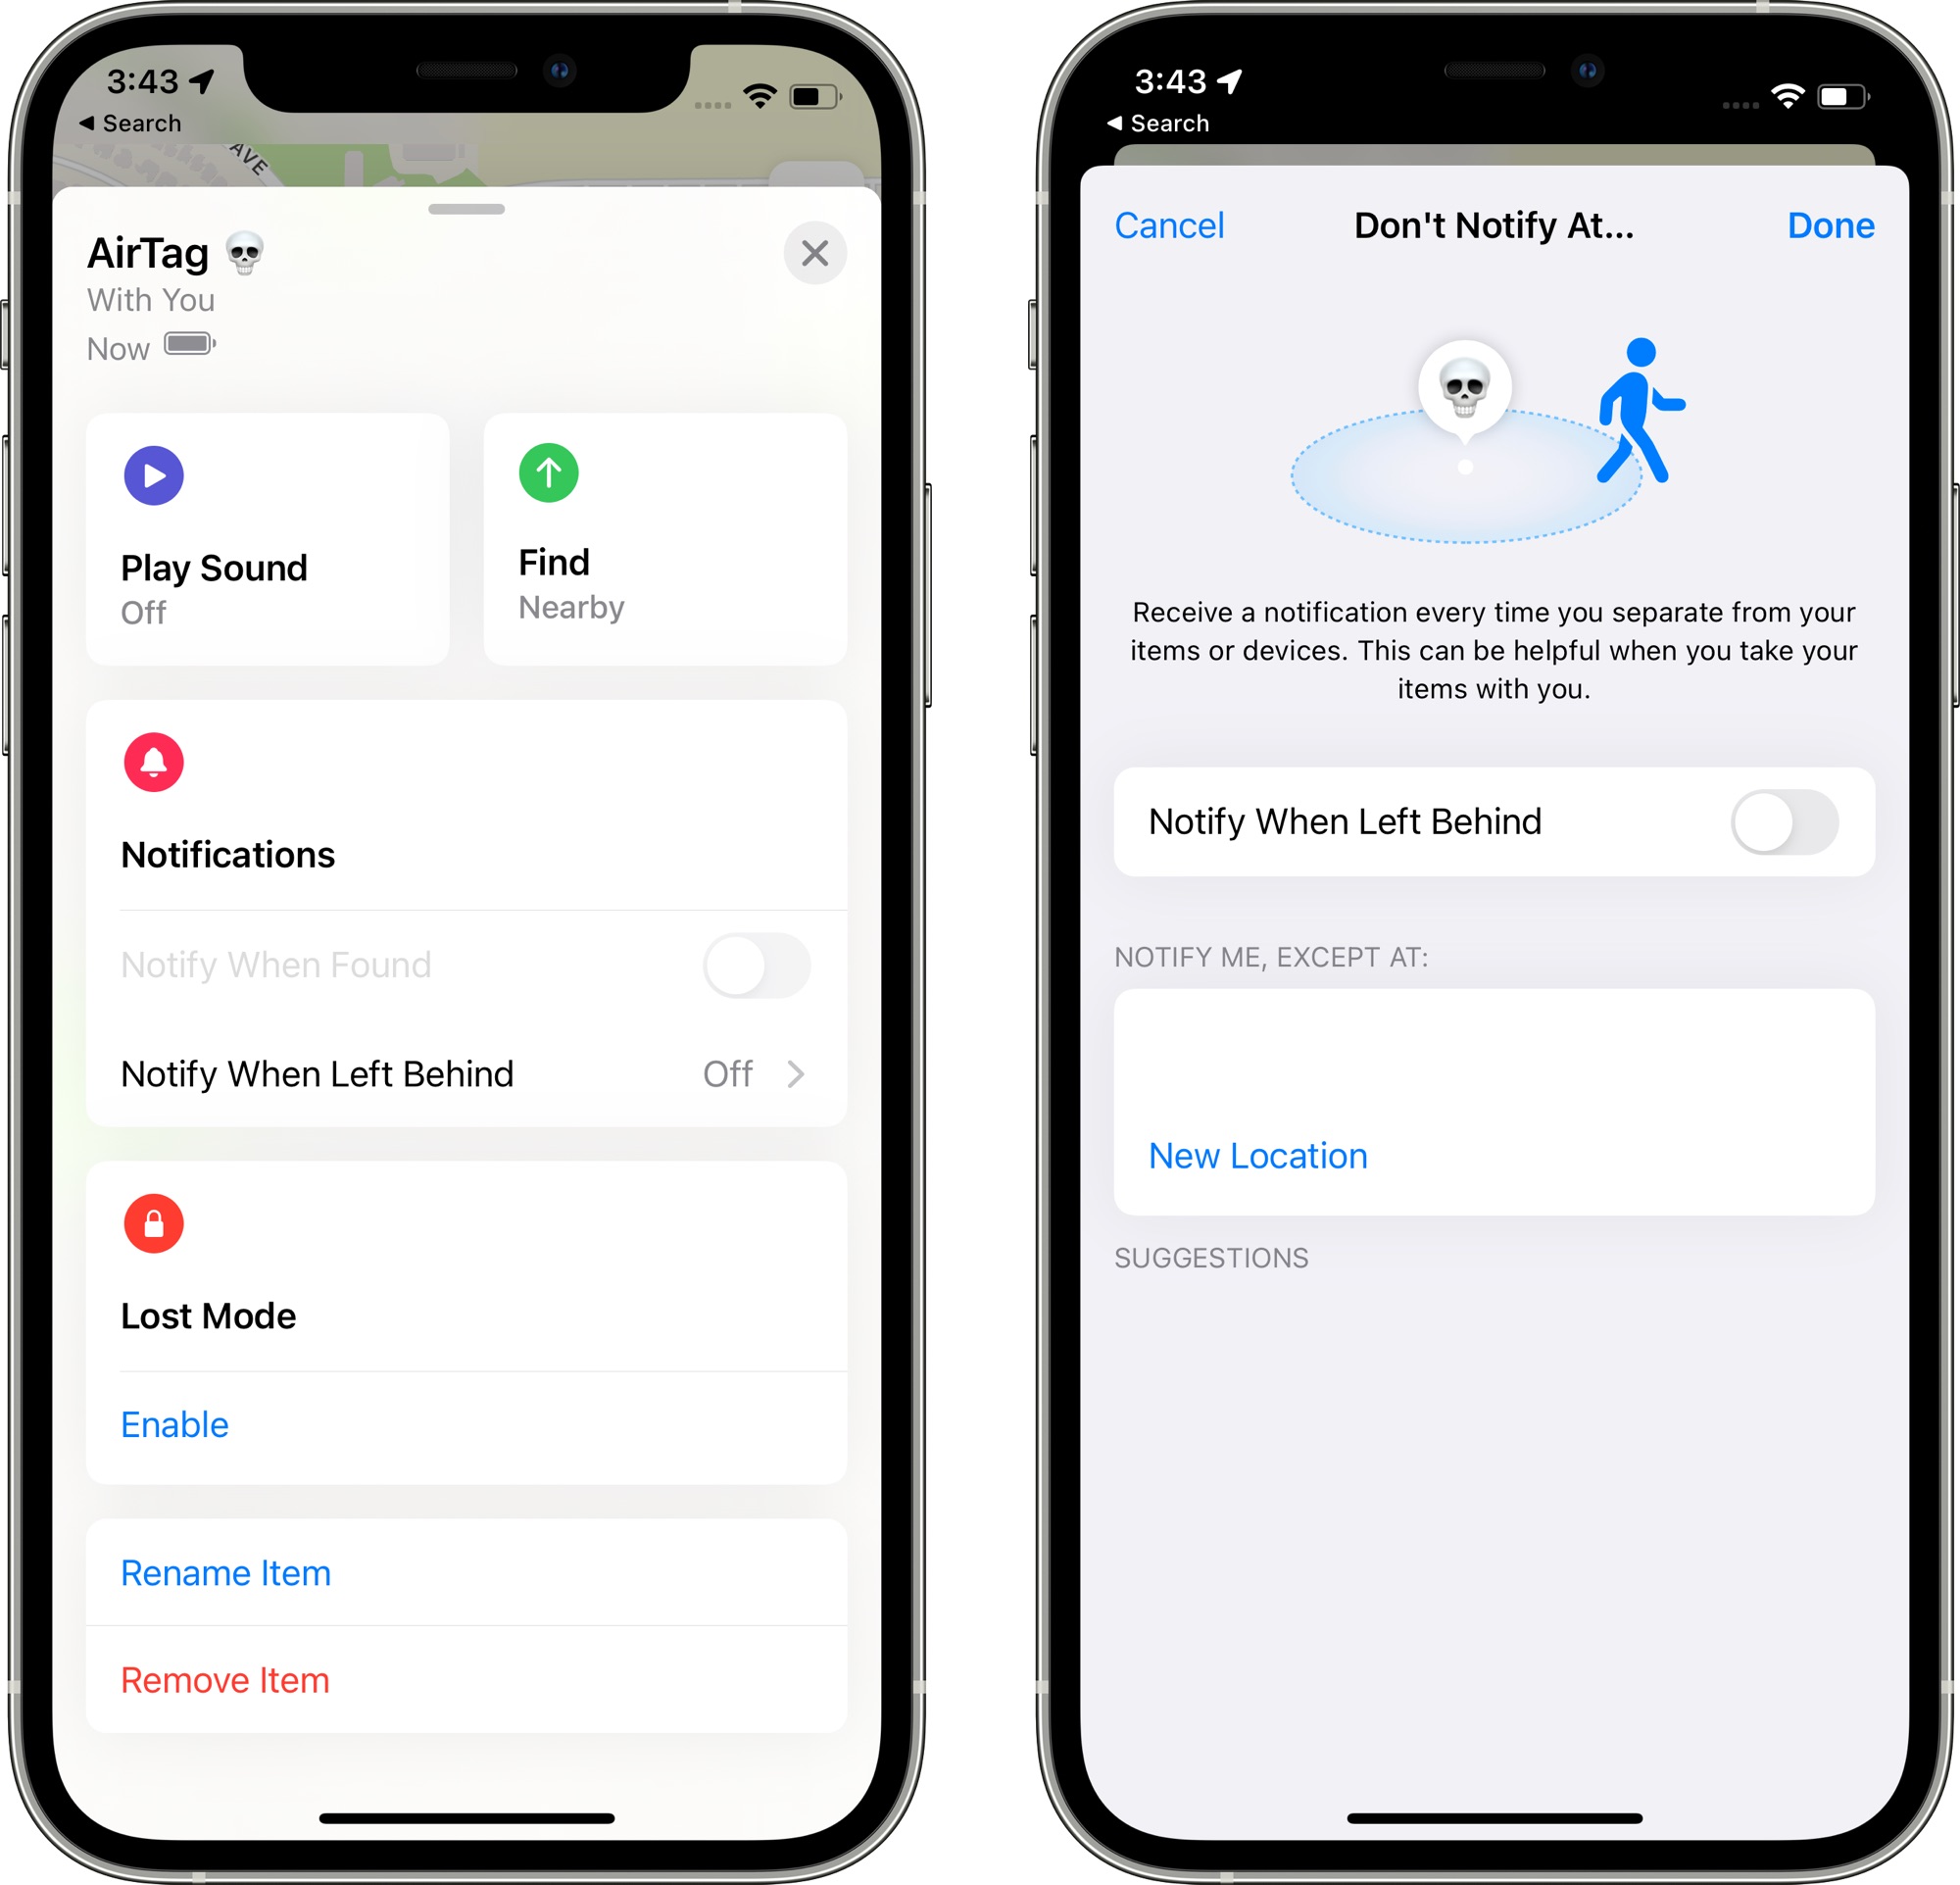
Set Up Alerts for When a Device is Left Behind
iOS 15 introduces a long-awaited feature that can let you know if you've left a device behind. If you're in a cafe with your MacBook and your iPhone, for example, and walk out without the MacBook, your iPhone can ping you to let you know your device isn't with you.
This setting can be enabled for all of your Apple devices, ranging from Macs to AirPods to iPhones, and it also works with AirTags and Find My-enabled accessories.
To set it up, go to the Find My app, tap on the device that you want to be notified about if you leave it behind, and then tap on the "Notify When Left Behind" option. From there, toggle it on.
You can set up exceptions so you won't get an alert if you leave your belongings at home or at work. Be aware that this setting works with most devices, but some older devices are unsupported.
Find My in iOS 15 also keeps tracking your devices if they're erased or turned off, with full details available in our Find My guide.
Make Sure iCloud Private Relay is Enabled
If you have a paid iCloud plan, that plan is now an "iCloud+" plan that comes with a number of benefits, including iCloud Private Relay.
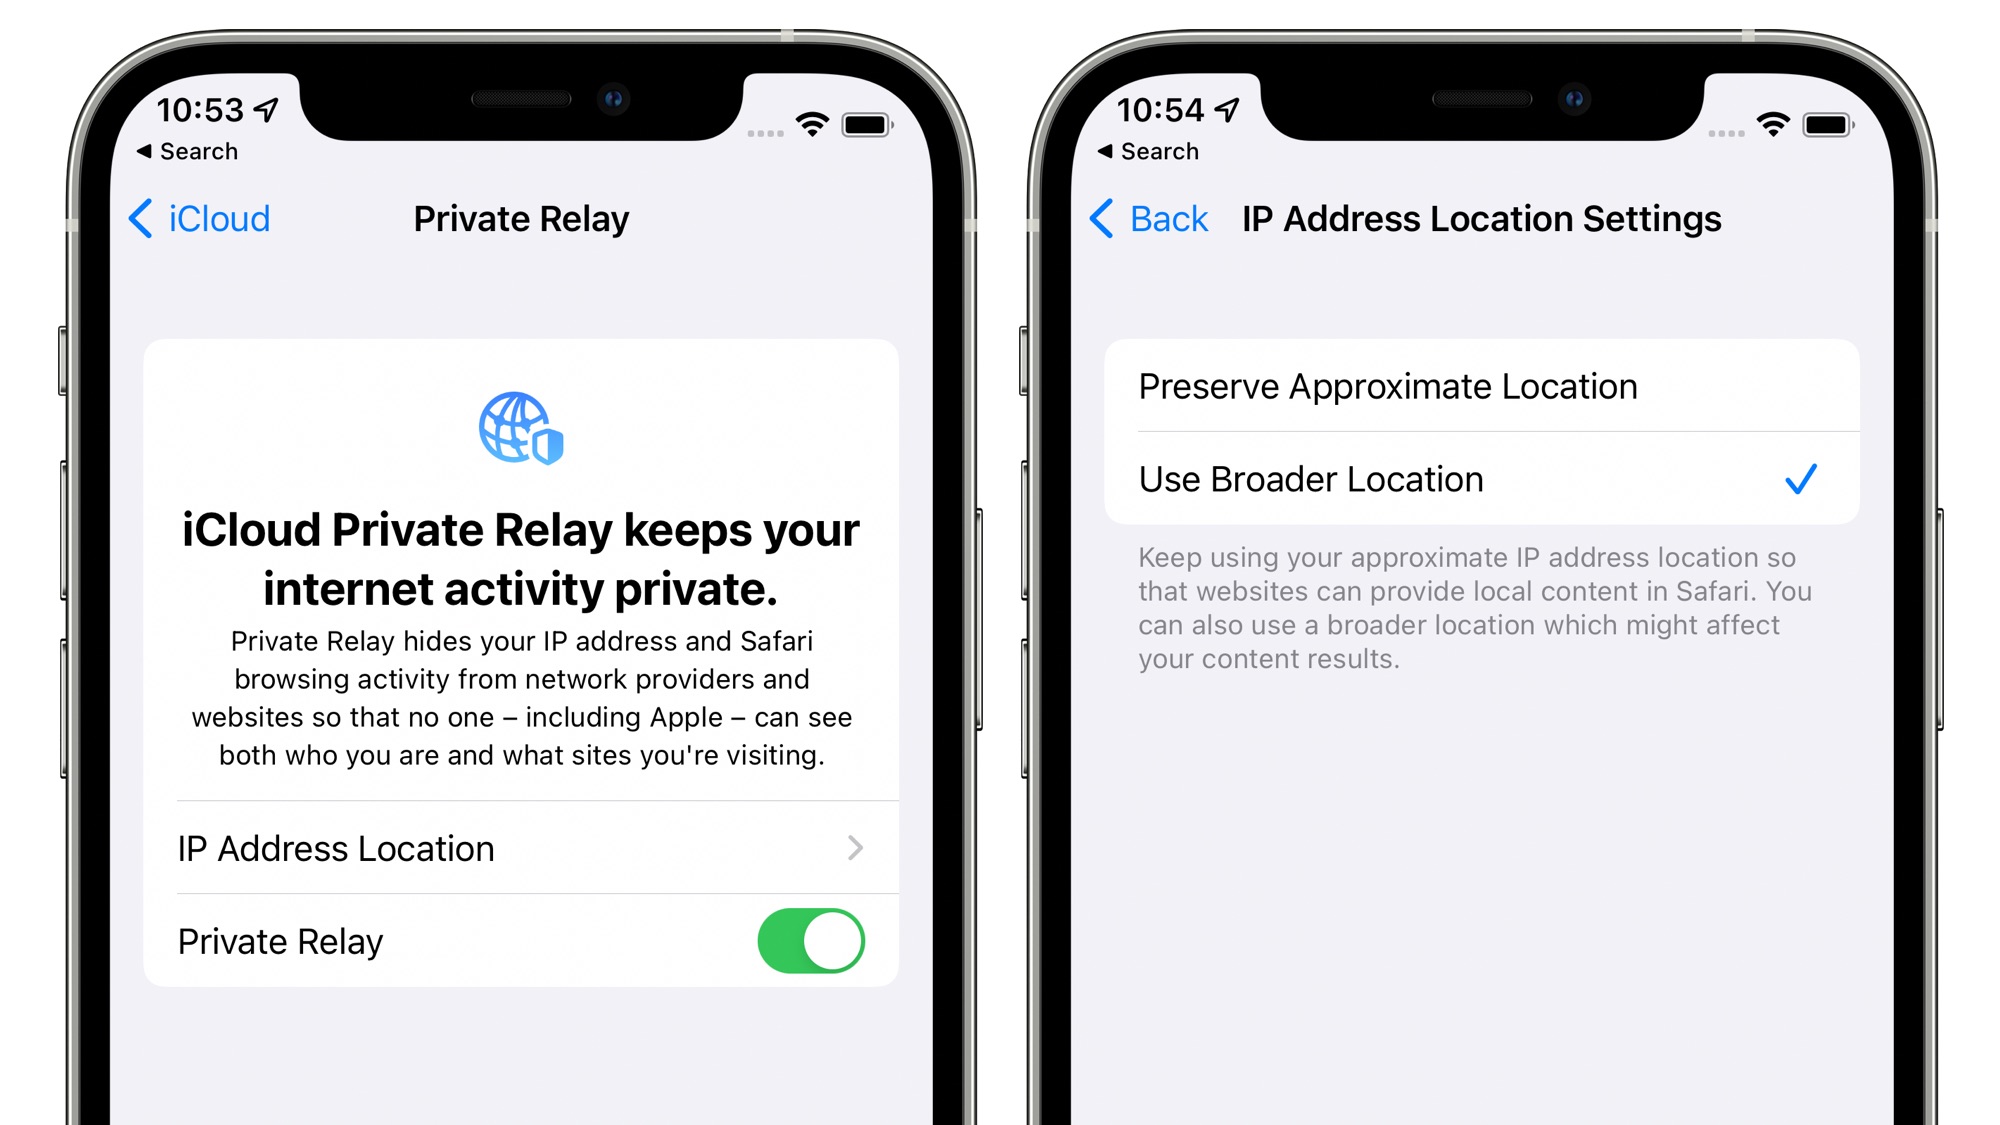
iCloud Private Relay makes sure Safari traffic and other unencrypted traffic leaving an iPhone, iPad, or Mac is encrypted and uses two separate internet relays so that companies cannot use personal information like IP address, location, and browsing activity to create a detailed profile about you.
It obscures your IP address and your location to keep your web browsing more private, and most people will want to use this feature. To make sure it's turned on, open up the Settings app, tap on your profile picture, and select iCloud. From there, tap on "Private Relay" and toggle it on.
You can read more about how iCloud Private Relay works in our iOS 15 privacy guide, which is worth checking out because there are a few situations where iCloud Private Relay might not work.
- iOS 15: How to Enable and Disable iCloud Private Relay
- iOS 15: How to Adjust iCloud Private Relay IP Address Settings
Set Up Focus Modes
If you often find yourself distracted by incoming notifications and unnecessary apps when trying to work or relax at home, Focus is a feature you're going to want to set up right away.

Focus Mode is basically a more customizable version of Do Not Disturb. You can create Focuses for activities like working, reading, exercising, or spending time with family, blocking out the apps and content that you don't want to see during those periods.
If you're at work, for example, you might want to make sure you're not getting social media notifications, or if you're at home, you might want to prevent yourself from seeing work notifications. You can set a Focus for any activity that you want, and set it up to allow notifications only from a select number of apps.
You can also hide apps from the Home screen when creating a Focus, which also makes it useful for putting distracting apps out of reach.
Focus can be accessed by opening up the Settings app and tapping on the "Focus" option. From there, walk through the setup steps to get started. We have more on creating, editing, and using Focuses in our iOS 15 Focus guide.
- How to Create a FocusHow to Schedule and Automate Focus Modes
- How to Customize a Focus
- How to Activate a FocusHow to Allow Time Sensitive Notifications to Bypass Focus Mode
Set a Recovery Contact
Losing access to your iCloud account can be devastating because they're so locked down that there are few methods for getting back into one once you've lost your password.
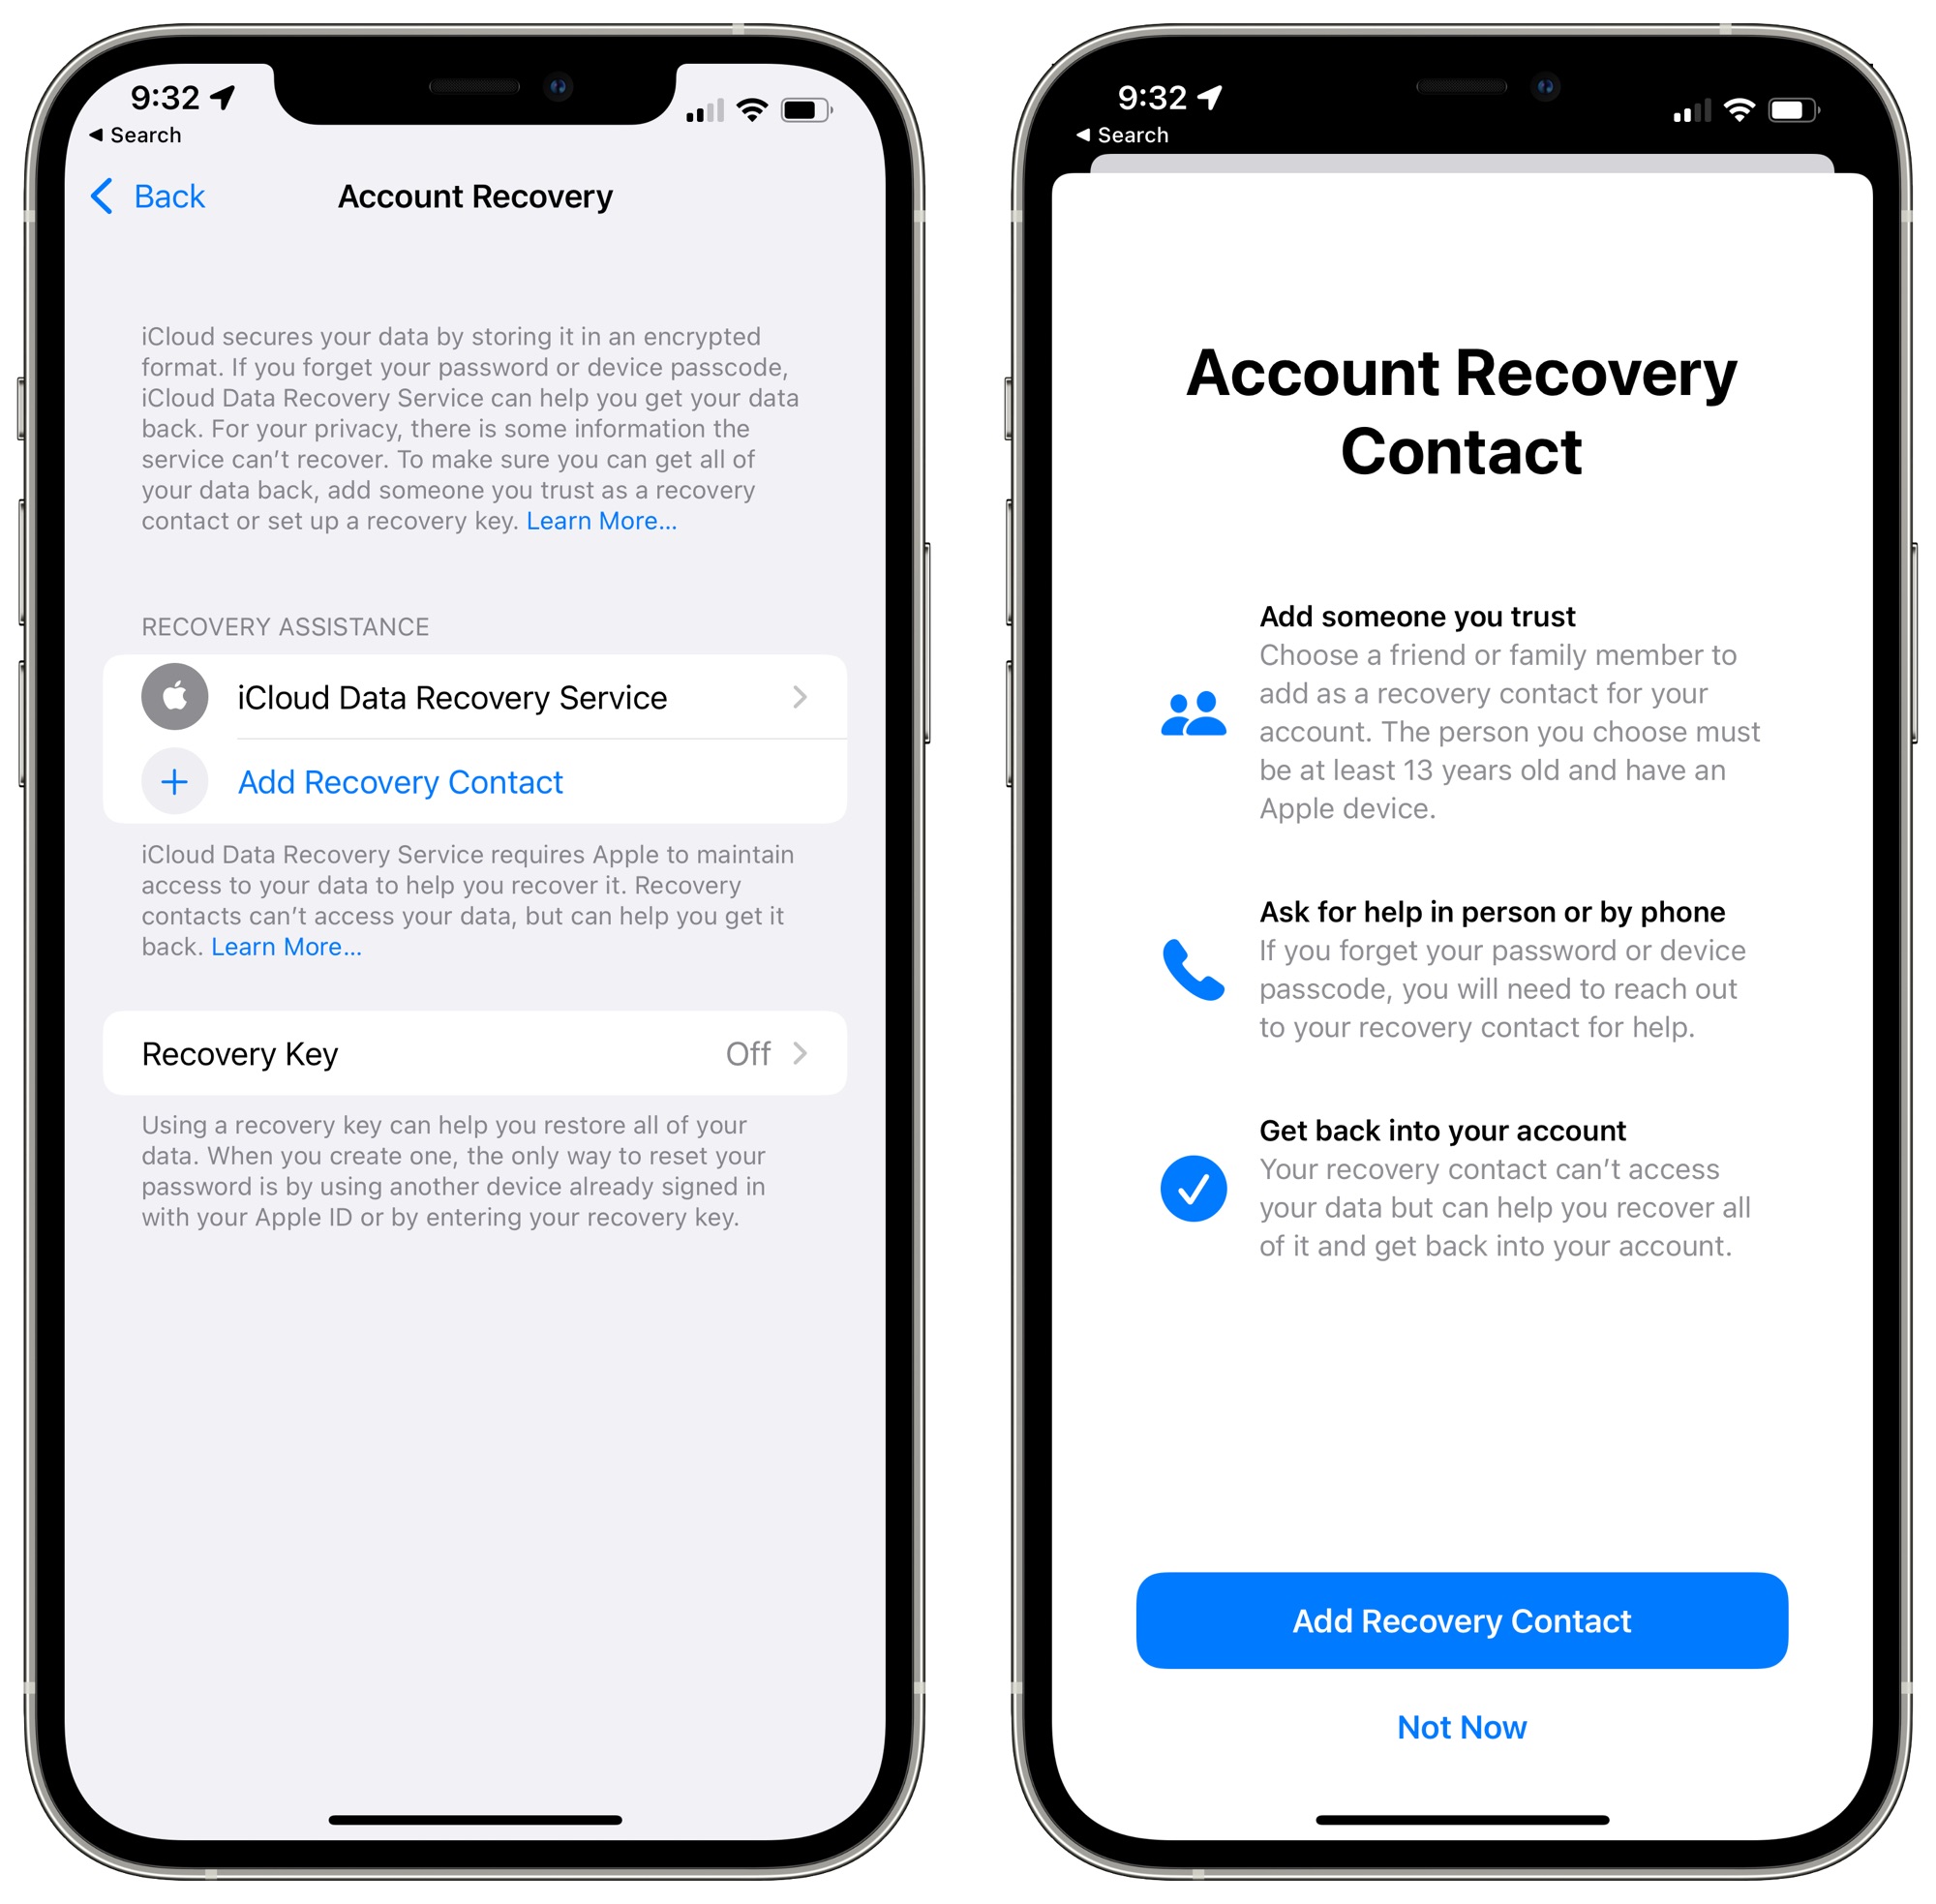
Starting with iOS 15, you can set a Recovery Contact, i.e. a trusted person that can help you reset your Apple ID password and recover your account if the need arises. This also works for a lost device passcode.
To set up Account Recovery, open up the Settings app and tap on your profile at the top. From there, tap on "Password & Security," and then tap on "Account Recovery."
Tap on "Add Recovery Contact" and then again at the screen that explains the feature. Authenticate with Face ID, and then select a person to serve as your contact.
Note that to use the Recovery Contact feature, all of your devices must be updated to the latest versions of iOS, iPadOS, and watchOS. Devices linked to your account that are not running the latest software will prevent the feature from being turned on and Apple will tell you that they need to be updated.
Enable Mail Privacy Protection
Marketing emails, newsletters, and some email clients use an invisible tracking pixel in email messages to check to see whether you've opened up an email, and in iOS 15, Apple is putting a stop to that practice with Mail Privacy Protection.
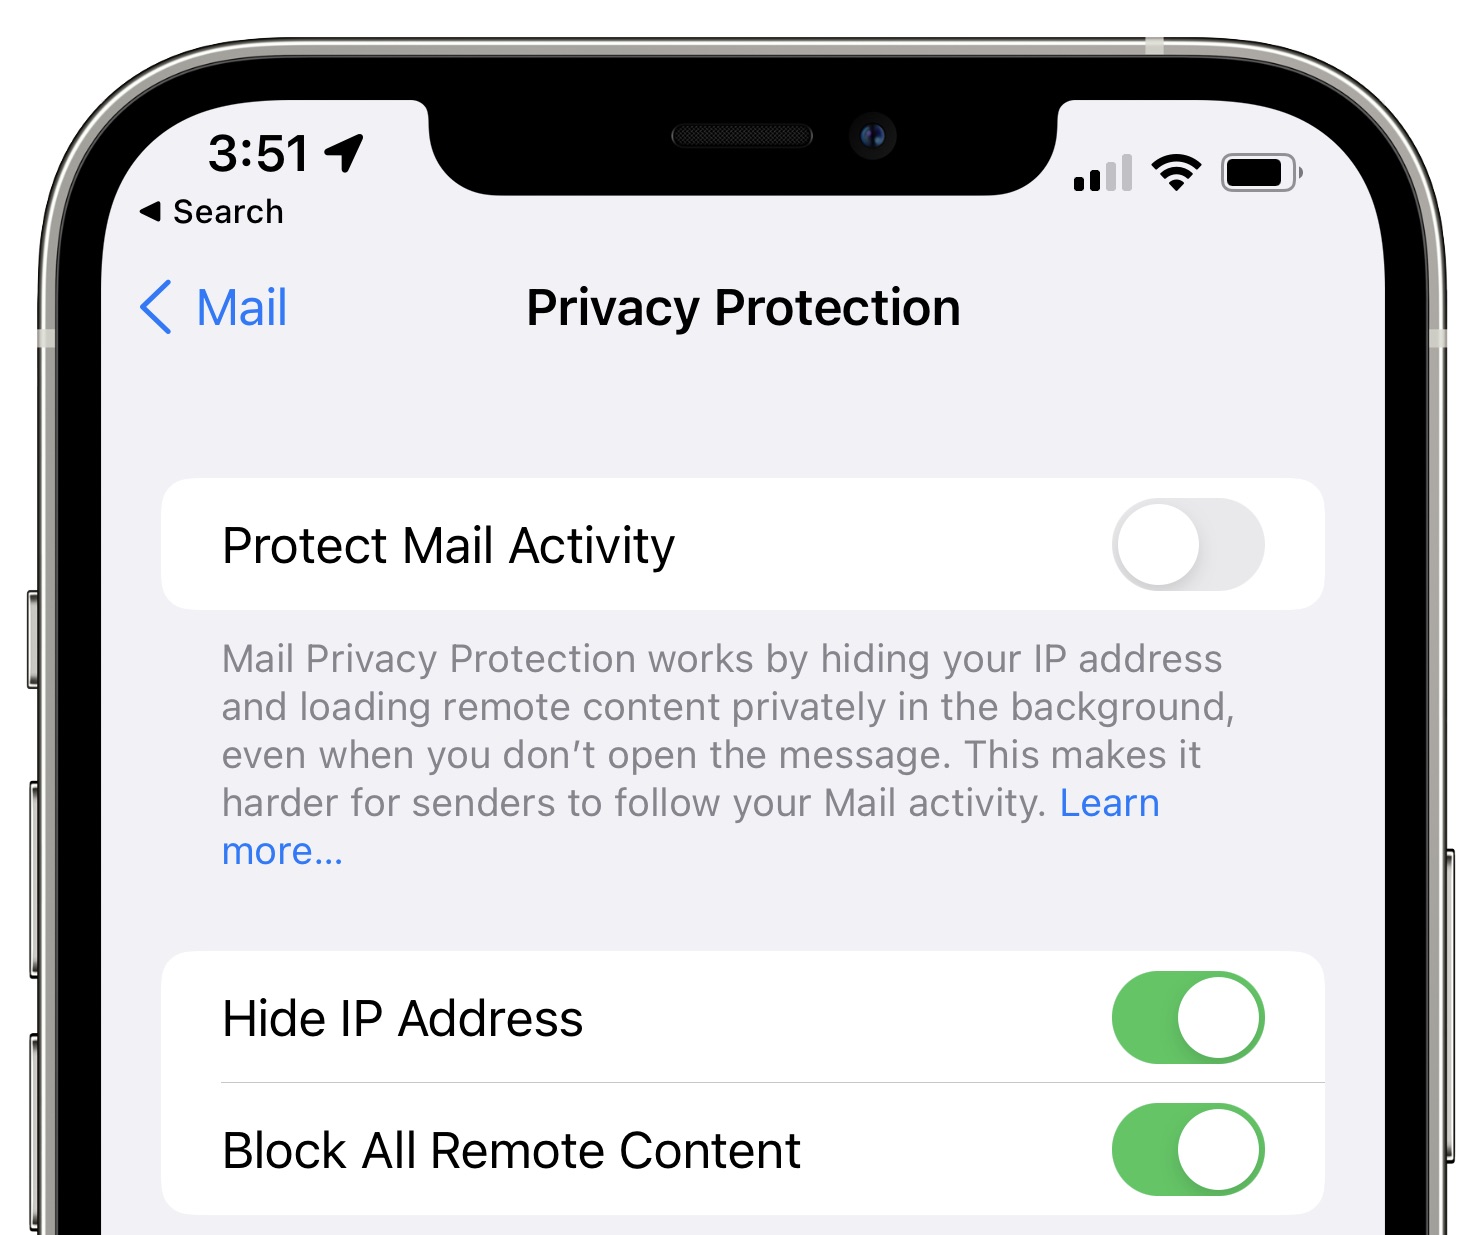
Mail Privacy Protection prevents email senders from keeping track of whether you opened an email, how many times you viewed an email, and whether you forwarded the email. It also strips your IP address and specific location for further protection.
Mail Privacy Protection can be enabled by opening up the Settings app, tapping on "Mail," and selecting "Privacy Protection." Toggle on "Protect Mail Activity."
Note that "Protect Mail Activity" overrides the prior "Hide IP Address" and "Block All Remote Content" settings, but it arguably offers better functionality because it allows all content to be viewed while still protecting your identity and email usage behavior.
We have more how Mail Privacy Protection works in our iOS 15 privacy guide.
Go Through the Health App Checklist
With iOS 15, Apple has added a "Health Checklist" feature that gives you an all-in-one place to manage your health-related settings. You can turn on features like hand washing detection and walking steadiness from here, and it's a great way to check to make sure you're taking advantage of all of the health features your devices offer.
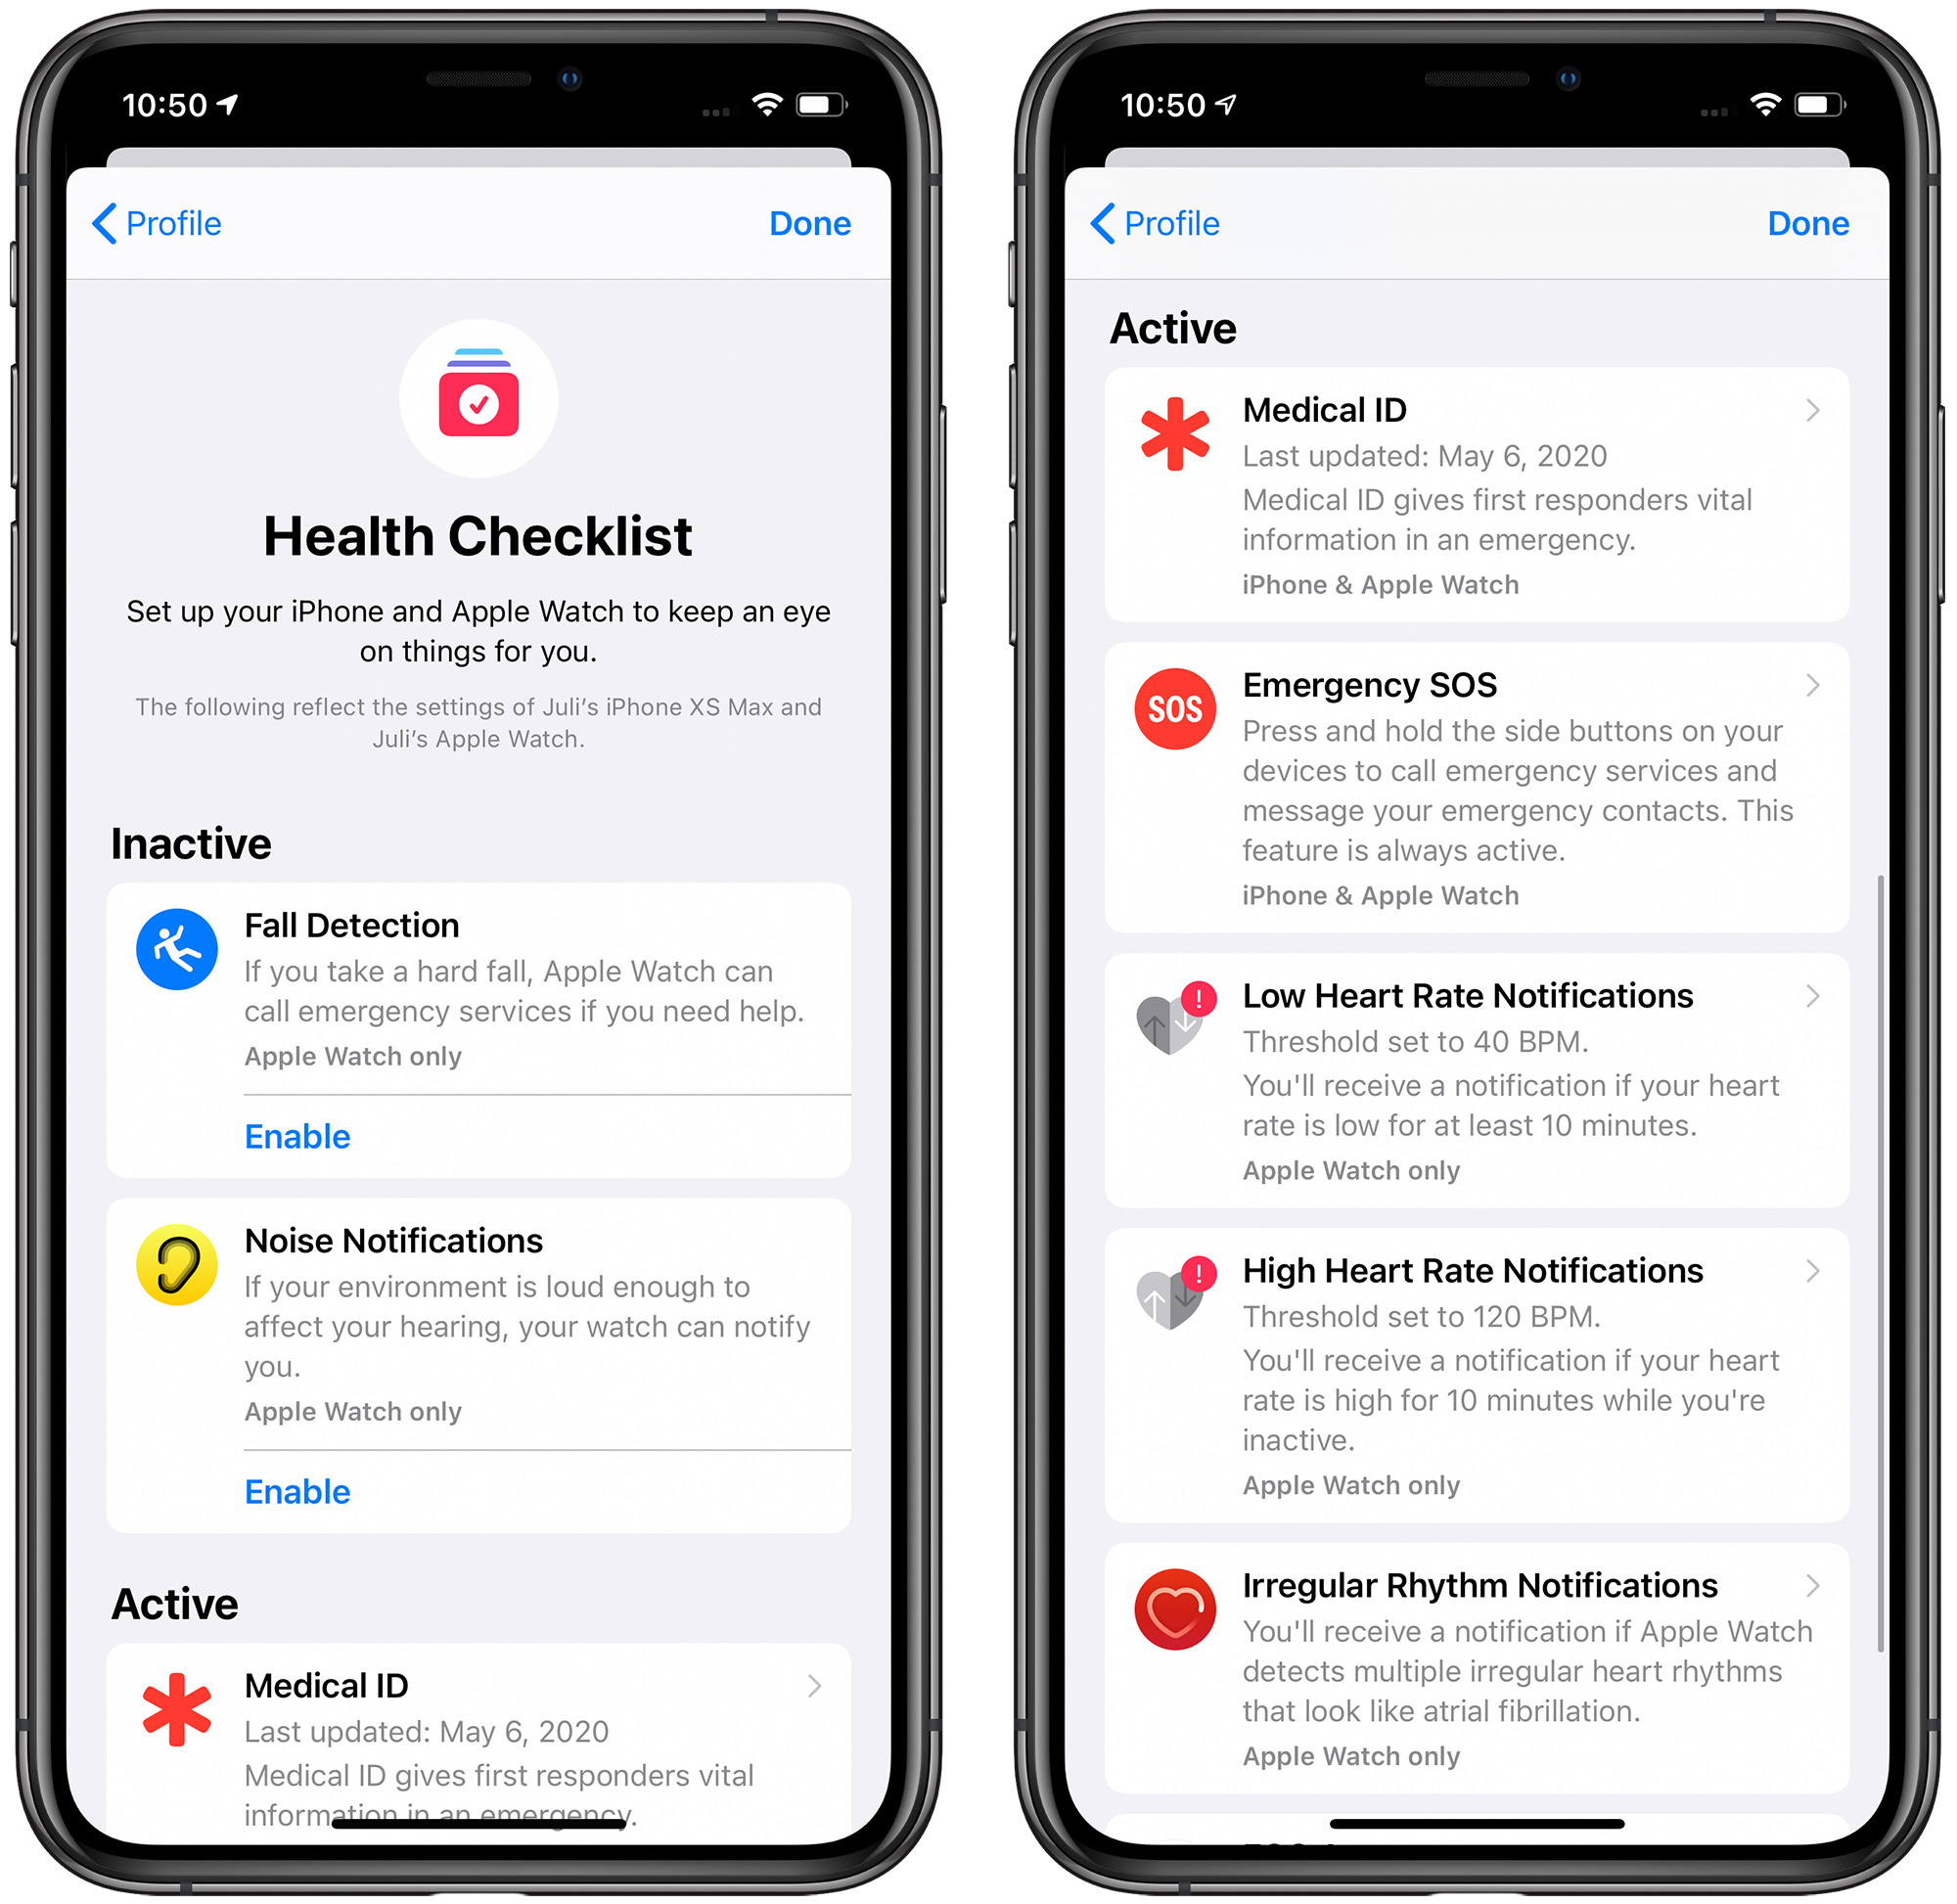
To get to the Health Checklist, open up the Health app and then tap on your profile picture in the upper right corner. From there, tap on "Health Checklist."
In this view, you can see what's enabled and what's not, and access any of the settings by tapping on the entry in the list. You can manage heart rate notifications, medical ID information, headphone notifications, and more.
iOS 15 introduces quite a few new Health-related features including Sharing, which is another option you might want to set up. Details on all of the Health additions in iOS 15 can be found in our Health guide.
Choose Your Safari Layout
iOS 15 introduces a new Safari layout that moves the address bar and tabs to the bottom of the Safari interface, and which adds new transparency options.
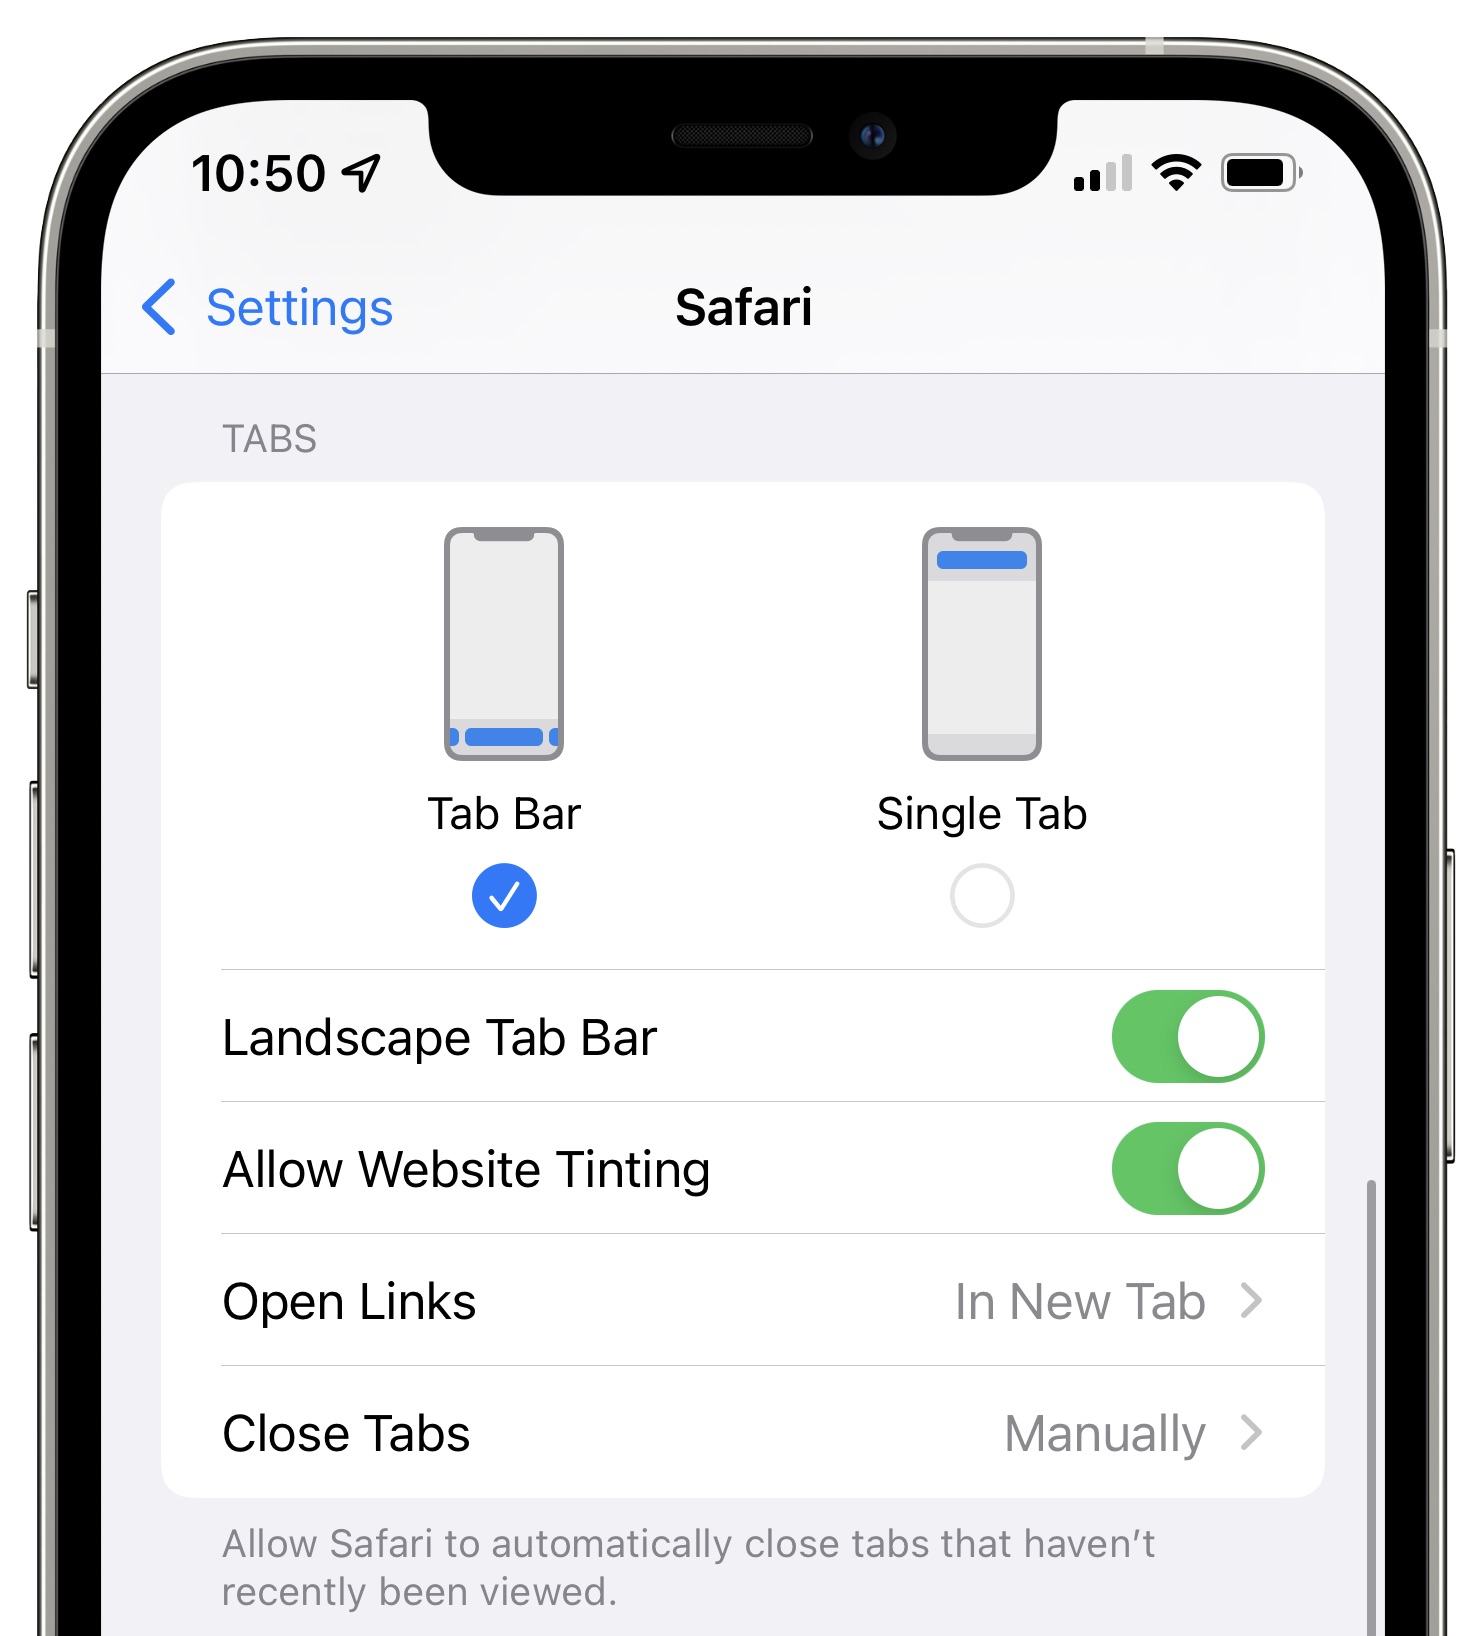
You can choose to use this new look or turn it off for an iOS 14-style Safari experience. To change the look of Safari, open up the Settings app, tap on Safari, and scroll down to the "Tabs" interface.
Choosing "Tab Bar" will give you the bottom interface that's the new design, while choosing "Single Tab" will leave you with the standard iOS 14 Safari look. You can also turn website tinting on/or off, with this feature allowing the tab bar to blend in with the background color of a website.
You can also change the look of Safari right in Safari itself by tapping on the "Aa" button and choosing "Show Top Address Bar" or "Show Bottom Tab Bar."
Safari has a number of other changes like Tab Groups and a customizable start page that you might want to set up, and more detail on Safari can be found in our iOS 15 Safari guide.
Set Up a Custom Email Domain
With iOS 15, if you have a paid iCloud+ storage plan, you can personalize your iCloud email addresses with a custom domain name that you own.
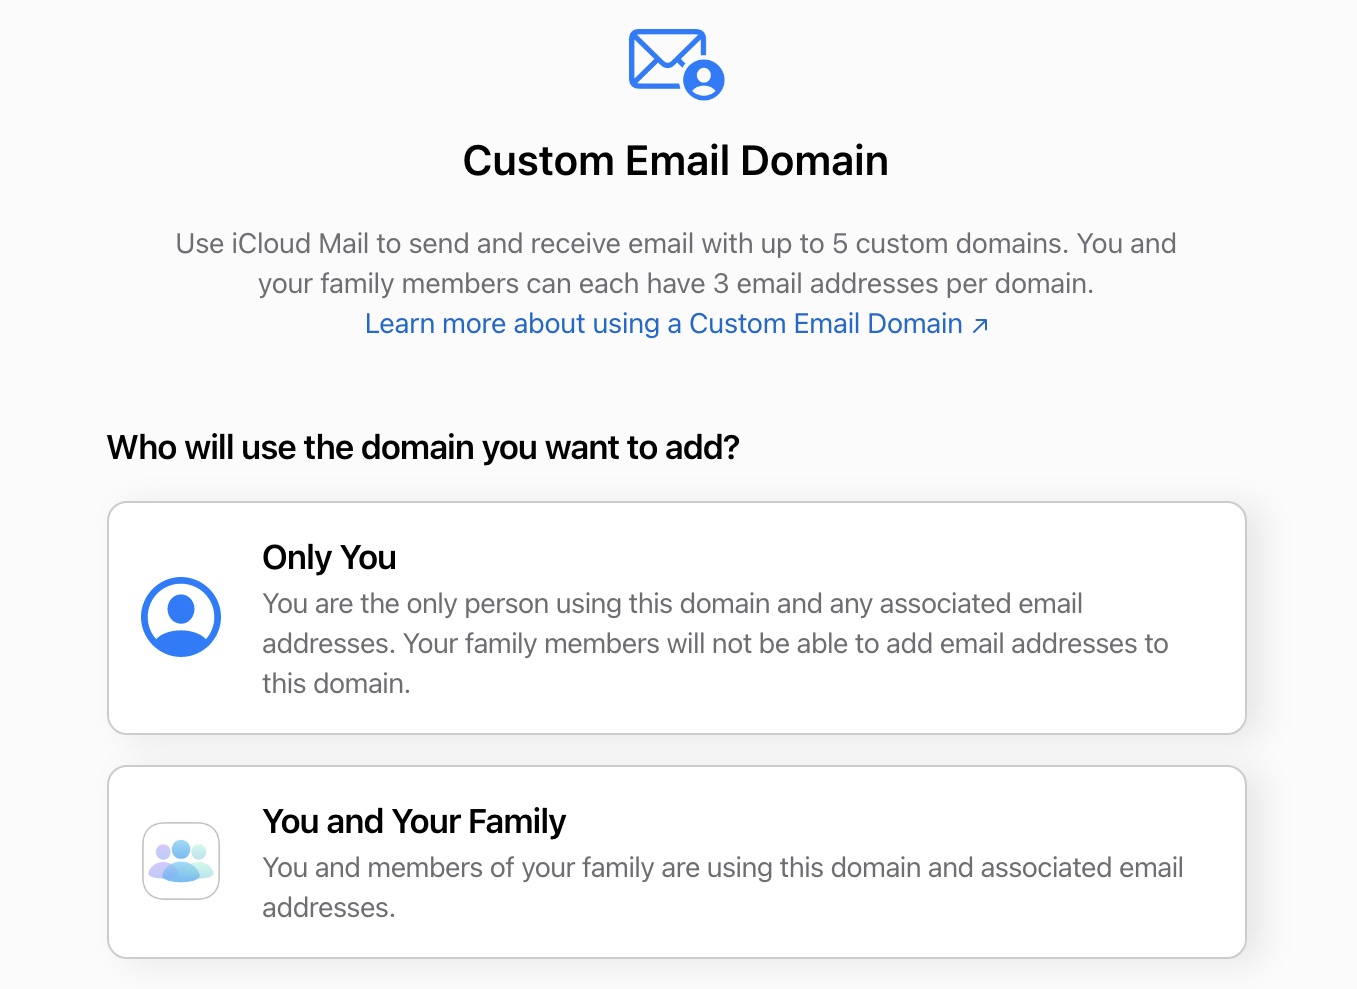
If you have the website Appleseed.com, for example, and want to use eric@appleseed.com as your iCloud email address, that's possible. Apple is still testing this feature, but to use it, go to the icloud.com website.
From there, select "Account Settings" and then select "Manage" under "Custom Email Domain" to set it up. You will need to update your domain's records with Apple's settings, so access to your domain's registrar is required.
Add Your Two-Factor Authentication Codes to Passwords
Many websites use two-factor authentication as an additional security measure alongside a password, and typically, two-factor authentication that's not based on a phone number requires a third-party app like Authy or Google Authenticator.
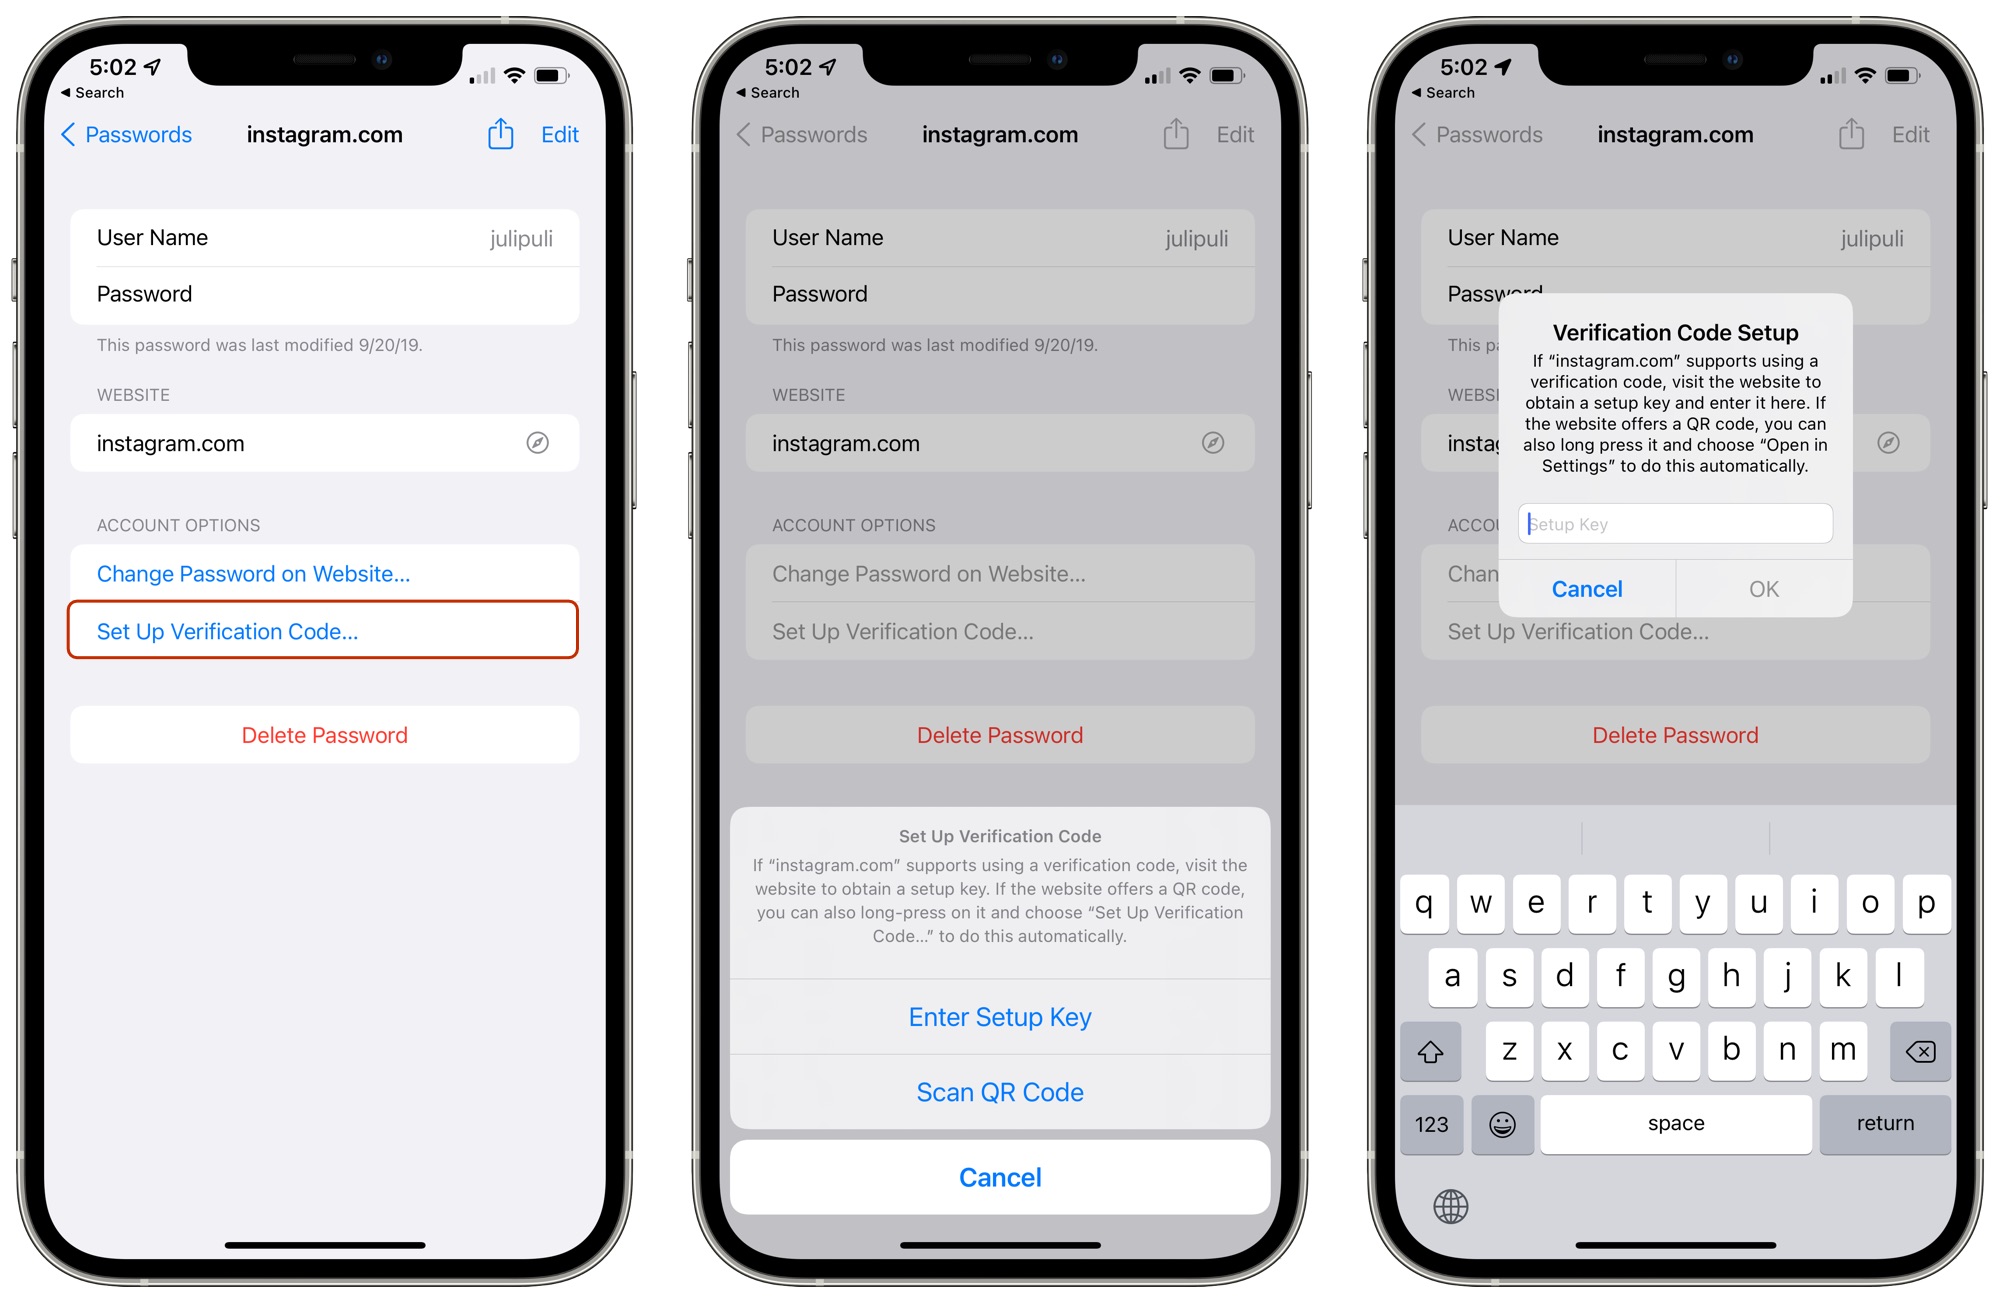
That's no longer the case in iOS 15 because Apple has added a Verification Code option to the Password app, so you can create and access two-factor authentication codes right on the iPhone without the need for another service.
In the Passwords section of the Settings app, you can tap into any password and then select "Set Up Verification Code..." to get two-factor authentication working. The iPhone can use a setup key or scan a QR code, which is how most authentication apps work.
If you already use two-factor authentication on a number of websites, it's going to be a hassle to transfer everything over to iCloud Keychain, but it may be worth the trouble because codes will autofill when you're using an Apple device for more convenient logins.
Guide Feedback
Have questions, other recommendations of features that should be set up right away when upgrading to iOS 15, or want to offer feedback on this guide? Send us an email here.
Article Link: Just Install iOS 15? Here's Where to Start
- Article Link
- https://www.macrumors.com/guide/ios-15-start-guide/
Last edited:
