Become a MacRumors Supporter for $50/year with no ads, ability to filter front page stories, and private forums.

Yoksel

macrumors newbie
Original poster
Sep 5, 2020
7
0
My wife has a Mid-2010 MacBook Pro that I bought her 10 years ago and it's still running great but lately has been getting too slow. I decided to revive it a bit with some hardware upgrade.

Upgrading RAM from 4GB to 8GB went mostly without issues although took several attempts before I found compatible memory sticks.

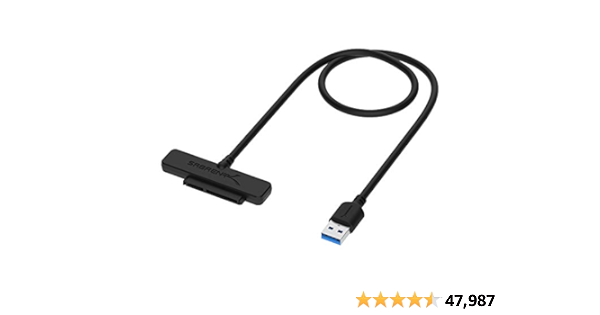
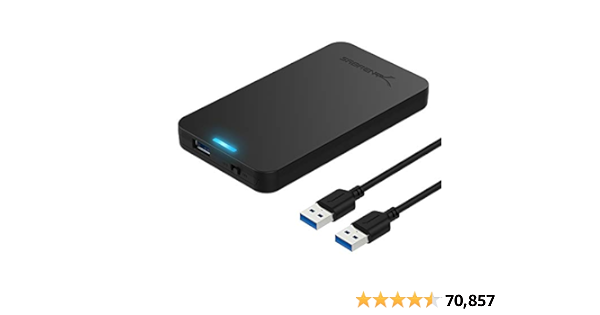
Now I'm trying to replace the HDD with SSD and having no success at all.

I can't recall which OS this Mac ran on when we purchased it but I think it was Snow Leopard. Currently it is on El Capitan.

When I try to press Command-R or Option-Command-R at boot, it does not go into OS install.

I prepped a bootable USB stick with El Capitan and booted from it - getting white screen with little crossed circle in the middle. Decided to go a step up and prepped USB stick with Sierra - same result. I read about date reset but it does not seem something I can do when booting from USB.

Struggled all day today and definitely could use some suggestions! Thank you in advance!
 

DeltaMac

macrumors G5
Jul 30, 2003
13,117
4,196
Delaware
Mid-2010 MBPro is too old for the Option-command-R boot for internet recovery. There's a firmware update that provides that support, but doesn't work on all 2010 Macs.
I think you need to use a different method for making a bootable macOS installer.
Are you trying to make that from Windows? A lot of users don't have much luck with that.
Do you have access to another Mac? That will be much easier to make a (working) bootable installer...
 
  • Like
Reactions: Yoksel

Yoksel

macrumors newbie
Original poster
Sep 5, 2020
7
0
Thank you! At least this solves the mystery around Option-Command-R not working!

This Mac is still working fine with its old hard drive so this is what I'm using to build the bootable USB. I first downloaded El Capitan from App Store and made a bootable USB stick using Terminal. When that did not work, I downloaded Sierra and made a bootable USB with it but the result was the same - white screen with little crossed circle in the middle.
 

justashooter

macrumors 6502
Apr 8, 2020
332
191
Get yourself an inexpensive external USB3 2.5 inch enclosure ($10-12), install the SSD drive in the enclosure. Download Carbon Copy Cloner, it is free to use for 30 days. Clone your drive to the external SSD. After cloning has finished reboot while holding down the option key. Select the external drive to boot from and let the MBP boot up. If it all works well, and it should, shut down the computer. Open up the computer and remove the hard drive and replace it with the ssd and reboot (you may have to hold option key again to select the SSD). How to install drive:

I realize you won't get a "clean" install of operating system but you will be surprised at how well and fast the computer will be. I have done this with multiple 2009 thru 2012 MBP 13 inch computers for friends (including 2 of my own 2012 MBP 13). You will have to enable "trim" on the SSD after you have it installed: https://www.cnet.com/how-to/installing-ssd-on-mac-trim-mistake/

If the SSD runs "flaky" after it is installed you may have a bad SATA cable. They are known to go bad on this series of MBPs and are easy to acquire and install. For some reason a hard drive will work fine on a failing cable but an SSD won't. Possibly due to the amount of data being moved.
 
Excellent suggestion! The OP can also use SuperDuper! (it's completely free) to clone your internal drive onto the SSD.

After doing all that, you might be able to "place" your current internal HDD into that enclosure. If you can, you will then have an external device that you can make backups to (with SuperDuper! (SD) or Carbon Copy Cloner (CCC)). Once you have that setup, you can use SD or CCC to clone your internal SSD to that external drive, boot form that external drive (will be slow, most likely), then do a clean installation of the newer OS you want to get to, and then migrate/copy needed files, folders, settings, etc. from that external clone. Remember to insure that all your third party applications are compatible with the newer Mac OS. This site can help with that:


Click on where it says "Options" along the top row, towards the right, and it will allow you to "expand" the versions of the Mac OS you desire.
 

Juicy Box

macrumors 604
Sep 23, 2014
7,345
8,565
Get yourself an inexpensive external USB3 2.5 inch enclosure ($10-12), install the SSD drive in the enclosure. Download Carbon Copy Cloner, it is free to use for 30 days. Clone your drive to the external SSD.
I support the cloning of the drive.

Getting the enclosure if fine, but I like to keep a few USB3/SATA3 cable adapters around like this one for 2.5" drives:


and this one for 3.5" drives:

They are quicker than enclosures for situations like the OP's.

Also, if the OP doesn't want to mess with CCC (which I really like CCC and have been using it for year), there isn't a need to clone if you have an enclosure or a USB3/SATA3 cable adapter. You can just run the installer from the HDD and install to the SSD.

One other thing to think about:
Currently it is on El Capitan.

IIRC, the highest OS you can use on the Mid 2010 MBP is 10.13 High Sierra.

If you want to continue using El Capitan, that would be perfectly fine, but I highly suggest that after you clone or install to the SSD while it is external, you upgrade the HDD to High Sierra.

There is firmware with High Sierra that will only install on an OEM Apple drive, and won't install on a third party drive. I would take care of that while the HDD is still in, then you never have to worry about it later.
 

Fishrrman

macrumors Penryn
Feb 20, 2009
27,277
11,640
OP:

I'll solve your problems in the length of time it takes to read this post.

First, you don't need to re-install the OS.
Just download CarbonCopyCloner, which is FREE to use for 30 days.
Get it here:

Then, all you need to do is:
- boot from the OLD drive
- use disk utility to initialize (erase) the SSD (the NEW drive) to Mac OS extended with journaling enabled, GUID partition format
- use CCC to clone the contents of the old drive to the new drive (it will even clone over the recovery partition)
- then, do a test boot from the SSD to make sure things are as you like
- finally, swap the drives around

If you already swapped the drives around, and the new SSD is inside the MBP and the old drive is "in your hand", then...
- get an EXTERNAL USB3 enclosure like this one:
(cheap and snaps together without tools)
- put the old drive in the enclosure
- boot from and it and follow the procedure above.

You'll want an external enclosure for the old drive in any case.
It now becomes your backup drive.

One other thing:
Once the SSD is in the MBP, be sure to go to the startup disk pref pane and RE-SELECT the SSD to be the new boot drive...
 
This post assumes you want to "move to" High Sierra from El Capitan.

OK, looking at the video for swapping out the old HDD reveals it is a standard 2.5 " HDD. Thus, it can be used in the enclosure for the SSD.

Secondly, this inexpensive Orico enclosure will do the job:


I have 3 of them, with Samsung SSDs inside, and they work fine.

Third, if High Sierra is the OS you want to get to, you can get the full, final version of the installer using dosdude1's patcher site/software:


Fourth, as I mentioned above:

a. You need to insure that all your third party applications are compatible with High Sierra. This link can help you with that:


Again, click on where it says "Options" near the upper right of the link to reveal the list for High Sierra.

b. Assuming you have not done much disk cleanup, you should do as much of that as you can before starting all this. One excellent free program you can use to assist with that is Onyx, available from here:


Make sure you download the version for El Capitan, V3.1.9. After completing the following steps, download and install the version for High Sierra (on your High Sierra system): V3.4.9.

Lastly, either get the free version of Carbon Copy Cloner (CCC) (link above in Fishrrman's post), or SuperDuper! (SD):


Either one is reliable, work flawlessly, and will make bootable clones of your old system.

OK, here are the steps you would take:

1. Boot up your machine.
2. "Install"/place the SSD inside the Orico external enclosure.
3. Connect that external enclosure to your Mac.
4. Start up Disk Utility, and as Fishrrman states above, Erase the SSD, and format it.
5. Start up SD (or CCC), and make a complete backup/clone of your current El Capitan system onto the external SSD.
6. Restart your Mac from that just completed backup/clone.
7. Shut down your Mac, disconnect the external enclosure, and swap the drives.
8. Turn on your Mac, and start it up from the external HDD (now inside the enclosure). Will be somewhat slow, but should work.
9. From that HDD, launch Disk Utility, and Erase and format the internal SSD.
10. Navigate to dosdude1's High Sierra patcher, launch it, and then do a clean, fresh installation of High Sierra onto the internal SSD.
11. At the end of that installation, you'll be offered the opportunity to migrate/copy needed files, folders, settings, etc. from the external HDD to the internal SSD. Do that.
12. Restart your Mac from the internal SSD. You will then be good to go (except for installing the High Sierra version of Onyx.

If after #7 you just want to use your Mac as is, ie, with El Capitan, that's fine. Note that you will have an external device onto which you can "place" backups/clones.
 
Last edited:

Yoksel

macrumors newbie
Original poster
Sep 5, 2020
7
0
Mid-2010 MBPro is too old for the Option-command-R boot for internet recovery. There's a firmware update that provides that support, but doesn't work on all 2010 Macs.
This was the key. I found and installed firmware update. It updated firmware enough to enable internet recovery which worked smoothly and installed High Sierra!
 

Yoksel

macrumors newbie
Original poster
Sep 5, 2020
7
0
You will have to enable "trim" on the SSD after you have it installed: https://www.cnet.com/how-to/installing-ssd-on-mac-trim-mistake/

If the SSD runs "flaky" after it is installed you may have a bad SATA cable. They are known to go bad on this series of MBPs and are easy to acquire and install. For some reason a hard drive will work fine on a failing cable but an SSD won't. Possibly due to the amount of data being moved.
Big thanks about reminding me about TRIM. I recall it from early days of SSDs but haven't had to enable it manually in a long time. Not surprising here because this is 10 years old hardware - glad it at least supports SSD smoothly :)

I'll keep SATA cable in mind but so far I don't see any issues (knock on wood).
 

Yoksel

macrumors newbie
Original poster
Sep 5, 2020
7
0
One thing to mention, I see a lot of people suggesting cloning the old drive to SSD. I could probably use it as a last resort and don't need to think about it anymore now since the issue is solved but there's a couple of reasons why I did not like this idea.

1. Fresh install likely cleans up the system. Unnecessary old installs, upgrades, software that isn't used anymore, settings/configuration. Maybe OS X/macOS is better about it than Windows but still over 10 years of use I'm sure it gets clogged up with unnecessary junk.

2. The method only works if the old drive is still operational. That was my case but what if the HDD was dead. There's gotta be a way to boot up from another media and install OS on empty new drive.

P.S. Still have no idea why bootable SSDs did not load the system. Could be something that's solved now by the firmware updates. I did not try again because I don't want to jinx it. It's wife's laptop, I just want it to work and be done with it :)

P.P.S. One last thing left now - need to replace the trackpad. Wish me luck :)
 

justashooter

macrumors 6502
Apr 8, 2020
332
191
Great that you got it figured out. The 2010 that I upgraded I did not come across the firmware update, but the owner wanted all the data that was on the drive, so a clone of the drive was the way to go.

About the trackpad, have you examined the battery to make sure it is not swollen? You don't say what the problem is with the trackpad but one indicator of a swollen battery is that the track pad gets flaky, is hard to click, etc. The battery, which runs under the trackpad, swells and puts pressure on the trackpad. Just a thought.
 

Yoksel

macrumors newbie
Original poster
Sep 5, 2020
7
0
About the trackpad, have you examined the battery to make sure it is not swollen? You don't say what the problem is with the trackpad but one indicator of a swollen battery is that the track pad gets flaky, is hard to click, etc. The battery, which runs under the trackpad, swells and puts pressure on the trackpad. Just a thought.
I have not tried to remove the battery yet. Is this battery swelling something that's clearly visible? I did not notice any signs on the side that's on the other side of the trackpad but don't know what's going on close to trackpad yet.

The trackpad works fine to move the cursor but pressing is hard. Sometimes it registers a click, other times it does not. I did not know about potential battery problem but reasonably I expect a mechanical device like a trackpad to wear out after 10 years of use.
 

justashooter

macrumors 6502
Apr 8, 2020
332
191
"pressing is hard" would be a symptom.

The tightest area is where the battery runs past the trackpad. It may not be immediately apparent just looking at it, especially if you don't have a battery to compare it to. The way to check is simply remove the battery, turn the computer right side up and click the trackpad.

My avatar at the left would be an extreme example of a swollen battery. Remove from a 2011 MBP 13, I had to drill one of the screws out on the bottom cover because there was so much pressure against the cover it would not unscrew. It continued to swell.
 

Yoksel

macrumors newbie
Original poster
Sep 5, 2020
7
0
Thanks! I guess I'll try to take the battery out and look at it from the side adjacent to the trackpad.

I'm open to spend $25 on a brand new genuine Apple trackpad and replace it but if it comes to new battery, I doubt it makes any sense to put more money into the mid 2010 MBP. Would just have to move on to a new model in this case.
 
Register on MacRumors! This sidebar will go away, and you'll see fewer ads.