I used iFixit's teardown and teardown video as a reference to non destructively remove the outer mesh sock (3D mesh as Apple calls it) and tear the unit down to a point.
This isn't a guide, but I plan on getting around to making one with better photos in the future. (I didn't take photos of the parts iFixit already did) Nothing was wrong with this HomePod, but for those with completely dead units, I would suspect the integrated power supply has failed. Everything went back together with out a problem, but it takes a little finesse to get the "3D mesh" secured back into place at the top
1. Using a hair dryer, heat up the plastic touch surface and carefully remove it. It requires A LOT of heat and careful prying and the use of plastic guitar picks to avoid damage. You don't want to crack it since I have no idea where you can get a replacement.
2. Remove the 4 T6 screws securing the touch PCB, flip it over, pop up the ZIF retaining clip and remove the cable.
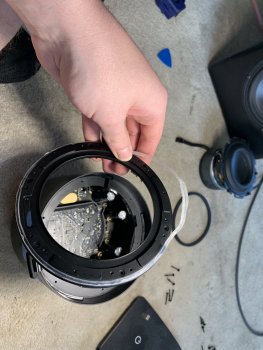
3. Remove the 2 T6 screws securing the drawstrings and undo the draw strings
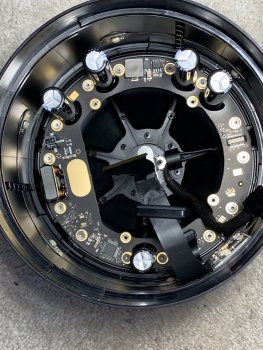
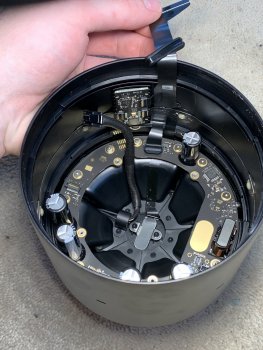
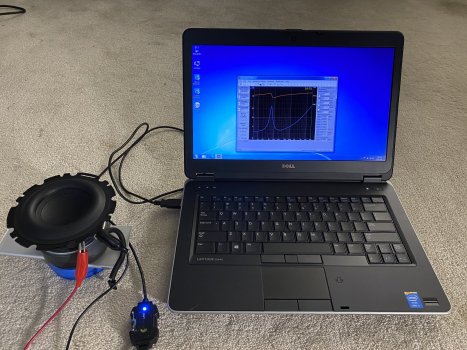
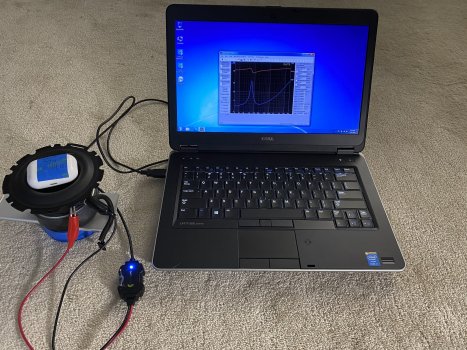
4. Remove the 4 T6 screws securing the plastic assembly in place, remove it and flip up the logic board, carefully pry up the ZIF retaining clip, remove the main cable. At this point you will see the 4" woofer below.
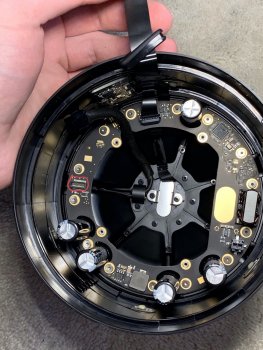
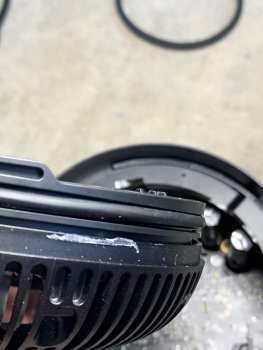
5. Remove the rubber screw covers and 9 T6 screws. This is where iFixit got stuck and where I got stumped trying to figure this out. Had to think about it for a few days and looked at other destructive teardowns. I tried using clamps to pull it off and twist it off with no luck. Make sure you use a hairdryer to loosen the foam adhesive securing the ribbon cable to the top cover. Again, if this is torn or damaged, I don't know where you could source a replacement from. I've indicated that area with a red square outline.
6. Heat the perimeter/joining line with a hairdryer on the hottest setting. Take your time getting it nice and hot. Don't use a heat gun as this will damage the plastics and melt the rubber surround of the woofer.
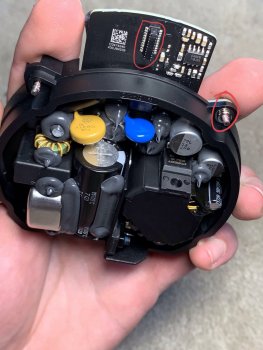
7.Using a wide flat blade screw driver with the tip wrapped in electrical tape, insert it as shown and twist to separate the top cover from the HomePod. (I didn't use tape and as a result I scuffed/marred the outer basket edge of the woofer. Thankfully it's only cosmetic damage and not something you can see when reassembled.
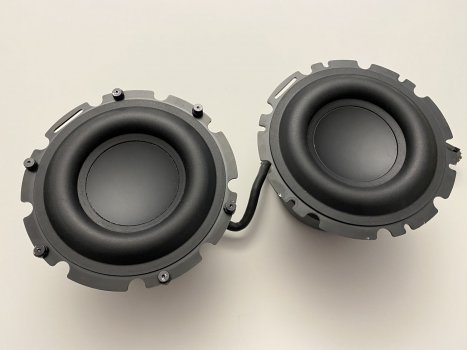
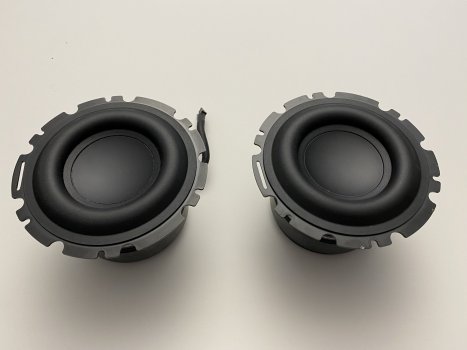
8. Once removed, the rest is pretty self explanatory. Six more T6 screws secure the woofer, a handful secure a plastic ring, and with that removed a metal ring unscrews
.


This isn't a guide, but I plan on getting around to making one with better photos in the future. (I didn't take photos of the parts iFixit already did) Nothing was wrong with this HomePod, but for those with completely dead units, I would suspect the integrated power supply has failed. Everything went back together with out a problem, but it takes a little finesse to get the "3D mesh" secured back into place at the top
1. Using a hair dryer, heat up the plastic touch surface and carefully remove it. It requires A LOT of heat and careful prying and the use of plastic guitar picks to avoid damage. You don't want to crack it since I have no idea where you can get a replacement.
2. Remove the 4 T6 screws securing the touch PCB, flip it over, pop up the ZIF retaining clip and remove the cable.
3. Remove the 2 T6 screws securing the drawstrings and undo the draw strings
4. Remove the 4 T6 screws securing the plastic assembly in place, remove it and flip up the logic board, carefully pry up the ZIF retaining clip, remove the main cable. At this point you will see the 4" woofer below.
5. Remove the rubber screw covers and 9 T6 screws. This is where iFixit got stuck and where I got stumped trying to figure this out. Had to think about it for a few days and looked at other destructive teardowns. I tried using clamps to pull it off and twist it off with no luck. Make sure you use a hairdryer to loosen the foam adhesive securing the ribbon cable to the top cover. Again, if this is torn or damaged, I don't know where you could source a replacement from. I've indicated that area with a red square outline.
6. Heat the perimeter/joining line with a hairdryer on the hottest setting. Take your time getting it nice and hot. Don't use a heat gun as this will damage the plastics and melt the rubber surround of the woofer.
7.Using a wide flat blade screw driver with the tip wrapped in electrical tape, insert it as shown and twist to separate the top cover from the HomePod. (I didn't use tape and as a result I scuffed/marred the outer basket edge of the woofer. Thankfully it's only cosmetic damage and not something you can see when reassembled.
8. Once removed, the rest is pretty self explanatory. Six more T6 screws secure the woofer, a handful secure a plastic ring, and with that removed a metal ring unscrews
.