UPDATE:
The solution detailed below is more or less out of date at this point, as I have recently developed a custom gMux IC firmware that not only permanently disables the AMD GPU, but also retains full native software-controlled display backlight brightness. Documentation explaining the process of flashing my custom firmware can be found here.
-----------------------------------------------------------------------------------
Recently, I figured out a very good solution to PERMANENTLY disable the dedicated AMD video card on a 2011 15"/17" MacBook Pro (MacBookPro8,2/8,3)! For those of you who don't know, MacBook Pros that utilize dynamic GPU switching between a dedicated GPU and integrated GPU use an IC known as the "gMux" chip. This is simply an off-the-shelf micro-controller, programmed with special firmware that switches active GPUs on-the-fly in a MacBook Pro system. This IC has 3 sets of LVDS lines connecting to it: The LVDS output lines from the dedicated GPU, the LVDS output lines from the integrated GPU, and the LVDS lines connecting to the connector for the display. In order to accomplish dynamic GPU switching, all this IC does is, when told to by the system, routes the correct set of LVDS lines to the display's LVDS output on the logic board.
In order to permanently keep the dedicated GPU disabled, there are 2 options:
- Option A, which will be detailed below, is to hard-wire the LVDS output lines from the integrated graphics straight to the lines connecting to the display.
- Option B would be to re-program the gMux IC (which is simply a Lattice LFXP2 FPGA), with a custom firmware to disable the GPU switching functionality. I may experiment with this in the future, but doing so requires special hardware that I don't have. This would, of course, be the optimal solution, though. EDIT: I have now done this, and it works perfectly! More details can be found by watching my video demonstrating my custom gMux IC firmware.
Performing the Modification ("Option A")
Before I get started with the explanation, I just want to make it clear this this is a VERY tedious modification, and requires precision soldering equipment. Use of a microscope is recommended.
To begin, here is a brief look at the schematic, and the main premise of this mod. In the following pictures, you can see how the LVDS data lines appear for both the integrated graphics output, dedicated graphics output, and the LVDS output for the display (EG for dedicated GPU, IG for integrated GPU, and CONN of course for connector). You can see how this data line corresponds with each set of LVDS lines. There are 12 total LVDS lines (6 pairs).


In order to perform this modification,the first thing that needs to be done is to remove the gMux IC. EDIT: Do NOT remove the gMux IC. After further experimentation, I found that leaving it in place will allow you to achieve full graphics acceleration WITHOUT flashing the system firmware at all. Simply proceed with the wiring, with the gMux IC in place.
Once the chip is removed and the pads are cleaned, each LVDS data line from the LVDS_IG side needs to be connected to its corresponding data line on the LVDS_CONN side. Of course, to do this, the use of small bodge wires is required. I used 0.1MM jumper wire (which can be purchased here). A wire needs to be used to connect each IG data line to its respective point on the CONN side.
Here is a wiring diagram that will help you do this very easily. This one is for a 15" machine, but I will update this post with the 17" one once I make it.

Once all the data lines are soldered properly, there are still a couple more lines that need to be soldered. We'll start with the clock lines. If you look on the schematic, you will notice that there is one set of clock lines on the LVDS_IG side (LVDS_IG_A_CLK), but 2 sets on the LVDS_CONN side (LVDS_CONN_A_CLK and LVDS_CONN_B_CLK). All you need to do in this instance is connect the A_CLK pair from the IG side to the A_CLK resistor pair on the CONN side. Then, simply connect the A_CLK pair to the B_CLK pair on the CONN side as well.
The next thing we need to do is pull the LVDS_DDC_SEL_IG rail high. To do this, all you need to do is connect the high side of this rail's pulldown resistor (R6982) to the PP3V3_S0 rail. I connected it to a capacitor near the backlight IC (C9711), as it was the easiest and closest source of PP3V3_S0 to that point of the board. This routes the necessary LVDS DDC clock lines to the integrated GPU.
The last few things we need to wire up are the enable rails for the LCD backlight and LCD panel power, as well as the PWM signal for the backlight. The first wire simply needs to bridge the following rails: LCD_PWR_EN, LVDS_IG_PANEL_PWR, and LCD_BKLT_EN.
The last wire will be used to wire the backlight PWM signal. The purpose of this signal is to control the backlight brightness level. Now, normally, the PWM signal is generated by the gMux IC. However, since the gMux IC is no longer in place, it cannot provide this signal (and even if you were to leave it in place, it still would not be able to provide this signal. I may be wrong on this, but feel free to test if you want.) As such, we will simply be wiring this rail to the LVDS_IG_BKL_ON rail. Unfortunately, what this means is that the backlight will remain at a fixed brightness, and be uncontrollable from the OS.
UPDATE: I have finished working on a new solution for backlight brightness control! You can read about, and see this modification in action here.
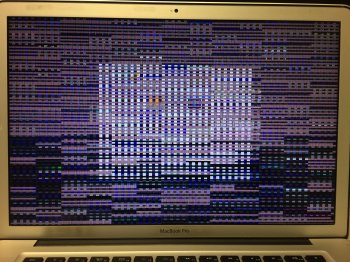
Finally, once all that is wired up, the system should be good to go! The final product will look something like this:

Last Step
After all your wiring is complete, you will need to cut power to the dedicated GPU, otherwise it will simply produce waste heat. To do so, all you need to do is remove the resistor that supplies power to the GPU VCORE regulator IC, R8911.
At last, once all that is complete, you are now done! You will now have a fully working 2011 15" or 17" MacBook Pro, running off ONLY integrated graphics! No OS X modifications are necessary, and it is not reliant on any NVRAM variable (obviously). This, short of making custom firmware for the gMux chip, is the BEST solution for rectifying the defective AMD GPU issue on these machines. The only issues are the lack of brightness control as mentioned earlier, and the external display port will not work. Other than that, though, everything works perfectly!
I have a video showing the mod in detail here.

The solution detailed below is more or less out of date at this point, as I have recently developed a custom gMux IC firmware that not only permanently disables the AMD GPU, but also retains full native software-controlled display backlight brightness. Documentation explaining the process of flashing my custom firmware can be found here.
-----------------------------------------------------------------------------------
Recently, I figured out a very good solution to PERMANENTLY disable the dedicated AMD video card on a 2011 15"/17" MacBook Pro (MacBookPro8,2/8,3)! For those of you who don't know, MacBook Pros that utilize dynamic GPU switching between a dedicated GPU and integrated GPU use an IC known as the "gMux" chip. This is simply an off-the-shelf micro-controller, programmed with special firmware that switches active GPUs on-the-fly in a MacBook Pro system. This IC has 3 sets of LVDS lines connecting to it: The LVDS output lines from the dedicated GPU, the LVDS output lines from the integrated GPU, and the LVDS lines connecting to the connector for the display. In order to accomplish dynamic GPU switching, all this IC does is, when told to by the system, routes the correct set of LVDS lines to the display's LVDS output on the logic board.
In order to permanently keep the dedicated GPU disabled, there are 2 options:
- Option A, which will be detailed below, is to hard-wire the LVDS output lines from the integrated graphics straight to the lines connecting to the display.
- Option B would be to re-program the gMux IC (which is simply a Lattice LFXP2 FPGA), with a custom firmware to disable the GPU switching functionality. I may experiment with this in the future, but doing so requires special hardware that I don't have. This would, of course, be the optimal solution, though. EDIT: I have now done this, and it works perfectly! More details can be found by watching my video demonstrating my custom gMux IC firmware.
Performing the Modification ("Option A")
Before I get started with the explanation, I just want to make it clear this this is a VERY tedious modification, and requires precision soldering equipment. Use of a microscope is recommended.
To begin, here is a brief look at the schematic, and the main premise of this mod. In the following pictures, you can see how the LVDS data lines appear for both the integrated graphics output, dedicated graphics output, and the LVDS output for the display (EG for dedicated GPU, IG for integrated GPU, and CONN of course for connector). You can see how this data line corresponds with each set of LVDS lines. There are 12 total LVDS lines (6 pairs).
In order to perform this modification,
Here is a wiring diagram that will help you do this very easily. This one is for a 15" machine, but I will update this post with the 17" one once I make it.
Once all the data lines are soldered properly, there are still a couple more lines that need to be soldered. We'll start with the clock lines. If you look on the schematic, you will notice that there is one set of clock lines on the LVDS_IG side (LVDS_IG_A_CLK), but 2 sets on the LVDS_CONN side (LVDS_CONN_A_CLK and LVDS_CONN_B_CLK). All you need to do in this instance is connect the A_CLK pair from the IG side to the A_CLK resistor pair on the CONN side. Then, simply connect the A_CLK pair to the B_CLK pair on the CONN side as well.
The next thing we need to do is pull the LVDS_DDC_SEL_IG rail high. To do this, all you need to do is connect the high side of this rail's pulldown resistor (R6982) to the PP3V3_S0 rail. I connected it to a capacitor near the backlight IC (C9711), as it was the easiest and closest source of PP3V3_S0 to that point of the board. This routes the necessary LVDS DDC clock lines to the integrated GPU.
The last few things we need to wire up are the enable rails for the LCD backlight and LCD panel power, as well as the PWM signal for the backlight. The first wire simply needs to bridge the following rails: LCD_PWR_EN, LVDS_IG_PANEL_PWR, and LCD_BKLT_EN.
The last wire will be used to wire the backlight PWM signal. The purpose of this signal is to control the backlight brightness level. Now, normally, the PWM signal is generated by the gMux IC. However, since the gMux IC is no longer in place, it cannot provide this signal (and even if you were to leave it in place, it still would not be able to provide this signal. I may be wrong on this, but feel free to test if you want.) As such, we will simply be wiring this rail to the LVDS_IG_BKL_ON rail. Unfortunately, what this means is that the backlight will remain at a fixed brightness, and be uncontrollable from the OS.
UPDATE: I have finished working on a new solution for backlight brightness control! You can read about, and see this modification in action here.
Finally, once all that is wired up, the system should be good to go! The final product will look something like this:
Last Step
After all your wiring is complete, you will need to cut power to the dedicated GPU, otherwise it will simply produce waste heat. To do so, all you need to do is remove the resistor that supplies power to the GPU VCORE regulator IC, R8911.
At last, once all that is complete, you are now done! You will now have a fully working 2011 15" or 17" MacBook Pro, running off ONLY integrated graphics! No OS X modifications are necessary, and it is not reliant on any NVRAM variable (obviously). This, short of making custom firmware for the gMux chip, is the BEST solution for rectifying the defective AMD GPU issue on these machines. The only issues are the lack of brightness control as mentioned earlier, and the external display port will not work. Other than that, though, everything works perfectly!
I have a video showing the mod in detail here.
Last edited:
As an Amazon Associate, MacRumors earns a commission from qualifying purchases made through links in this post.