After a lengthy bit of browsing I decided that I could not easily find a tutorial for installing and booting Linux from a external usb that works on Macs, so I thought that I might make one. Here it goes:
Prerequisites:
Note: For this tutorial I am using a Mac with OS X El Capitan, If you are using a Mac with an earlier version of OS X installed then some parts that use Disk Utility will be slightly different.
Step #1:
Once you have everything you need a good place to start is Disk Utility.

While still in Disk Utility you can partition your soon to be OS install drive.
Step #2
After formatting the drives, you will need to create the install disk with UNetbootin or your preferred equivalent.
Select 'EFI Boot' followed by 'Try Ubuntu without installing' to boot into a 'live' version of Ubuntu
Step #3
Tip: At this point you may want to use WiFi if you are using a laptop, but you may find that you are unable to if your laptop has a Broadcom wireless chip (Most 802.11AC laptops to my knowledge). To enable Wifi for updates ect. during the installation, Go to 'System Settings' -> 'Software & Updates' -> 'Additional Drivers' and enable the Broadcom driver (Note: this seems to only work during installation, you will need to connect to the internet some way or another and install 'bcmwl-kernel-source' via the terminal after installation).

Now that you have your favorite version of Linux installed, it's now time to make it 'bootable' so that your Mac can see it as a boot drive.
Note: Some of you may not have to mount the EFI partition on the internal drive if GRUB managed to install itself on the external drive. Steps 2 - 5 are solely a work around for a glitch that I have experienced where the Ubuntu installer completely ignores when you told it to install the boot loader. If you are sure that is not the case (e.g. you disconected the internal drive to prevent harm.) then only create a folder for and mount the EFI partiton of the USB drive. However it is always handy to mount the EFI partition of the internal drive just to check.
Once you have installed Linux you may need to set OS X as the startup disk again, I have found myself that ubuntu (more likely grub) sometimes likes to set itself as the default boot loader for when the system starts up which will inevitably lead to your system complaining that no startup volume can be found because you moved the boot files after the installation.

Installing Ubuntu Linux (or any other Linux distro really) onto a USB drive for use with Macs.
Prerequisites:
- A 64 bit capable Intel Mac (Anything from 2008 or after should be fine i.e Intel Core 2 Duo machines)
- A 64 bit EFI capable (Desktop) Ubuntu iso file or equivalent for your favourite distro.
- UNetbootin or similarly capable software for creating an install drive from the .iso file
- A 2GB or larger USB for putting the installer on. This will be erased so make sure you take everything important off it.
- A USB Flash or Hard Drive of you choice and size (32 GB minimum recommended for Ubuntu 16.04) This will be erased so make sure you take everything important off it.
Note: For this tutorial I am using a Mac with OS X El Capitan, If you are using a Mac with an earlier version of OS X installed then some parts that use Disk Utility will be slightly different.
Step #1:
Once you have everything you need a good place to start is Disk Utility.
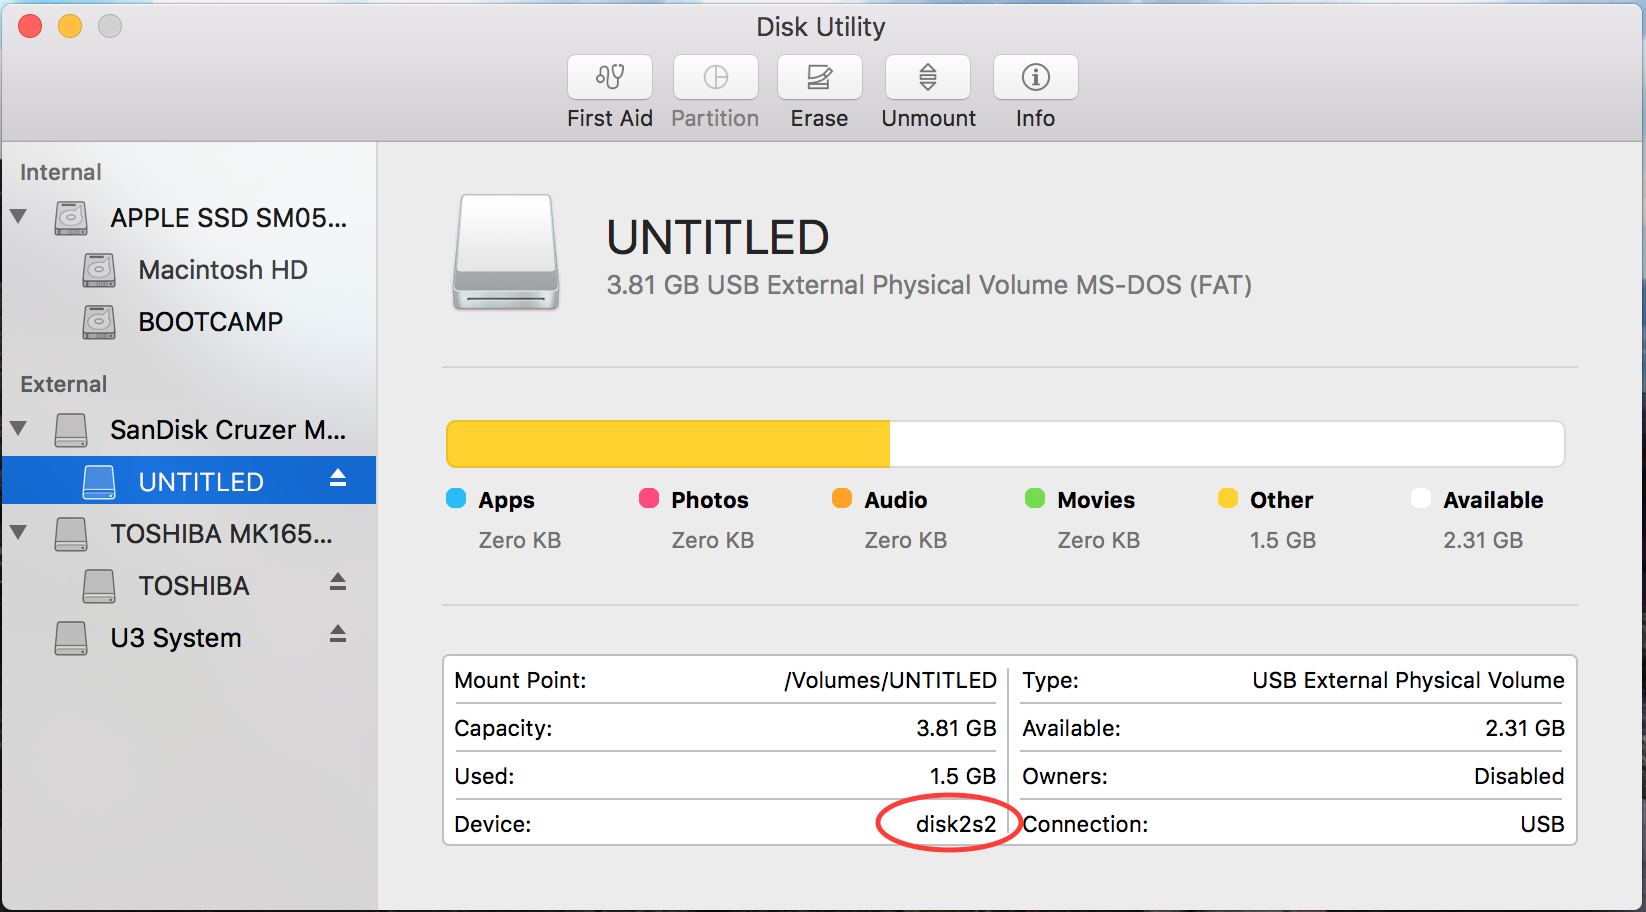
- Open Disk Utility and select the USB drive you wish to boot the installer from and erase it as FAT32 using GPT Partition Table. For this I am using a 4 GB Sandisk Cruzer from back when they made the 'U3' USBs
While still in Disk Utility you can partition your soon to be OS install drive.
- Select the drive and erase it as OS X Extended (Journaled) with the GPT Partition Table, this is because for some reason El Capitan wont let you partition a drive that has been formatted otherwise.


- Once the drive has been erased, open the partitioning window and create the partitions however you want them. I you are not sure, I for example have created three partitions on my drive. The first partition is 50 GB and is for the system (/ mount point) the third partition is 4 Gb for swap and the second partition takes up what ever space is left and is used for the user data (/home mount point)

- Click 'Apply' and wait for the disk to Finish partitioning.
- Select the drive and erase it as OS X Extended (Journaled) with the GPT Partition Table, this is because for some reason El Capitan wont let you partition a drive that has been formatted otherwise.
Step #2
After formatting the drives, you will need to create the install disk with UNetbootin or your preferred equivalent.
- Open UNetbootin, you will be confronted with a prompt to input the credentials of an account with administration rights.

- Select the 'Disk Image' option and browse to your .iso file, then select the correct device from the drop down list. It should look something like this before hitting 'OK':

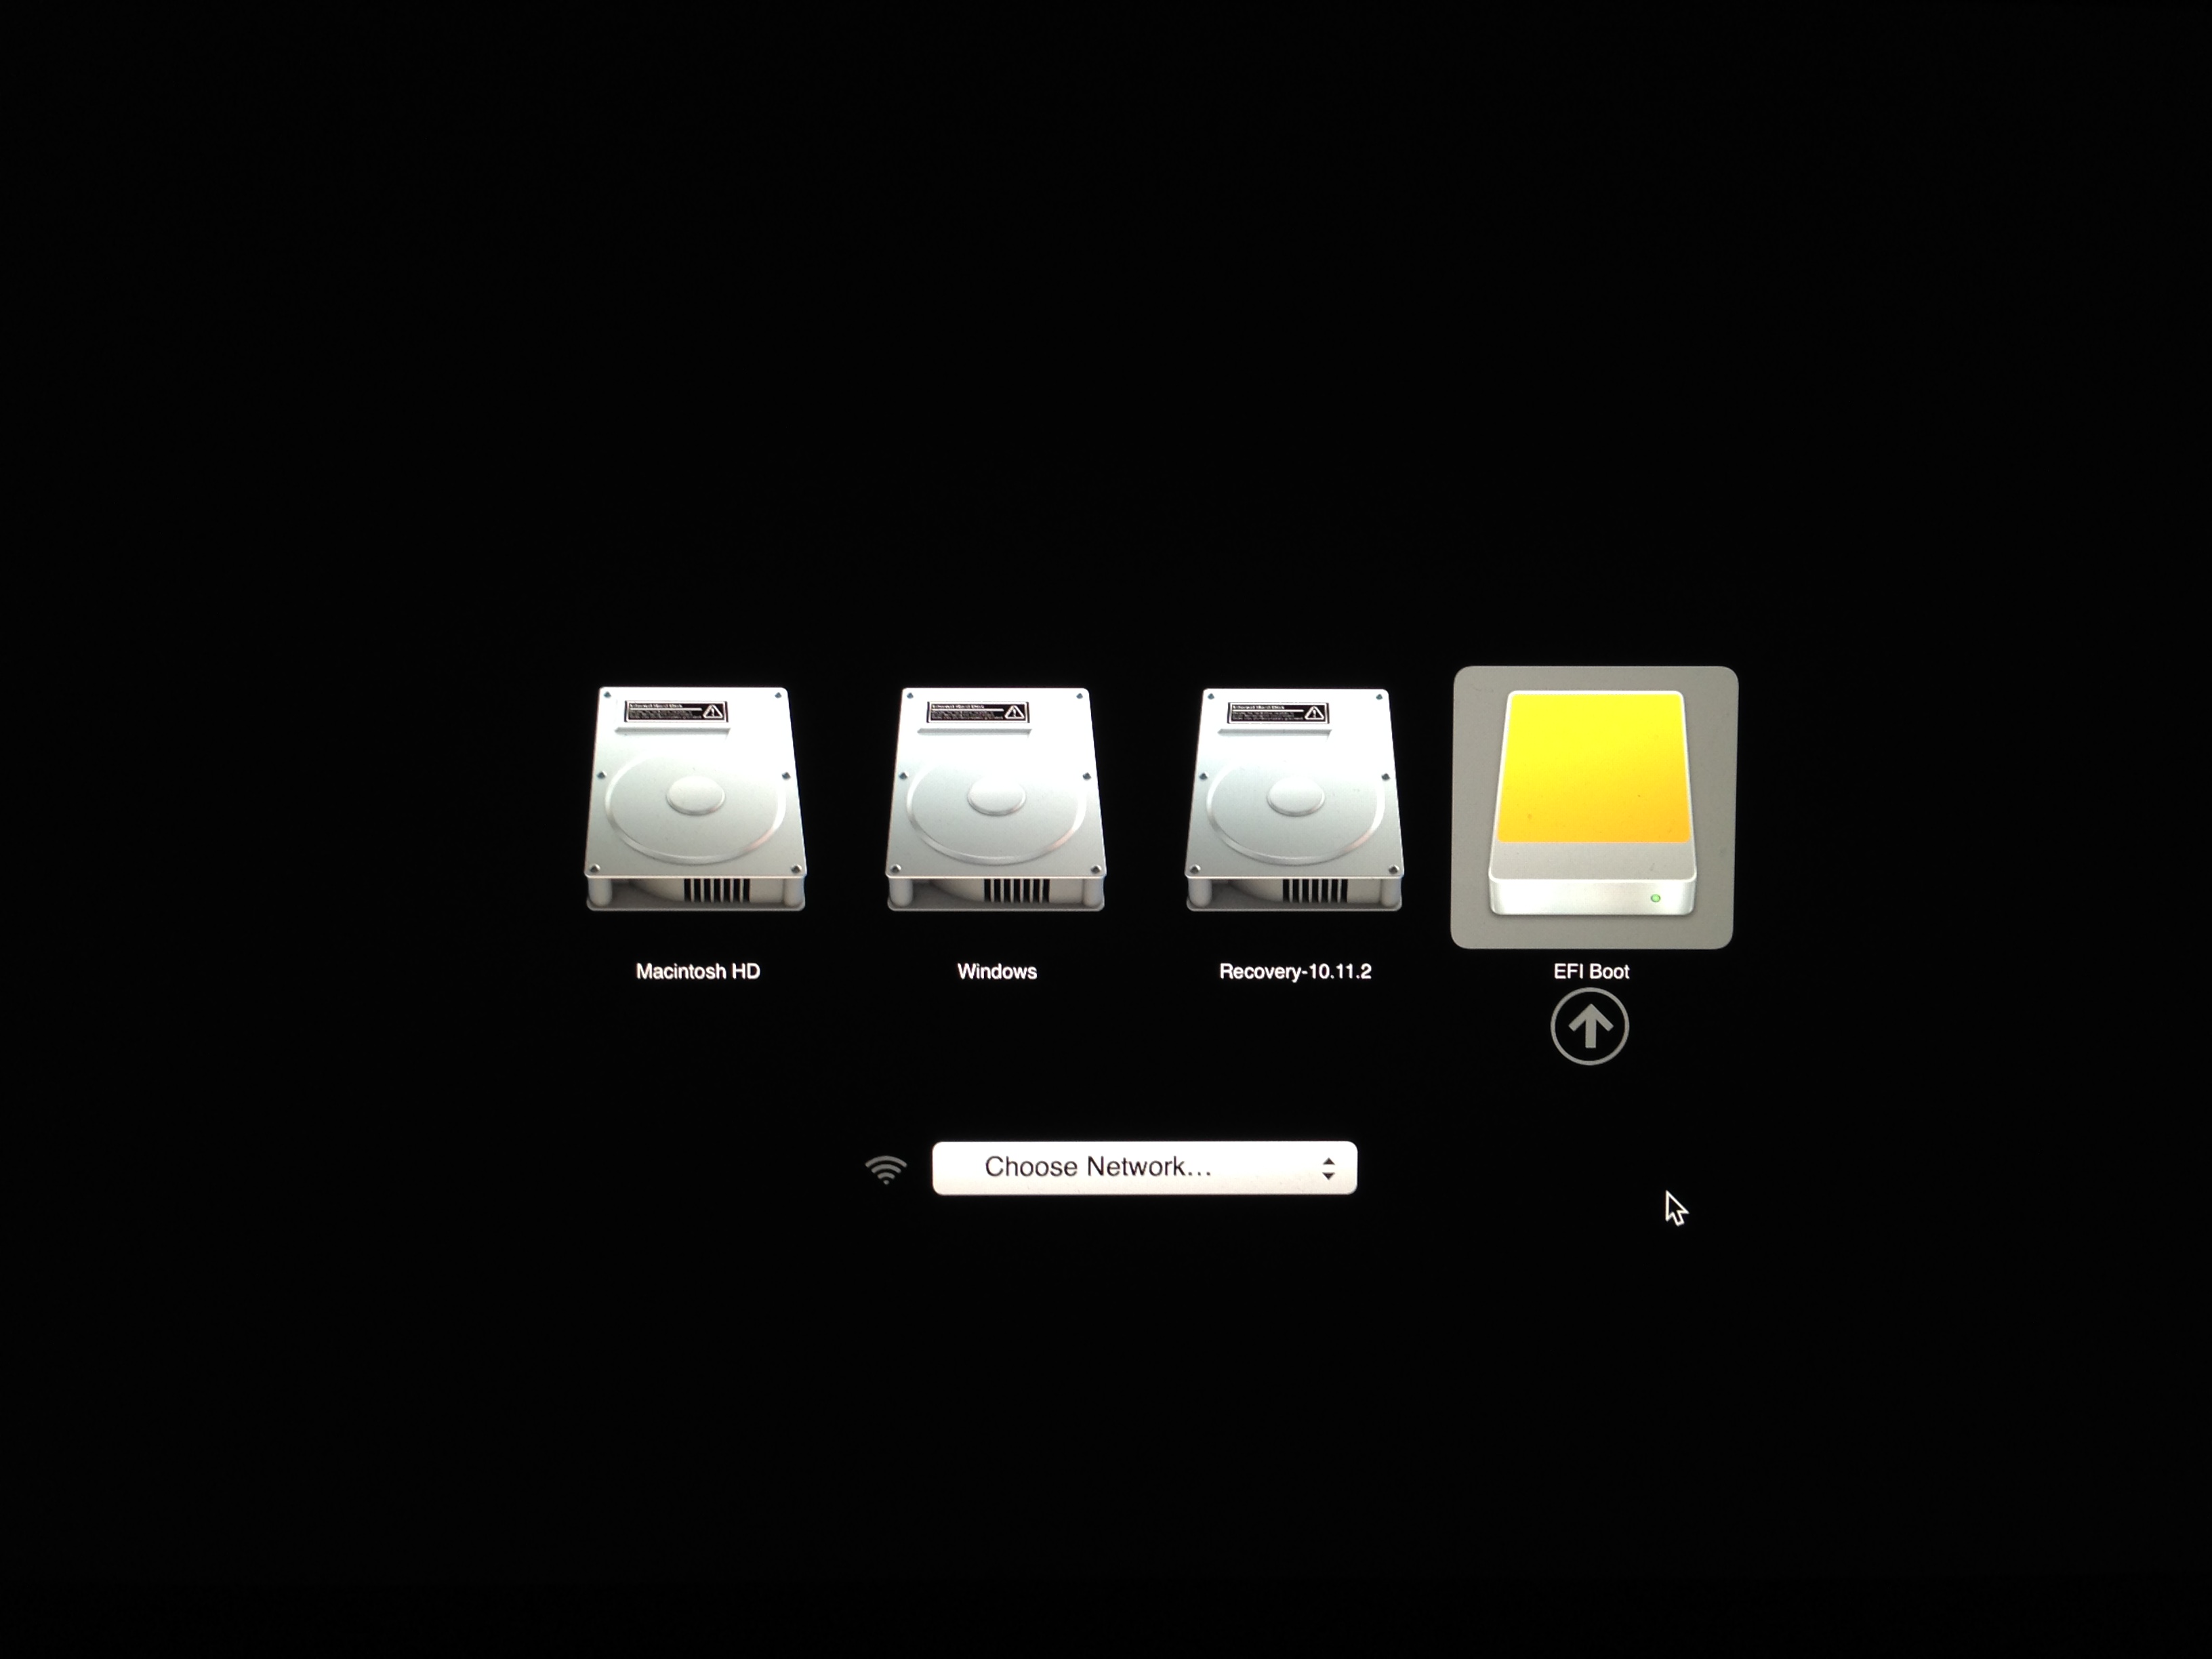
Select 'EFI Boot' followed by 'Try Ubuntu without installing' to boot into a 'live' version of Ubuntu
Step #3
Tip: At this point you may want to use WiFi if you are using a laptop, but you may find that you are unable to if your laptop has a Broadcom wireless chip (Most 802.11AC laptops to my knowledge). To enable Wifi for updates ect. during the installation, Go to 'System Settings' -> 'Software & Updates' -> 'Additional Drivers' and enable the Broadcom driver (Note: this seems to only work during installation, you will need to connect to the internet some way or another and install 'bcmwl-kernel-source' via the terminal after installation).
- Open the Ubuntu Installer shortcut thats on the desktop to open the Ubuntu Installer. Note: At somepoint the installer might ask you if you want to unmount the currently mounted drives, CLICK YES


- Continue through the installer as normal until you get up to 'Installation Type' screen.

- At this point you must click 'Something Else' OTHERWISE you risk losing all your data or doing something that you didn't mean to do.
- Set the 'boot loader' install device to your desired USB device from the drop down menu and setup the partitions to how you desire MAKING SURE that you are using the right partitions, for example if your USB device shows up as '/dev/sda' from the drop down menu then only edit the partitions that start with '/dev/sda' for example '/dev/sda2'. Do not touch any partitions that don't start with the same path as your USB unless you know what you are doing. If you are following the partition scheme that I am using then your screen should look similar to this (substituting /dev/sda2 with /dev/sdX2 or what ever letter your drive has assigned:

- Once you are sure that you have done the partition setup correctly you may hit 'Install Now' and finish the rest of the installation setup such as time zone, user ect. DO NOT restart at the end of the installation.
Now that you have your favorite version of Linux installed, it's now time to make it 'bootable' so that your Mac can see it as a boot drive.
Note: Some of you may not have to mount the EFI partition on the internal drive if GRUB managed to install itself on the external drive. Steps 2 - 5 are solely a work around for a glitch that I have experienced where the Ubuntu installer completely ignores when you told it to install the boot loader. If you are sure that is not the case (e.g. you disconected the internal drive to prevent harm.) then only create a folder for and mount the EFI partiton of the USB drive. However it is always handy to mount the EFI partition of the internal drive just to check.
- While still in the live environment, open up a terminal and start your disto's file manager as root, for example in Ubuntu the command is
Code:
sudo nautilus
- Navigate to /mnt/ (Click 'Computer' in the side bar then click the folder named 'mnt') and create two folders, one will be named after the EFI partition of your internal Hard Drive (for example mine was sdb1), and the other will be named after the EFI partition of your USB drive (for example mine was sda1). Note: The EFI partition will always be the first partition e.g /dev/sdX1 where X is the drive letter and 1 is the partition.

- Using another Terminal window you will need to mount the EFI partitions of both the internal and USB drives using the command
Replace X with the letter assigned to your drive e.g. for me it wasCode:
sudo mount /dev/sdX1 /mnt/sdX1for the USB drive andCode:sudo mount /dev/sda1 /mnt/sda1for the internal drive.Code:sudo mount /dev/sdb1 /mnt sdb1 - Once you have the EFI partition mounted you can move the 'ubuntu' folder from the internal drive's EFI partition to that of your USB drive. First, however you must create a folder called 'EFI' (without the quotation marks) on the root of the EFI partition for your USB drive. If that folder already exists then you may use that one instead.
- Move (don't copy, move) the 'ubuntu' folder from the EFI folder inside the EFI partition on your internal drive to the EFI folder on the EFI partition on you USB Drive (if that makes any sense to you).
- While in the EFI folder of your USB drive, create a folder named 'boot' (without the quotation marks of course). The EFI folder on the EFI partition of the USB drive should now look like this.

- Finally move the file named 'grubx64.efi' located inside the 'ubuntu' folder to the 'boot' folder you created earlier and rename it 'bootx64.efi' (If you prefer to use the 'secure boot' version of grub then move the 'simx64.efi file along with the grubx64.efi and rename the shimx64 file instead.) Note: I have previously renamed my grubx64.efi file to ubuntux64.efi to test something, yours will be called grubx64.efi

- Once you have in the EFI folder on the EFI partition of your USB drive a folder named 'boot' containing a file named bootx64.efi (previously grubx64.efi) and another folder called 'ubuntu' with the grub.cfg file and the other files found in the 'ubuntu' folder then you may restart your computer holding the 'option' key as you do so.
- Boot into OS X
Once you have installed Linux you may need to set OS X as the startup disk again, I have found myself that ubuntu (more likely grub) sometimes likes to set itself as the default boot loader for when the system starts up which will inevitably lead to your system complaining that no startup volume can be found because you moved the boot files after the installation.
- Once OS X has booted login to an admin account and open 'System Preferences' -> 'Startup Disk'
- Select 'Macintosh HD' (or whatever your OS X drive is called) and click restart. Hint: You may need to unlock the preference pane by clicking the lock on the lower left corner and inputing the credentials of an admin account.

- While restarting you may jump straight to the OS selection menu by holding 'option' and then selecting the 'EFI Boot' option. Hint: If there are two, remove the USB that you used to install Ubuntu or whatever Linux distro you used. Then select the sole remaining option named 'EFI Boot'
Last edited:
