Sharing with the community
Using the below method, anyone should be able to install any version of Windows 32-BIT or 64-BIT on their Intel-Based Mac without any concern for whether the machine is EFI 32 or EFI 64, and regardless of Apple's willingness to support that version of Windows with Bootcamp.
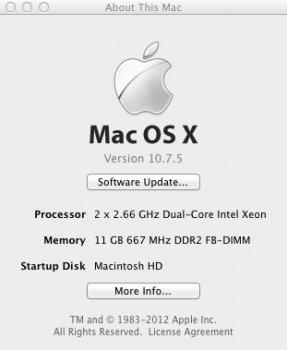
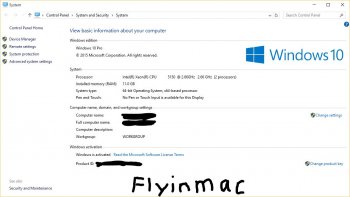
The 2006 Mac Pro 1,1 with 32-BIT EFI can successfully and easily boot and run the 64-BIT version of Windows 10 (Final Release) without any major modifications.
For those who care, here is my Geekbench profile. I didn't pay for Geekbench, so the results are only the 32-BIT Benchmarks, despite being run on a 64-BIT version of Windows 10. Naturally, not optimal for benchmarking. But, I posted a comparison of this Mac Pro 2006 running Geekbench on Windows 10 Pro 64-BIT and Mac OS X 10.7.5 Lion. Both results are in my profile, and fairly comparable to each other. I'll probably add a couple other machines with Windows to my profile for comparison purposes.
My Geekbench test results
http://browser.primatelabs.com/user/flyinmac
Keep in mind that since we are not using BootCamp, Apple's bootcamp software appears unwilling to run in Windows 10 in this configuration (unsupported machine / Windows environment combination). So, here's what I did after Windows was installed.
Since I still have the factory nVidia 7300GT installed, I went to nVidia's website, and did a search for the latest Windows 7 x64-BIT drivers. I did not run their configuration program. I extracted the drivers, and went into Windows' Device manager, and updated the drivers in there manually for the graphics adapter by pointing it at the folder of drivers I downloaded from nVidia. This worked great.
I also downloaded both the 4.0 and 5.0 bootcamp drivers, and let Windows device manager search those extracted folders for the IDE / SATA controller drivers.
Sounds, and ethernet, etc. all seem to work fine. I can't find anything that isn't running smoothly. I have not tried Airport, I never use it anyway on my desktops. But, it should work.
My Mac Pro appears as any normal PC to Windows 10 64-BIT.
My Mac Pro has had it's firmware updated from 1,1 to 2,1 making it think it's a 2007 Mac Pro... But, that is of no consequence or effect on this operation.
This technique should work with any Macintosh with an Intel Processor that meets the requirements of Windows 10. If you don't have a 64-BIT Microprocessor, than it should work with the 32-BIT version of Windows 10 also. But, since the Xeons are 64-BIT, I went with the 64-BIT version of Windows 10.
Now, the easiest solution, would be to install Windows 10 on a hard drive using a different computer, such as a PC, and then not activate it until after you have placed the hard drive into the Mac and booted from it.
But, lacking such an option, I went a different route.
I used VMWare Fusion 5.x running on my 2006 Mac Pro under Mac OS X 10.7.5 Lion. The trick, is to make VMWare use a real hard drive instead of a virtual drive.
There are ways to do this with other virtualization software, but I don't have them, so that's your experiment 😀
I also understand that newer versions of VMWare kind of balk at this technique... So... you might want to try an older version if you have trouble. VMWare Fusion can be used in trial mode for approx 30 days I believe, so it's a free option that'll work long enough to perform the task. You won't need it afterwards (an you won't want to use it afterwards anyway - The emulation environment will appear as a separate computer and Windows 10 doesn't like being activated twice).
And, lastly, this technique does not use bootcamp, and bootcamp will refuse to acknowledge it. So, you will not be able to pick which machine you want to boot from. You'll have to hold down the OPTION KEY at start-up and pick your Windows partition there to boot into Windows.
And, the caveat... This is all done at your own risk... It worked for me, should work for you, but it's your computer, your data, and all risk is yours. Please make backups of all your data first. Did I mention you're doing this at your own risk? 😛
I had a hard drive already Partitioned and Formatted with the GUID scheme, and the first partition was a Mac OS Extended (Journaled) partition. The second partition was formatted to NTFS and had Windows Vista installed on it (previously used with bootcamp).
I set up a NEW virtual machine in VMware Fusion 5.x, and configured it to be a Windows 7 machine (not 64-BIT), with 4 GB of RAM and 2 processor cores. I then pointed VMWare Fusion to use my Windows 10 ISO image as the installation CD (alternatively you could point it to a real CD if you wanted).
I then saved that virtual machine as it was, without further alterations.
There are a few issues that need resolved from there. First, the Virtual Machine defaults to setting up a virtual hard drive. We need to get it to ignore that drive. We also need to point it to our real hard drive or partition for the install destination.
Go into Disk Utilities on your Mac in OS X. Click on the drive (or partition) that you wish to install Windows on. Make sure it's already formatted to NTFS, and that the partition scheme is set for GUID. If not, configure it that way now (repartitioning if you have to). Remember to backup anything important first, before doing anything (especially if repartitioning / reformatting).
Now that your drive is configured properly, click on the drive (or partition) that you will be installing windows on. In my case, my Windows partition was disk2s3.
disk2 is the drive
s3 is the partition
Your disk number and partition numbers will vary depending on your configuration.
Also, make note of the specific size of your Windows / NTFS partition. You'll want to make sure you're installing to the right partition later, so you don't accidentally overwrite something else. Make note of the other drive's and partition sizes as well, so you can easily tell which ones they are when you get to the install point.
Now for the fun 😀
Making note of the disk number discovered above for your Windows / NTFS partition, you will need to open TERMINAL. Go to the spotlight search on your Mac, and type in terminal, and launch the program.
You'll be in a window with a command line interface. Don't be scared, it's not that bad.
copy and paste (or type) the following line exactly into Terminal and then press Enter
cd "/Applications/VMware Fusion.app/Contents/Library/"
Now we're going to make the link to the physical hard drive.
Remember my partition was located on Disk 2... you will need to be absolutely certain that you change the disk number to reflect the correct disk on your computer. Copy and paste (or type) the following line exactly into terminal MAKING SURE THAT YOU CHANGE THE DISK NUMBER TO THE CORRECT NUMBER FOR YOUR WINDOWS / NTFS DESTINATION DISK.
./vmware-rawdiskCreator create /dev/disk2 fullDevice ~/physical-hdd ide
Now... this has created a link file that should reside in your HOME folder on your Mac... go take a look and make sure that physical-hdd.vmdk is in your Home Folder on your Mac.
Now for the really fun part 🙂
Remember the virtual machine that we made earlier? I hope you remember what you named it. I'm going to call it "Bob" (I like Bob) lol.... But, you'd better remember what you named it, because whenever I say Bob, change "Bob" to whatever you named it.
Using Finder, you should be able to locate Bob in the "Documents/Vitual Machines" folder on your hard drive.
Right click on "Bob" and choose "Show Package Contents"
Now, you're looking at "Bob's" innards... 😎
keeping this folder view open, use another finder window to locate the file we made called "physical-hdd.vmdk" in your "Home" folder.
move or copy that "physical-hdd.vmdk" file into Bob's innards.
now... you need to edit a file that is located in Bob's innards... Remember, you need to use the name you gave your machine instead of Bob...
So, the file you're looking for is "Bob.vmx" (so your machine's name with the VMX extension).
right click on Bob.vmx and select Open With, and choose Text Edit.
Go down to the very end of the file that you are now looking at, and type or copy the following lines.
ide1:1.present = "TRUE"
ide1:1.fileName = "physical-hdd.vmdk"
We're not quite done yet.
You also need to disable the SCSI devices that are listed. Scroll through the document, and anywhere that you see a reference to SCSI that says "Present" change "True" to "False".
When all that is done, go to the file menu, and choose "Save a Version". Then close Text Editor.
Now, all I can say at this point, is experiment. In my case, since I had Windows Vista already on that drive, when I launched Fusion, it booted me into Vista within the Fusion emulator. I found that amusing, it confirmed I had everything working, and I shut Vista down, and then went into the settings in Fusion for that Machine (I'm calling him Bob) and chose the Startup disk, and made the startup disk to be the CD (remember in my example, the Windows 10 Install CD is an ISO image).
When I was booting from the CD, it eventually prompted me for an installation drive. This is where it's important to be careful. Make sure that you tell Windows to install to the proper hard drive and partition. Use the name you gave the partition as a partial indicator, and pay close attention to the drive / partition capacity, and make sure that it matches what it should be for your destination location.
If everything looks right, proceed to install Windows 10 64-BIT onto your hard drive.
Once it has been completely installed, do not activate it yet. Shut it down in the emulator / Fusion.
Now, restart your Macintosh and hold down the OPTION key. Now, choose your Windows 10 disk, and boot from Windows. It may give you a white screen for a moment, just be patient. Wait.... let it do it's thing. Don't panic.
When Windows comes up, log in as normal. And, then activate it.
Do not activate it in VMWare Fusion. Your activation is tied to the computer it thinks it's on. Make sure you wait to activate it until after you are actually running it directly on your Macintosh natively. That way your Mac will forever be blessed with the privilege of running Windows 10 😀
This method avoids all the 32-BIT / 64-BIT EFI issues. And, is working great for me.
May your machine have a long and prosperous future secure in having the latest 64-BIT Operating System installed natively.
Best of luck to all of you.
Below I have pasted the contents from my Bob.vmx for you to reference and compare should you have any trouble.
The lines in Pink are for you to notice, and compare to your situation. Add them if needed. Naturally, change "Bob" to the right name for your machine, and any path's to files modify to your system and volume / hard drive and folder names.
Lines in Blue, make sure they're there. Lines in Purple are the one's we've added based on the steps / directions above.
Good Luck, and hope this helps...
You're friend,
flyinmac
.encoding = "UTF-8"
config.version = "8"
virtualHW.version = "9"
memsize = "4248"
mem.hotadd = "TRUE"
ide1:0.present = "TRUE"
ide1:0.autodetect = "TRUE"
ide1:0.deviceType = "cdrom-image"
ethernet0.present = "TRUE"
ethernet0.connectionType = "nat"
ethernet0.virtualDev = "e1000"
ethernet0.wakeOnPcktRcv = "FALSE"
ethernet0.addressType = "generated"
ethernet0.linkStatePropagation.enable = "TRUE"
usb.present = "TRUE"
ehci.present = "TRUE"
ehci.pciSlotNumber = "35"
sound.present = "TRUE"
sound.virtualDev = "hdaudio"
sound.fileName = "-1"
sound.autodetect = "TRUE"
mks.enable3d = "TRUE"
serial0.present = "TRUE"
serial0.fileType = "thinprint"
pciBridge0.present = "TRUE"
pciBridge4.present = "TRUE"
pciBridge4.virtualDev = "pcieRootPort"
pciBridge4.functions = "8"
pciBridge5.present = "TRUE"
pciBridge5.virtualDev = "pcieRootPort"
pciBridge5.functions = "8"
pciBridge6.present = "TRUE"
pciBridge6.virtualDev = "pcieRootPort"
pciBridge6.functions = "8"
pciBridge7.present = "TRUE"
pciBridge7.virtualDev = "pcieRootPort"
pciBridge7.functions = "8"
vmci0.present = "TRUE"
hpet0.present = "TRUE"
usb.vbluetooth.startConnected = "TRUE"
tools.syncTime = "TRUE"
displayName = "Bob"
guestOS = "windows7"
nvram = "Bob.nvram"
virtualHW.productCompatibility = "hosted"
proxyApps.publishToGuest = "TRUE"
tools.upgrade.policy = "upgradeAtPowerCycle"
powerType.powerOff = "soft"
powerType.powerOn = "soft"
powerType.suspend = "soft"
powerType.reset = "soft"
extendedConfigFile = "Bob.vmxf"
numvcpus = "2"
cpuid.coresPerSocket = "2"
ide1:0.fileName = "/Volumes/OSXHardDrive/Windows10_x64_EN-US.iso"
ide1:1.present = "TRUE"
ide1:1.fileName = "physical-hdd.vmdk"
ethernet0.generatedAddress = "00:0c:29:a9:c7:ec"
ethernet0.pciSlotNumber = "33"
usb.pciSlotNumber = "32"
sound.pciSlotNumber = "34"
vmci0.id = "95012844"
vmci0.pciSlotNumber = "36"
uuid.location = "56 4d 7a bf 71 9c 20 6a-89 e7 91 03 05 a9 c7 ec"
uuid.bios = "56 4d 7a bf 71 9c 20 6a-89 e7 91 03 05 a9 c7 ec"
cleanShutdown = "TRUE"
replay.supported = "FALSE"
replay.filename = ""
pciBridge0.pciSlotNumber = "17"
pciBridge4.pciSlotNumber = "21"
pciBridge5.pciSlotNumber = "22"
pciBridge6.pciSlotNumber = "23"
pciBridge7.pciSlotNumber = "24"
usb:1.present = "TRUE"
ethernet0.generatedAddressOffset = "0"
vmotion.checkpointFBSize = "134217728"
softPowerOff = "TRUE"
usb:1.speed = "2"
usb:1.deviceType = "hub"
usb:1.port = "1"
usb:1.parent = "-1"
ide0:1.redo = ""
ide1:1.redo = ""
bios.bootOrder = "CDROM"
usb:0.present = "TRUE"
usb:0.deviceType = "hid"
usb:0.port = "0"
usb:0.parent = "-1"
gui.viewModeAtPowerOn = "windowed"
scsi0.present = "FALSE"
scsi0:0.present = "FALSE"
floppy0.present = "FALSE"
Using the below method, anyone should be able to install any version of Windows 32-BIT or 64-BIT on their Intel-Based Mac without any concern for whether the machine is EFI 32 or EFI 64, and regardless of Apple's willingness to support that version of Windows with Bootcamp.
The 2006 Mac Pro 1,1 with 32-BIT EFI can successfully and easily boot and run the 64-BIT version of Windows 10 (Final Release) without any major modifications.
For those who care, here is my Geekbench profile. I didn't pay for Geekbench, so the results are only the 32-BIT Benchmarks, despite being run on a 64-BIT version of Windows 10. Naturally, not optimal for benchmarking. But, I posted a comparison of this Mac Pro 2006 running Geekbench on Windows 10 Pro 64-BIT and Mac OS X 10.7.5 Lion. Both results are in my profile, and fairly comparable to each other. I'll probably add a couple other machines with Windows to my profile for comparison purposes.
My Geekbench test results
http://browser.primatelabs.com/user/flyinmac
Keep in mind that since we are not using BootCamp, Apple's bootcamp software appears unwilling to run in Windows 10 in this configuration (unsupported machine / Windows environment combination). So, here's what I did after Windows was installed.
Since I still have the factory nVidia 7300GT installed, I went to nVidia's website, and did a search for the latest Windows 7 x64-BIT drivers. I did not run their configuration program. I extracted the drivers, and went into Windows' Device manager, and updated the drivers in there manually for the graphics adapter by pointing it at the folder of drivers I downloaded from nVidia. This worked great.
I also downloaded both the 4.0 and 5.0 bootcamp drivers, and let Windows device manager search those extracted folders for the IDE / SATA controller drivers.
Sounds, and ethernet, etc. all seem to work fine. I can't find anything that isn't running smoothly. I have not tried Airport, I never use it anyway on my desktops. But, it should work.
My Mac Pro appears as any normal PC to Windows 10 64-BIT.
My Mac Pro has had it's firmware updated from 1,1 to 2,1 making it think it's a 2007 Mac Pro... But, that is of no consequence or effect on this operation.
This technique should work with any Macintosh with an Intel Processor that meets the requirements of Windows 10. If you don't have a 64-BIT Microprocessor, than it should work with the 32-BIT version of Windows 10 also. But, since the Xeons are 64-BIT, I went with the 64-BIT version of Windows 10.
Now, the easiest solution, would be to install Windows 10 on a hard drive using a different computer, such as a PC, and then not activate it until after you have placed the hard drive into the Mac and booted from it.
But, lacking such an option, I went a different route.
I used VMWare Fusion 5.x running on my 2006 Mac Pro under Mac OS X 10.7.5 Lion. The trick, is to make VMWare use a real hard drive instead of a virtual drive.
There are ways to do this with other virtualization software, but I don't have them, so that's your experiment 😀
I also understand that newer versions of VMWare kind of balk at this technique... So... you might want to try an older version if you have trouble. VMWare Fusion can be used in trial mode for approx 30 days I believe, so it's a free option that'll work long enough to perform the task. You won't need it afterwards (an you won't want to use it afterwards anyway - The emulation environment will appear as a separate computer and Windows 10 doesn't like being activated twice).
And, lastly, this technique does not use bootcamp, and bootcamp will refuse to acknowledge it. So, you will not be able to pick which machine you want to boot from. You'll have to hold down the OPTION KEY at start-up and pick your Windows partition there to boot into Windows.
And, the caveat... This is all done at your own risk... It worked for me, should work for you, but it's your computer, your data, and all risk is yours. Please make backups of all your data first. Did I mention you're doing this at your own risk? 😛
I had a hard drive already Partitioned and Formatted with the GUID scheme, and the first partition was a Mac OS Extended (Journaled) partition. The second partition was formatted to NTFS and had Windows Vista installed on it (previously used with bootcamp).
I set up a NEW virtual machine in VMware Fusion 5.x, and configured it to be a Windows 7 machine (not 64-BIT), with 4 GB of RAM and 2 processor cores. I then pointed VMWare Fusion to use my Windows 10 ISO image as the installation CD (alternatively you could point it to a real CD if you wanted).
I then saved that virtual machine as it was, without further alterations.
There are a few issues that need resolved from there. First, the Virtual Machine defaults to setting up a virtual hard drive. We need to get it to ignore that drive. We also need to point it to our real hard drive or partition for the install destination.
Go into Disk Utilities on your Mac in OS X. Click on the drive (or partition) that you wish to install Windows on. Make sure it's already formatted to NTFS, and that the partition scheme is set for GUID. If not, configure it that way now (repartitioning if you have to). Remember to backup anything important first, before doing anything (especially if repartitioning / reformatting).
Now that your drive is configured properly, click on the drive (or partition) that you will be installing windows on. In my case, my Windows partition was disk2s3.
disk2 is the drive
s3 is the partition
Your disk number and partition numbers will vary depending on your configuration.
Also, make note of the specific size of your Windows / NTFS partition. You'll want to make sure you're installing to the right partition later, so you don't accidentally overwrite something else. Make note of the other drive's and partition sizes as well, so you can easily tell which ones they are when you get to the install point.
Now for the fun 😀
Making note of the disk number discovered above for your Windows / NTFS partition, you will need to open TERMINAL. Go to the spotlight search on your Mac, and type in terminal, and launch the program.
You'll be in a window with a command line interface. Don't be scared, it's not that bad.
copy and paste (or type) the following line exactly into Terminal and then press Enter
cd "/Applications/VMware Fusion.app/Contents/Library/"
Now we're going to make the link to the physical hard drive.
Remember my partition was located on Disk 2... you will need to be absolutely certain that you change the disk number to reflect the correct disk on your computer. Copy and paste (or type) the following line exactly into terminal MAKING SURE THAT YOU CHANGE THE DISK NUMBER TO THE CORRECT NUMBER FOR YOUR WINDOWS / NTFS DESTINATION DISK.
./vmware-rawdiskCreator create /dev/disk2 fullDevice ~/physical-hdd ide
Now... this has created a link file that should reside in your HOME folder on your Mac... go take a look and make sure that physical-hdd.vmdk is in your Home Folder on your Mac.
Now for the really fun part 🙂
Remember the virtual machine that we made earlier? I hope you remember what you named it. I'm going to call it "Bob" (I like Bob) lol.... But, you'd better remember what you named it, because whenever I say Bob, change "Bob" to whatever you named it.
Using Finder, you should be able to locate Bob in the "Documents/Vitual Machines" folder on your hard drive.
Right click on "Bob" and choose "Show Package Contents"
Now, you're looking at "Bob's" innards... 😎
keeping this folder view open, use another finder window to locate the file we made called "physical-hdd.vmdk" in your "Home" folder.
move or copy that "physical-hdd.vmdk" file into Bob's innards.
now... you need to edit a file that is located in Bob's innards... Remember, you need to use the name you gave your machine instead of Bob...
So, the file you're looking for is "Bob.vmx" (so your machine's name with the VMX extension).
right click on Bob.vmx and select Open With, and choose Text Edit.
Go down to the very end of the file that you are now looking at, and type or copy the following lines.
ide1:1.present = "TRUE"
ide1:1.fileName = "physical-hdd.vmdk"
We're not quite done yet.
You also need to disable the SCSI devices that are listed. Scroll through the document, and anywhere that you see a reference to SCSI that says "Present" change "True" to "False".
When all that is done, go to the file menu, and choose "Save a Version". Then close Text Editor.
Now, all I can say at this point, is experiment. In my case, since I had Windows Vista already on that drive, when I launched Fusion, it booted me into Vista within the Fusion emulator. I found that amusing, it confirmed I had everything working, and I shut Vista down, and then went into the settings in Fusion for that Machine (I'm calling him Bob) and chose the Startup disk, and made the startup disk to be the CD (remember in my example, the Windows 10 Install CD is an ISO image).
When I was booting from the CD, it eventually prompted me for an installation drive. This is where it's important to be careful. Make sure that you tell Windows to install to the proper hard drive and partition. Use the name you gave the partition as a partial indicator, and pay close attention to the drive / partition capacity, and make sure that it matches what it should be for your destination location.
If everything looks right, proceed to install Windows 10 64-BIT onto your hard drive.
Once it has been completely installed, do not activate it yet. Shut it down in the emulator / Fusion.
Now, restart your Macintosh and hold down the OPTION key. Now, choose your Windows 10 disk, and boot from Windows. It may give you a white screen for a moment, just be patient. Wait.... let it do it's thing. Don't panic.
When Windows comes up, log in as normal. And, then activate it.
Do not activate it in VMWare Fusion. Your activation is tied to the computer it thinks it's on. Make sure you wait to activate it until after you are actually running it directly on your Macintosh natively. That way your Mac will forever be blessed with the privilege of running Windows 10 😀
This method avoids all the 32-BIT / 64-BIT EFI issues. And, is working great for me.
May your machine have a long and prosperous future secure in having the latest 64-BIT Operating System installed natively.
Best of luck to all of you.
Below I have pasted the contents from my Bob.vmx for you to reference and compare should you have any trouble.
The lines in Pink are for you to notice, and compare to your situation. Add them if needed. Naturally, change "Bob" to the right name for your machine, and any path's to files modify to your system and volume / hard drive and folder names.
Lines in Blue, make sure they're there. Lines in Purple are the one's we've added based on the steps / directions above.
Good Luck, and hope this helps...
You're friend,
flyinmac
.encoding = "UTF-8"
config.version = "8"
virtualHW.version = "9"
memsize = "4248"
mem.hotadd = "TRUE"
ide1:0.present = "TRUE"
ide1:0.autodetect = "TRUE"
ide1:0.deviceType = "cdrom-image"
ethernet0.present = "TRUE"
ethernet0.connectionType = "nat"
ethernet0.virtualDev = "e1000"
ethernet0.wakeOnPcktRcv = "FALSE"
ethernet0.addressType = "generated"
ethernet0.linkStatePropagation.enable = "TRUE"
usb.present = "TRUE"
ehci.present = "TRUE"
ehci.pciSlotNumber = "35"
sound.present = "TRUE"
sound.virtualDev = "hdaudio"
sound.fileName = "-1"
sound.autodetect = "TRUE"
mks.enable3d = "TRUE"
serial0.present = "TRUE"
serial0.fileType = "thinprint"
pciBridge0.present = "TRUE"
pciBridge4.present = "TRUE"
pciBridge4.virtualDev = "pcieRootPort"
pciBridge4.functions = "8"
pciBridge5.present = "TRUE"
pciBridge5.virtualDev = "pcieRootPort"
pciBridge5.functions = "8"
pciBridge6.present = "TRUE"
pciBridge6.virtualDev = "pcieRootPort"
pciBridge6.functions = "8"
pciBridge7.present = "TRUE"
pciBridge7.virtualDev = "pcieRootPort"
pciBridge7.functions = "8"
vmci0.present = "TRUE"
hpet0.present = "TRUE"
usb.vbluetooth.startConnected = "TRUE"
tools.syncTime = "TRUE"
displayName = "Bob"
guestOS = "windows7"
nvram = "Bob.nvram"
virtualHW.productCompatibility = "hosted"
proxyApps.publishToGuest = "TRUE"
tools.upgrade.policy = "upgradeAtPowerCycle"
powerType.powerOff = "soft"
powerType.powerOn = "soft"
powerType.suspend = "soft"
powerType.reset = "soft"
extendedConfigFile = "Bob.vmxf"
numvcpus = "2"
cpuid.coresPerSocket = "2"
ide1:0.fileName = "/Volumes/OSXHardDrive/Windows10_x64_EN-US.iso"
ide1:1.present = "TRUE"
ide1:1.fileName = "physical-hdd.vmdk"
ethernet0.generatedAddress = "00:0c:29:a9:c7:ec"
ethernet0.pciSlotNumber = "33"
usb.pciSlotNumber = "32"
sound.pciSlotNumber = "34"
vmci0.id = "95012844"
vmci0.pciSlotNumber = "36"
uuid.location = "56 4d 7a bf 71 9c 20 6a-89 e7 91 03 05 a9 c7 ec"
uuid.bios = "56 4d 7a bf 71 9c 20 6a-89 e7 91 03 05 a9 c7 ec"
cleanShutdown = "TRUE"
replay.supported = "FALSE"
replay.filename = ""
pciBridge0.pciSlotNumber = "17"
pciBridge4.pciSlotNumber = "21"
pciBridge5.pciSlotNumber = "22"
pciBridge6.pciSlotNumber = "23"
pciBridge7.pciSlotNumber = "24"
usb:1.present = "TRUE"
ethernet0.generatedAddressOffset = "0"
vmotion.checkpointFBSize = "134217728"
softPowerOff = "TRUE"
usb:1.speed = "2"
usb:1.deviceType = "hub"
usb:1.port = "1"
usb:1.parent = "-1"
ide0:1.redo = ""
ide1:1.redo = ""
bios.bootOrder = "CDROM"
usb:0.present = "TRUE"
usb:0.deviceType = "hid"
usb:0.port = "0"
usb:0.parent = "-1"
gui.viewModeAtPowerOn = "windowed"
scsi0.present = "FALSE"
scsi0:0.present = "FALSE"
floppy0.present = "FALSE"
Attachments
Last edited: