A few things here I'd like to note:
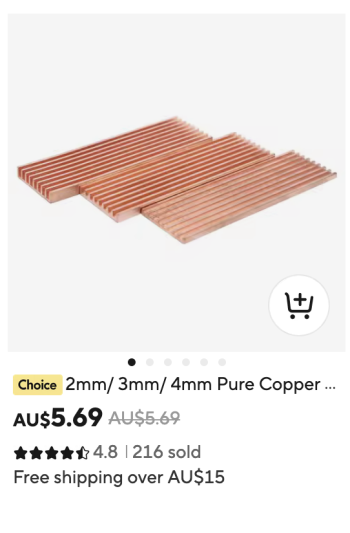
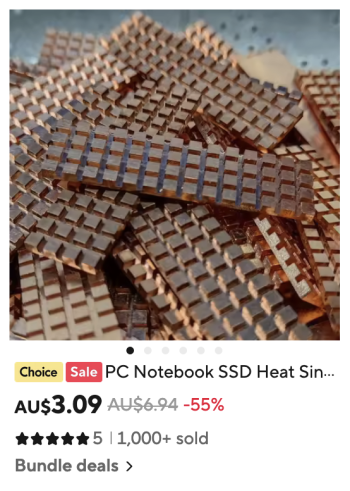
1. Heatsink:
Excellent reasoning on using copper instead of the usual aluminium heat sinks, as copper has roughly twice the conductivity coefficient than (most) aluminium alloys. What would interest me would be the actual reduction in temperature with/without copper heatsink with no interference by Macs Fan Control etc., because I am not entirely convinced about your statement that airflow is more important than heatsink surface: This is because the airflow reduces temperature because it flows over the surfaces to be cooled, the higher the touched surface the higher hence the heat removal. And here the fins serve to enlarge the available surface area such that the net effect between a flat copper heatsink vs. the commercial aluminium heatsink with fins could be actually identical.
Really curious!
2. Fan control software:
There is absolutely no need to use such as macOS perfectly reads the temperature from the NVMe SSD. Fan control software was necessary back in the 2009 - 2011 days of iMacs when Apple used (i) special versions of HDDs with a separate connector for a temperature data cable (2009/2010) or (ii) special firmware on their HDDs. Vendors like OWC offered (expensive) special cables with temperature sensor. Fun fact: for the 2009/2011 iMacs one could easily use a €2 Apple DVD Drive temperature cable to reinstate perfect temperature reading from any HDD/SSD, just the 2011 iMac absolutely needed the OWC cable if a third-party drive would be use. No such drive cable or fan control software is needed for the slim 2012 or later iMacs for any of the SSDs confirmed to be compatible.
If you want to achieve lower than the macOS-set temperature range at the cost of some additional noise then of course you can resort to fan control software.
3. Migration from TM backup of FusionDrive:
In terms of migration and TM there is no difference between a FusionDrive or a normal HDD/SSD. You can migrate from or to a FusionDrive just like a normal drive provided the available drive space allows and the target macOS is the same version or younger. For purposes of macOS backup and migration, a FusionDrive is seen just like a standard drive.
BTW, @Terraaustralis, Howard Oakley does no longer recommend full macOS install and then migration later - he does it now directly at setup: https://eclecticlight.co/2024/11/12/migrating-to-a-new-mac-and-claiming-time-machine-backups/
Cheers and good luck to all!
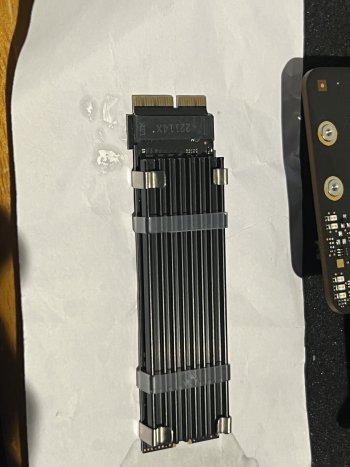
1. Heatsink:
With so little space, I want as much air movement as possible. Reduced air space limits efficient cooling. I understand airflow is a more important factor for heat dispersal than total heatsink surface area (fins). It is airflow which is essential for removing radiated heat. A greater volume and faster movement of air = greater heat dispersal and a cooler running SSD or chip, fins or no fins. That is my opinion. The flat copper helps absorb heat from the controller and diffuse it more evenly throughout the heatsink. Fan then blows excess radiant heat away from the copper heatsink thus preventing heat build up in the NVMe operation. Generally, when NVMe temperature rises to 75° or above (depending on each models design tolerance), NVMe will throttle back to avoid damage.
Excellent reasoning on using copper instead of the usual aluminium heat sinks, as copper has roughly twice the conductivity coefficient than (most) aluminium alloys. What would interest me would be the actual reduction in temperature with/without copper heatsink with no interference by Macs Fan Control etc., because I am not entirely convinced about your statement that airflow is more important than heatsink surface: This is because the airflow reduces temperature because it flows over the surfaces to be cooled, the higher the touched surface the higher hence the heat removal. And here the fins serve to enlarge the available surface area such that the net effect between a flat copper heatsink vs. the commercial aluminium heatsink with fins could be actually identical.
Really curious!
2. Fan control software:
There is absolutely no need to use such as macOS perfectly reads the temperature from the NVMe SSD. Fan control software was necessary back in the 2009 - 2011 days of iMacs when Apple used (i) special versions of HDDs with a separate connector for a temperature data cable (2009/2010) or (ii) special firmware on their HDDs. Vendors like OWC offered (expensive) special cables with temperature sensor. Fun fact: for the 2009/2011 iMacs one could easily use a €2 Apple DVD Drive temperature cable to reinstate perfect temperature reading from any HDD/SSD, just the 2011 iMac absolutely needed the OWC cable if a third-party drive would be use. No such drive cable or fan control software is needed for the slim 2012 or later iMacs for any of the SSDs confirmed to be compatible.
If you want to achieve lower than the macOS-set temperature range at the cost of some additional noise then of course you can resort to fan control software.
3. Migration from TM backup of FusionDrive:
Also, did anyone make a Fusion drive clone before the drive replacement? If yes, please let me know how it works, since I do not want to make a clean installation on a new drive because I would like to install Sonoma from scratch via OCLP some time after the upgrade, restore the backup via Time Machine (if it would be possible, of course) and upgrade OS to Sequoia (since the restoration does not work on Sequoia properly according to OCLP website). And I do not want to make some extra steps during or right after the upgrade, so I can have some time to test the updated hardware.
In terms of migration and TM there is no difference between a FusionDrive or a normal HDD/SSD. You can migrate from or to a FusionDrive just like a normal drive provided the available drive space allows and the target macOS is the same version or younger. For purposes of macOS backup and migration, a FusionDrive is seen just like a standard drive.
BTW, @Terraaustralis, Howard Oakley does no longer recommend full macOS install and then migration later - he does it now directly at setup: https://eclecticlight.co/2024/11/12/migrating-to-a-new-mac-and-claiming-time-machine-backups/
Cheers and good luck to all!