UPDATE MAY 3RD 2015: You can use the instructions posted below with the new firmware released in April '15. Simply replace the file called BTDSK.IMG from the .cdr image provided below with the one from the .iso file downloaded from Samsung's website.
EDIT: Remember to empty trash once the old BTDSK.IMG is deleted or you will get the "Not enough free space" message.
840 EVO: http://ssd.samsungsemi.com/ecomobile/ssd/update3.do?fname=/Samsung_SSD_840_EVO_EXT0DB6Q.iso
After unsuccessfully attempting all morning to make a bootable USB thumb drive to update my firmware and run the Performance restoration software on my 840 I was about to give up. That is, until I found instructions on how to go about it on a French website (source here, for those who care: http://forum.mac4ever.com/tutoriel-cle-usb-bootable-firmware-ssd-samsung-840-evo-t102027.html ). This tutorial is especially useful to those of us(like me) running an Opti-Bay. If you have a DVD drive, you don't(shouldn't) need this tutorial.
Back to the subject matter at hand. Since I'm French Canadian, the instructions were no problem for me, but I figured that since the majority of people don't speak French on here, I might as well share my findings. I've already made a disk image ready to be used (download link in the instructions below). If you follow these steps carefully, you should be up and running pretty quickly. The restoration software itself takes a while, so make sure you don't have anything time critical to do on your Mac before you attempt this.
1. Make sure you have some time where you won’t need your computer, as once your thumb drive has been made, the firmware flash and performance restoration can easily take over an hour.
2. Make a proper backup of your OS X install should anything go wrong. I will not be held liable for any data loss. I provide these instructions as a guideline. Proceed at your own risk.
3. Find a USB thumb drive.
4. Back it up somewhere if you have any valuable data on it. If you don’t, all data on your thumb drive WILL BE LOST.
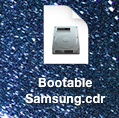
5. Download the bootable image I made here: https://www.dropbox.com/s/264tz271l1ipk31/Bootable Samsung.cdr?dl=0
6. Put the downloaded file somewhere it is easily found, such as the desktop.
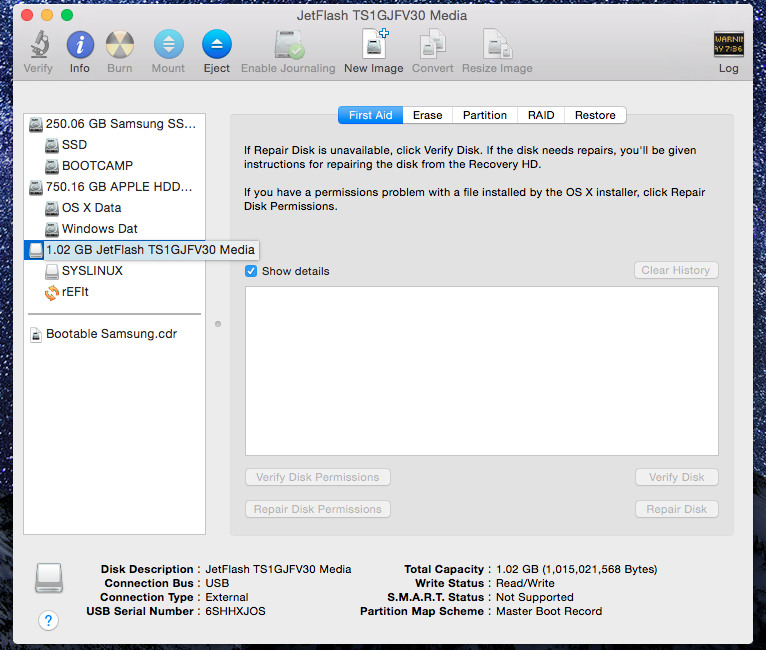
7. Open up disk utility.
8. Find your thumb drive in the left hand pane and click on it.
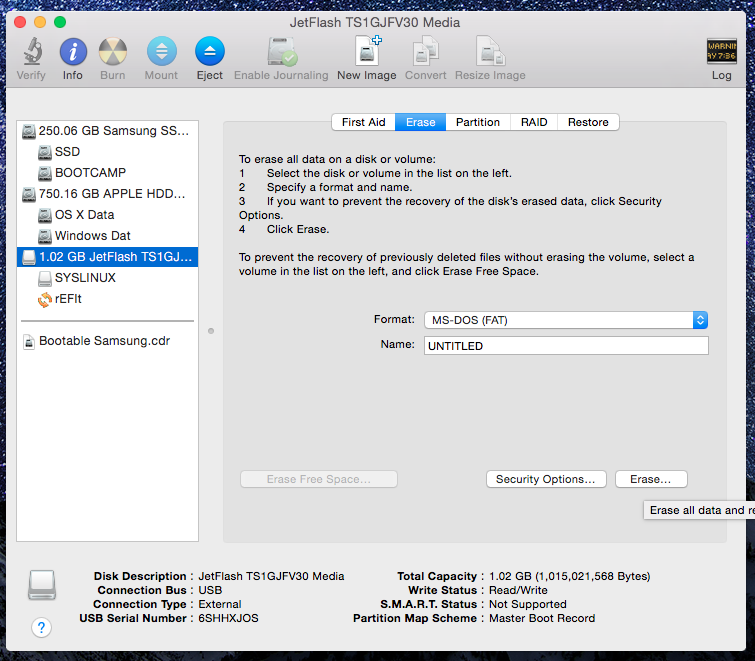
9. Go to the erase tab and format it to MS-DOS (FAT) by clicking Erase. Wait for it to finish.
10. In the partition tab, selection 2 partition scheme. (I left mine at default, half and half, size doesn't matter at all, leave it that way.) Make sure to click the options and ensure you are using an MS DOS format, not GUID.

11. Partition 1 should remain MS-DOS (FAT), partition 2 should be Mac OS Extended (Journaled). Choose the proper format for each.
12. Click apply.
13. When the popup asks if really want to do this, click Partition.
14. Still in disk utility, go to the first aid tab.

15. Choose your first partition, and run repair disk. Very important, not doing so will prevent it from being bootable).
16. Choose your second partition and run repair disk.
17. Now, in the finder, double click on the Samsung Bootable.cdr, the image will mount.
18. The image should contain two partitions in disk utility: SYSLINUX and rEFIt. Click on SYSLINUX.

19. Click on the SYSLINUX partition under the Bootable Samsung.cdr. Go to the restore tab, verify that the Source: is SYSLINUX, if it is not, drag and drop it there from the left pane.
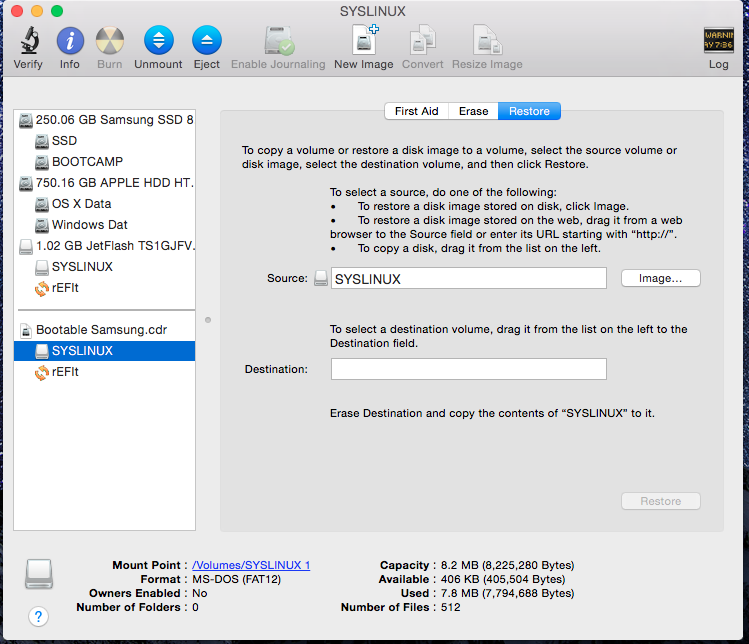
20. The destination should be your MS-DOS (FAT) partition. Drag and drop it there.
21. Click Restore, enter your password.
22. Repeat the process with the second partition (Mac OS Journaled) and rEFIt.
23. Click Restore, enter your password.
24. As an extra precaution, rerun repair disk on both partitions on your thumb drive.
25. Reboot your machine holding the option key. As a boot option you should see a USB disk icon with the name WINDOWS. This is what you want to boot from.

(Picture lifted from maciverse to show the look of the icon).
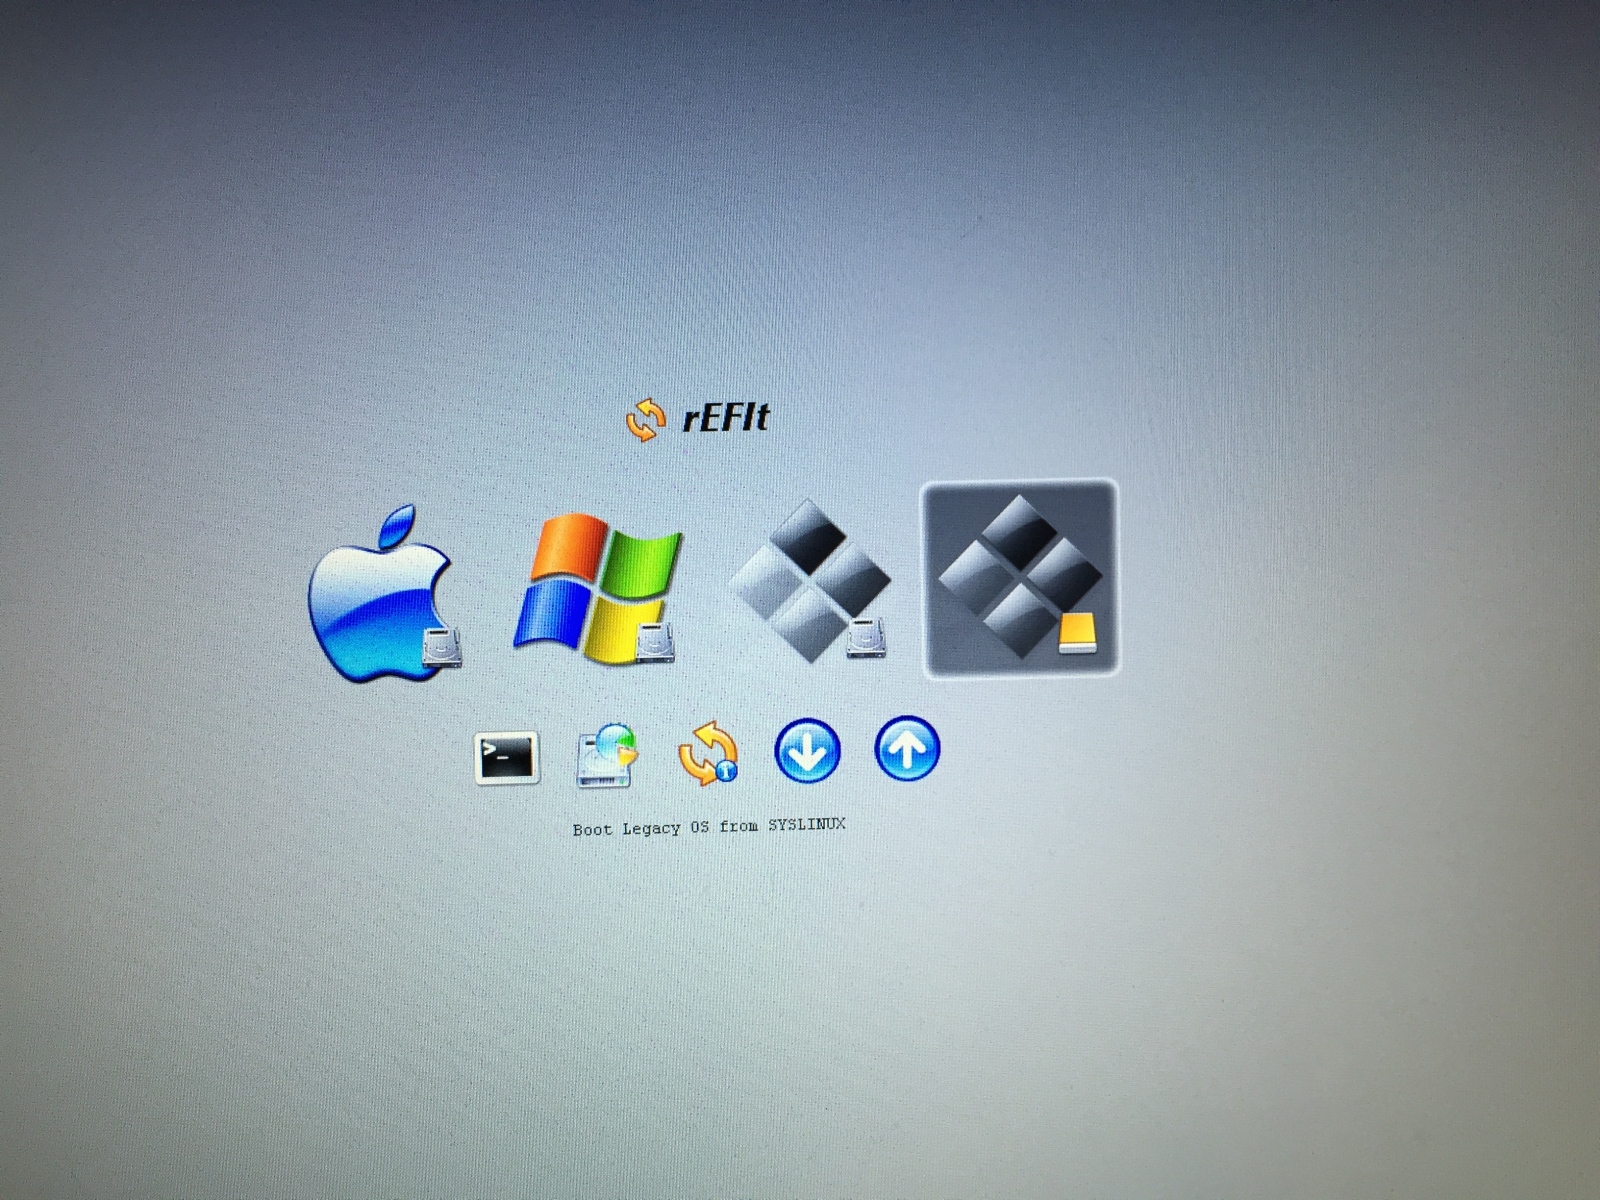
26. If that does not show up, choose rEFIt.

(picture lifted from an unknown source)
27. From that boot menu, choose “Boot Legacy OS from SYSLINUX partition”. Read each description carefully, you’ll find it.
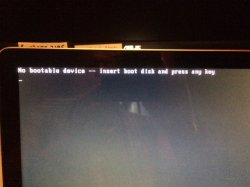
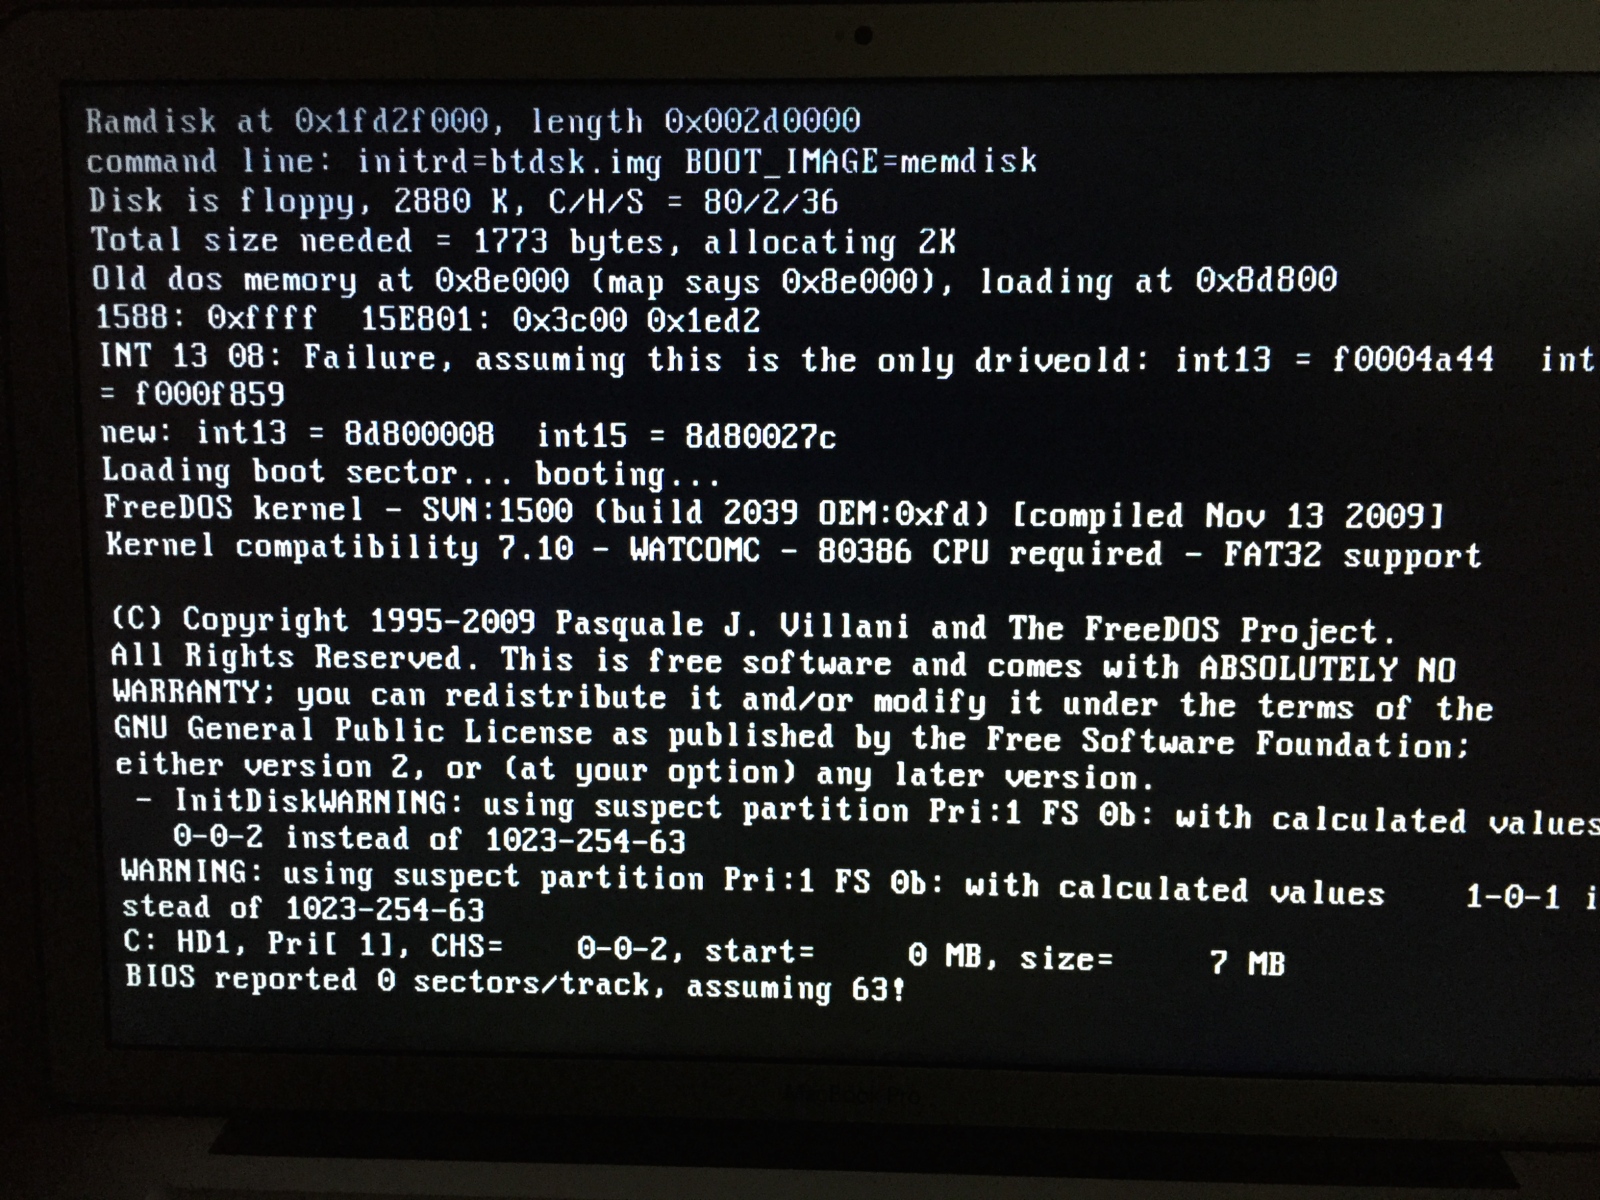
28. From there follow the on screen instructions, you may see quite a few BIOS error messages, ignore them, they are normal. It may take a bit of time (a minute or two) for the performance restoration software to load.
29. Once your are booted into MS DOS, simply follow the prompts.
30. Once the firmware update is done and the performance restoration complete, you’ll get a message saying so and you’ll be left with a blinking cursor at the bottom of the page following A:>/SYSLINUX/ or similar.
31. When you’re done, simply hold down the power button to shut the machine down, remove the thumb drive and boot the machine as your normally would.
32. You’re done.
I will again state: Please, keep a backup of your data. You should not run into any problems, but if you do, I will not be held liable for any data loss incurred following my instructions.
Hope this helps!
EDIT: Remember to empty trash once the old BTDSK.IMG is deleted or you will get the "Not enough free space" message.
840 EVO: http://ssd.samsungsemi.com/ecomobile/ssd/update3.do?fname=/Samsung_SSD_840_EVO_EXT0DB6Q.iso
After unsuccessfully attempting all morning to make a bootable USB thumb drive to update my firmware and run the Performance restoration software on my 840 I was about to give up. That is, until I found instructions on how to go about it on a French website (source here, for those who care: http://forum.mac4ever.com/tutoriel-cle-usb-bootable-firmware-ssd-samsung-840-evo-t102027.html ). This tutorial is especially useful to those of us(like me) running an Opti-Bay. If you have a DVD drive, you don't(shouldn't) need this tutorial.
Back to the subject matter at hand. Since I'm French Canadian, the instructions were no problem for me, but I figured that since the majority of people don't speak French on here, I might as well share my findings. I've already made a disk image ready to be used (download link in the instructions below). If you follow these steps carefully, you should be up and running pretty quickly. The restoration software itself takes a while, so make sure you don't have anything time critical to do on your Mac before you attempt this.
1. Make sure you have some time where you won’t need your computer, as once your thumb drive has been made, the firmware flash and performance restoration can easily take over an hour.
2. Make a proper backup of your OS X install should anything go wrong. I will not be held liable for any data loss. I provide these instructions as a guideline. Proceed at your own risk.
3. Find a USB thumb drive.
4. Back it up somewhere if you have any valuable data on it. If you don’t, all data on your thumb drive WILL BE LOST.
5. Download the bootable image I made here: https://www.dropbox.com/s/264tz271l1ipk31/Bootable Samsung.cdr?dl=0
6. Put the downloaded file somewhere it is easily found, such as the desktop.
7. Open up disk utility.
8. Find your thumb drive in the left hand pane and click on it.
9. Go to the erase tab and format it to MS-DOS (FAT) by clicking Erase. Wait for it to finish.
10. In the partition tab, selection 2 partition scheme. (I left mine at default, half and half, size doesn't matter at all, leave it that way.) Make sure to click the options and ensure you are using an MS DOS format, not GUID.
11. Partition 1 should remain MS-DOS (FAT), partition 2 should be Mac OS Extended (Journaled). Choose the proper format for each.
12. Click apply.
13. When the popup asks if really want to do this, click Partition.
14. Still in disk utility, go to the first aid tab.
15. Choose your first partition, and run repair disk. Very important, not doing so will prevent it from being bootable).
16. Choose your second partition and run repair disk.
17. Now, in the finder, double click on the Samsung Bootable.cdr, the image will mount.
18. The image should contain two partitions in disk utility: SYSLINUX and rEFIt. Click on SYSLINUX.
19. Click on the SYSLINUX partition under the Bootable Samsung.cdr. Go to the restore tab, verify that the Source: is SYSLINUX, if it is not, drag and drop it there from the left pane.
20. The destination should be your MS-DOS (FAT) partition. Drag and drop it there.
21. Click Restore, enter your password.
22. Repeat the process with the second partition (Mac OS Journaled) and rEFIt.
23. Click Restore, enter your password.
24. As an extra precaution, rerun repair disk on both partitions on your thumb drive.
25. Reboot your machine holding the option key. As a boot option you should see a USB disk icon with the name WINDOWS. This is what you want to boot from.
(Picture lifted from maciverse to show the look of the icon).
26. If that does not show up, choose rEFIt.
(picture lifted from an unknown source)
27. From that boot menu, choose “Boot Legacy OS from SYSLINUX partition”. Read each description carefully, you’ll find it.
28. From there follow the on screen instructions, you may see quite a few BIOS error messages, ignore them, they are normal. It may take a bit of time (a minute or two) for the performance restoration software to load.
29. Once your are booted into MS DOS, simply follow the prompts.
30. Once the firmware update is done and the performance restoration complete, you’ll get a message saying so and you’ll be left with a blinking cursor at the bottom of the page following A:>/SYSLINUX/ or similar.
31. When you’re done, simply hold down the power button to shut the machine down, remove the thumb drive and boot the machine as your normally would.
32. You’re done.
I will again state: Please, keep a backup of your data. You should not run into any problems, but if you do, I will not be held liable for any data loss incurred following my instructions.
Hope this helps!
Last edited: