Become a MacRumors Supporter for $50/year with no ads, ability to filter front page stories, and private forums.

philipma1957

macrumors 603
Original poster
Apr 13, 2010
6,367
251
Howell, New Jersey
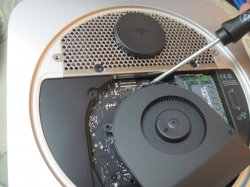
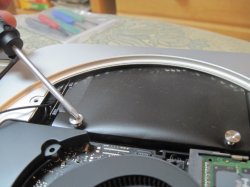
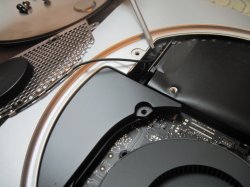
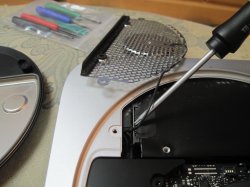
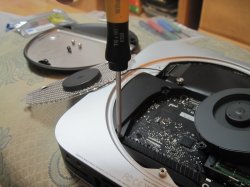
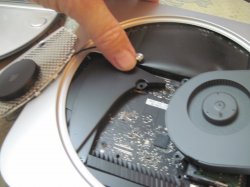
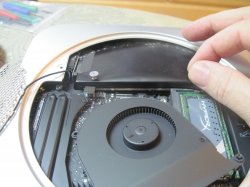
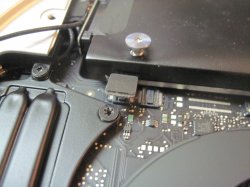
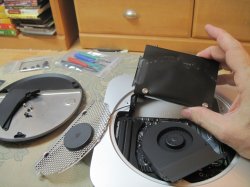
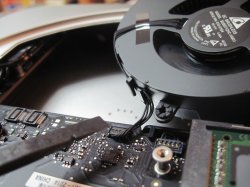
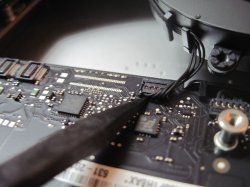
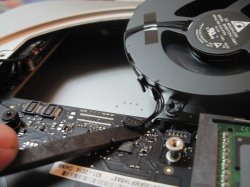
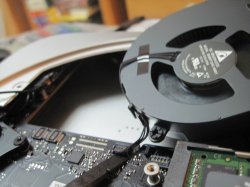
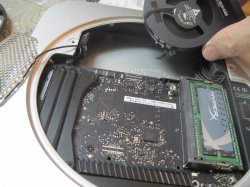
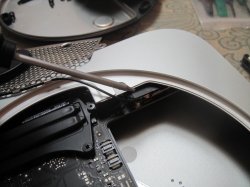
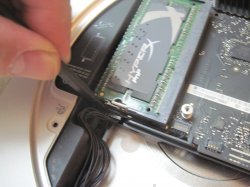
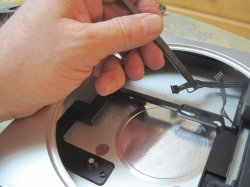
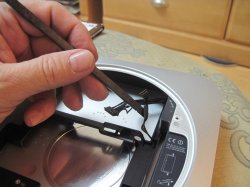
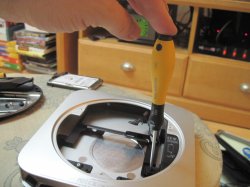
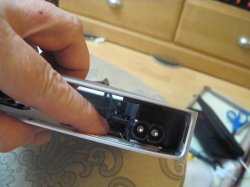
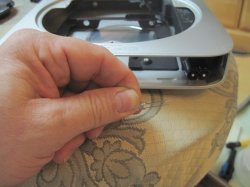
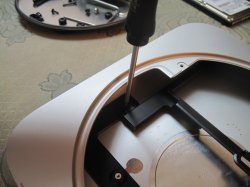
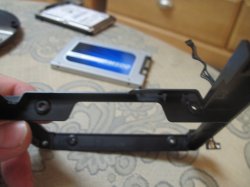
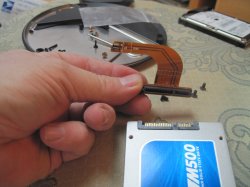
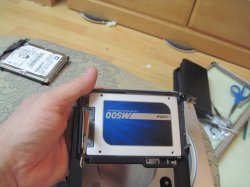
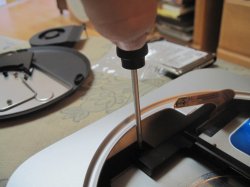
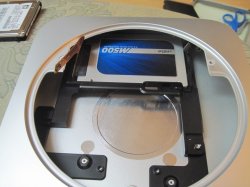
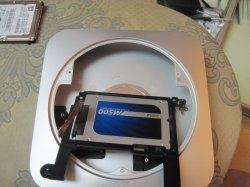
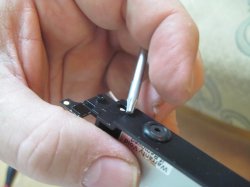
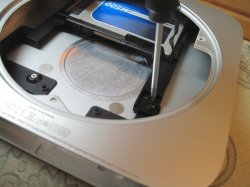
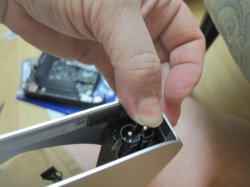
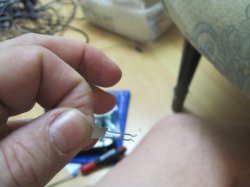
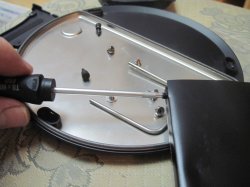
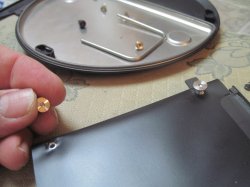
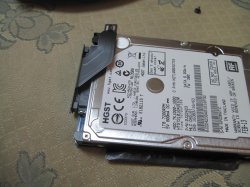
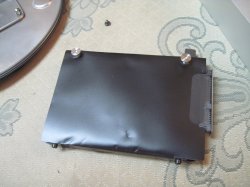
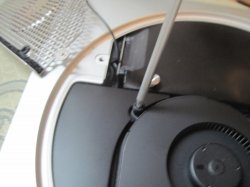
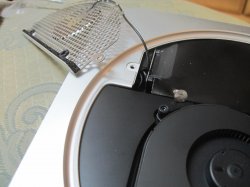
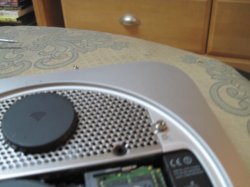
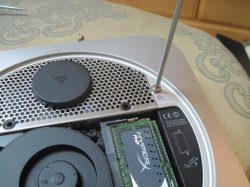
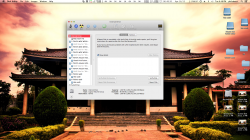
to mods sorry for double post but the 1tb 7200 rpm hitachi and the 960gb crucia, ssd are installed as a fusion. so a 1.96tb fusion has been built I am cloning the osx to it. so I do not know if it is fully done yet. I took about 50 photos of the install.

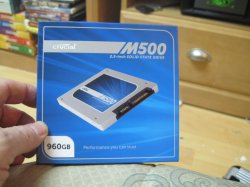
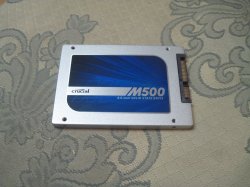
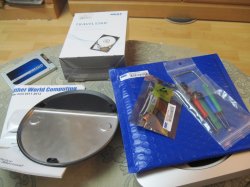
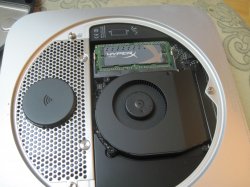
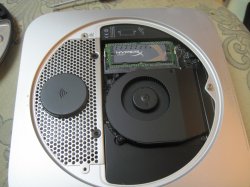
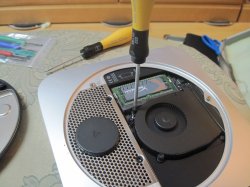
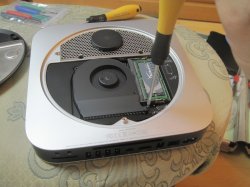
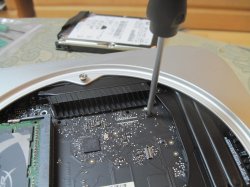
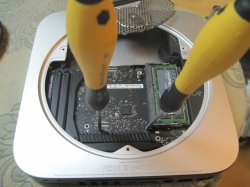
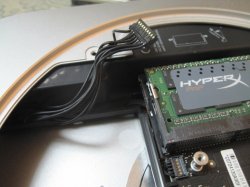
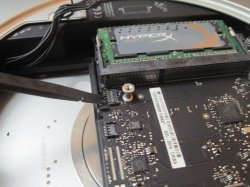
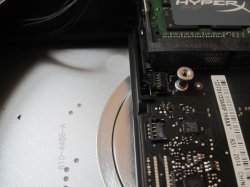
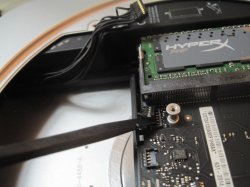
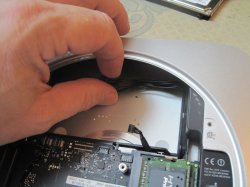
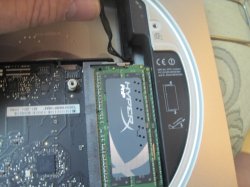
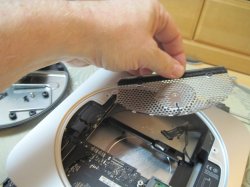
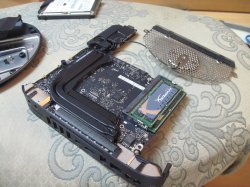
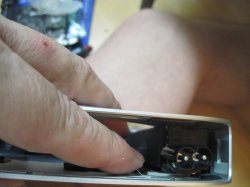
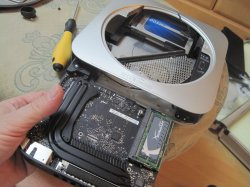
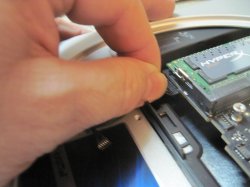
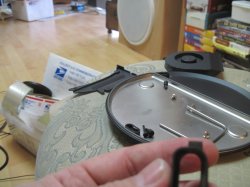
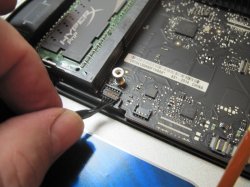
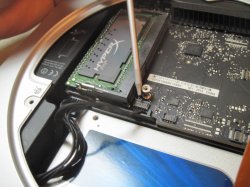
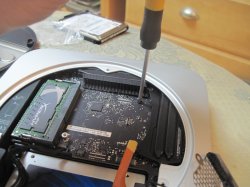
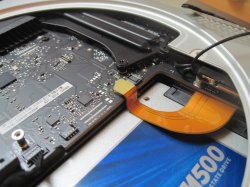
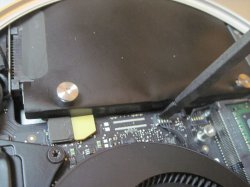
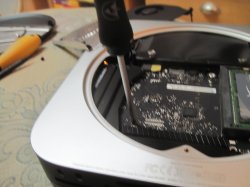
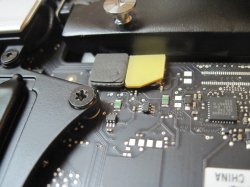
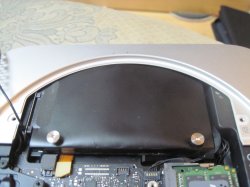
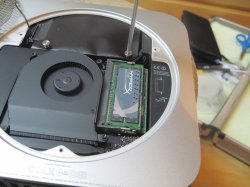
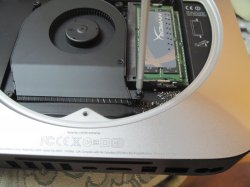
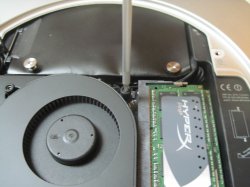
I replaced the stock 1tb 5400 rpm hitachi hdd with a 7200 rpm 1tb hitachi. I had the fastest ram in the machine for the last 20 days. kingston plug n play 1600 ghz with the fastest timings available ,, the crucial 960gb ssd cam today and I had an owc doubler kit on hand. I had a clone of the osx on an external thunderbolt the good osx that will auto build the fusion. I put in the new ssd and the new hdd right out of the boxes and the disc utility asked to repair the 2 drives into a fusion and now I have a 1.96 tb fusion that has a 960gb ssd. along with a 1tb 7200rpm hdd. the osx that I am cloning is about 350gb long and will take a while to clone.

Since the mountain lion osx is on an external 4tb hdd attached by thunderbolt it can clone at about 110 to 130 mb/s
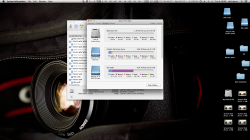
scores are very good:


------ NovaBench ------------------
****************************************************************

NovaBench Score: 1097
2013-04-17 13:51:52 +0000
Mac OS X 10.8.3
Intel Core i7 @ 2300 MHz
Graphics Card: Intel HD Graphics 4000

16384 MB System RAM (Score: 221)
- RAM Speed: 8692 MB/s

CPU Tests (Score: 759)
- Floating Point Operations/Second: 315634368
- Integer Operations/Second: 576739072
- MD5 Hashes Calculated/Second: 1155882

Graphics Tests (Score: 58)
- 3D Frames Per Second: 131

Hardware Tests (Score: 59)
- Primary Partition Capacity: 1814 GB
- Drive Write Speed: 287 MB/s

**************************************************************************

--------xBench-----
**************************************************************************

Disk Test 367.29

SEQUENTIAL ----------------------------------------211.71
Uncached Write --------------------------------------763.75 468.93 MB/sec 4k blocks
Uncached Write --------------------------------------494.73 279.92 MB/sec 256K blocks
Uncached Read -------------------------------------- 72.99 21.36 MB/sec 4k blocks
Uncached Read -------------------------------------- 536.80 269.79 MB/sec 256k blocks

Random --------------------------------------- 1385.30
-Uncached Write----------------------------------------1610.12--170.45 MB/sec 4k Blocks
-Uncached Write----------------------------------------911.80--291.90 MB/sec 256k Blocks
-Uncached Read---------------------------------------2190.77-- 15.52 MB/sec 4k Blocks
-Uncached Read---------------------------------------1402.13- 260.17 MB/sec 256k Blocks
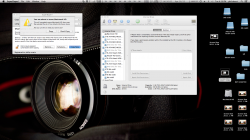
*******************************************************************************
---------64 Bit geek bench-------
*******************************************************************************

Summary

Section Description Score
Geekbench 2.1.6 for Mac OS X x86 (64-bit)
Geekbench Score-------------------------------------------------------- 12030
Integer Processor integer performance------------------10252
Floating Point Processor floating point performance----18376
Memory Memory performance ---------------------------6418
Stream Memory bandwidth performance --------------7267


*********************************************************************************
 

Attachments

  • Screen Shot 2013-04-16 at 6.48.20 PM.png
    Screen Shot 2013-04-16 at 6.48.20 PM.png
    2.7 MB · Views: 328
  • Screen Shot 2013-04-16 at 6.48.47 PM.png
    Screen Shot 2013-04-16 at 6.48.47 PM.png
    1.6 MB · Views: 240
  • Screen Shot 2013-04-16 at 6.49.50 PM.png
    Screen Shot 2013-04-16 at 6.49.50 PM.png
    1.5 MB · Views: 200
  • Screen Shot 2013-04-16 at 6.50.02 PM.png
    Screen Shot 2013-04-16 at 6.50.02 PM.png
    1.5 MB · Views: 184
  • Screen Shot 2013-04-16 at 6.47.36 PM.png
    Screen Shot 2013-04-16 at 6.47.36 PM.png
    2.7 MB · Views: 225
Last edited:

philipma1957

macrumors 603
Original poster
Apr 13, 2010
6,367
251
Howell, New Jersey
To mods this is the first set of many photos. How to install a diy fusion in a mini.
first shot is the base with four rubber feet that allow for air. next shots show the crucial 960gb ssd. note the shot of the spacer I did not attach it because I was putting the ssd in the 4 screw grommet spot the space is not need . it is also peel and stick. the last shot shows the new hdd from hitachi the owc kit to add a ssd/hdd and the crucial ssd. A plug for the OWC kit the cable and the grommets are high quality the tools are so so except for the u shaped board puller. that comes in handy.
 

Attachments

  • IMG_2686.JPG
    IMG_2686.JPG
    1.4 MB · Views: 196
  • IMG_2685.JPG
    IMG_2685.JPG
    1.9 MB · Views: 182
  • IMG_2684.JPG
    IMG_2684.JPG
    1.3 MB · Views: 177
  • IMG_2687.JPG
    IMG_2687.JPG
    1.8 MB · Views: 148
  • IMG_2690.JPG
    IMG_2690.JPG
    1.4 MB · Views: 165
Last edited:

philipma1957

macrumors 603
Original poster
Apr 13, 2010
6,367
251
Howell, New Jersey
This is the second set of install photos. I had the high end kingston installed. you can just leave it in place if you have the ram that you want in your mini. you will see I never removed it. next shot is that of a better quality torx 8 from wiha it will fit in the hex 2mm cover holder. or you can use a 2mm hex for a perfect fit. the third shot was with the 2mm hex.

i removed the pair of 2mm hex and the pair of t8 torx that hold the screen. I then used the torx 6 to start on the fan
 

Attachments

  • IMG_2689.JPG
    IMG_2689.JPG
    1.4 MB · Views: 176
  • IMG_2692.JPG
    IMG_2692.JPG
    1.4 MB · Views: 184
  • IMG_2813.JPG
    IMG_2813.JPG
    1.4 MB · Views: 184
  • IMG_2694.JPG
    IMG_2694.JPG
    1.4 MB · Views: 164
  • IMG_2695.JPG
    IMG_2695.JPG
    1.4 MB · Views: 171
Last edited:

philipma1957

macrumors 603
Original poster
Apr 13, 2010
6,367
251
Howell, New Jersey
Once the three fan screws are removed you get to the first

mother board death trap the famous I pulled the fan socket out and killed my mobo what can i do. DO NOT BREAK IT! If you do oh well. Now here is how I do not break it. I pull the screen out of the way. leave it attached but off to the side. then the first secret of pulling out the hdd I use the two torx screws to pull the hdd out. notice the fan was moved just a little bit. it is attached to the mobo
 

Attachments

  • IMG_2696.JPG
    IMG_2696.JPG
    1.4 MB · Views: 162
  • IMG_2697.JPG
    IMG_2697.JPG
    1.3 MB · Views: 170
  • IMG_2700.JPG
    IMG_2700.JPG
    1.1 MB · Views: 173
  • IMG_2699.JPG
    IMG_2699.JPG
    1.4 MB · Views: 183
  • IMG_2698.JPG
    IMG_2698.JPG
    1.4 MB · Views: 177

philipma1957

macrumors 603
Original poster
Apr 13, 2010
6,367
251
Howell, New Jersey
next step is get what I call the quarter moon out of the way. then lift the sata cable up and remove the hdd. my hand has one of the torn screws and pull the drive out is easy this way. remember to detech the sata Cable before you pull the drive out

I find at this point some drives are too big to pull out of the mini. this drive was slim enough to lift out. the fan is still attached the ram was not removed and the screen grate was not removed.

if you get to this point and the drive is to big to remove you need to do things a bit different . you would need to move the mobo 1/10 of an inch. then slide the drive out.
 

Attachments

  • IMG_2702.JPG
    IMG_2702.JPG
    1.4 MB · Views: 196
  • IMG_2703.JPG
    IMG_2703.JPG
    1.3 MB · Views: 176
  • IMG_2705.JPG
    IMG_2705.JPG
    1.3 MB · Views: 205
  • IMG_2707.JPG
    IMG_2707.JPG
    1.6 MB · Views: 173
  • IMG_2708.JPG
    IMG_2708.JPG
    1.4 MB · Views: 175
Last edited:

philipma1957

macrumors 603
Original poster
Apr 13, 2010
6,367
251
Howell, New Jersey
I did the tear down this way for a reason.. I want to show that fan plug removal as clear as possible failure to remove the fan correctly is a 300 dollar or more mistake. I have the hdd out of the way and here are 5 shots on how to pull the fan. notice the tool from amazon you can use other tools the blade must be thin enough to get under the fan plug and pry the plug up or deth to the mobo
 

Attachments

  • IMG_2709.JPG
    IMG_2709.JPG
    1.8 MB · Views: 176
  • IMG_2711.JPG
    IMG_2711.JPG
    1.7 MB · Views: 181
  • IMG_2710.JPG
    IMG_2710.JPG
    1.8 MB · Views: 213
  • IMG_2713.JPG
    IMG_2713.JPG
    1.4 MB · Views: 198
  • IMG_2712.JPG
    IMG_2712.JPG
    1.4 MB · Views: 181
Last edited:

ToomeyND

macrumors 6502a
Sep 14, 2011
563
378
Thanks for posting these instructions. I'll be ordering a mini and an SSD in the next week or so, and I will be following this to the letter!
 

philipma1957

macrumors 603
Original poster
Apr 13, 2010
6,367
251
Howell, New Jersey
This is a shot of the grate and where it attaches to the mini. I never remove it for this job.

then a shot of the power cable connection pry it out carefully.

next is a long screw that hold mobo to the mini IIRC it is a torx 8.

I use the torx 8 and the torx 6 to shift the mobo 1/10 of an inch.

I lay the mini on a padded foot stool And I pull on the right torx then on the left torx. the goal is small movement at this point the power cord is detached, but I gamble a bit and have not detached the ir sensor's cable A risk if the mobo moves a lot like two inches rather then a little like 1/10 of an inch. once again in this case success the mobo moved 1/10 of an inch
 

Attachments

  • IMG_2717.JPG
    IMG_2717.JPG
    1.4 MB · Views: 152
  • IMG_2718.JPG
    IMG_2718.JPG
    1.5 MB · Views: 149
  • IMG_2719.JPG
    IMG_2719.JPG
    1.6 MB · Views: 161
  • IMG_2721.JPG
    IMG_2721.JPG
    1.5 MB · Views: 164
  • IMG_2720.JPG
    IMG_2720.JPG
    1.6 MB · Views: 173
Last edited:

philipma1957

macrumors 603
Original poster
Apr 13, 2010
6,367
251
Howell, New Jersey
the power cable detached
next step is detaching the ir cable
everyone myself include breaks this{ not everyone but it does get broken a lot

the trick is once you popped it out you are not done!
 

Attachments

  • IMG_2722.JPG
    IMG_2722.JPG
    1.4 MB · Views: 150
  • IMG_2723.JPG
    IMG_2723.JPG
    1.6 MB · Views: 170
  • IMG_2725.JPG
    IMG_2725.JPG
    1.4 MB · Views: 179
  • IMG_2726.JPG
    IMG_2726.JPG
    1.4 MB · Views: 186
  • IMG_2727.JPG
    IMG_2727.JPG
    1.5 MB · Views: 165
Last edited:

RoastingPig

macrumors 68000
Jul 23, 2012
1,606
70
SoCal
i always felt that the ssd placement was a little weird in the 2012 mac mini i feel like it can slip out and be hanging
 

philipma1957

macrumors 603
Original poster
Apr 13, 2010
6,367
251
Howell, New Jersey
just about ready to pull the mobo out with the ram in it and the screen/grate attached..

fully pull the ir cable back and out of the way. slide mobo a bit and trail it with the attached screen the screen will follow the mobo right out the mini leaving you one less part to attache later on. when you are done the ssd tray is ready to pull
 

Attachments

  • IMG_2728.JPG
    IMG_2728.JPG
    1.5 MB · Views: 179
  • IMG_2729.JPG
    IMG_2729.JPG
    1.4 MB · Views: 117
  • IMG_2730.JPG
    IMG_2730.JPG
    1.8 MB · Views: 140
  • IMG_2731.JPG
    IMG_2731.JPG
    2.1 MB · Views: 148
  • IMG_2732.JPG
    IMG_2732.JPG
    1.1 MB · Views: 141

philipma1957

macrumors 603
Original poster
Apr 13, 2010
6,367
251
Howell, New Jersey
to roastingpig you are correct if you do not buy the full kit from OWC with grommets and screws along with the ssd cable your are floating the ssd . This method of floating is less sturdy the the way I did it.


back to pull of ssd tray. make sure the power wires are all clear. make sure the ir sensor wire is clear.

double check unscrew the torx screw that holds the power supply to the ssd tray.

pull the pin on the power supply.. next photo I will pull the power supply and then pull the ssd tray,
 

Attachments

  • IMG_2733.JPG
    IMG_2733.JPG
    1.4 MB · Views: 149
  • IMG_2734.JPG
    IMG_2734.JPG
    1.8 MB · Views: 101
  • IMG_2735.JPG
    IMG_2735.JPG
    1.4 MB · Views: 145
  • IMG_2738.JPG
    IMG_2738.JPG
    1.6 MB · Views: 151
  • IMG_2739.JPG
    IMG_2739.JPG
    1.4 MB · Views: 164

philipma1957

macrumors 603
Original poster
Apr 13, 2010
6,367
251
Howell, New Jersey
this 2 prong jack needs to be twisted counter clock wise to remove

it is twisted and ready to pull out

photo of it pulled. the plastic tab holds the jack in place and is why you spun it. unscrew the last torx on the ssd tray and then slide it out
 

Attachments

  • IMG_2741.JPG
    IMG_2741.JPG
    1.5 MB · Views: 169
  • IMG_2742.JPG
    IMG_2742.JPG
    1.6 MB · Views: 160
  • IMG_2743.JPG
    IMG_2743.JPG
    1.3 MB · Views: 137
  • IMG_2737.JPG
    IMG_2737.JPG
    1.5 MB · Views: 187
  • IMG_2745.JPG
    IMG_2745.JPG
    1.4 MB · Views: 162

philipma1957

macrumors 603
Original poster
Apr 13, 2010
6,367
251
Howell, New Jersey
one of the 4 rubber grommet holes fill the four of them.

then put the sata cable on the ssd.

put the ssd into the caddy this ssd was a tight fit so it was held still by the grommets

screw the grommets in see that they (black 2mm hex screw) are just sunk a little
 

Attachments

  • IMG_2748.JPG
    IMG_2748.JPG
    1.6 MB · Views: 156
  • IMG_2753.JPG
    IMG_2753.JPG
    1.4 MB · Views: 159
  • IMG_2758.JPG
    IMG_2758.JPG
    1.3 MB · Views: 156
  • IMG_2763.JPG
    IMG_2763.JPG
    2.7 MB · Views: 160
  • IMG_2760.JPG
    IMG_2760.JPG
    1.5 MB · Views: 113
Last edited:

philipma1957

macrumors 603
Original poster
Apr 13, 2010
6,367
251
Howell, New Jersey
with the grommets in i put the ssd caddy back into the mini and screw it down and make a mistake the last photo shows me screwing in the caddy without the powersupply the screw was too long and took a while to figure out the mistake.
 

Attachments

  • IMG_2772.JPG
    IMG_2772.JPG
    1.4 MB · Views: 147
  • IMG_2770.JPG
    IMG_2770.JPG
    1.5 MB · Views: 150
  • IMG_2768.JPG
    IMG_2768.JPG
    1.4 MB · Views: 133
  • IMG_2766.JPG
    IMG_2766.JPG
    1.6 MB · Views: 171
  • IMG_2773.JPG
    IMG_2773.JPG
    1.6 MB · Views: 146

philipma1957

macrumors 603
Original poster
Apr 13, 2010
6,367
251
Howell, New Jersey
once I realized the screw was too long I put in the psu then screwed in the second ssd screw after that I slide in the mobo note I threaded the screen/grill in first sinc eit was never removed from the mobo
 

Attachments

  • IMG_2776.JPG
    IMG_2776.JPG
    1.3 MB · Views: 155
  • IMG_2777.JPG
    IMG_2777.JPG
    1.5 MB · Views: 142
  • IMG_2778.JPG
    IMG_2778.JPG
    1.6 MB · Views: 125
  • IMG_2780.JPG
    IMG_2780.JPG
    1.7 MB · Views: 156
  • IMG_2781.JPG
    IMG_2781.JPG
    1.6 MB · Views: 139

philipma1957

macrumors 603
Original poster
Apr 13, 2010
6,367
251
Howell, New Jersey
near the finish.

I plug the power supply in.

This rubber gasket I leave out it goes around the 2 prong power jack. I do this because i do 25 machines a month and if someone wants this mini I will put it back. this make for a tight seal .

next is the ir cable plug it in. here it is plugged in tight.

last is the longest screw in the mini it attaches mobo to the case
 

Attachments

  • IMG_2783.JPG
    IMG_2783.JPG
    1.6 MB · Views: 113
  • IMG_2784.JPG
    IMG_2784.JPG
    1.5 MB · Views: 142
  • IMG_2785.JPG
    IMG_2785.JPG
    1.6 MB · Views: 109
  • IMG_2786.JPG
    IMG_2786.JPG
    1.6 MB · Views: 129
  • IMG_2788.JPG
    IMG_2788.JPG
    1.5 MB · Views: 144

philipma1957

macrumors 603
Original poster
Apr 13, 2010
6,367
251
Howell, New Jersey
I like the sata cable from owc I bend it into place. I removed the oem 1tb hdd and put in a 7200rpm 1tb hdd next is my trick screw in the two screen/grate screws early the screw in the side screws now the new 1tb hdd is ready to go in
 

Attachments

  • IMG_2789.JPG
    IMG_2789.JPG
    1.6 MB · Views: 149
  • IMG_2791.JPG
    IMG_2791.JPG
    1.9 MB · Views: 145
  • IMG_2790.JPG
    IMG_2790.JPG
    1.6 MB · Views: 140
  • IMG_2798.JPG
    IMG_2798.JPG
    1.7 MB · Views: 154
  • IMG_2799.JPG
    IMG_2799.JPG
    1.7 MB · Views: 154
Last edited:

philipma1957

macrumors 603
Original poster
Apr 13, 2010
6,367
251
Howell, New Jersey
okay before you put the second drive in I realized my second mistake this drive was too big to slide in so I had to un screw the long mobo screw and slide the mobo out 1/8 inch. the newer 1tb 7200 rpm hdd is about 1/100 of an icnh or .25 mm wider . if I was to do this again I would of kept the stock 1tb 5400 rpm hdd in. this tiny width difference made this job a little harder
 

Attachments

  • IMG_2801.JPG
    IMG_2801.JPG
    2.1 MB · Views: 184
  • IMG_2805.JPG
    IMG_2805.JPG
    1.9 MB · Views: 156
  • IMG_2804.JPG
    IMG_2804.JPG
    1.2 MB · Views: 131
  • IMG_2803.JPG
    IMG_2803.JPG
    1.6 MB · Views: 143
  • IMG_2802.JPG
    IMG_2802.JPG
    1.3 MB · Views: 108
Last edited:

philipma1957

macrumors 603
Original poster
Apr 13, 2010
6,367
251
Howell, New Jersey
I finally got the sata cables attached and the hdd in place I plugged in the fan and screwed it in. the two torx screws really help moving the hdd into spot
 

Attachments

  • IMG_2810.JPG
    IMG_2810.JPG
    1.5 MB · Views: 175
  • IMG_2809.JPG
    IMG_2809.JPG
    1.4 MB · Views: 140
  • IMG_2808.JPG
    IMG_2808.JPG
    2.2 MB · Views: 145
  • IMG_2807.JPG
    IMG_2807.JPG
    1.4 MB · Views: 171
  • IMG_2806.JPG
    IMG_2806.JPG
    1.3 MB · Views: 146

philipma1957

macrumors 603
Original poster
Apr 13, 2010
6,367
251
Howell, New Jersey
last three shots

the screen back in place it was never unplugged . this little grates screens whatever can be ned to impossible to get back in place . I had a lot of trouble due to the hdd being a very small fraction wider then the stock hdd. the easy fix if it does not align is use a dremel bit and make the 2 screen holes that use the hex screw a little bit bigger. these are the same 2 bolts that hold the cover on . what I like about this is this mini has become a set it and forget piece of gear. Most likely this will go in my friends recording studio he already has one of these with the stock 1tb hdd and a 500gb samsung ssd. I built if for him a few months ago.
 

Attachments

  • IMG_2811.JPG
    IMG_2811.JPG
    1.4 MB · Views: 158
  • IMG_2812.JPG
    IMG_2812.JPG
    1.5 MB · Views: 142
  • IMG_2813.JPG
    IMG_2813.JPG
    1.6 MB · Views: 162

hfg

macrumors 68040
Dec 1, 2006
3,621
312
Cedar Rapids, IA. USA
i ordered it today. install was done on tues. I have 50 photos and will start to post them today thur. to mods please forgive mulit posts as I have 30 plus photos of proper 2 drive install

Excellent series of posts with great pictures! :cool:

Thanks for the time and effort posting this procedure ... it should become a sticky here.


-howard
 
Register on MacRumors! This sidebar will go away, and you'll see fewer ads.