Got a tip for us?
Let us know
Become a MacRumors Supporter for $50/year with no ads, ability to filter front page stories, and private forums.
How to: custom Bootlogo/ Post your custom Bootlogo
- Thread starter TSX
- Start date
- Sort by reaction score
You are using an out of date browser. It may not display this or other websites correctly.
You should upgrade or use an alternative browser.
You should upgrade or use an alternative browser.

yes how do we change this without winterboard?
Winterboard won't touch a bootlogo
Use Redsn0w 0.9.2, You can change your bootlogo without having to re-jailbreak.yes how do we change this without winterboard?
Just check custom bootlogo and already pwned.


Heres how to make them using PS:
1. Click FILE>NEW in Photoshop, select PRESET>Custom, enter size 320x480 pixels for width and height, Select COLOUR MODE>RGB>8-BIT, then BACKGROUND CONTENTS>TRANSPARENT . Also click ADAVANCED and ensure you have COLOUR PROFILE>SRGB... selected and PIXEL ASPECT RATIO>SQUARE PIXELS. (you might save these presets for other iPhone png files you want to create).
2. Put your picture in it using FILE>PLACE, and selecting the image from your computer, You can do this numerous times to select several images as you wish. Then position it on the canvas and click the tick on the taskbar; alternative might be using (in addition or not) the text tool to add text to the canvas.
3. Click FILE>SAVE FOR WEB and DEVICES, ensure you have PRESET>PNG-24 or png 8 depending how big the file is, ensure the TRANSPARENCY box is checked. Then at the botton left it will tell you the size of your image, ensure it is less than or equal to 100KB.
4. Click save, browse to your desired destination and save it as a .png file.
5. In PwnageTool select the file you just saved and so long as you ensured the file size is below 100kb and followed all steps correctly it should work.
Heres how to make them using PS:
1. Click FILE>NEW in Photoshop, select PRESET>Custom, enter size 320x480 pixels for width and height, Select COLOUR MODE>RGB>8-BIT, then BACKGROUND CONTENTS>TRANSPARENT . Also click ADAVANCED and ensure you have COLOUR PROFILE>SRGB... selected and PIXEL ASPECT RATIO>SQUARE PIXELS. (you might save these presets for other iPhone png files you want to create).
2. Put your picture in it using FILE>PLACE, and selecting the image from your computer, You can do this numerous times to select several images as you wish. Then position it on the canvas and click the tick on the taskbar; alternative might be using (in addition or not) the text tool to add text to the canvas.
3. Click FILE>SAVE FOR WEB and DEVICES, ensure you have PRESET>PNG-24, ensure the TRANSPARENCY box is checked. Then at the botton left it will tell you the size of your image, ensure it is less than or equal to 100KB. If it is larger select IMAGE SIZE from the right and for the PERCENT box enter a lower percentage to make the image smaller and so file size smaller, click apply. Keep entering a lower percentage until the size gets below or equal to 100KB.
4. Click save, browse to your desired destination and save it as a .png file.
5. In PwnageTool select the file you just saved and so long as you ensured the file size is below 100kb and followed all steps correctly it should work.
Or you can use MS Paint to create a picture under 320x480 and save it as .PNG file.

Heres how to make them using PS:
1. Click FILE>NEW in Photoshop, select PRESET>Custom, enter size 320x480 pixels for width and height, Select COLOUR MODE>RGB>8-BIT, then BACKGROUND CONTENTS>TRANSPARENT . Also click ADAVANCED and ensure you have COLOUR PROFILE>SRGB... selected and PIXEL ASPECT RATIO>SQUARE PIXELS. (you might save these presets for other iPhone png files you want to create).
2. Put your picture in it using FILE>PLACE, and selecting the image from your computer, You can do this numerous times to select several images as you wish. Then position it on the canvas and click the tick on the taskbar; alternative might be using (in addition or not) the text tool to add text to the canvas.
3. Click FILE>SAVE FOR WEB and DEVICES, ensure you have PRESET>PNG-24, ensure the TRANSPARENCY box is checked. Then at the botton left it will tell you the size of your image, ensure it is less than or equal to 100KB. If it is larger select IMAGE SIZE from the right and for the PERCENT box enter a lower percentage to make the image smaller and so file size smaller, click apply. Keep entering a lower percentage until the size gets below or equal to 100KB.
4. Click save, browse to your desired destination and save it as a .png file.
5. In PwnageTool select the file you just saved and so long as you ensured the file size is below 100kb and followed all steps correctly it should work.
Thanks for this. I made one last night. All went well. Even came in under the size requirement. I had An issue when I went to load them in redsn0w said they were above kb requirement. So I shrunk it further than turned it to grayscale to make it work. So now it's in grayscale and it's not full screen. Looks pretty dumb IMO. Would you have recommendation on what to change inorder to keep it fullscreen and in color? TIA
GF
It should be full screen and look normal your problem is you said it came under size requirements Make sure it's 320x480
to look normal. When you save it for Web and devices, look at preview that pops up to the bottom left of your image it should give the file size, make sure it's under a 100kb. Also on the save for web and devices screen set it to Png 8 bit instead of 24, that should help drop the file size down and just make sure everything is set to 320x480.
Well when i started it was the right size. But it was over 100 kb so I readjusted the percentage like you recommended. Thus beginning my dilemma.
Well when i started it was the right size. But it was over 100 kb so I readjusted the percentage like you recommended. Thus beginning my dilemma.
That's my fault for putting that in there ignore that part, just make sure you put the size at 320x480, if the file is too big try to change it to png-8 instead of 24
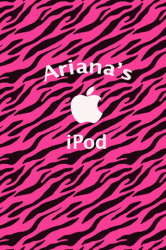
Here is mine, I JUST made and installed on a friends iphone i just jail broke

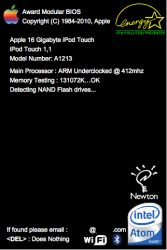
Update: Here is another I just made

Update: Here is another I just made
Here is mine, I JUST made and installed on a friends iphone i just jail broke
Update: Here is another I just made
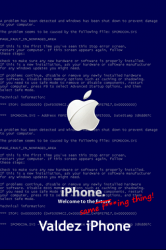
Hope you don't mind, I borrowed the first one...very slick!
Register on MacRumors! This sidebar will go away, and you'll see fewer ads.