Agreed @iModFrenzy, if you don't have to, don't go ANYWHERE near a G5 Quad LCS. Tough, tough stuff, and most of us are electrical/computer type people, not plumbers... no experience with liquid cooling and none of the parts, tools and procedures needed to do this successfully.
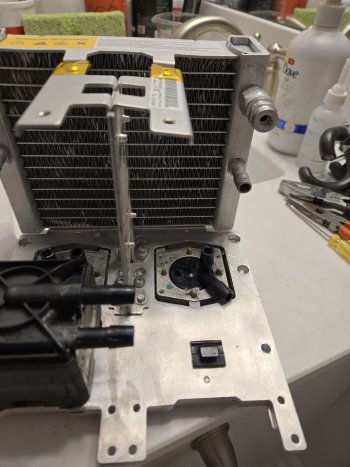
I read through your air cooling conversion post, and I have to say that it sounds even MORE complicated than the LCS stuff... you are machining metal on top of everything else. Waaay outside of my experience set, not to mention available tools. Definitely, at least for now, "a bridge too far" for me.
I am blundering my way through it and learning lots as I go, but it is a massively frustrating task, completely outside of anything my 30+ years of computer experience has equipped me for. The good folks here at MacRumors are perhaps the most valuable resource available, and have been, and continue to be, a HUGE aid as I walk down this road.
I am adopting a "failure is not an option" mindset, but I have to admit that after nearly two weeks with no appreciable progress, I am getting mighty sick of tearing down Quads, changing something in the LCS and reassembling, only to find that this too did not work. Rinse and repeat!
Eventually.... I hope ... I will get at least one of these two machines back on its feet.