Become a MacRumors Supporter for $50/year with no ads, ability to filter front page stories, and private forums.
It is the dual bump "version 2" LCU. I had to take it apart and replace all the tubing, fittings and clamps. My CPU cards look identical to the images in your guide and I'm sure it'll work. If I remember right the "version 2" LCU was made in response to the original unit leaking.
 
I've done some preliminary fitting of the parts and everything looks to be good. When it comes to using the included knurled thumb bolts from the coolers to attach the bracket to the motherboard standoffs I had an idea. What about the tall "bolts" used to secure the original cooler to those standoffs? They screw all the way down and they might just clear the fan. If they don't work I'll used the knurled ones. All I have to do now is go to the hardware store and make those holes bigger on the 2 front brackets. Hopefully it's all gravy from there.

I included more images of things. Feel free to include any of these in your guide and I'll be taking more throughout the process if I think they'll be of help to someone else doing this.

Don't worry I was very careful when setting the cooler on the CPU.

I'm sure this would be considered blasphemy by Apple purists... but it'll extend the life of the machine another 20-30 years until the thermal paste should be reapplied. Damn I'll be approaching retirement by then!
 

Attachments

  • 20250608_094246.jpg
    20250608_094246.jpg
    325.5 KB · Views: 30
  • 20250608_094039.jpg
    20250608_094039.jpg
    269.5 KB · Views: 24
  • 20250608_094309.jpg
    20250608_094309.jpg
    305.9 KB · Views: 28
  • 20250608_094109.jpg
    20250608_094109.jpg
    409.7 KB · Views: 28
  • 20250608_102222.jpg
    20250608_102222.jpg
    228.9 KB · Views: 31
There have been some issues and the machine is unable to post or chime. When pressing the power button with air baffle off LED 3 and 4 are lit. LED 5 never comes on. I've noticed the infamous checkstop LED start to flicker rapidly a couple seconds after pressing the power button. It's not blinking but flickering with varying intensity. Almost like it's not sure what it wants to do. All fans come on as expected including the GPU fan. The LED above the power button doesn't blink at all but stays lit. The caps-lock on the keyboard works and the mouse has power. Here is everything I've done to troubleshoot...

1. reset the logic board via the button on the board.
2. remove all but innermost pair of RAM
3. remove all RAM (power LED above power button doesn't flash once indicating no RAM)
4. removed the CPU cards/heatsinks and verified pins are OK
5. powering on with no CPUs causes LED 1 and 6 to light up

I found a post on these forums about the checkstop LED blinking in defined groups of 2 meaning CPU B is dead. Mine comes on bright then flickers out. I hope the previous overheating and dark crud blocking coolant flow didn't kill CPU A.

My question is this: Could I move CPU B to the top slot and leave the bottom slot empty? Or will LED 6 come on and not post? Suppose I could also try swapping the CPU cards and see if checkstop blinks twice.

 
Screenshot_20250608_175637.png


LED diagnostic indicator chart.

If you're not seeing LED 5 either your logic board is bad or the CPUs are so cooked that it checkstops before finishing power on tests (reaches Open Firmware).
 
I'm thinking CPU A is dead. It overheated before so it makes sense. Can a quad technically run with only 1 cpu installed?

I have the January 13 2006 edition of the service manual :)
 
What are the results with the air baffle *in*? It makes a difference!

Quads CAN run on just one CPU card, since you can turn off the second one via an Open Firmware command. However, I *think* the second one has be somewhat "sane" to even get to the Open Firmware prompt to disable it...sort of a Quad "Catch-22" .

I am presently running my Air Quad with CPU B disabled because it was causing color artifacts on the display. I must have "lightly damaged" it during the combination of LCS and Air cooling efforts. It runs, but it causes random, and sometimes severe, color distortion on screen, so I turned it off.

The Quad runs wonderfully on just one CPU card (2 cores) and correctly, if somewhat humorously, reports itself as a Dual 2.5 GHz machine in "About This Mac". I prefer to think of it as a "Half Quad"! :cool:
 
Last edited:
I haven't worked on it just yet. CPU A likely died when my rebuilt LCU got gummed up with something. This weekend I'm gonna move CPU B to A and see what happens. If it refuses to work with nothing in the B position I'll put CPU A in and see what that does. If it boots with the CPUs reversed and is stable (unlikely) I'll leave it. However, if it has issues and I can at least get into Open Firmware I'll have to disable it.

I'm also trying to figure things out at 68kmla.org with regards to a replacement CPU.

The actual process of doing the air mod did go smoothly and i'm going to try something different. instead of using 3/16s worth of spacers in the front i'll try the same 1/4" thick spacers like the back. And try not cutting myself again on that thin metal along the PCIe slots while plugging in the rear fan.
 
Last edited:
Yup! That thin metal slot protector is a *killer*!

Can you buy *just* Quad CPU cards (not whole Quads) through 68kmla.org? I need one as well!
 
68kmla is another place like here to get help. Sometimes you just gotta widen your net to get answers and combine everything into a solution that (hopefully) works.
 
BTW, 
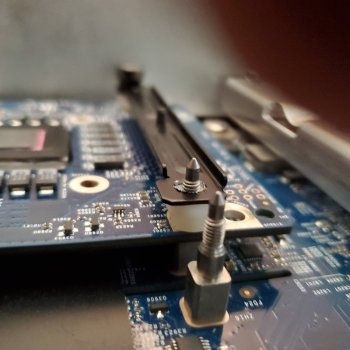
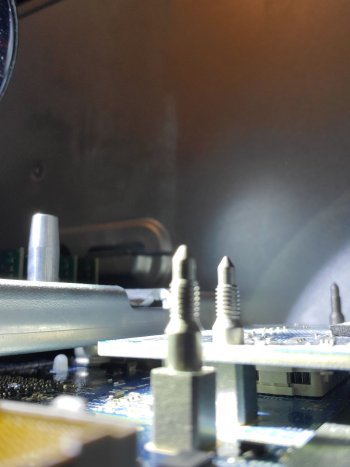
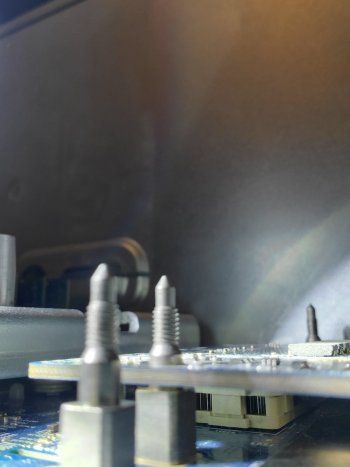
@amishallin, did you have any luck with the tall "bolts" as fasteners? I tried them, but found that they would not "bite" onto the threads of the alignment posts with the FROZN mounting brackets also on those posts. If they would have screwed down, they would have been a perfect solution.

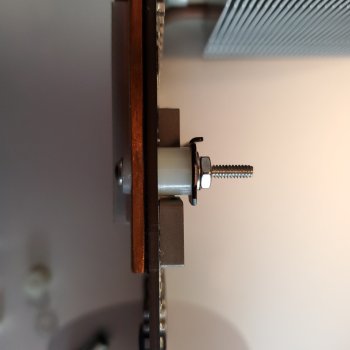
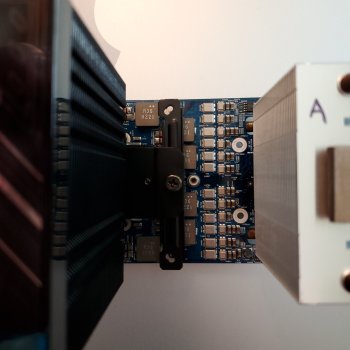
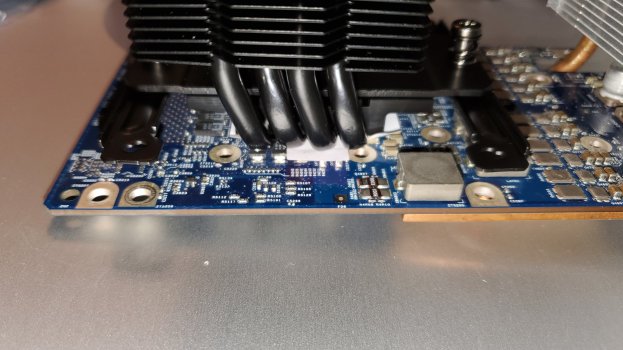
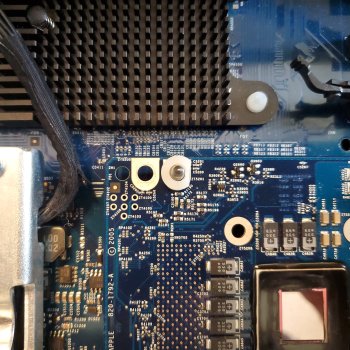
This may be a silly question, but are you sure that the FROZN/shim sets are tightly screwed down onto the CPUs? If they are not, it could explain some of the behavior you are seeing. Perhaps CPU B is tightly screwed down but not CPU A? I had all nature of problems until I came up with the "knurl" solution and accomplished a tight fit of the cooling apparatus onto the CPUs.

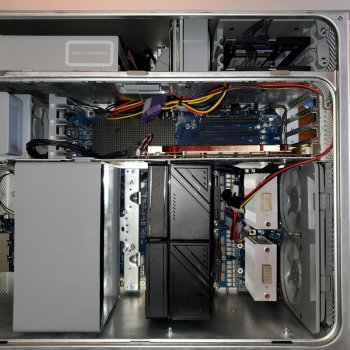
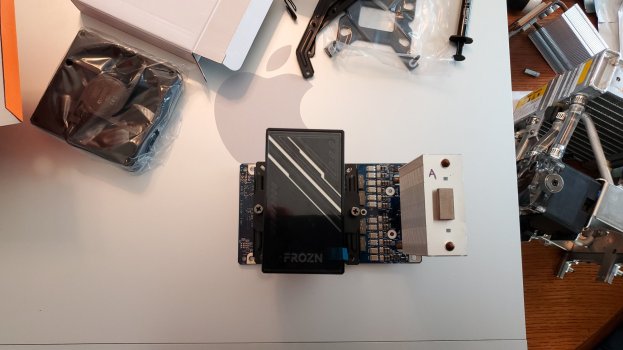
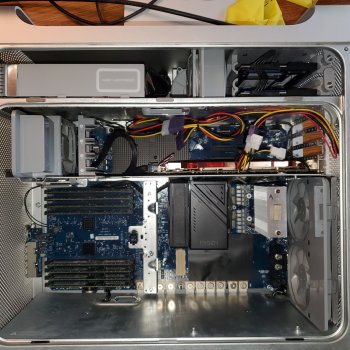
One other thing to examine: It *looks* like you assembled each CPU card/shim/FROZN cooler set before installing them into the Quad. Did you also attach the fans to the FROZN coolers before installing each CPU card? If so, is it possible that the second CPU/shim/FROZN/Fan set, after being installed, exerted mechanical pressure on the first one installed, pulling it even slightly off its tight fit onto its CPU? Mechanical clearances are really tight in that area... @Doq mentioned a similar issue in his post on air cooling his Quad.

This is why I used the FROZN clips on the top CPU fan, but only duct tape (and a twist tie) on the second one, so that it fit into the case without pressing on its peer CPU card fan in any way.

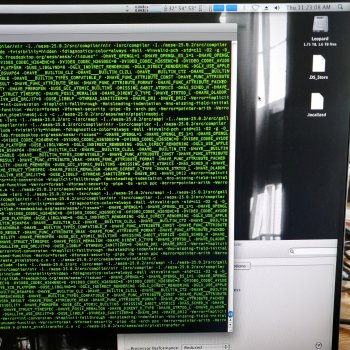
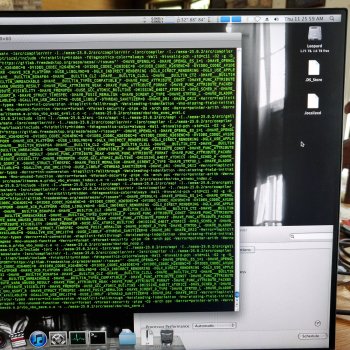
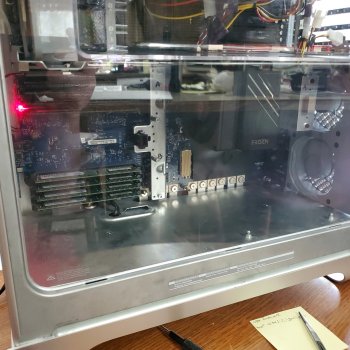
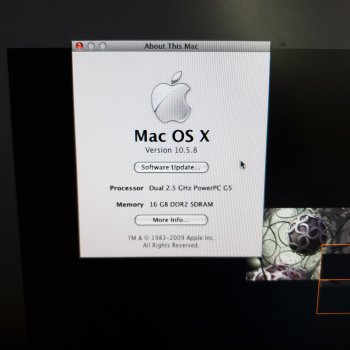
Assuming they are both tightly screwed down, and not impinging on each other, your plan to swap the A and B CPU positions seems the right next step. I am about to try the same thing on my LCS cooled Quad, which won't boot at all right now - the Check Stop light comes on immediately. I am hoping that CPU B is still operational (it is unlikely that both CPUs got "smoked"), and when placed into the A slot, it may provide enough "brains" to get the Quad up to Open Firmware, where I can disable the second CPU.

Stay at it @amishallin! Persistence and determination are the keys to success in this effort. I had nothing but trouble until I came up with the "knurl solution", but it was the third or fourth thing I had tried - until then, it was just one failure after another. I just kept methodically plugging away at it until I finally succeeded. The result is SO worth it! A "cool, quiet Quad" is a thing of beauty!

[offside comment]

The alliterative nature of "cool, quiet Quad" always puts me in mind of a line from the Pink Floyd album "Dark Side of the Moon", which talks about a "short, sharp shock". I made reference to this in one of my posts, but no-one seemed to notice, or to comment anyway!

[/offside comment]

In the end, the only thing that can truly stop you is dead CPU cards. As I said in my guide, it is "game over" if you kill the CPU cards. If that happens, you have to pause until you can source replacement CPU cards, something I have not yet been able to do. Hence, my Air Quad runs on two of its CPUs, not four, because I damaged one of the CPU cards somewhere along the way. Mind you, even a "half Quad" is amazingly fast!
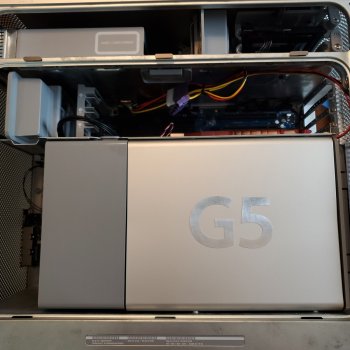
 
Last edited:
I had the same results as you did with those tall bolts and used the knurled ones.

Its not really a silly question. I imagine if the coolers weren't tight enough they may not make good contact and cause them to overheat. However, if they were too tight they may cause damage considering the spacers near the rear are 1/4" and the ones in the front are about 3/16." This is why I want to try having all spacers be 1/4" and have a more even pressure. Currently, I have nylon spacers/washers since that's all my hardware store has other than metal. How tight did you screw yours down? The screws that connect the cooler to the brackets have springs for tension. I could technically go tighter but they're about as tight as the liquid cooler (has springs for tension) on my AMD 7950X3D gaming PC that never reaches 60C running 24/7 at flat 94% CPU utilization crunching numbers for milkyway@home. I also don't wanna crack a trace or solder joint on the board.

There are things I'm going to try this weekend and hopefully have a booting G5 even if with 1 CPU installed.
 
If so, is it possible that the second CPU/shim/FROZN/Fan set, after being installed, exerted mechanical pressure on the first one installed, pulling it even slightly off its tight fit onto its CPU? Mechanical clearances are really tight in that area... @Doq mentioned a similar issue in his post on air cooling his Quad.
Can confirm this is what happened. With the clips installed the cooler becomes just barely too wide to install side-by-side and cooling contact suffers if the processor card itself isn't poorly seated.

Used to be one clip per cooler on the outside edges with a twist tie but I've replaced the twist tie with a more elegant 3D-printed solution instead.
I also don't wanna crack a trace or solder joint on the board.
In regards to screw tightness, I don't know how much tension @mac57mac57's install can get, but in my install I actually was able to bottom out both the captive screws on each end of the cooler itself and the pass-through screws with the thumb-nuts.

I wouldn't worry too much about cracking traces or solder joints (the processor board's PCB is pretty robust), I'd be more concerned with cracking the 970MP's die itself, since you are cooling a bare die and run that risk.
 
Thanks @Doq, I tend to agree that you can apply as much mechanical tightening to the mounting hardware as it will take. However, I was more "measured" when I did this. The FROZN mounting screws in my Air Quad are probably about half way tightened down.

I am ALWAYS, just as a matter of course, cautious about over tightening heat sinks on any CPU card: Mac or PC - you can literally squeeze the thermal paste out, reducing cooling efficiency substantially.

So... I tightened mine incrementally, a little bit at a time, alternating between front and back, until I could feel that the cooler was tightly seated. I am guessing that this was about half way in each case, but that IS a guess.
 
@mac57mac57 Would this be a service you would be willing to offer? I'm terrified to try this with my G5 Quad.
I second this question...I have a Quad that's been sitting on the shelf for the better part of two years, as the last time I poked around with it, I couldn't get it to boot consistently and, with some of the LEDs on the motherboard lit up, I suspected that it was a thermal issue. And this kind of retooling of the LCS is WAY above my skillset, so I would love to find someone that could help me finally get this old girl up and running again.

Anyone in the Chicago area reading this that has the skills & savvy to help with this?
 
Last edited:
Would this be a service you would be willing to offer? I'm terrified to try this with my G5 Quad.

I thought about this @ZacharyFergeson, but it isn't practical. Quads are big, heavy boxes, and just the shipping costs alone in EACH direction would exceed $US 100. Then there is a little over $US 100 in parts and then the cost of my time/labor. My guess: this service would have to be priced in the $US 400 region. You could almost buy a new Quad on eBay for that amount! ... and then you have to consider that after all that money, your Quad might be damaged by the shipper on it way back to you (or on its original journey to me!).

I do understand your "terror" though - in learning how to get to this point, I completely "smoked" one Quad CPU card, damaged another, and bought a whole separate G5 Dual just as a "donor" machine, using it for non-CPU parts. No matter how good my guide might be, this is not an easy task. If you like this kind of work, it can be (somewhat) fun, but otherwise, it is a real slog.

Now that I have the process down, I would love to repeat it on other folks machines for them, but I doubt that anyone would find it to be financially attractive, not to mention the ever present possibility that the shipper might damage the finished product on its way back to you. Just not practical for all sorts of reasons!
 
I am ALWAYS, just as a matter of course, cautious about over tightening heat sinks on any CPU card: Mac or PC - you can literally squeeze the thermal paste out, reducing cooling efficiency substantially.

So... I tightened mine incrementally, a little bit at a time, alternating between front and back, until I could feel that the cooler was tightly seated. I am guessing that this was about half way in each case, but that IS a guess.
Of course. This is best practice no matter what system or cooler and is definitely what I did (I just went all the way instead of only about halfway).

Too much on one side is pretty much how you end up cracking a die and cooking your processor. Don't ask me how I know this.
 
It *looks* like you assembled each CPU card/shim/FROZN cooler set before installing them into the Quad. Did you also attach the fans to the FROZN coolers before installing each CPU card? If so, is it possible that the second CPU/shim/FROZN/Fan set, after being installed, exerted mechanical pressure on the first one installed, pulling it even slightly off its tight fit onto its CPU? Mechanical clearances are really tight in that area... @Doq mentioned a similar issue in his post on air cooling his Quad.
I take it you saw my images of the coolers on the CPU cards outside the machine. All I did was do a "test fit" to make sure the holes lined up with the CPU cards. Nothing was screwed down.

When I work on it again this weekend I'll have to take some more pictures. There are some tiny resistors next to the ground pads on the front of the cards that go onto the standoffs in the machine. I can see someone accidentally breaking one of those off.

Has anyone tried using all 1/4" tall spacers? If not I'm going to try that this weekend.
 
I'd like to report a half success!

After removing both CPUs to check the pins they all looked perfect. However, while cleaning off the die for CPU B I noticed it was chipped on the side that faces the front of the machine.

I tried using 1/4" spacers in the front and the knurls don't thread onto the standoffs. Went back to the 3/16 spacers and being even more careful.

After plugging it in the trickle power LED and the CPU B fault LED came on. I was expecting this. After pressing the power button the power good LED came on and after a couple seconds (seemed like forever) the OF good LED came on and it chimed! Booted right to desktop.

There is a new issue now. My wifi/bluetooth combo card only half works. It doesn't detect the airport but detects the BT. I'm able to turn it on and connect devices. Maybe not having CPU B has something to do with this? It worked before. I've tried cleaning the pins and blowing out the connector. Oh well it's connected via ethernet anyways.

I ran some Cinebench CPU tests and with the power setting set to "reduced" the highest temp is 52C on both cores. It also scored about 1/4 the speed as when run with both CPUs. When changing the power to "highest/automatic" the highest temp is 86C on both cores with dips to low 70s. The end result was only 1/2 of a real quad. The temps dropped rapidly to the low 30s when the tests finished.

I uploaded some videos to youtube here and here.

No idea why the picture with the LEDs is so washed out. A flash wasn't used.
 

Attachments

  • 20250614_140555.jpg
    20250614_140555.jpg
    677.4 KB · Views: 18
  • 20250614_132225.jpg
    20250614_132225.jpg
    428.2 KB · Views: 21
  • 20250614_130709.jpg
    20250614_130709.jpg
    1.3 MB · Views: 21
  • 20250614_130528.jpg
    20250614_130528.jpg
    273.8 KB · Views: 20
  • 20250614_111320.jpg
    20250614_111320.jpg
    606 KB · Views: 15
  • 20250608_164717.jpg
    20250608_164717.jpg
    383.9 KB · Views: 17
Last edited:
Congratulations @amishallin! I am SO pleased to see that it worked out for you, if only for one CPU card.

My Air Quad is also a "half Quad" right now too. Both CPU cards and all four cores work, but with CPU B enabled, I get color distortion on screen so I am keeping it turned off.

Even half a Quad is noticeably faster however than my late 2005 G5 Dual 2.3 GHz machine. I am loving this machine... it feels SO fast!

I too have an original Apple runway card (combined Bluetooth and WiFi). I am going to install into my Air Quad. I will let you know if I have similar issues. Both of us have a CPU B that is out of service, so my results will hopefully shed some light on yours.

... and to everyone else with Quads, there are now three of us here at MacRumors who have converted our Quads to air cooling. You can too if you wish!
 
After all the conflicting info online about whether or not a quad will boot with only 1 CPU installed I just had to do it. What did I have to lose? Yes there is a way to disable 1 of the CPUs via open firmware... BUT I couldn't access it. It would either work or not work.

I have noticed an "oddity" though. Sometimes after rebooting the temps for CPU A would read 0C. To fix this all I did was remove the side panel and air baffle. Somehow tripping the sensor for the baffle made it work. I don't know?

I forget how those standoffs are attached to the motherboard/case but I think the spacing needed between the PCB and the bottom of the CPU card is about 5/16" to still allow the 300 pin connector to snap into place. Perhaps slightly longer 4-40 bolts could be used on the front and replace the 3/16" spacers with 1/4" spacers and not have to worry about uneven pressure to damage one of the CPUs.

Attached are some more images.
1. After I completed it the first time. I used 2 layers of double sided tape between the fans and a strip of gorilla tape on the bottom fan. The top is still secured with a fan clip. To power the fans I used a molex splitter to power the optical drive and pass the other end down where the ATA ribbon cable passes down to the PCIe expansion bay. I then attached another longer splitter to bring the power down to the CPU bay since the bottom fan can't reach the PCIe bay.
2. Side view of the rear mounting bracket.
3. Side view of the front mount before I cleaned the burrs off. Those small resistors/capacitors can be seen close to the spacers. The spacers must have an inner diameter of at least .170" to fit on the standoffs. I used 3/8 wide spacers and cut a flat on 1 side to not touch those components.
4. Top view of the setup. This was before I killed CPU B.
5. Top down view of a modified 3/8" spacer. I think 1/4 wide spacers with .171 inner diameter should work without modification.
6. A view of the CPU card sitting in the computer. Notice the space between the standoff and the card. Firm pressure on the space between the standoffs to fully seat the 300 pin connector and the card will be fully inserted. *snap*
7. CPU card is fully seated and no gap between the standoff and card.

So many images to remind me of the atrocity committed towards CPU B.

Feel free to use any of these images in your guide.

{edit} Looks like the images are out of order after I posted this.
 

Attachments

  • 20250608_134945.jpg
    20250608_134945.jpg
    298.1 KB · Views: 18
  • 20250608_134712.jpg
    20250608_134712.jpg
    277.7 KB · Views: 16
  • 20250608_145348.jpg
    20250608_145348.jpg
    737.5 KB · Views: 16
  • 20250608_142916[1].jpg
    20250608_142916[1].jpg
    725.2 KB · Views: 15
  • 20250608_142952.jpg
    20250608_142952.jpg
    458.8 KB · Views: 17
  • 20250608_133645.jpg
    20250608_133645.jpg
    252.8 KB · Views: 15
  • 20250608_164354.jpg
    20250608_164354.jpg
    637.9 KB · Views: 18
Last edited:
@amishallin, your photos are very good! Thanks for your gracious permission; I will use a few of them in an updated version of the guide, giving you credit of course. I will post again when I have made the update. We are out of town for the next week visiting family, so it may be a bit before the update is published, but your photos will make it much better.

In the meantime, if you have any suggestions for improvements to the guide, please feel free to PM me with them.

Again, congratulations! This is not an easy task and you have prevailed. Well done!
 
In a way of testing the stability of the system I'm updating my MacPorts installs. This is day 2 and some items (like gcc14) has been building (or compiling?) for several hours now. After many hours of sustained 100% CPU usage the temps never go above 84C. The memory controller seems to stay in the range of 20s-30s. The air tunnel (backside) ranges from low 30s to upper 40s.

Just to see what would happen I tightened the knurl towards the back of the machine by 3/4 turn. This resulted in core 2 being 2C lower than core 1 (which was unchanged) while at a sustained 100% load.

I originally started playing around with MacPorts to see if there was a speed difference between AquaFox for OSX or compiled from source from MacPorts. This was when the version numbers were still the same at 1.0. Now AquaFox is at 2.2 while the MacPorts version is still 1.0. This was when the LCU was working but I had to stop when stopped working properly.

The machine still works fine otherwise. Just that ominous red LED for CPU B to remind me of what I did.
 
I've been doing more stress testing today. From what I can tell the stock CPU intake fans are just loud/obnoxious and don't seem to do too much anymore. After removing them and putting a sustained 100% load on the CPUs and switching between reduced and automatic power settings there is a seemingly minor change. CPU A core 1 slowly reaches 88C but hasn't gone any higher than that while core 2 stays 2-4C below core 1. Also the memory controller is running a couple degrees C warmer. The rear exhaust seems to still be able to pull enough air through the front of the case.

After watching various things compile the rate of temps increasing/decreasing seems unchanged. I plan on compiling Aquafox using the unofficial Tenfourfox development toolkit. Supposedly it pulls the current source code and should build the current version 2.2. That should put a sustained 100% load on the CPU for several hours to see if the max temp goes above 88C.

Perhaps whenever I find a replacement for CPU B I'll try removing the fans for the air coolers and make a cardboard shroud to direct the air from the stock intakes into the air coolers. Worth a try since they move more air than the fans that came with the air coolers.

I'm starting to wonder what would actually happen if thermal calibration was run.

The images taken below are when mesa was compiling.

The CPU B light still mocks me...
 

Attachments

  • 20250619_112308.jpg
    20250619_112308.jpg
    1.1 MB · Views: 14
  • 20250619_112559.jpg
    20250619_112559.jpg
    1.2 MB · Views: 14
  • 20250619_112621.jpg
    20250619_112621.jpg
    560.8 KB · Views: 16
Last edited:
  • Like
Reactions: sailorMH
Register on MacRumors! This sidebar will go away, and you'll see fewer ads.